Note
Access to this page requires authorization. You can try signing in or changing directories.
Access to this page requires authorization. You can try changing directories.
Azure Cloud HSM is a highly available, FIPS 140-3 Level 3 validated single-tenant service that enables you to deploy hardware security modules (HSMs) by using various methods. These methods include the Azure CLI, Azure PowerShell, Azure Resource Manager templates (ARM templates), Terraform, or the Azure portal. This quickstart guides you through the deployment process in the Azure portal.
Prerequisites
- An Azure account with an active subscription. If you don't have one, create a free account before you begin.
- Appropriate permissions to create resources in your subscription, including the ability to create HSM resources and managed identities.
- For production environments, an existing virtual network and subnet for configuring private endpoints.
Note
If you don't have a virtual network and subnet ready, you can still create the HSM first and add network connectivity later. We strongly recommend that you use private endpoints for production environments, as described in Network security for Azure Cloud HSM.
Create an Azure Cloud HSM resource
To create an Azure Cloud HSM resource via the Azure portal:
Sign in to the Azure portal.
Search for and select Azure Cloud HSMs.
Select Create.

Configure basic settings
On the Basics tab:
Select your Azure subscription.
Choose an existing resource group or create a new one.
We recommend that you deploy your Cloud HSM resources in a separate resource group from your related client virtual network and virtual machine (VM) resources. This separation provides for better management and security isolation.
Specify the HSM Name, Region, and Sku (product tier) values.
The HSM name must be unique. If you specify an HSM resource name that already exists in the chosen region, your deployment will fail.
Keep the default Domain Name Reuse setting as Tenant Reuse. This setting helps prevent malicious subdomain takeover and ensure that the fully qualified domain name (FQDN) can be reused only within your tenant.

Configure a managed identity (optional)
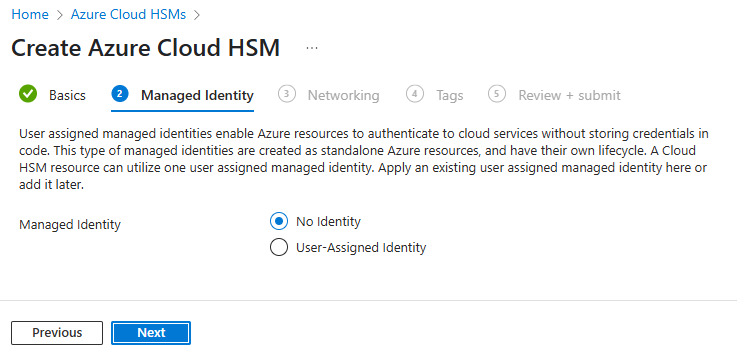
On the Managed Identity tab, consider the following options:
No Identity: Select this option if you don't plan to use backup and restore operations.
By default, Azure Cloud HSM is set to No Identity because it primarily uses password-based authentication with user management handled directly on the HSM. However, for backup and restore operations, you need a managed identity.
User-Assigned Identity: We recommend that you select this option for business continuity and disaster recovery (BCDR). Each Cloud HSM cluster can have only one managed identity, but you can use the same managed identity for multiple HSMs or assign different ones.
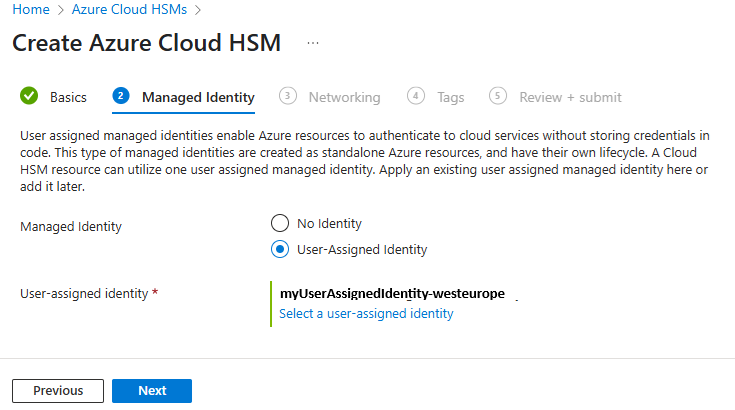


For detailed instructions on configuring a user-assigned identity for backup and restore operations, see Apply a managed identity and create a storage account.
Set up networking
For secure connectivity, establish a private endpoint to Azure Cloud HSM. This task requires an existing virtual network.
On the Networking tab:
Select the subscription that contains your virtual network.
Select your virtual network and subnet.
Configure the Domain Name System (DNS) integration settings as needed.

Tip
Private endpoints are crucial for security. They enable secure connections to Azure Cloud HSM through a private link. These connections ensure that traffic between your virtual network and the service traverses the Microsoft backbone network. This configuration eliminates exposure to the public internet, as described in Network security for Azure Cloud HSM.
Add tags (optional)
Tags are name/value pairs that help you organize and categorize resources for management and reporting. On the Tags tab, you can enter details to create tags. This step is optional but recommended for resource organization, especially in enterprise environments.

Deploy your Cloud HSM resource
On the Review + submit tab:
Review all HSM details, including managed identity and network settings.
Select Create to begin provisioning your Azure Cloud HSM resource.

The portal displays Deployment is in progress while it creates the resource. When the deployment finishes, the portal displays Your deployment is complete.

Initialize and configure your HSM
You can't activate or configure Azure Cloud HSM through the portal. You must use the Azure Cloud HSM SDK and client tools.
After you deploy your Cloud HSM resource, follow these steps:
Download and install the Azure Cloud HSM SDK from GitHub on a VM that has network connectivity to your HSM.
Initialize and configure your HSM by following the detailed steps in the Azure Cloud HSM onboarding guide.
Establish user management with appropriate cryptography officers and users, as described in User management in Azure Cloud HSM.
Implement proper key management practices to help ensure optimal security and performance, as outlined in Key management in Azure Cloud HSM.
Clean up resources
If you created a resource group solely for this quickstart and you don't need to keep these resources, you can delete the entire resource group:
In the Azure portal, go to the resource group that contains your Cloud HSM resources.
Select Delete resource group.
Enter the resource group name to confirm the deletion, and then select Delete.
Troubleshoot common deployment problems
If you encounter problems during deployment:
- Resource name conflicts: Ensure that your HSM name is unique in the region. If deployment fails with a naming conflict, try a different name.
- Network connectivity problems: Ensure that your VM has proper network access to the HSM. For best practices, review Network security for Azure Cloud HSM.
- Authentication failures: Verify that you're using the correct format for credentials, as detailed in Authentication in Azure Cloud HSM.
- Client connection errors: Check that the Azure Cloud HSM client is running and properly configured. For common client connection problems, see Troubleshoot Azure Cloud HSM.