Note
Access to this page requires authorization. You can try signing in or changing directories.
Access to this page requires authorization. You can try changing directories.
Tip
Socket.IO is now natively supported on Azure. To scale out a Socket.IO app to handle thousands of connections, it is often frustrating. Now that Azure natively supports Socket.IO, you can let Azure handle scalability and availability. Learn more about how you can get any Socket.IO app running on Azure with a few lines of code.
Important
Cloud Services (classic) is now deprecated for all customers as of September 1st, 2024. Any existing running deployments will be stopped and shut down by Microsoft and the data will be permanently lost starting October 2024. New deployments should use the new Azure Resource Manager based deployment model Azure Cloud Services (extended support).
Socket.IO provides real time communication between your Node.js server and clients. This tutorial walks you through hosting a socket.IO based chat application on Azure. For more information on Socket.IO, see socket.io.
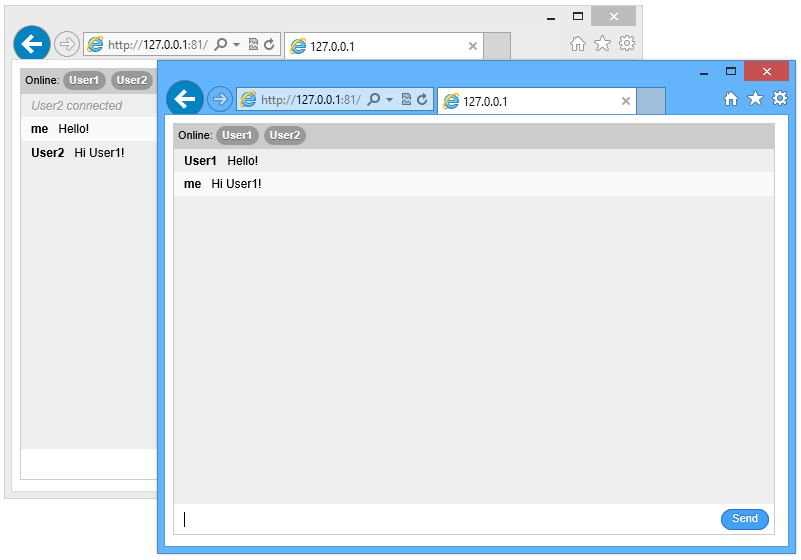
The following screenshot shows the completed application:
![A browser window displaying the service hosted on Azure][completed-app]
Prerequisites
Ensure that the following products and versions are installed to successfully complete the example in this article:
- Install Visual Studio
- Install Node.js
- Install Python version 2.7.10
Create a Cloud Service Project
The following steps create the cloud service project that hosts the Socket.IO application.
From the Start Menu or Start Screen, search for Windows PowerShell. Finally, right-click Windows PowerShell and select Run As Administrator.

Create a directory called c:\node.
PS C:\> md nodeChange directories to the c:\node directory
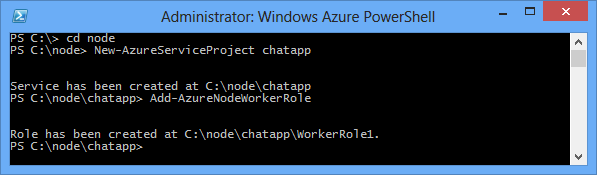
PS C:\> cd nodeEnter the following commands to create a new solution named
chatappand a worker role namedWorkerRole1:PS C:\node> New-AzureServiceProject chatapp PS C:\Node> Add-AzureNodeWorkerRoleYou see the following response:
Download the Chat Example
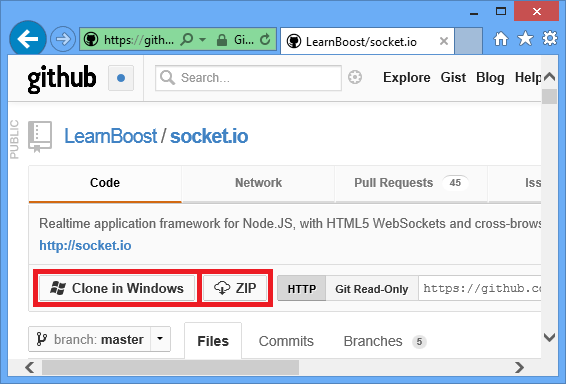
For this project, we use the chat example from the [Socket.IO GitHub repository]. Perform the following steps to download the example and add it to the project you previously created.
Create a local copy of the repository by using the Clone button. You may also use the ZIP button to download the project.
Navigate the directory structure of the local repository until you arrive at the examples\chat directory. Copy the contents of this directory to the C:\node\chatapp\WorkerRole1 directory created earlier.
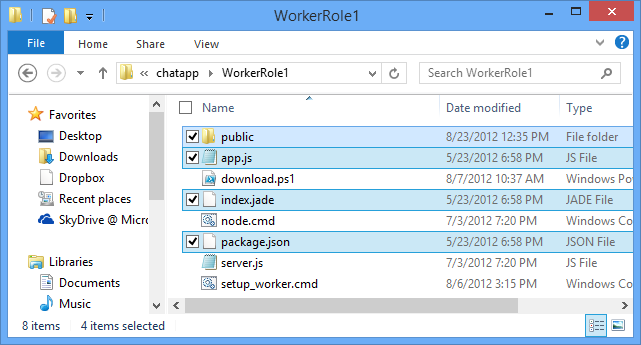
The highlighted items in the previous screenshot are the files copied from the examples\chat directory
In the C:\node\chatapp\WorkerRole1 directory, delete the server.js file, and then rename the app.js file to server.js. This step removes the default server.js file created previously by the Add-AzureNodeWorkerRole cmdlet and replaces it with the application file from the chat example.
Modify Server.js and Install Modules
Before testing the application in the Azure emulator, we must make some minor modifications. Perform the following steps to the server.js file:
Open the server.js file in Visual Studio or any text editor.
Find the Module dependencies section at the beginning of server.js and change the line containing sio = require('..//..//lib//socket.io') to sio = require('socket.io') as follows:
var express = require('express')
  , stylus = require('stylus')
  , nib = require('nib')
//, sio = require('..//..//lib//socket.io'); //Original
  , sio = require('socket.io');                //Updated
  var port = process.env.PORT || 3000;         //Updated
To ensure the application listens on the correct port, open server.js in Notepad or your favorite editor, and then change the following line by replacing 3000 with process.env.port as follows:
//app.listen(3000, function () {            //Original
app.listen(process.env.port, function () {  //Updated
  var addr = app.address();
  console.log('   app listening on http://' + addr.address + ':' + addr.port);
});
After saving the changes to server.js, use the following steps to install required modules, and then test the application in the Azure emulator:
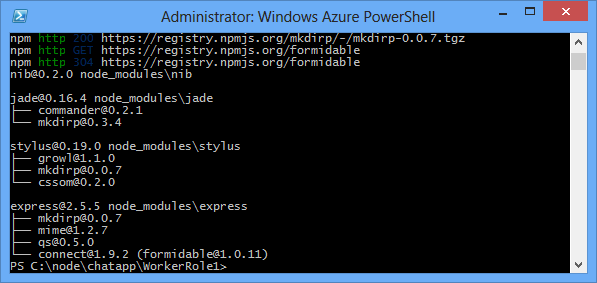
In Azure PowerShell, change directories to the C:\node\chatapp\WorkerRole1 directory and use the following command to install the modules required by this application:
PS C:\node\chatapp\WorkerRole1> npm installThis command installs the modules listed in the package.json file. After the command completes, you should see output similar to the following screenshot:
Since this example was originally a part of the Socket.IO GitHub repository, and directly referenced the Socket.IO library by relative path, Socket.IO wasn't referenced in the package.json file, so we must install it by issuing the following command:
PS C:\node\chatapp\WorkerRole1> npm install socket.io --save
Test and Deploy
Launch the emulator by issuing the following command:
PS C:\node\chatapp\WorkerRole1> Start-AzureEmulator -LaunchNote
If you encounter issues with launching emulator, eg.: Start-AzureEmulator : An unexpected failure occurred. Details: Encountered an unexpected error The communication object, System.ServiceModel.Channels.ServiceChannel, cannot be used for communication because it is in the Faulted state.
Reinstall AzureAuthoringTools v 2.7.1 and AzureComputeEmulator v 2.7 - make sure that version matches.
Open a browser and navigate to
http://127.0.0.1.When the browser window opens, enter a nickname and then hit enter. This step allows you to post messages as a specific nickname. To test multi-user functionality, open more browser windows using the same URL and enter different nicknames.
After testing the application, stop the emulator by issuing the following command:
PS C:\node\chatapp\WorkerRole1> Stop-AzureEmulatorTo deploy the application to Azure, use the Publish-AzureServiceProject cmdlet. For example:
PS C:\node\chatapp\WorkerRole1> Publish-AzureServiceProject -ServiceName mychatapp -Location "East US" -LaunchImportant
Be sure to use a unique name, otherwise the publish process will fail. After the deployment has completed, the browser will open and navigate to the deployed service.
If you receive an error stating that the provided subscription name doesn't exist in the imported publish profile, you must download and import the publishing profile for your subscription before deploying to Azure. See the Deploying the Application to Azure section of Build and deploy a Node.js application to an Azure Cloud Service
![A browser window displaying the service hosted on Azure][completed-app]
Note
If you receive an error stating that the provided subscription name doesn't exist in the imported publish profile, you must download and import the publishing profile for your subscription before deploying to Azure. See the Deploying the Application to Azure section of Build and deploy a Node.js application to an Azure Cloud Service
Your application is now running on Azure, and can relay chat messages between different clients using Socket.IO.
Note
For simplicity, this sample is limited to chatting between users connected to the same instance. This means that if the cloud service creates two worker role instances, users will only be able to chat with others connected to the same worker role instance. To scale the application to work with multiple role instances, you could use a technology like Service Bus to share the Socket.IO store state across instances. For examples, see the Service Bus Queues and Topics usage samples in the Azure SDK for Node.js GitHub repository.
Next steps
In this tutorial, you learned how to create a basic chat application hosted in an Azure Cloud Service. To learn how to host this application in an Azure Website, see Build a Node.js Chat Application with Socket.IO on an Azure Web Site.
For more information, see also the Node.js Developer Center.