Note
Access to this page requires authorization. You can try signing in or changing directories.
Access to this page requires authorization. You can try changing directories.
The first time you start Cloud Shell you have the choice to continue with or without storage. This article shows you how to start Cloud Shell using an existing storage account for persistent file storage.
Start Cloud Shell
Sign into the Azure portal.
Launch Cloud Shell from the top navigation of the Azure portal.

The first time you start Cloud Shell you're prompted to which shell to use. Select Bash or PowerShell.

In the Getting started pane, select Mount storage account. Using the dropdown menu, select the subscription you want to use for Cloud Shell, then select the Apply button.

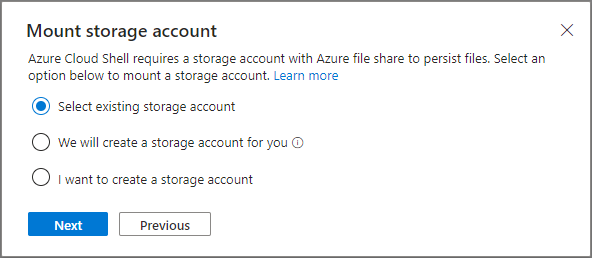
In the Mount storage account pane, select Select existing storage account. Select the Next button to create a new resource group and storage account.

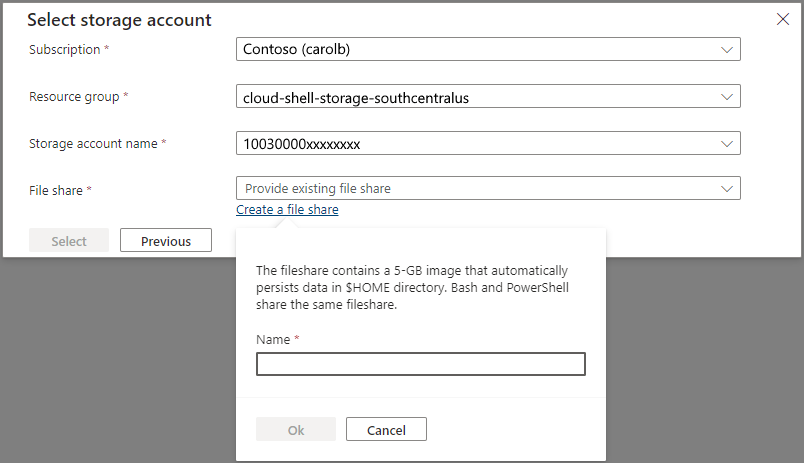
In the Select storage account pane, select the storage account you want to use. You have the option of selecting an existing fileshare or creating a new one. Enter the fileshare name then select the Ok button.

Set your subscription
List subscriptions you have access to.
az account listSet your preferred subscription:
az account set --subscription 'my-subscription-name'
Tip
Your subscription is remembered for future sessions using /home/<user>/.azure/azureProfile.json.
Get a list of Azure commands
Run the following command to see a list of all Azure CLI commands.
az
Run the following command to get a list of Azure CLI commands that apply to WebApps:
az webapp --help