How to use autolabeling for Custom Text Classification
Labeling process is an important part of preparing your dataset. Since this process requires much time and effort, you can use the autolabeling feature to automatically label your documents with the classes you want to categorize them into. You can currently start autolabeling jobs based on a model using GPT models where you may immediately trigger an autolabeling job without any prior model training. This feature can save you the time and effort of manually labeling your documents.
Prerequisites
Before you can use autolabeling with GPT, you need:
- A successfully created project with a configured Azure blob storage account.
- Text data that has been uploaded to your storage account.
- Class names that are meaningful. The GPT models label documents based on the names of the classes you've provided.
- Labeled data isn't required.
- An Azure OpenAI resource and deployment.
Trigger an autolabeling job
When you trigger an autolabeling job with GPT, you're charged to your Azure OpenAI resource as per your consumption. You're charged an estimate of the number of tokens in each document being autolabeled. Refer to the Azure OpenAI pricing page for a detailed breakdown of pricing per token of different models.
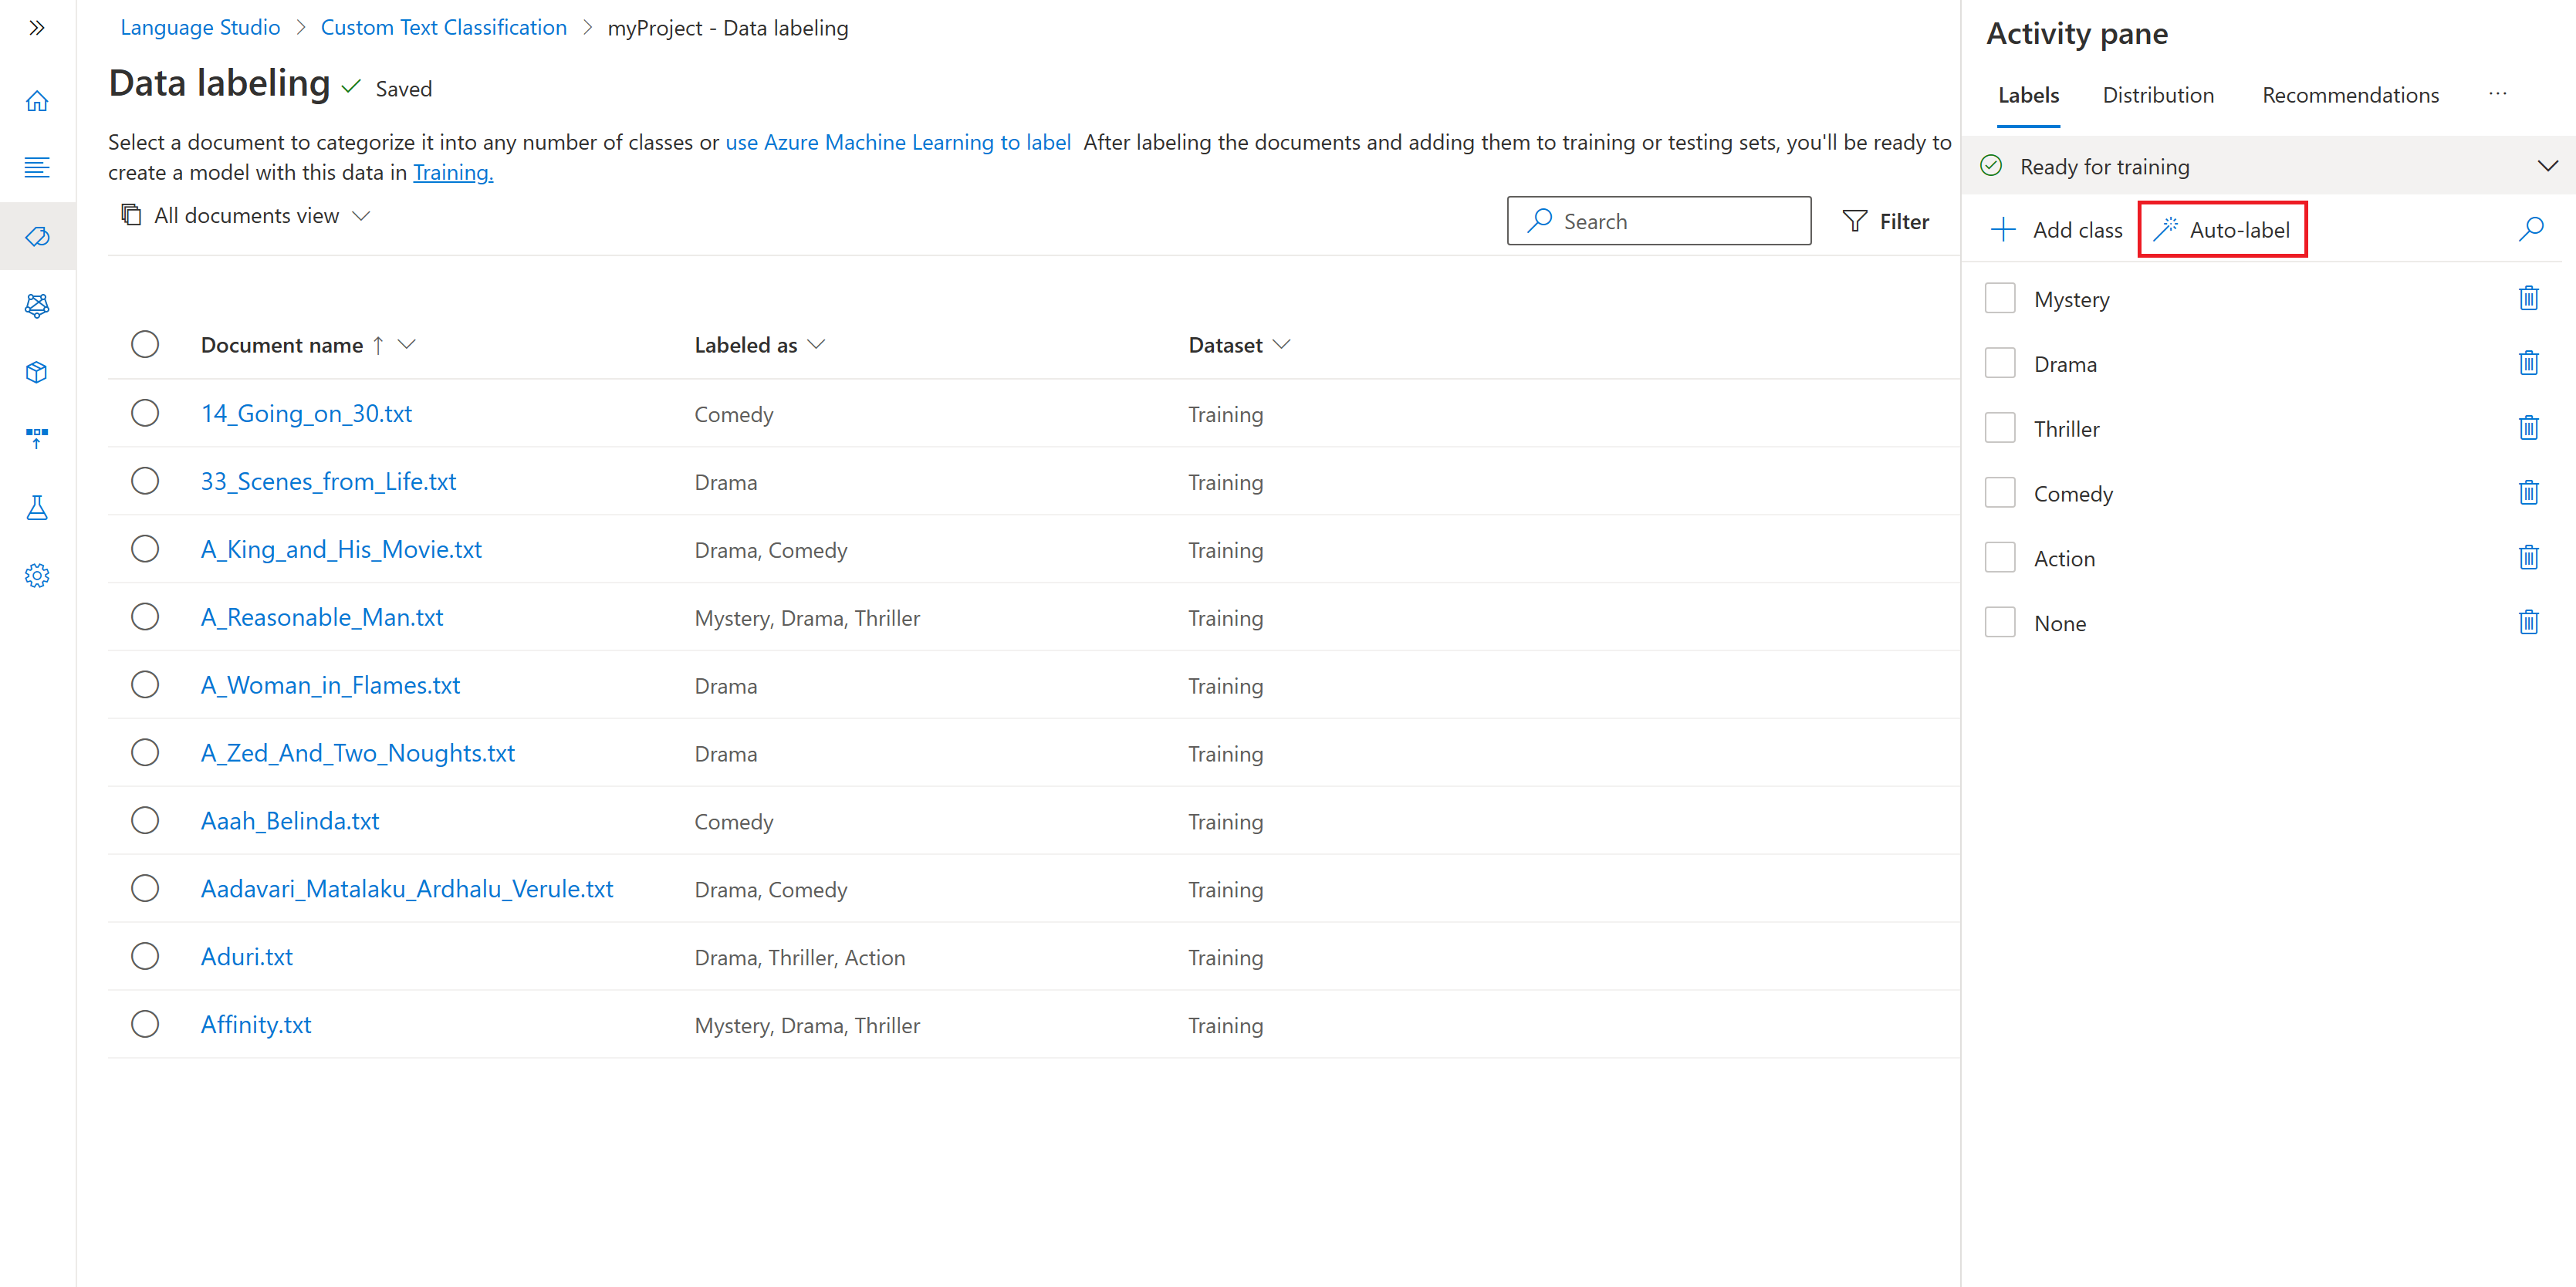
From the left navigation menu, select Data labeling.
Select the Autolabel button under the Activity pane to the right of the page.
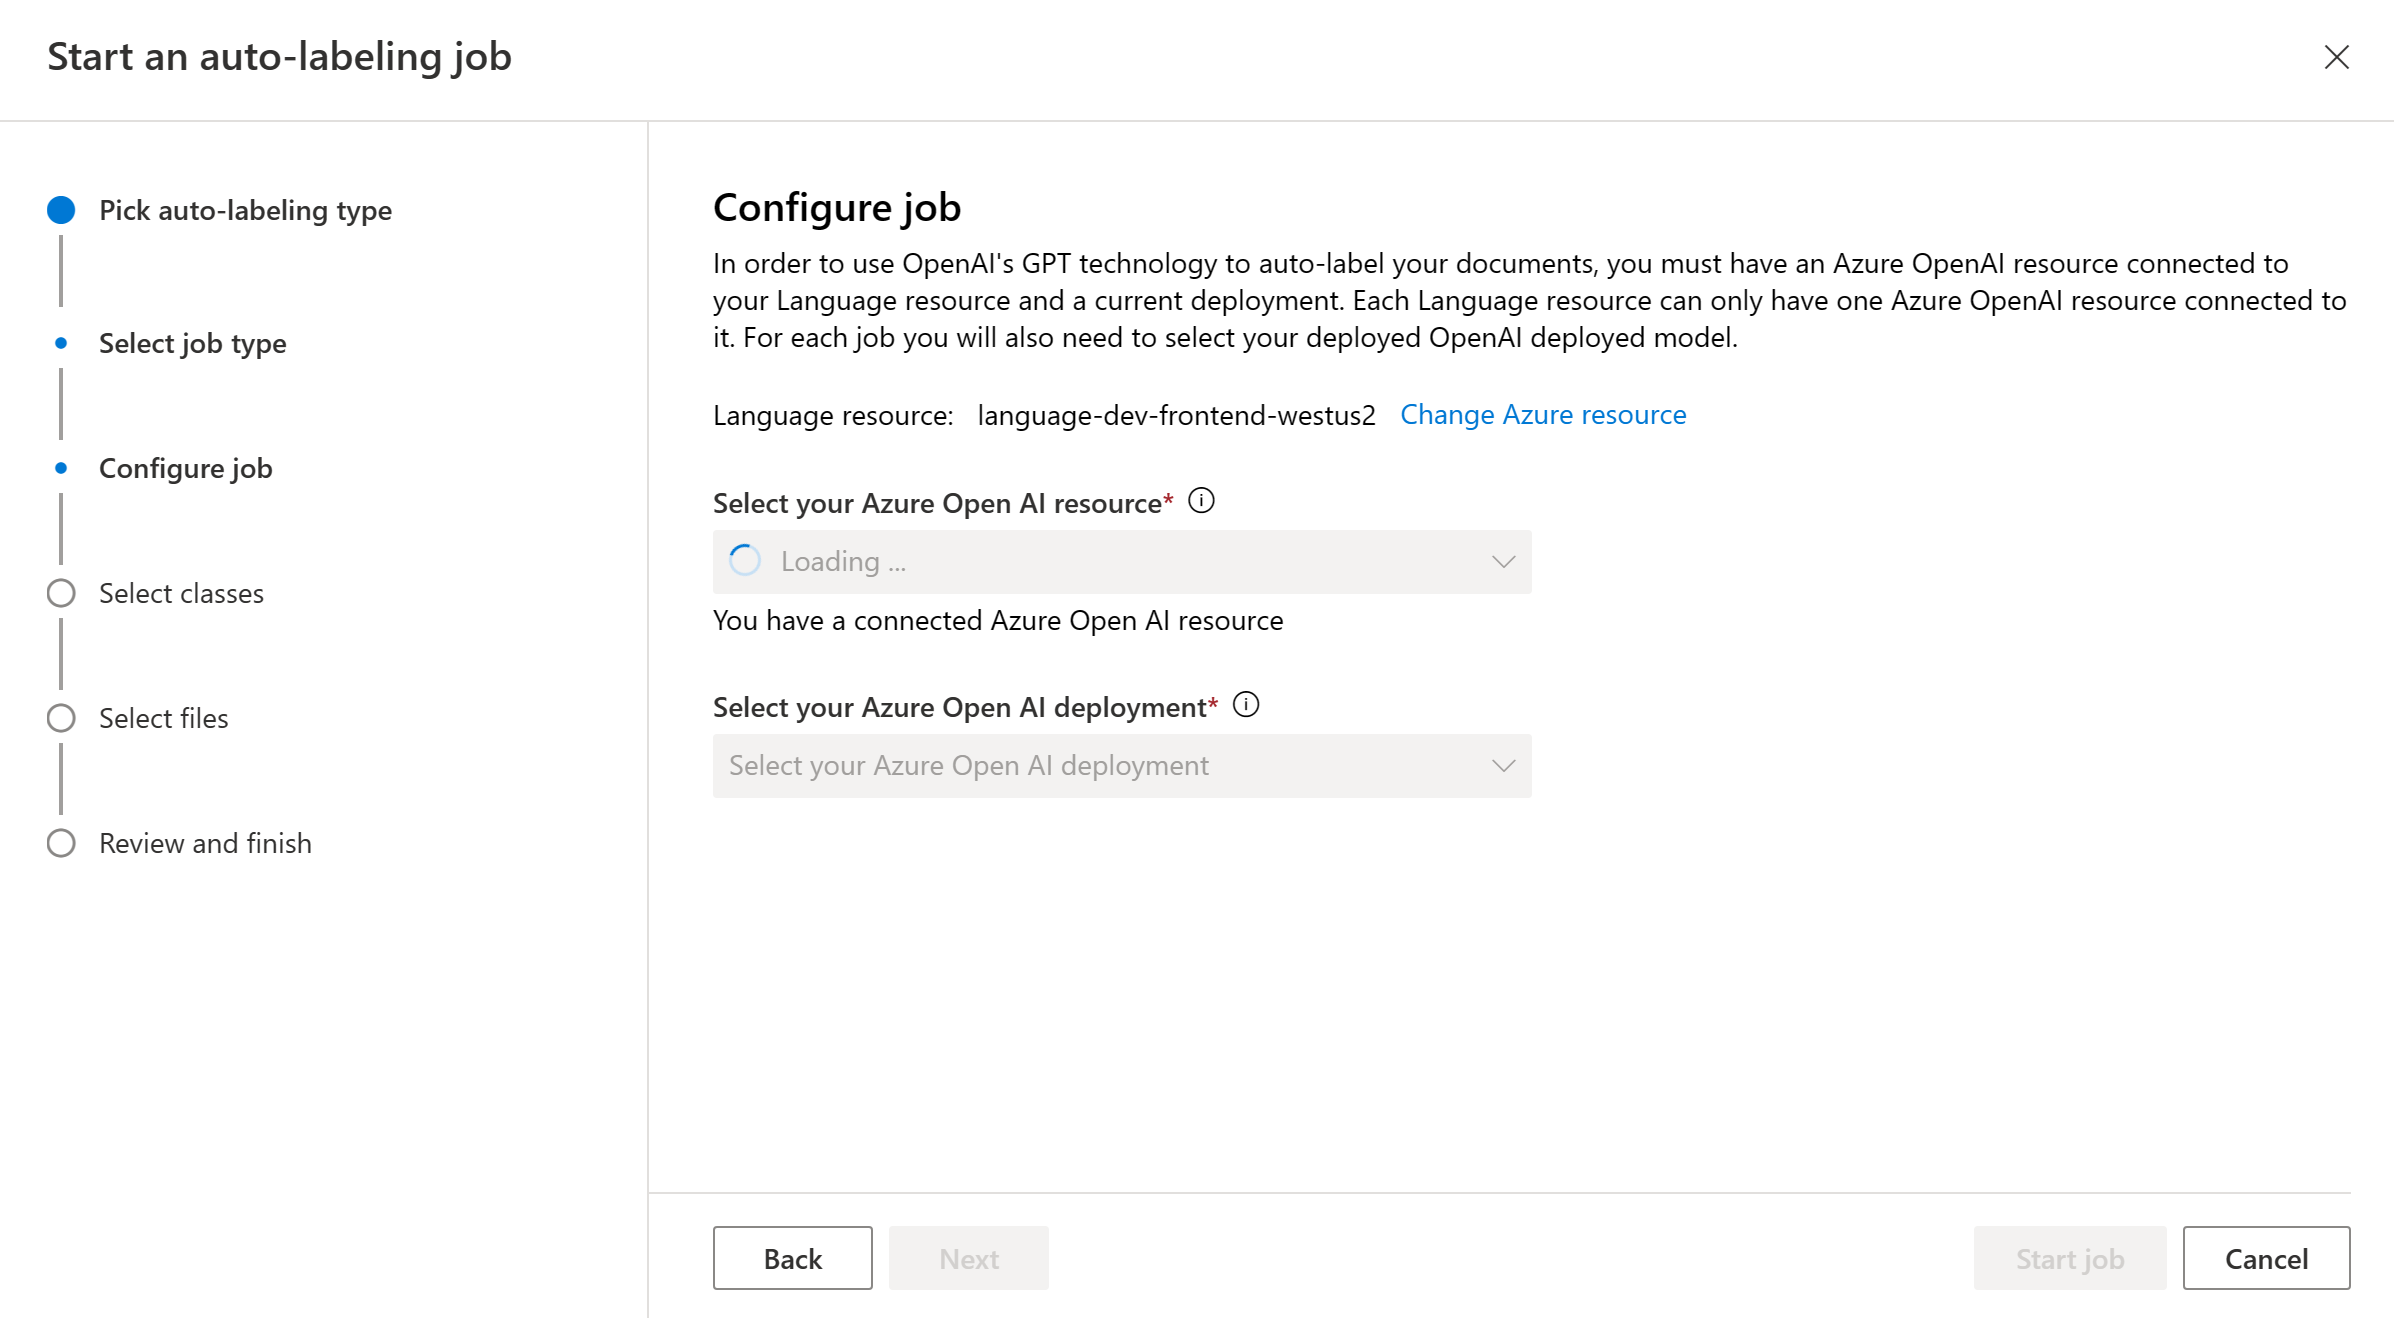
Choose Autolabel with GPT and select Next.

Choose your Azure OpenAI resource and deployment. You must create an Azure OpenAI resource and deploy a model in order to proceed.
Select the classes you want to be included in the autolabeling job. By default, all classes are selected. Having descriptive names for classes, and including examples for each class is recommended to achieve good quality labeling with GPT.

Choose the documents you want to be automatically labeled. It's recommended to choose the unlabeled documents from the filter.
Note
- If a document was automatically labeled, but this label was already user defined, only the user defined label is used.
- You can view the documents by clicking on the document name.

Select Start job to trigger the autolabeling job. You should be directed to the autolabeling page displaying the autolabeling jobs initiated. Autolabeling jobs can take anywhere from a few seconds to a few minutes, depending on the number of documents you included.


Review the auto labeled documents
When the autolabeling job is complete, you can see the output documents in the Data labeling page of Language Studio. Select Review documents with autolabels to view the documents with the Auto labeled filter applied.

Documents that have been automatically classified have suggested labels in the activity pane highlighted in purple. Each suggested label has two selectors (a checkmark and a cancel icon) that allow you to accept or reject the automatic label.
Once a label is accepted, the purple color changes to the default blue one, and the label is included in any further model training becoming a user defined label.
After you accept or reject the labels for the autolabeled documents, select Save labels to apply the changes.
Note
- We recommend validating automatically labeled documents before accepting them.
- All labels that were not accepted are deleted when you train your model.

Next steps
- Learn more about labeling your data.
Feedback
Coming soon: Throughout 2024 we will be phasing out GitHub Issues as the feedback mechanism for content and replacing it with a new feedback system. For more information see: https://aka.ms/ContentUserFeedback.
Submit and view feedback for