Create a Document Translation flow (preview)
Important
The Translator connector is currently available in public preview. Features, approaches and processes may change, prior to General Availability (GA), based on user feedback.
This tutorial guides you through configuring a Microsoft Translator V3 connector cloud flow that supports document translation. The Translator V3 connector creates a connection between your Translator Service instance and Microsoft Power Automate enabling you to use one or more prebuilt operations as steps in your apps and workflows.
Document Translation is a cloud-based REST API feature of the Azure AI Translator service. The Document Translation API enables multiple and complex document translations while preserving original document structure and data format.
In this tutorial:
Prerequisites
Here's what you need to get started: Translator resource, Azure storage account with at least two containers, and a system-assigned managed identity with role-based access.
Translator resource
If you don't have an active Azure account, you can create one for free.
Create a single-service Translator resource (not a multi-service Azure AI services resource). As you complete the Translator project and instance details fields, pay special attention to the following entries:
Resource Region. Choose a geographic region like West US (not the Global region).
Pricing tier. Select Standard S1 to try the service.
Use the key and name from your Translator resource to connect your application to Power Automate. Your Translator resource keys are found under the Resource Management section in the Azure portal and your resource name is located at the top of the page.
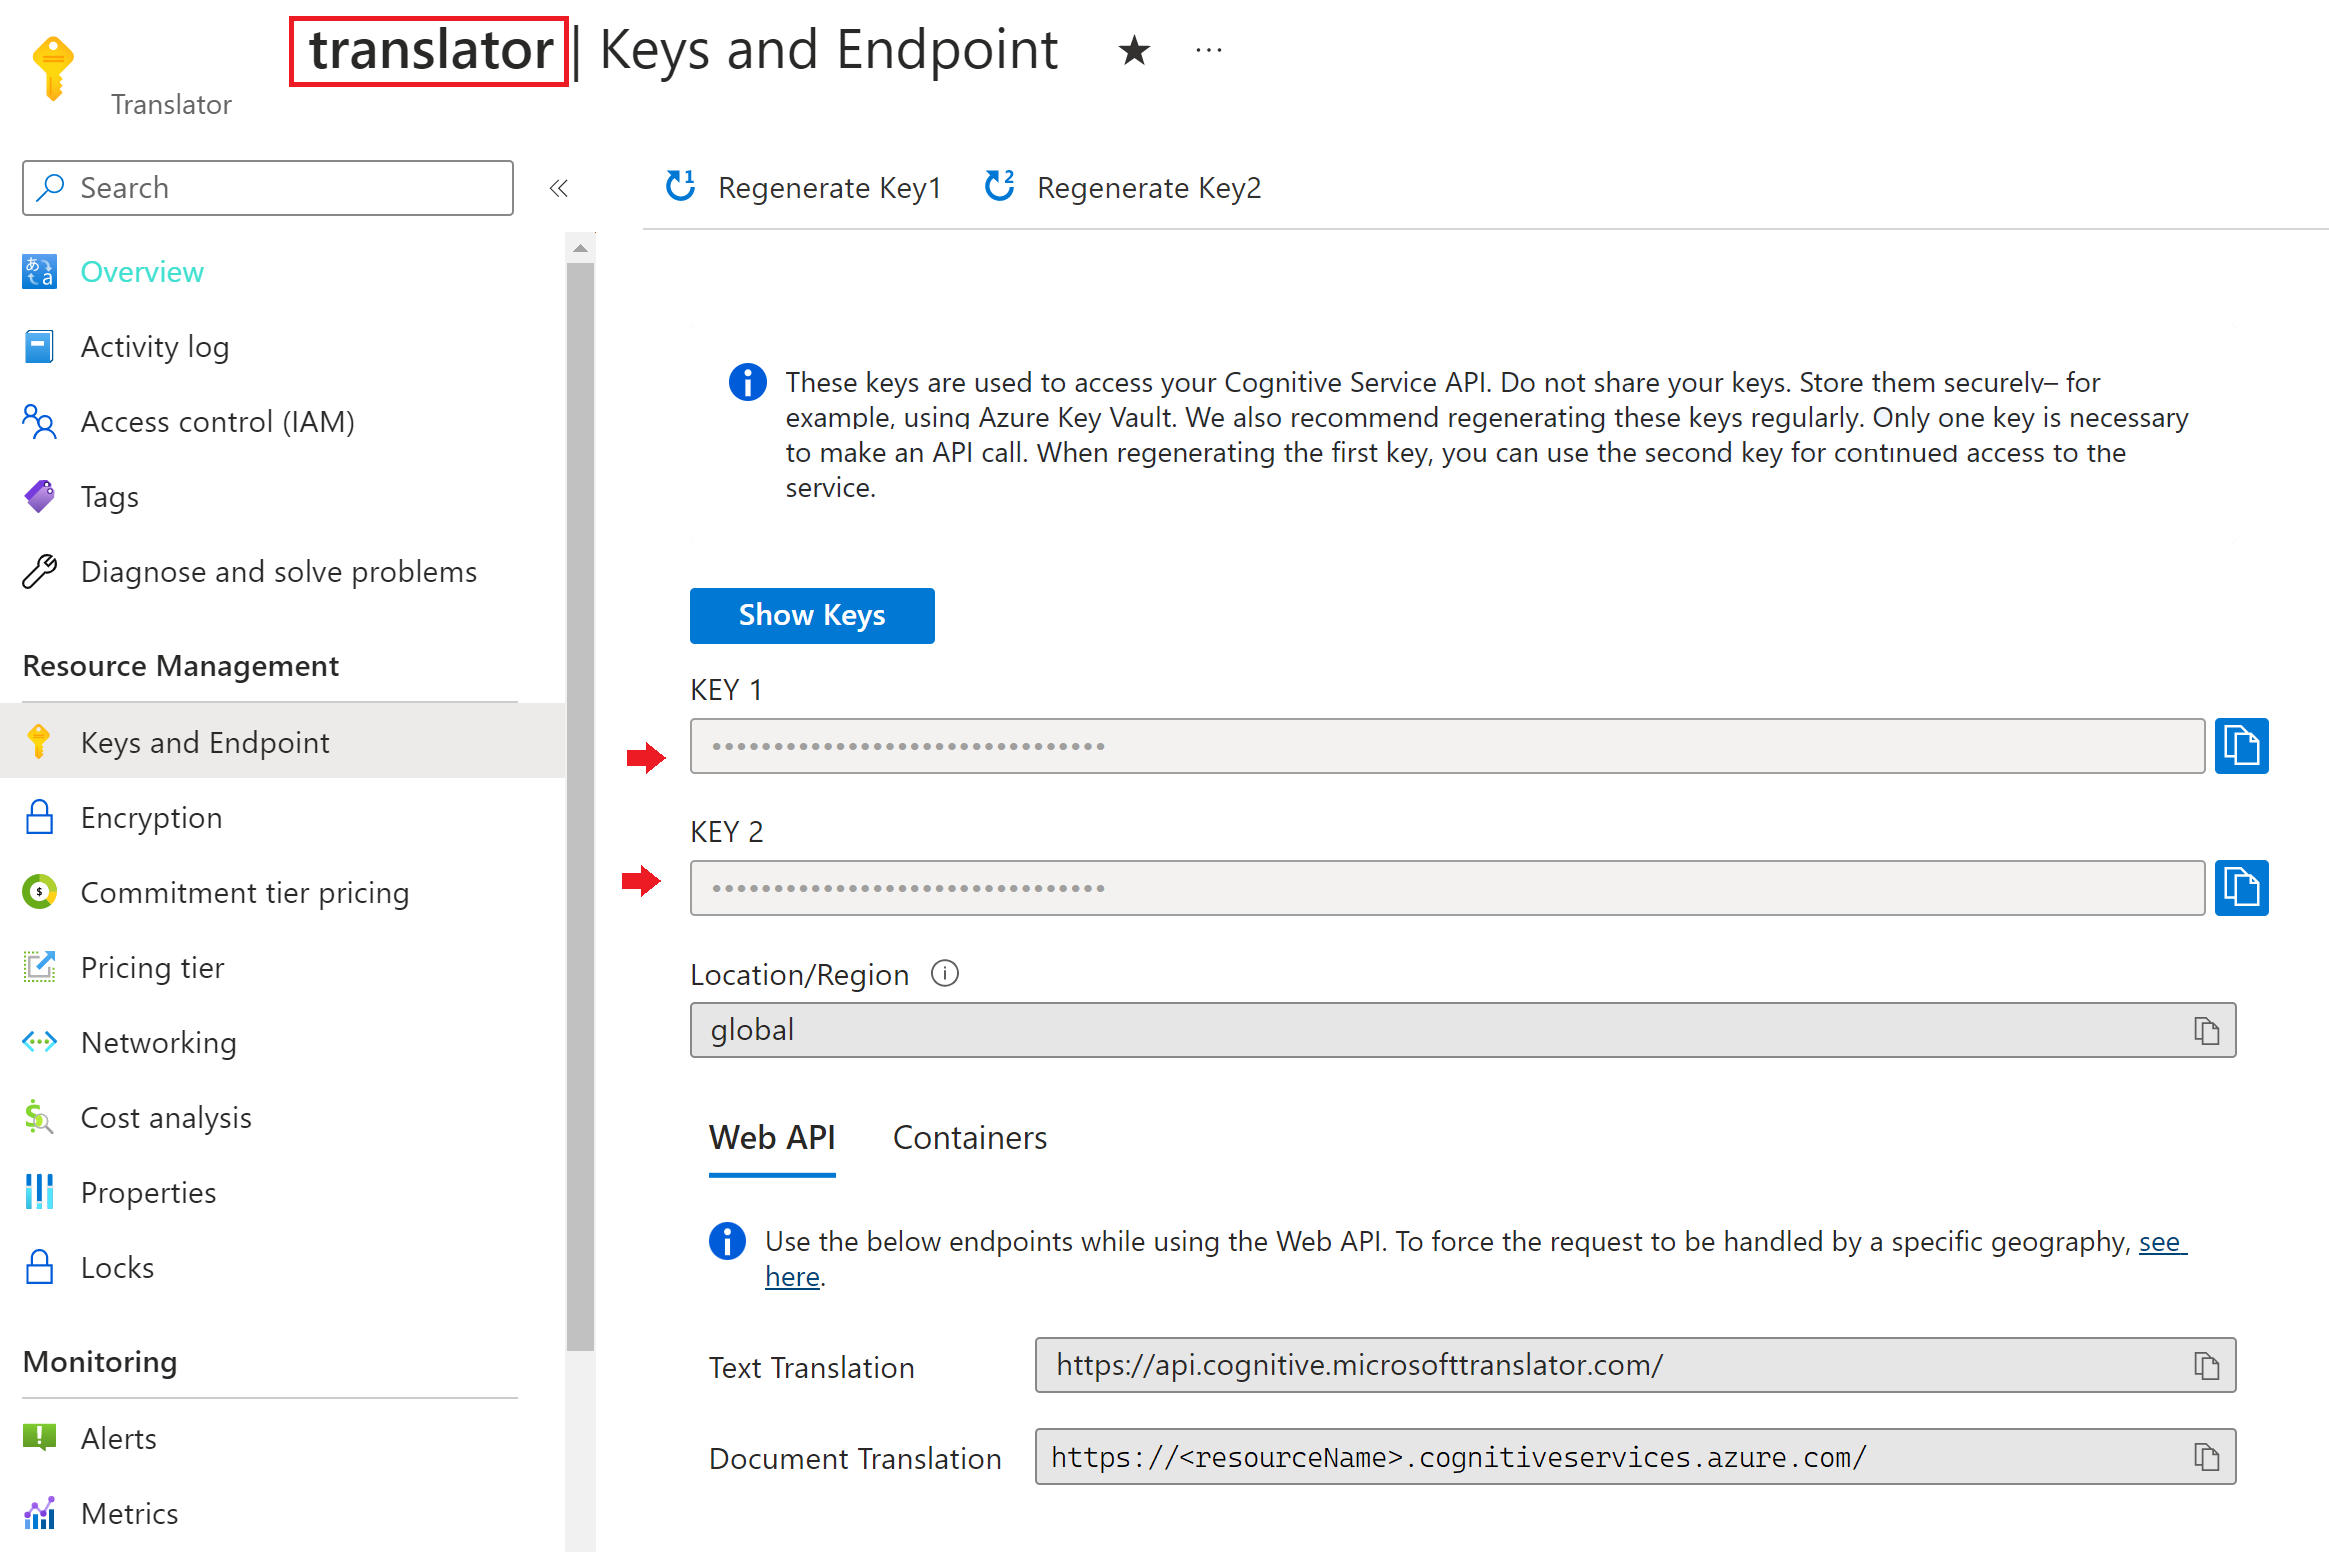
Copy and paste your key and resource name in a convenient location, such as Microsoft Notepad.
Azure storage
Next, you need an Azure Blob Storage account and at least two containers for your source and target files:
- Source container. This container is where you upload your files for translation (required).
- Target container. This container is where your translated files are stored (required).
If your storage account is behind a firewall, you must enable additional configurations:
Go to the Azure portal and sign in to your Azure account.
Select your Storage account.
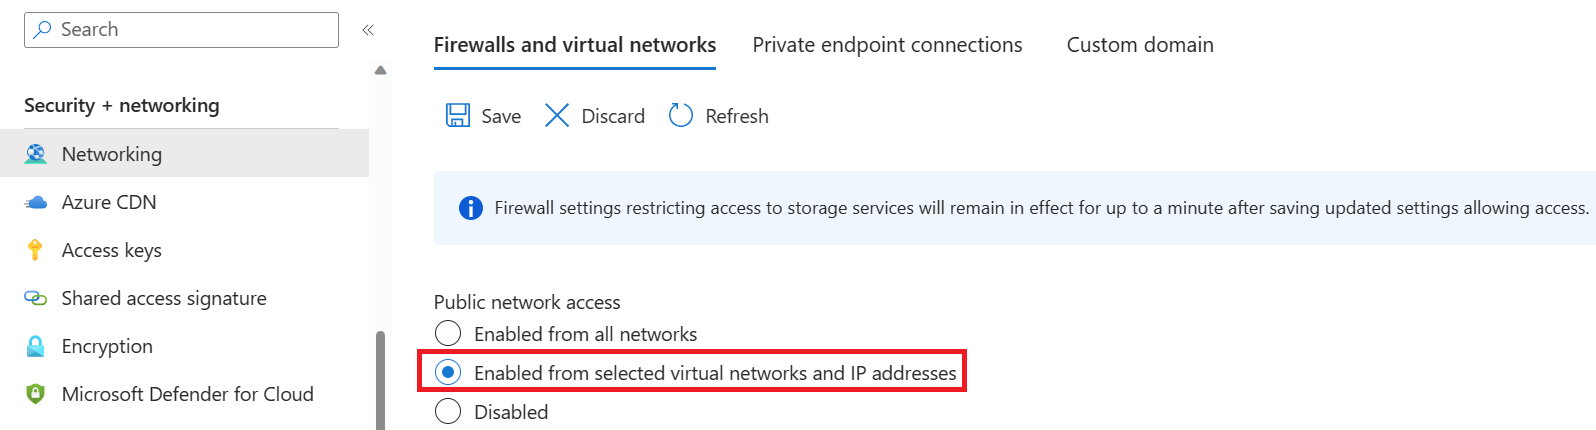
In the Security + networking group in the left pane, select Networking.
In the Firewalls and virtual networks tab, select Enabled from selected virtual networks and IP addresses.
Deselect all check boxes.
Make sure Microsoft network routing is selected.
Under the Resource instances section, select Microsoft.CognitiveServices/accounts as the resource type and select your Translator resource as the instance name.
Make certain that the Allow Azure services on the trusted services list to access this storage account box is checked. For more information about managing exceptions, see Configure Azure Storage firewalls and virtual networks.

Select Save. It may take up to 5 min for the network changes to propagate.
Managed identity with RBAC
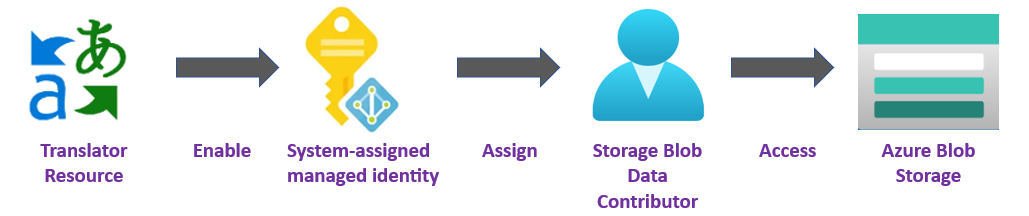
Finally, before you can use the Translator V3 connector's operations for document translation, you must grant your Translator resource access to your storage account using a managed identity with role based identity control (RBAC).
Create a managed identity
First, create a system-assigned managed identity for your Translator resource and grant that identity specific permissions to access your Azure storage account:
Go to the Azure portal and sign in to your Azure account.
Select the Translator resource.
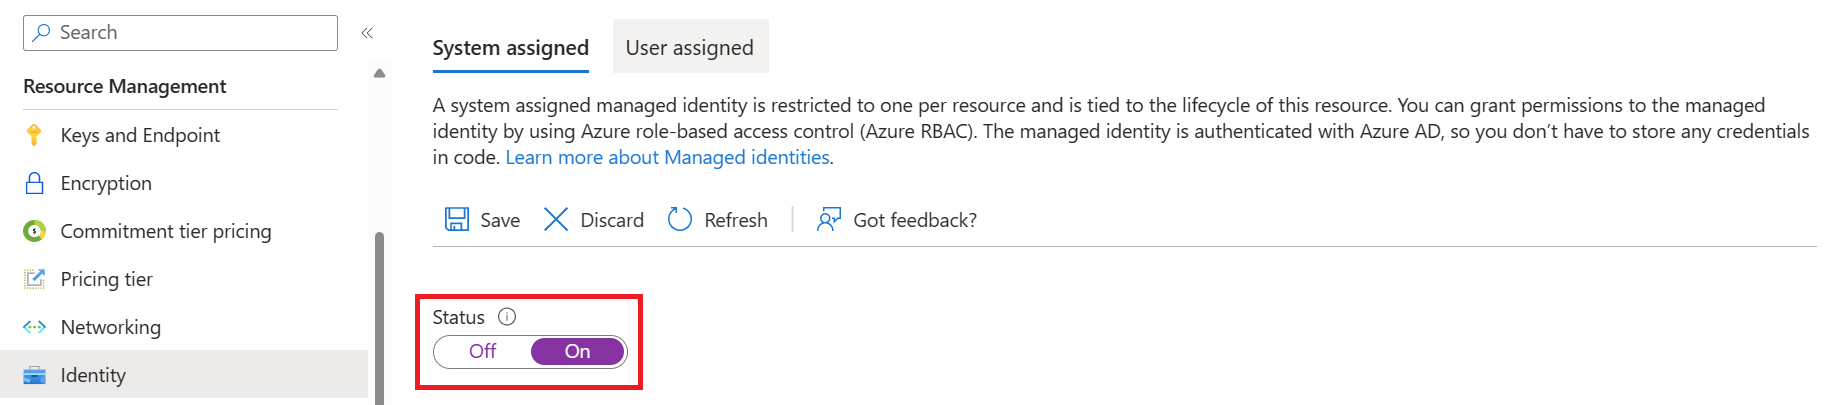
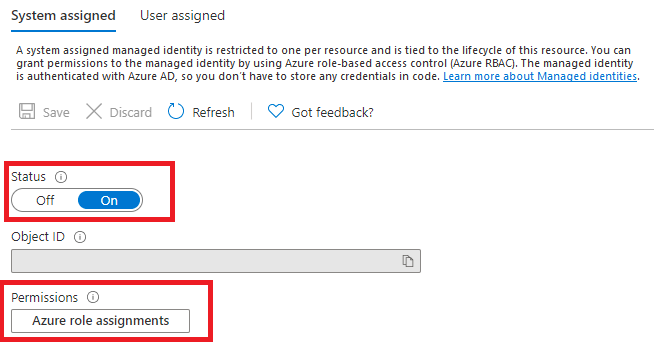
In the Resource Management group in the left pane, select Identity.
Within the System assigned tab, turn on the Status toggle.
Select Save.
Role assignment
Next, assign a Storage Blob Data Contributor role to the managed identity at the storage scope for your storage resource.
Go to the Azure portal and sign in to your Azure account.
Select the Translator resource.
In the Resource Management group in the left pane, select Identity.
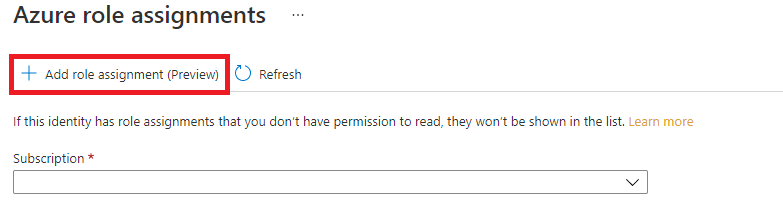
Under Permissions select Azure role assignments:
On the Azure role assignments page that opened, choose your subscription from the drop-down menu then select + Add role assignment.
Finally, assign a Storage Blob Data Contributor role to your Translator service resource. The Storage Blob Data Contributor role gives Translator (represented by the system-assigned managed identity) read, write, and delete access to the blob container and data. In the Add role assignment pop-up window, complete the fields as follows and select Save:
Field Value Scope Storage. Subscription The subscription associated with your storage resource. Resource The name of your storage resource. Role Storage Blob Data Contributor. After the Added Role assignment confirmation message appears, refresh the page to see the added role assignment.

If you don't see the new role assignment right away, wait and try refreshing the page again. When you assign or remove role assignments, it can take up to 30 minutes for changes to take effect.

Configure a Document Translation flow
Now that you completed the prerequisites and initial setup, let's get started using the Translator V3 connector to create your document translation flow:
Sign in to Power Automate.
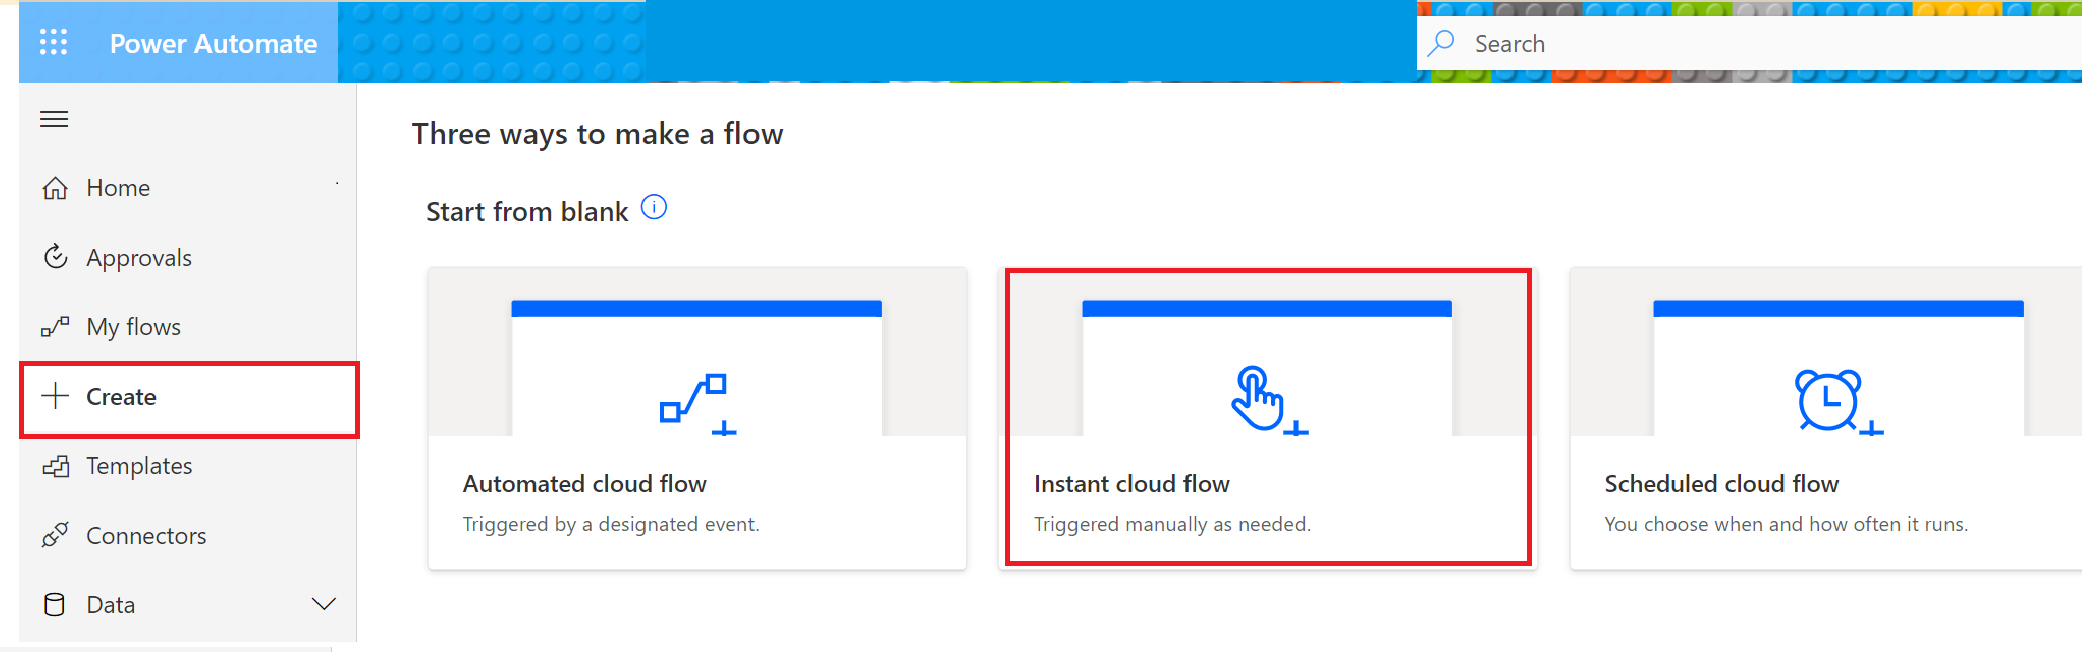
Select Create from the left sidebar menu.
Select Instant cloud flow from the main content area.
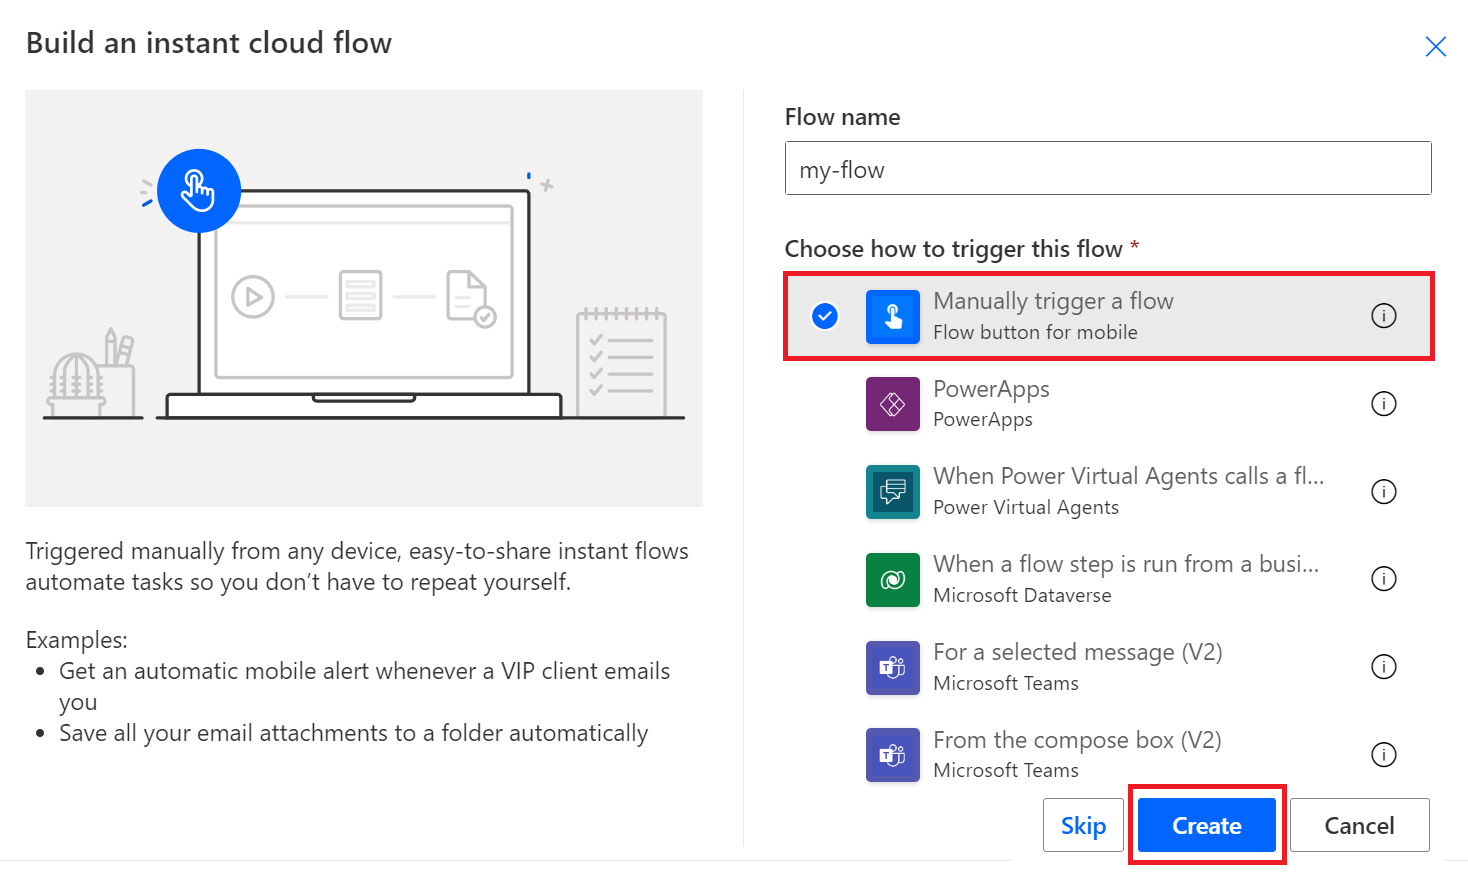
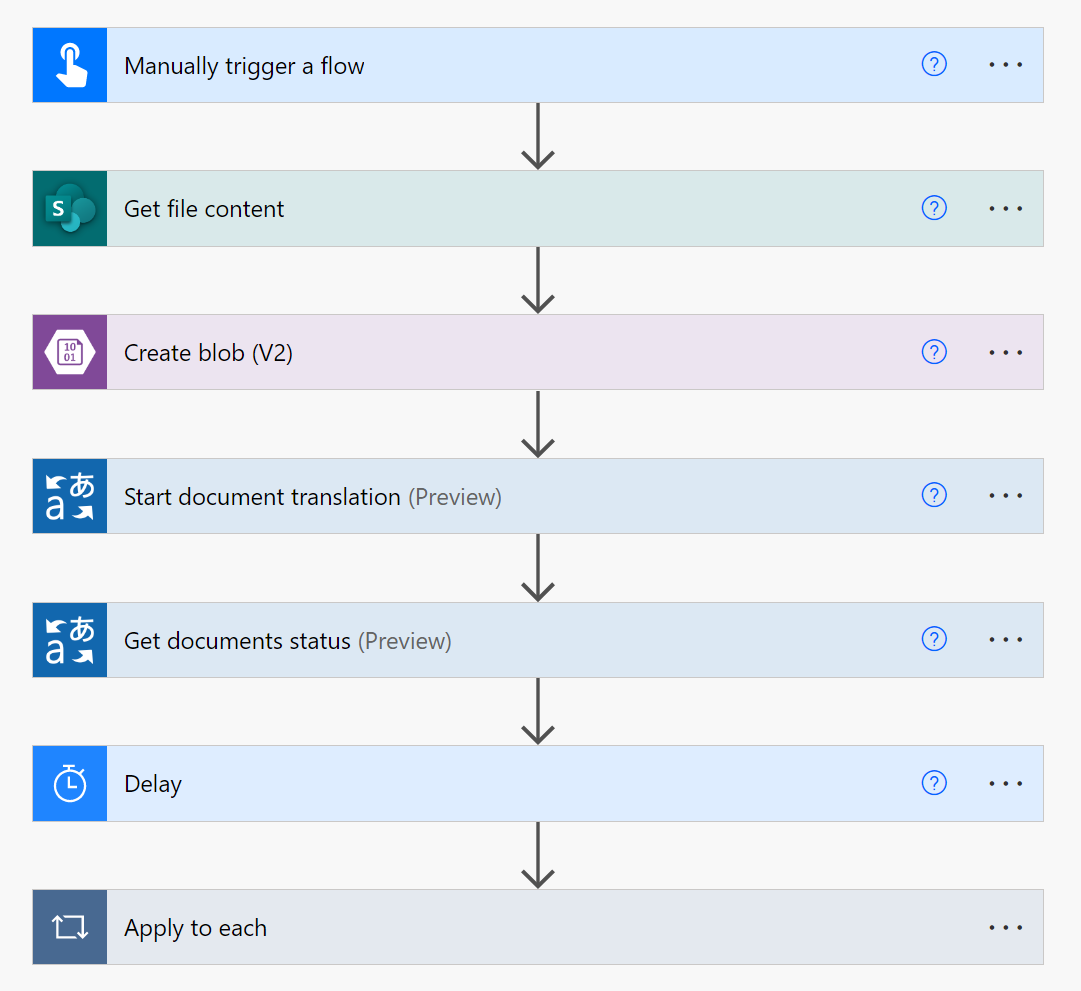
In the popup window, name your flow then choose Manually trigger a flow and select Create.
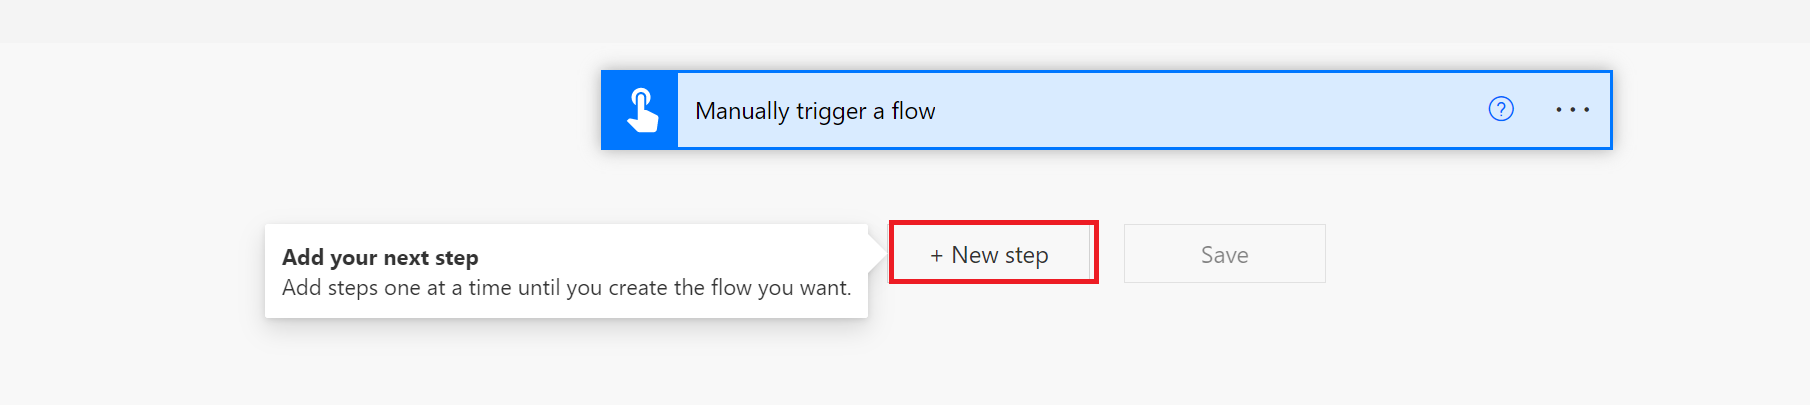
The first step for your instant flow—Manually trigger a flow—appears on screen. Select New step.
Translate documents
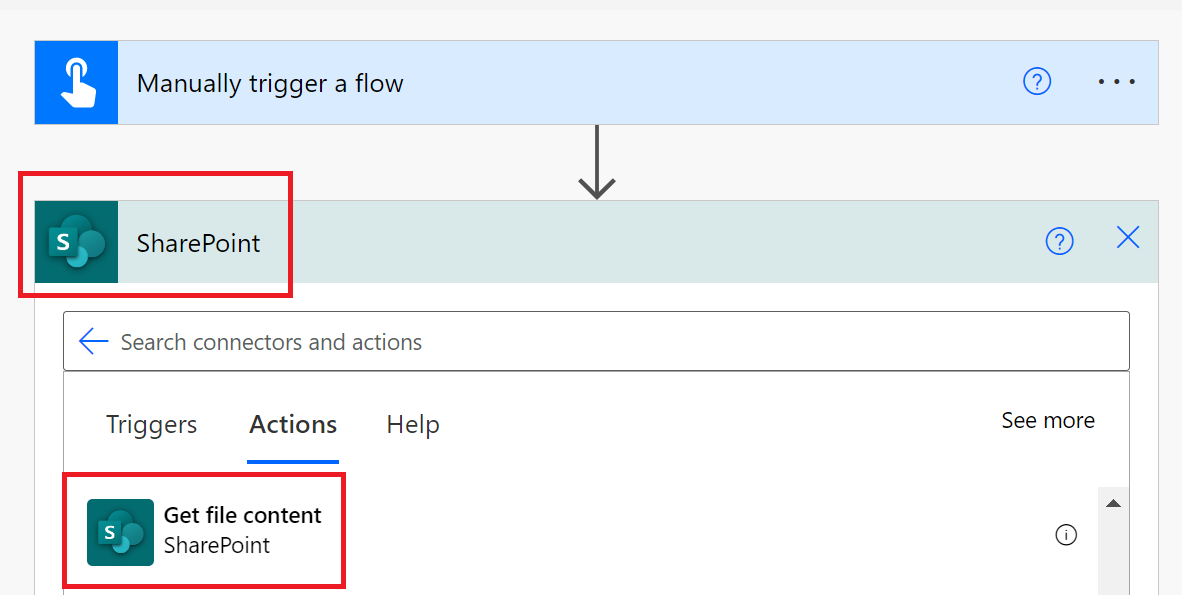
Next, we're ready to select an action. You can translate documents located in your Azure Blob Storage or Microsoft SharePoint account.
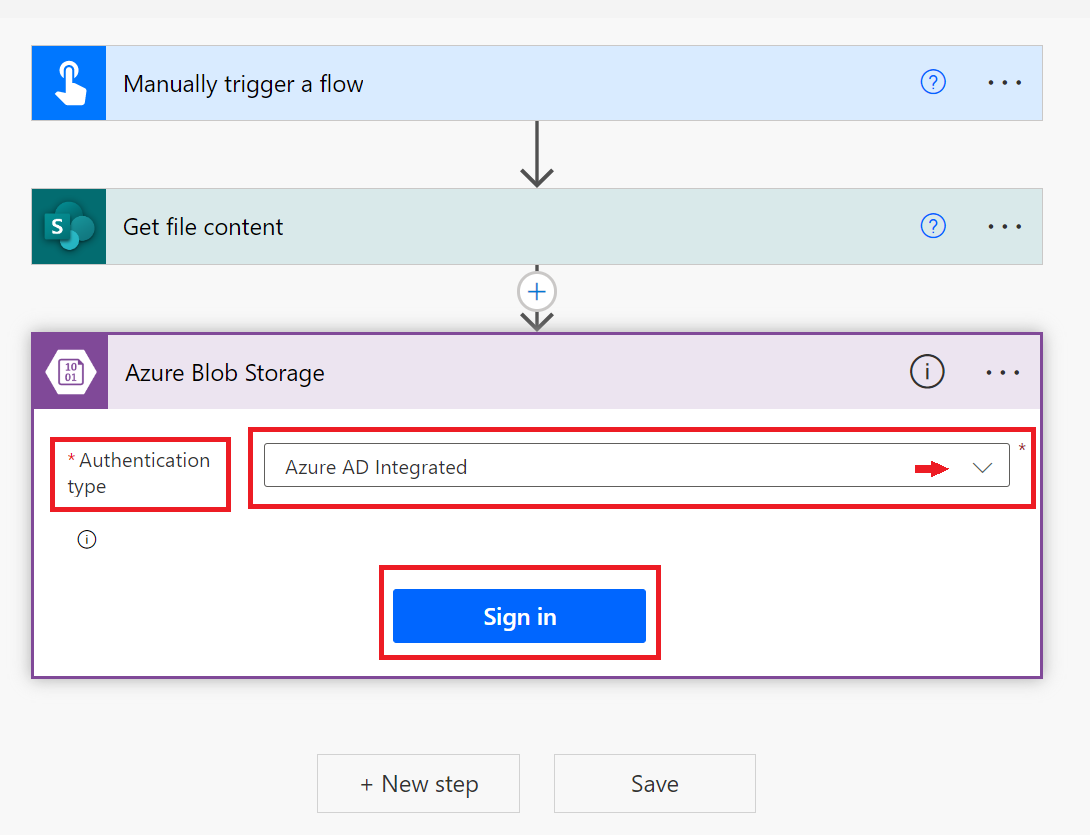
Azure Blob Storage
Here are the steps to translate a file in Azure Blob Storage using the Translator V3 connector:
- Choose the Translator V3 connector.
- Select document translation.
- Enter your Azure Blob Storage credentials and container locations.
- Translate your document(s) choosing source and target languages.
- Get the status of the translation operation.
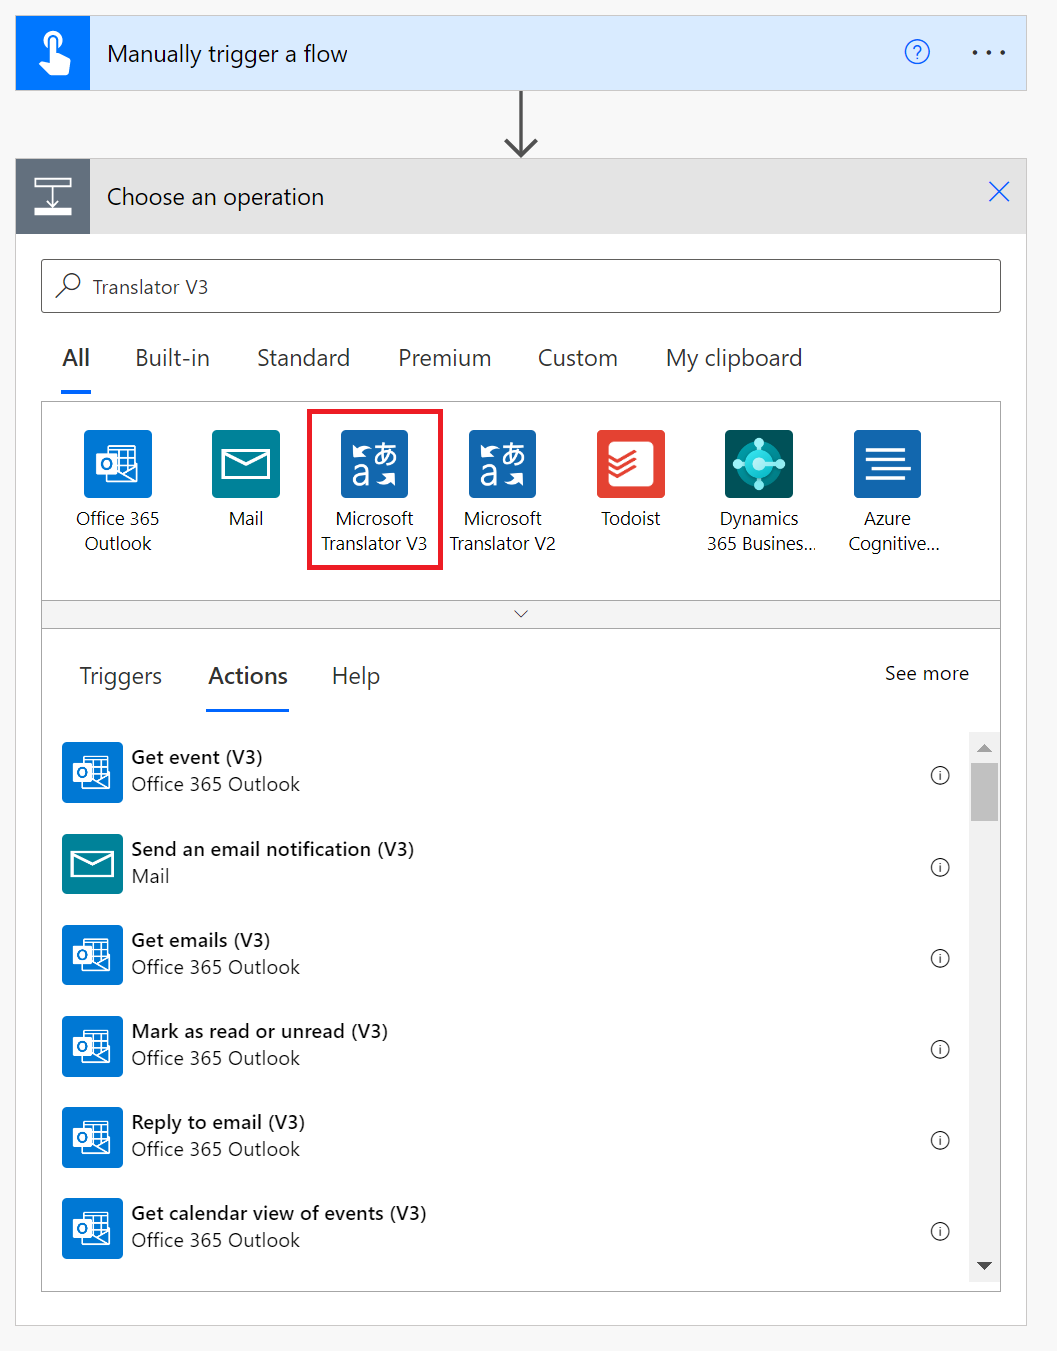
In the Choose an operation pop-up window, enter Translator V3 in the Search connectors and actions search bar and select the Microsoft Translator V3 icon.
Select the Start document translation action.
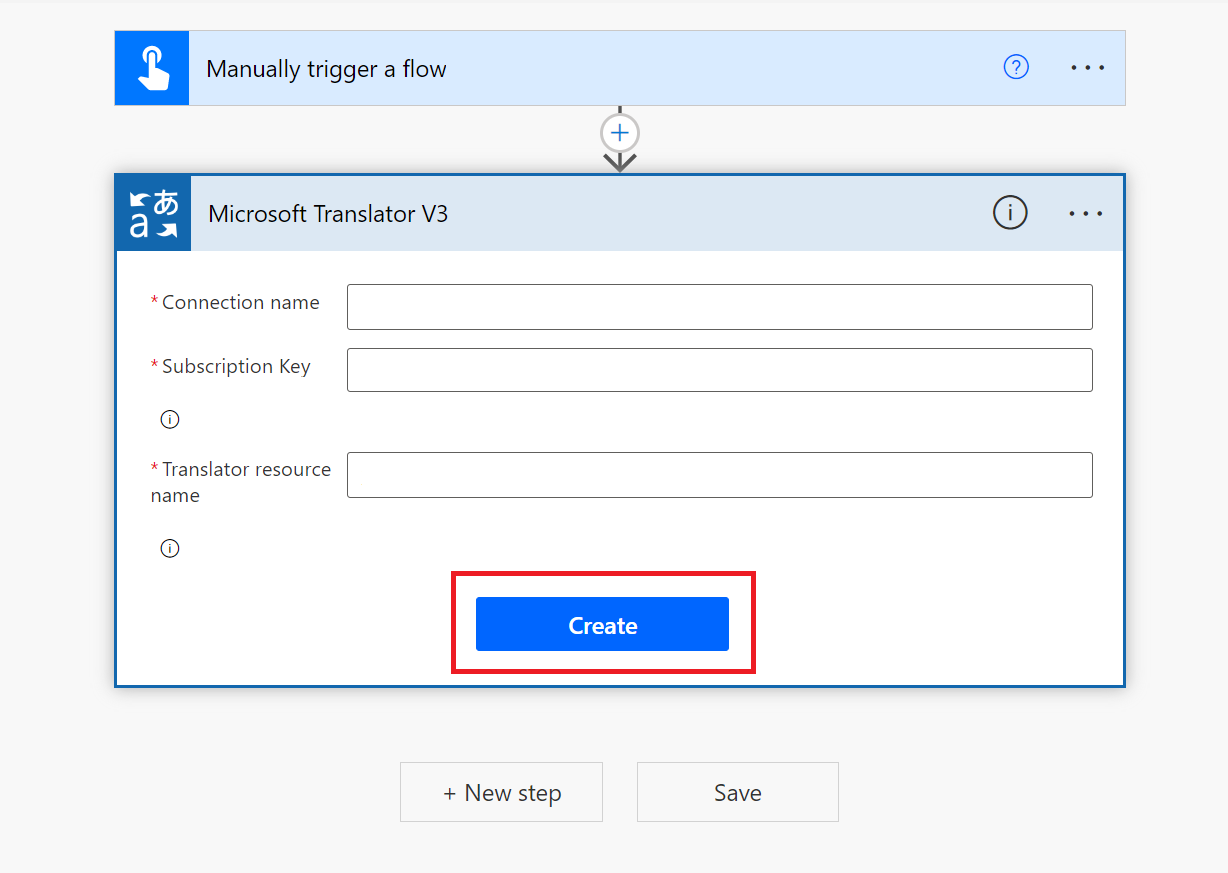
If you're using the Translator V3 connector for the first time, you need to enter your resource credentials:
Connection name. Enter a name for your connection.
Subscription Key. Your Translator resource keys are found under the Resource Management section of the resource sidebar in the Azure portal. Enter one of your keys. Make certain that your Translator resource is assigned to a geographical region such as West US (not global).
Translator resource name. Enter the name of your Translator resource found at the top of your resource page in the Azure portal. Select Create.
Note
After you've set up your connection, you won't be required to reenter your credentials for subsequent flows.
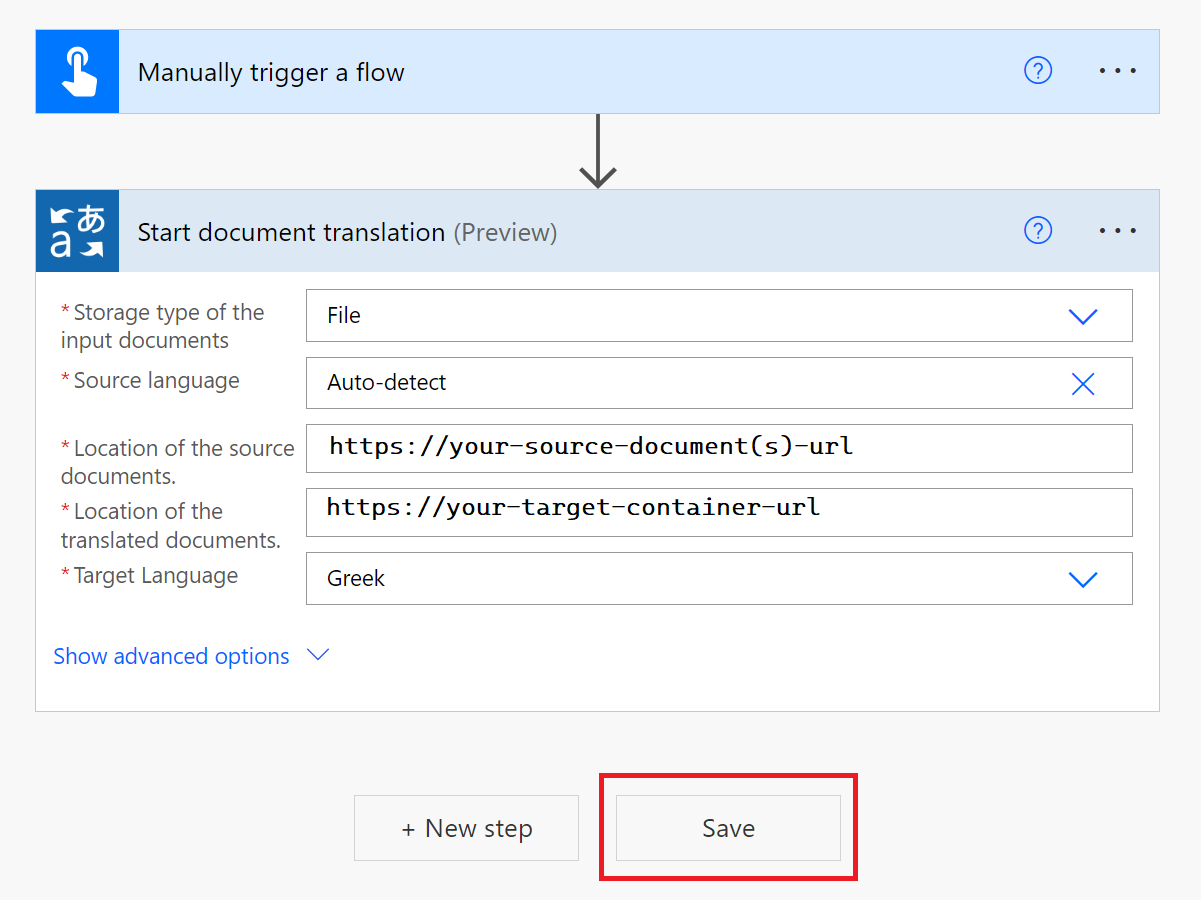
The Start document translation action window now appears. Complete the fields as follows:
For Storage type of the input documents. Select File or Folder.
Select a Source Language from the dropdown menu or keep the default Auto-detect option.
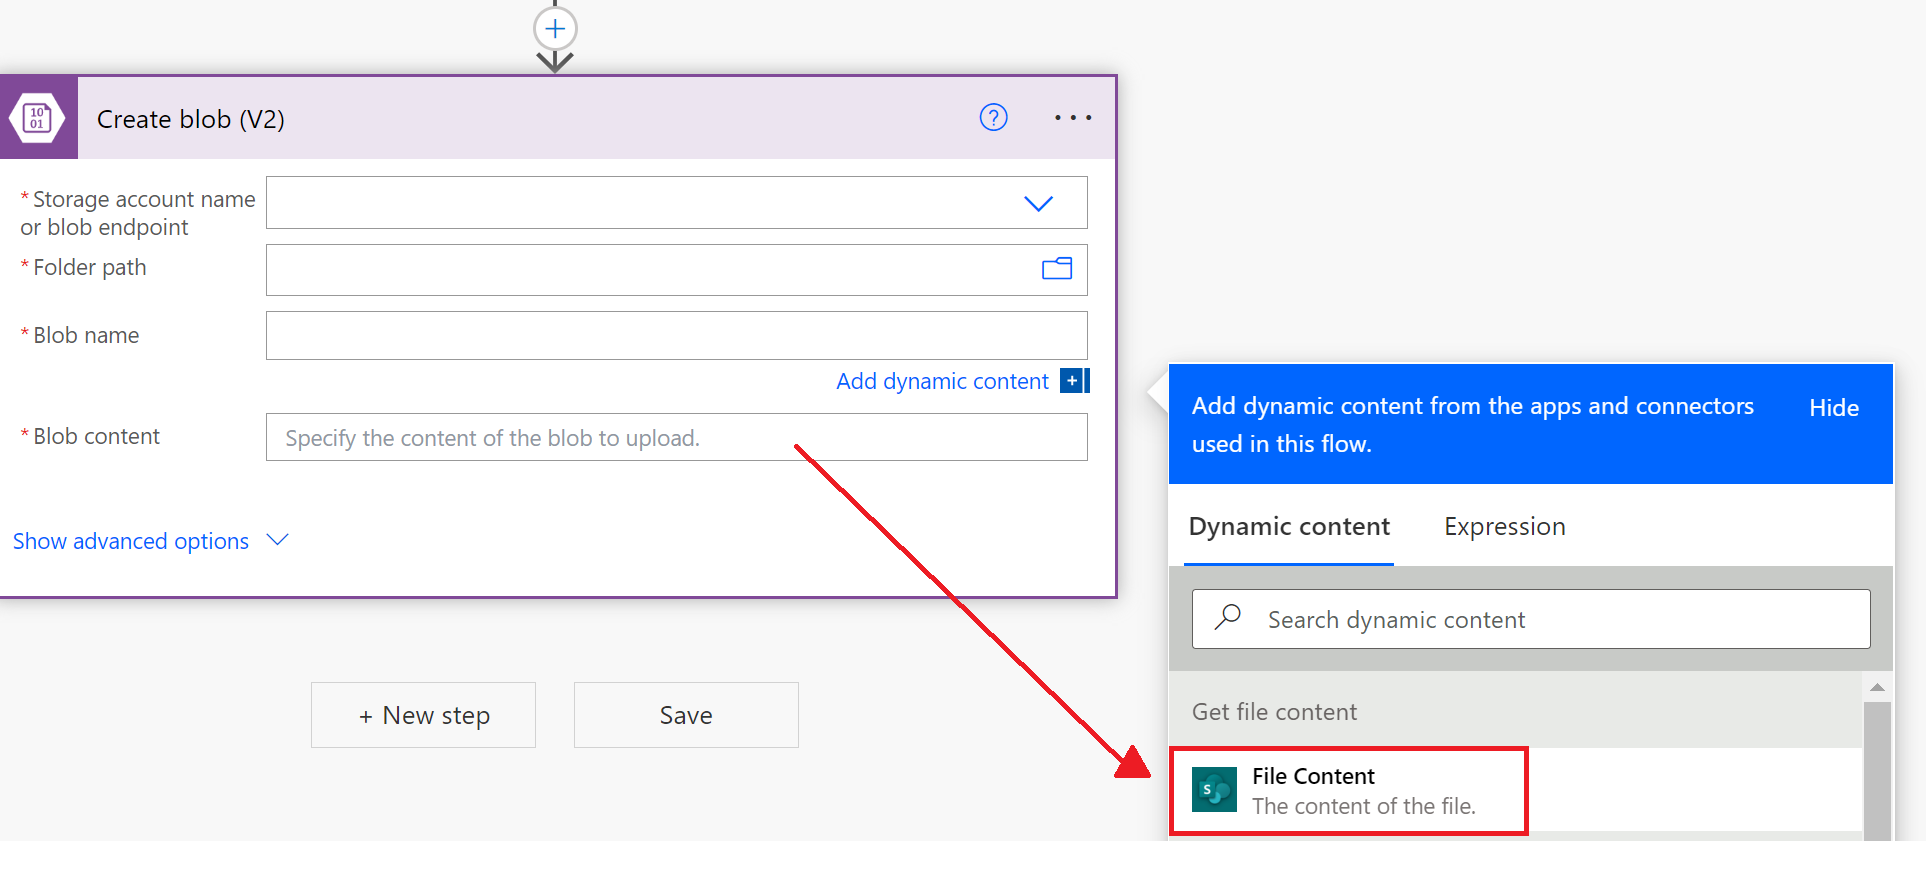
Location of the source documents. Enter the URL for your documents in your Azure storage source document container.
Location of the translated documents. Enter the URL for your Azure storage target document container.
To find your source and target URLs:
Navigate to your storage account in the Azure portal.
In the left sidebar, under Data storage , select Containers:
Source Target Select the checkbox next to the source container Select the checkbox next to the target container. From the main window area, select a file or document for translation. Select the ellipses located at the right, then choose Properties. The source URL is located at the top of the Properties list. Select the Copy to Clipboard icon. The target URL is located at the top of the Properties list. Select the Copy to Clipboard icon. Navigate to your Power automate flow and paste the source URL in the Location of the source documents field. Navigate to your Power automate flow and paste the target URL in the Location of the translated documents field.
Choose a Target Language from the dropdown menu and select Save.
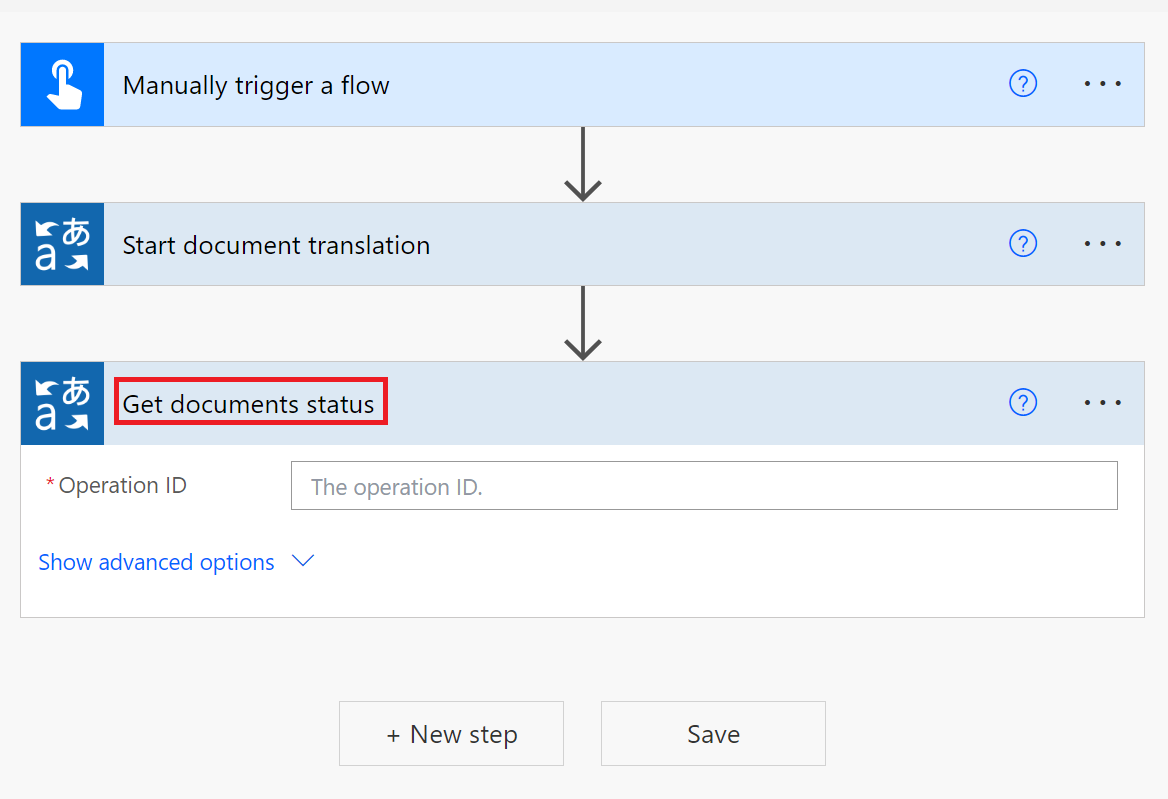
Get documents status
Now that you submitted your documents for translation, let's check the status of the operation.
Select New step.
Enter Translator V3 in the search box and choose Microsoft Translator V3.
Select Get documents status (not the singular Get document status action).
Next, you're going to enter an expression to retrieve the
operation IDvalue.Select the operation ID field. A Dynamic content / Expression dropdown window appears.
Select the Expression tab and enter the following expression into the function field:
body('Start_document_translation').operationID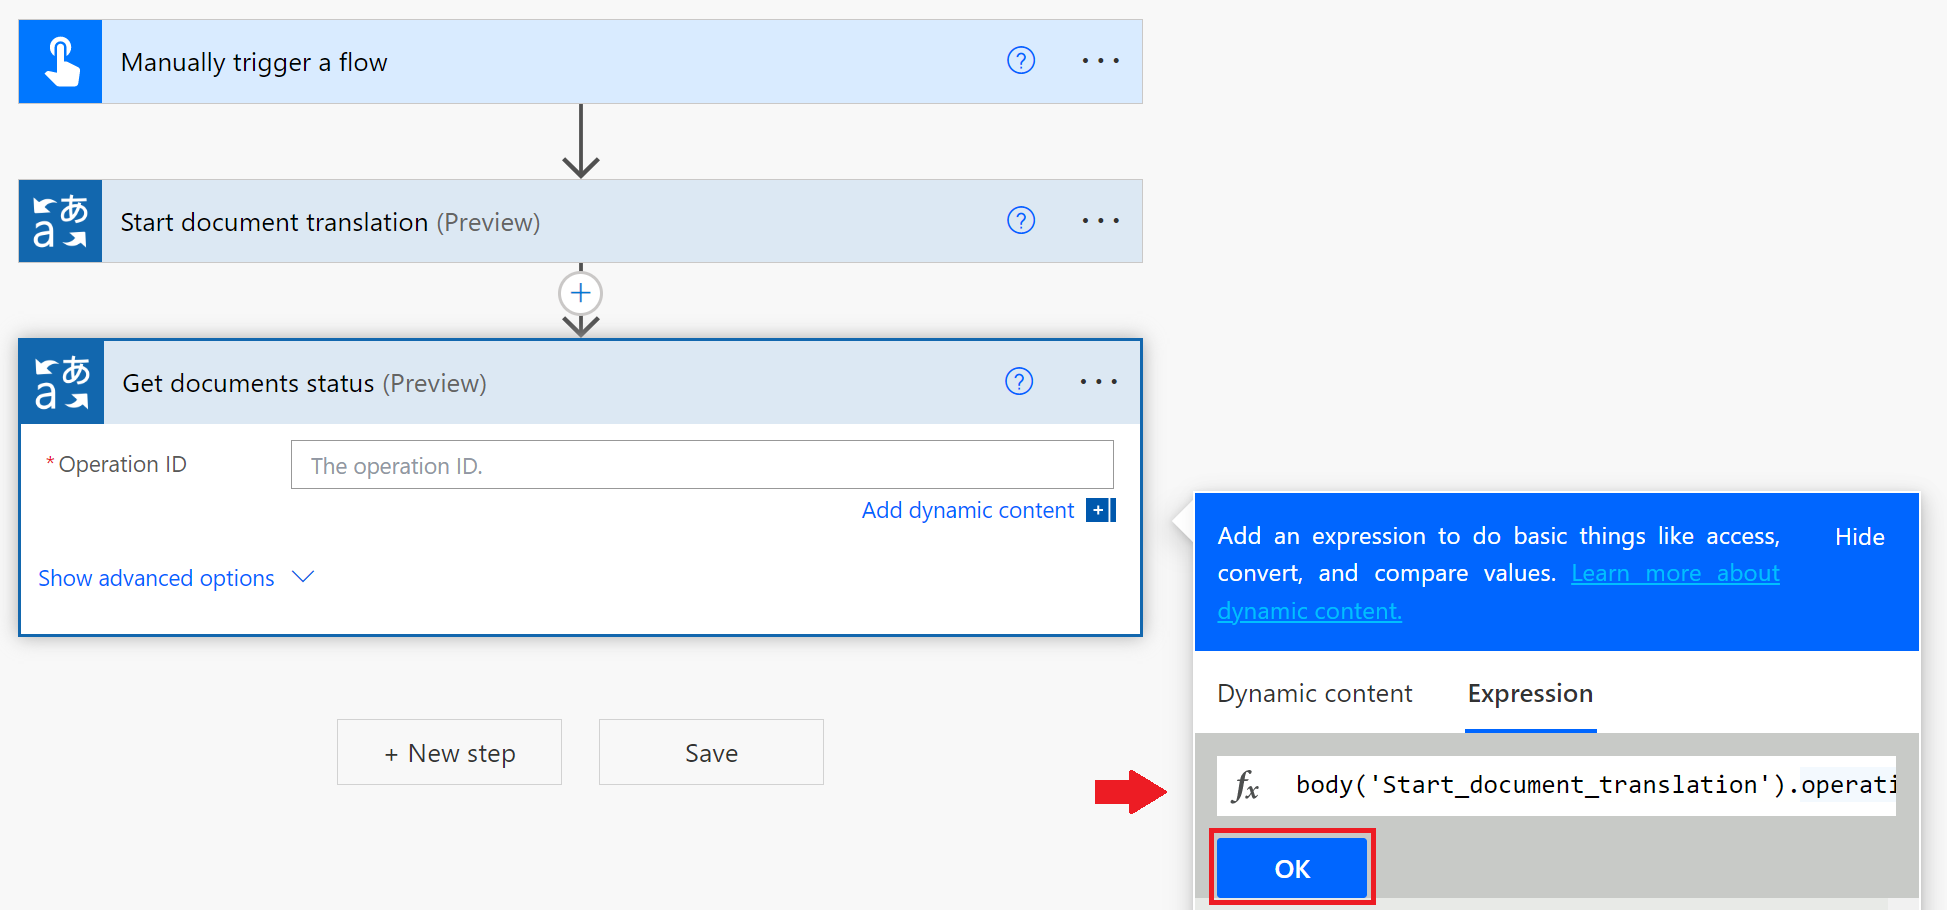
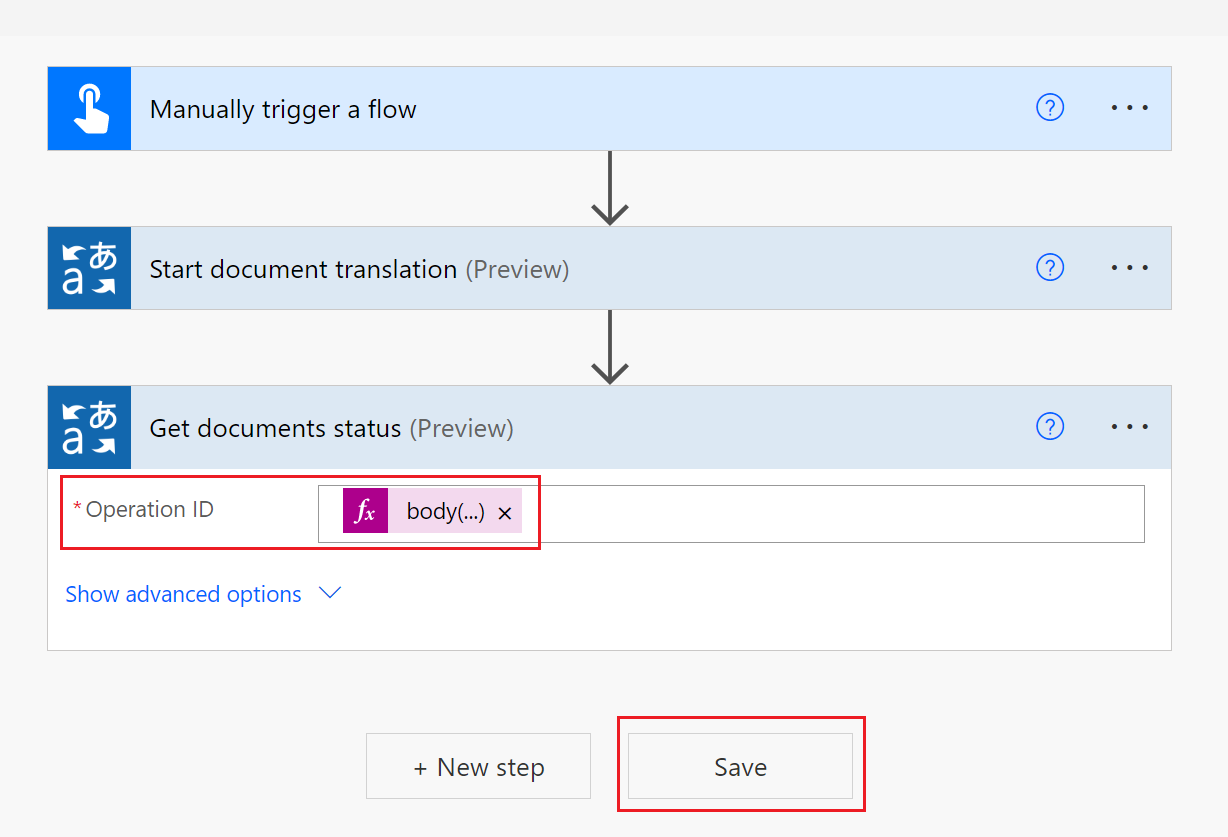
Select OK. The function appears in the Operation ID window. Select Save.
Test the connector flow
Time to check our flow and document translation results.
There's a green bar at the top of the page indicating that Your flow is ready to go.
Select Test from the upper-right corner of the page.

Select the following buttons: Test Flow → Manually → Test from the right-side window.
In the next window, select the Run flow button.
Finally, select the Done button.
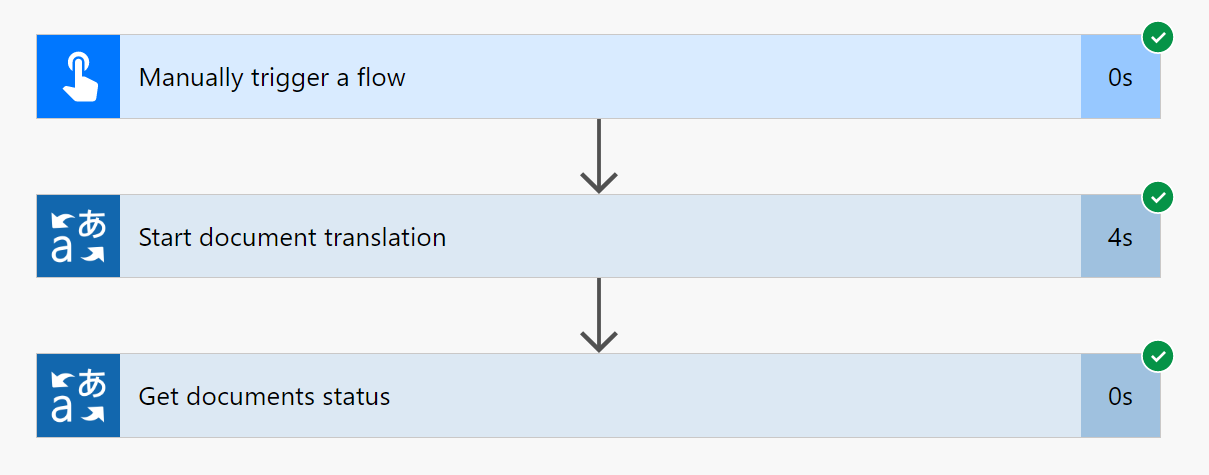
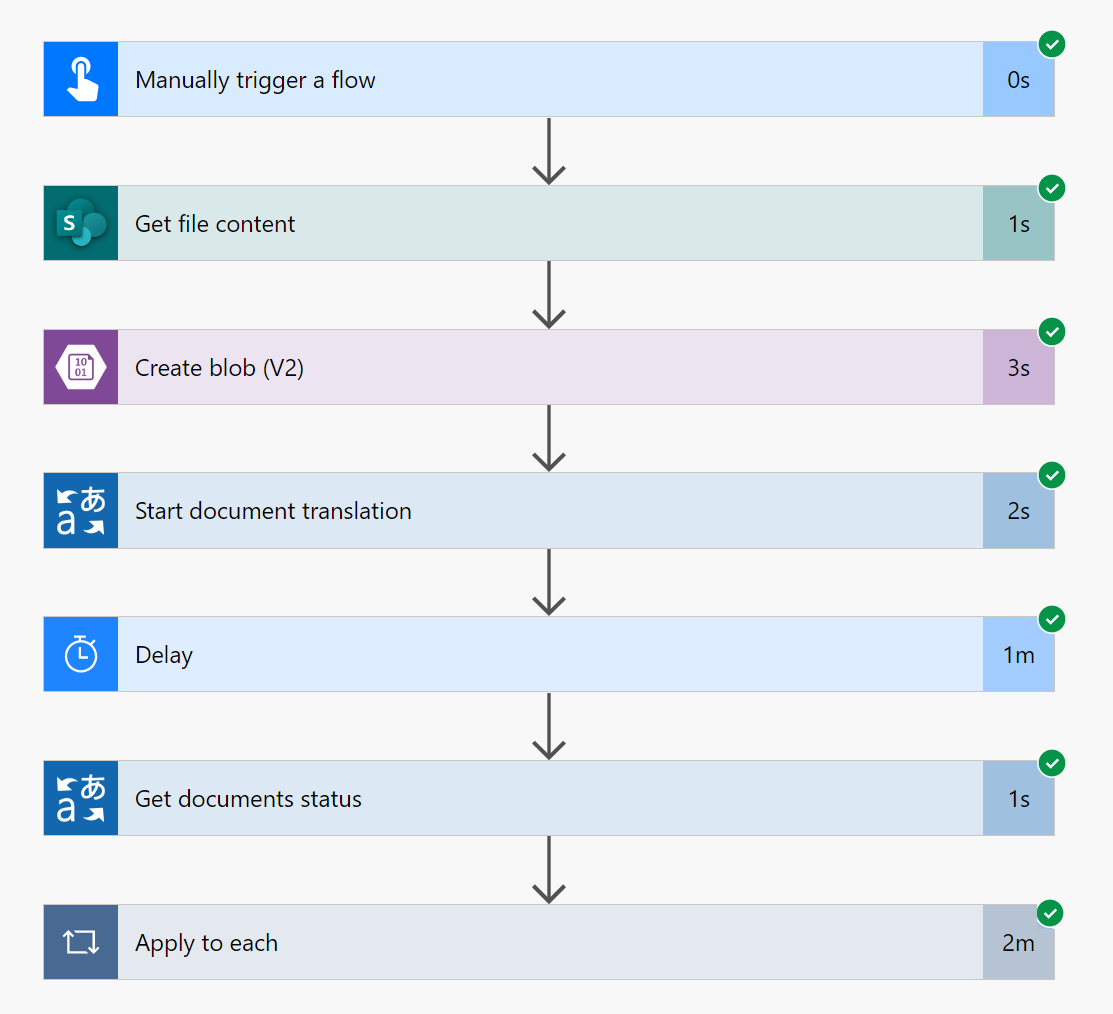
You should receive a Your flow ran successfully message and green check marks align with each successful step.
Select the Get documents status step, then select Show raw outputs from the Outputs section.
A Get documents status window appears. At the top of the JSON response, you see
"statusCode":200indicating that the request was successful.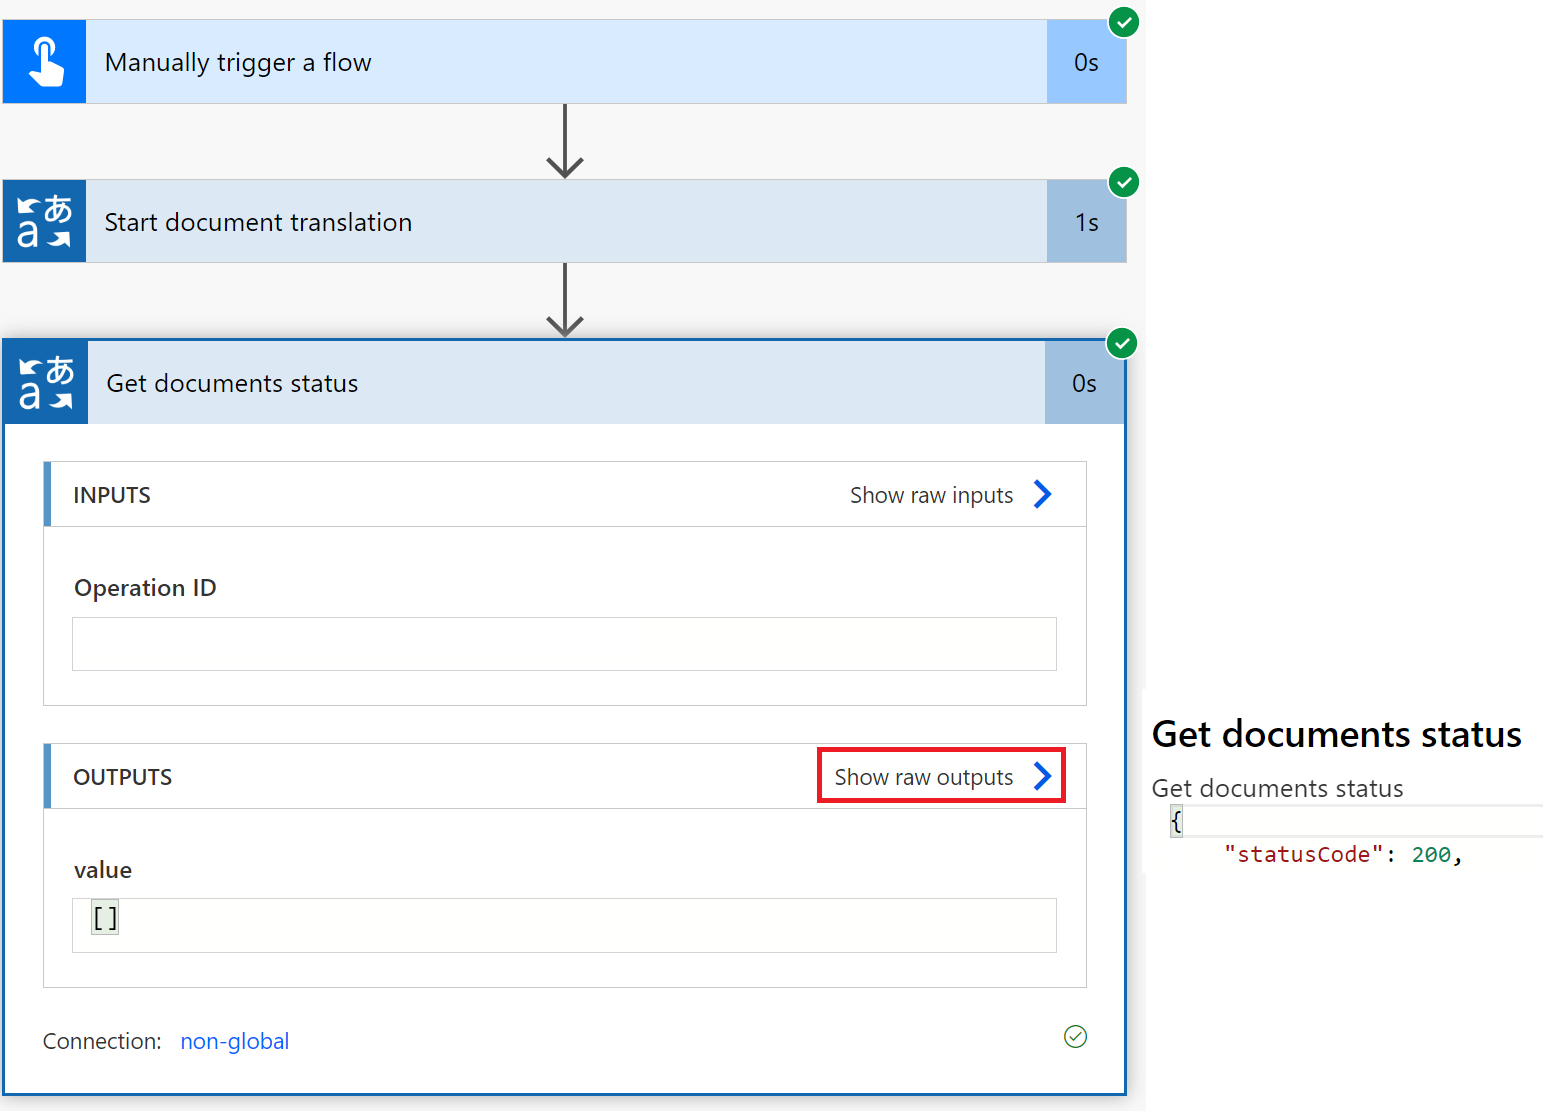
As a final check, navigate to your Azure Blob Storage target source container. There, you should see the translated document in the Overview section. The document may be in a folder labeled with the translation language code.


That's it! You learned to automate document translation processes using the Microsoft Translator V3 connector and Power Automate.