Note
Access to this page requires authorization. You can try signing in or changing directories.
Access to this page requires authorization. You can try changing directories.
Azure Communication Services Call Automation APIs allow developers to steer and control calls made through Azure Communication Services, including telephony, VoIP, and WebRTC. These APIs use real-time event triggers, which enable actions based on custom business logic that is specific to each developer’s domain. With Call Automation APIs, developers can use simple AI-powered features. For example, they can play personalized greetings, recognize spoken responses to gather information from customers, and analyze sentiment to improve service. These targeted APIs are managed through Azure AI Foundry, which allow developers to customize AI models. Importantly, developers do not need to deal with media streams or send them back to Azure for these AI functions—the processing happens seamlessly.
All this functionality is possible with one click, allowing enterprises to access a secure solution and link their models through the portal. Furthermore, developers and enterprises don't need to manage credentials. Connecting your Azure AI services uses managed identities to access user-owned resources. Developers can use managed identities to authenticate any resource that supports Microsoft Entra authentication.
Azure AI services can be easily integrated into any application regardless of the programming language. When creating an Azure Resource in Azure portal, enable the option and provide the URL to the Azure AI services. This simple experience allows developers to meet their needs, scale, and avoid investing time and resources into designing and maintaining a custom solution.
Note
This integration only supports Multi-service Cognitive Service resource, we recommend if you're creating a new Azure AI Service resource you create a Multi-service Cognitive Service resource or when you're connecting an existing resource confirm that it's a Multi-service Cognitive Service resource.
Common use cases
Build applications that can play and recognize speech
With the ability to connect your Azure AI services to Azure Communication Services. You can enable custom play functionality, using Text-to-Speech and Speech Synthesis Markup Language (SSML) configuration, to play more customized and natural sounding audio to users. Through the Azure AI services connection, you can also use the Speech-To-Text service to incorporate recognition of voice responses that can be converted into actionable tasks through business logic in the application. These functions can be further enhanced within Azure AI services by:
- Creating custom models tailored to your domain and region
- Selecting which languages are spoken and recognized
- Designing custom voices
- Building additional models based on your experience
Runtime flow

Azure portal experience
You need to connect your Azure Communication Services resource with the Azure AI resource through the Azure portal. There are two ways you can accomplish this step:
- Navigating through the steps of the Cognitive Services tab in your Azure Communication Services (recommended).
- Manually adding the Managed Identity to your Azure Communication Services resource. This step is more advanced and requires a little more effort to connect your Azure Communication Services to your Azure AI services.
Prerequisites
- Azure account with an active subscription and access to Azure portal, for details see Create an account for free.
- Azure Communication Services resource. See Create an Azure Communication Services resource.
- Azure Communication Service
Microsoft.Authorization/roleAssignments/writepermissions, commonly done through Azure RBAC. See Assign Azure roles using the Azure portal. - An Azure AI Services resource .
Connecting through the Azure portal
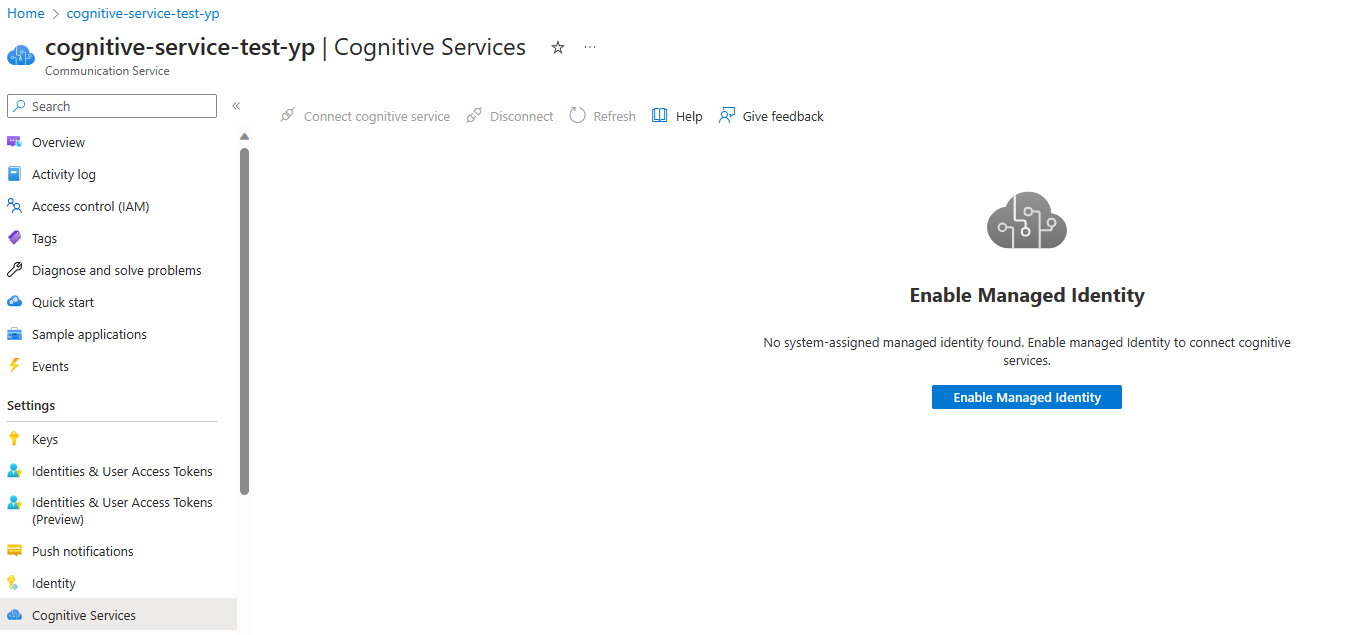
Open your Azure Communication Services resource and click on the Cognitive Services tab.
If system-assigned managed identity isn't enabled, you need to enable it.
In the Cognitive Services tab, click on "Enable Managed Identity" button.
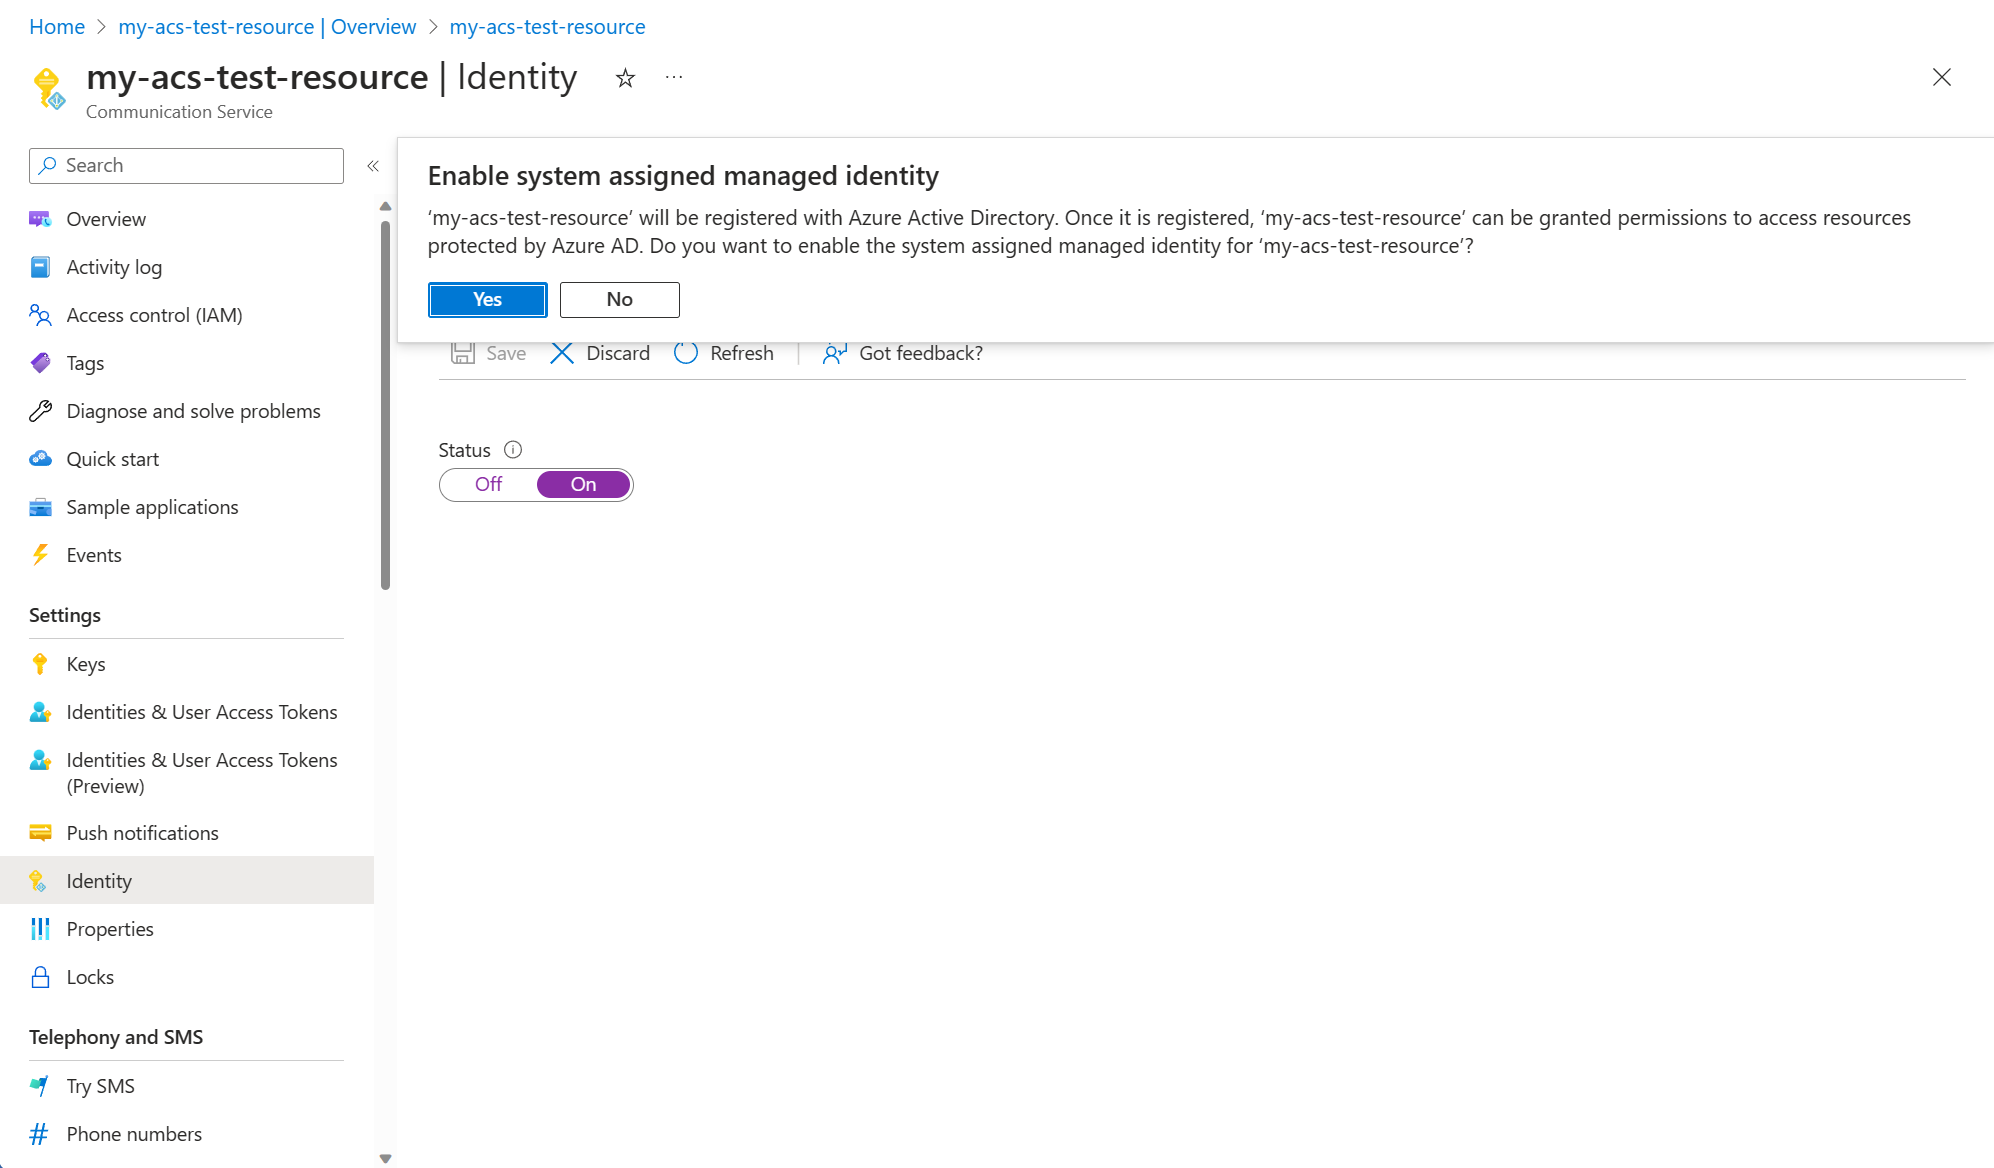
Enable system assigned identity. This action begins the creation of the identity; A pop-up notification appears notifying you that the request is being processed.
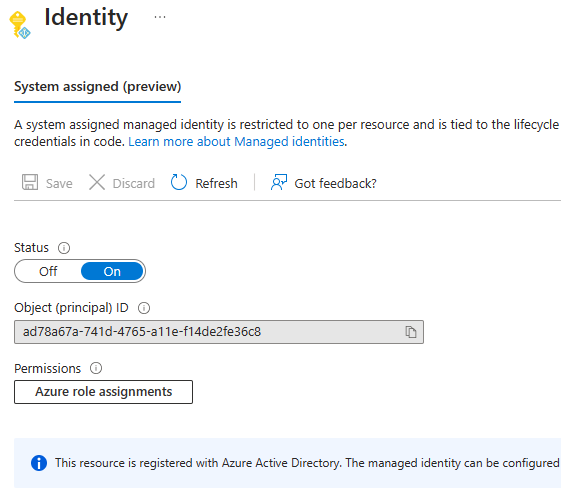
Once the identity is enabled, you should see something similar.
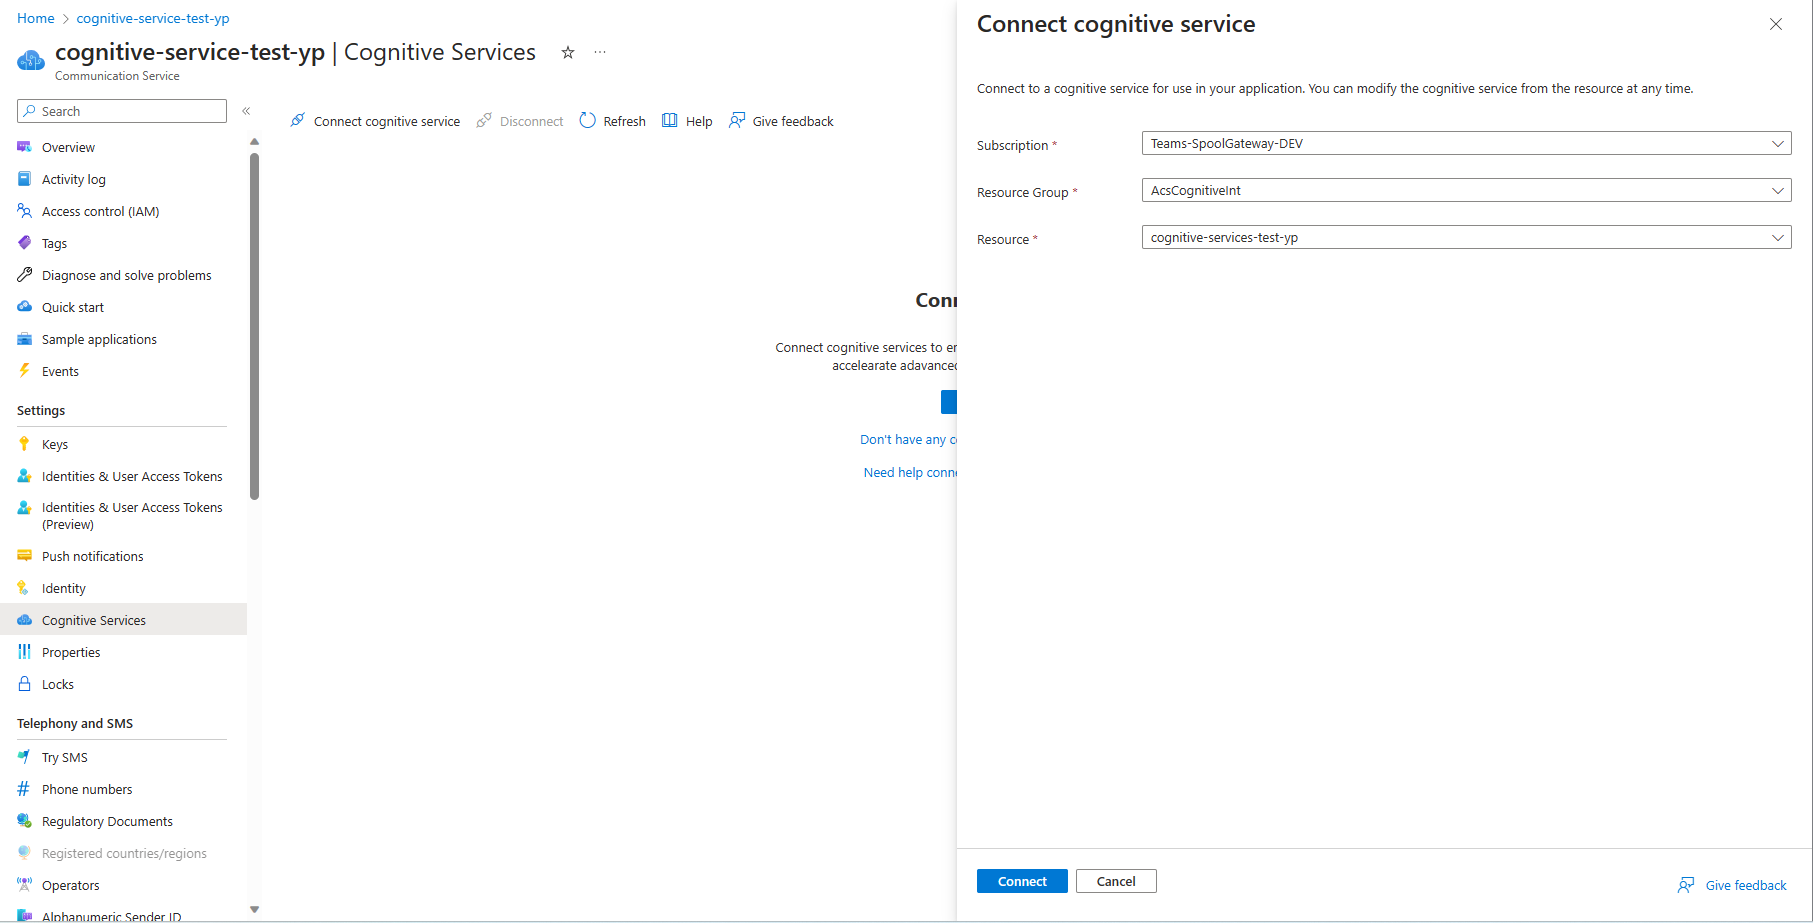
When managed identity is enabled, the Cognitive Service tab should show a button 'Connect cognitive service' to connect the two services.
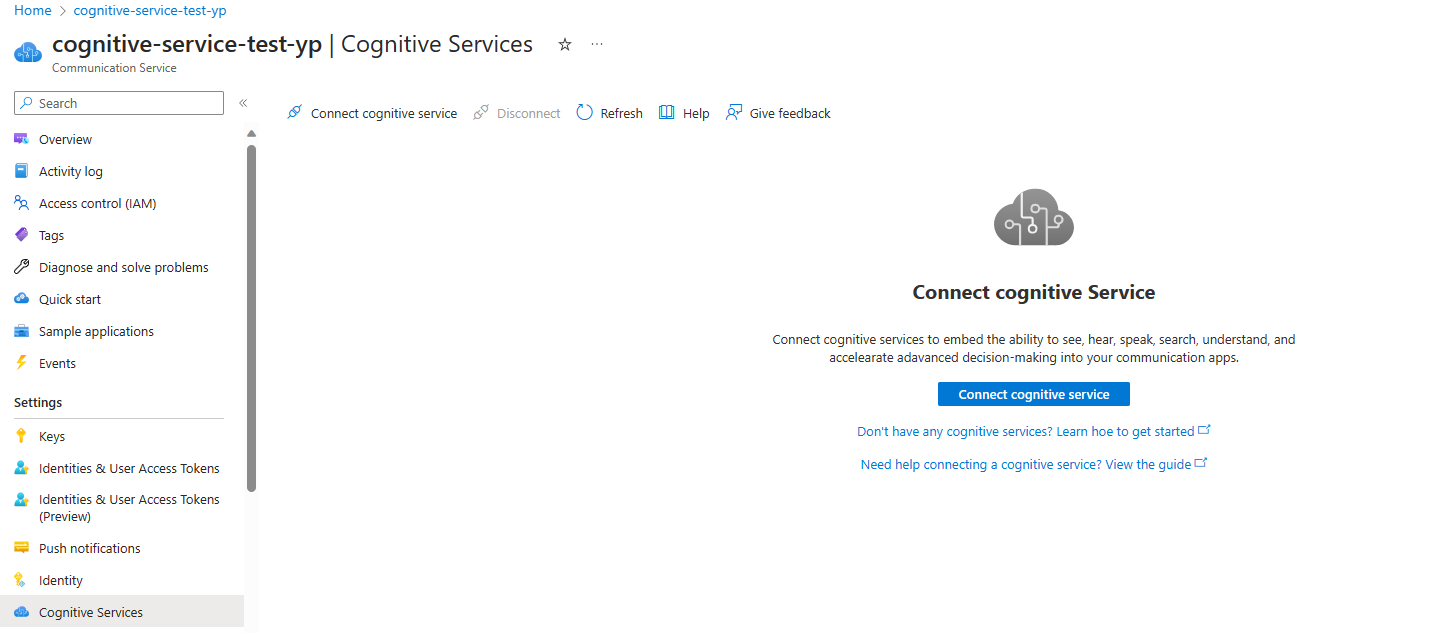
Click on 'Connect cognitive service', select the Subscription, Resource Group and Resource and click 'Connect' in the context pane that opens up.
If connection is successful, you should see a green banner confirming successful connection.
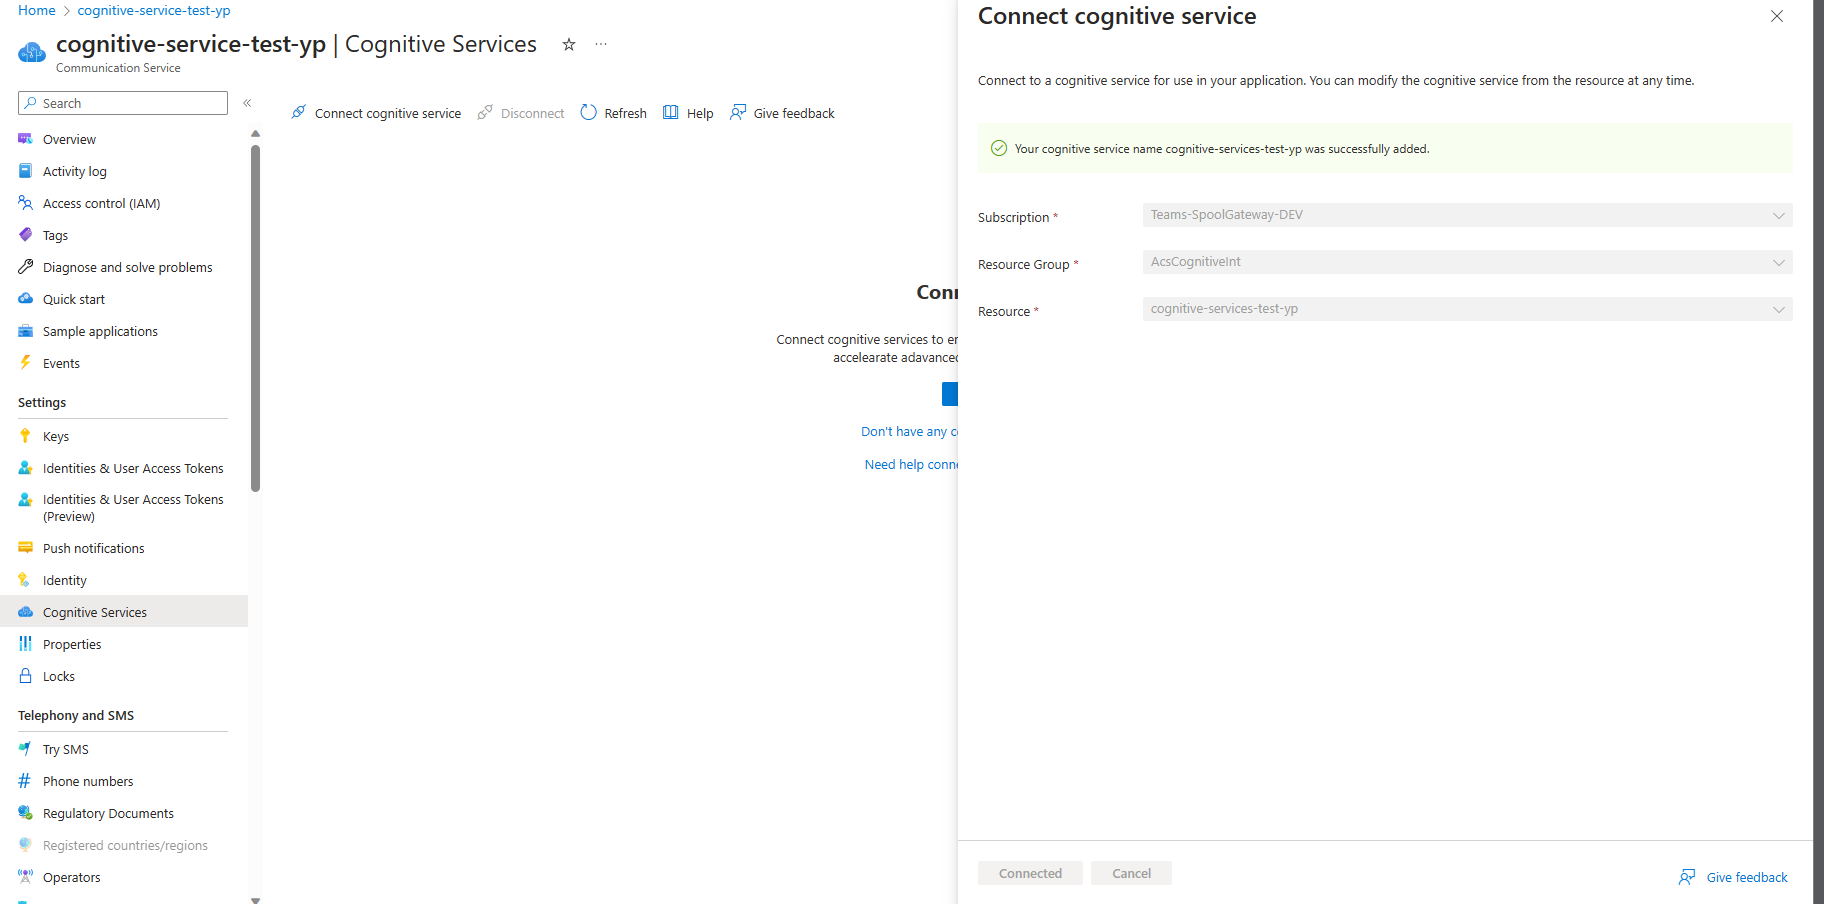
Now in the Cognitive Service tab you should see your connected services showing up.


Advanced option: Manually adding Managed Identity to Azure Communication Services resource
Alternatively if you would like to go through the manual process of connecting your resources you can follow these steps.
Enable system assigned identity
- Navigate to your Azure Communication Services resource in the Azure portal.
- Select the Identity tab.
- Enable system assigned identity. This action begins the creation of the identity. A pop-up notification appears notifying you that the request is being processed.
Option 1: Add role from Azure Cognitive Services in the Azure portal
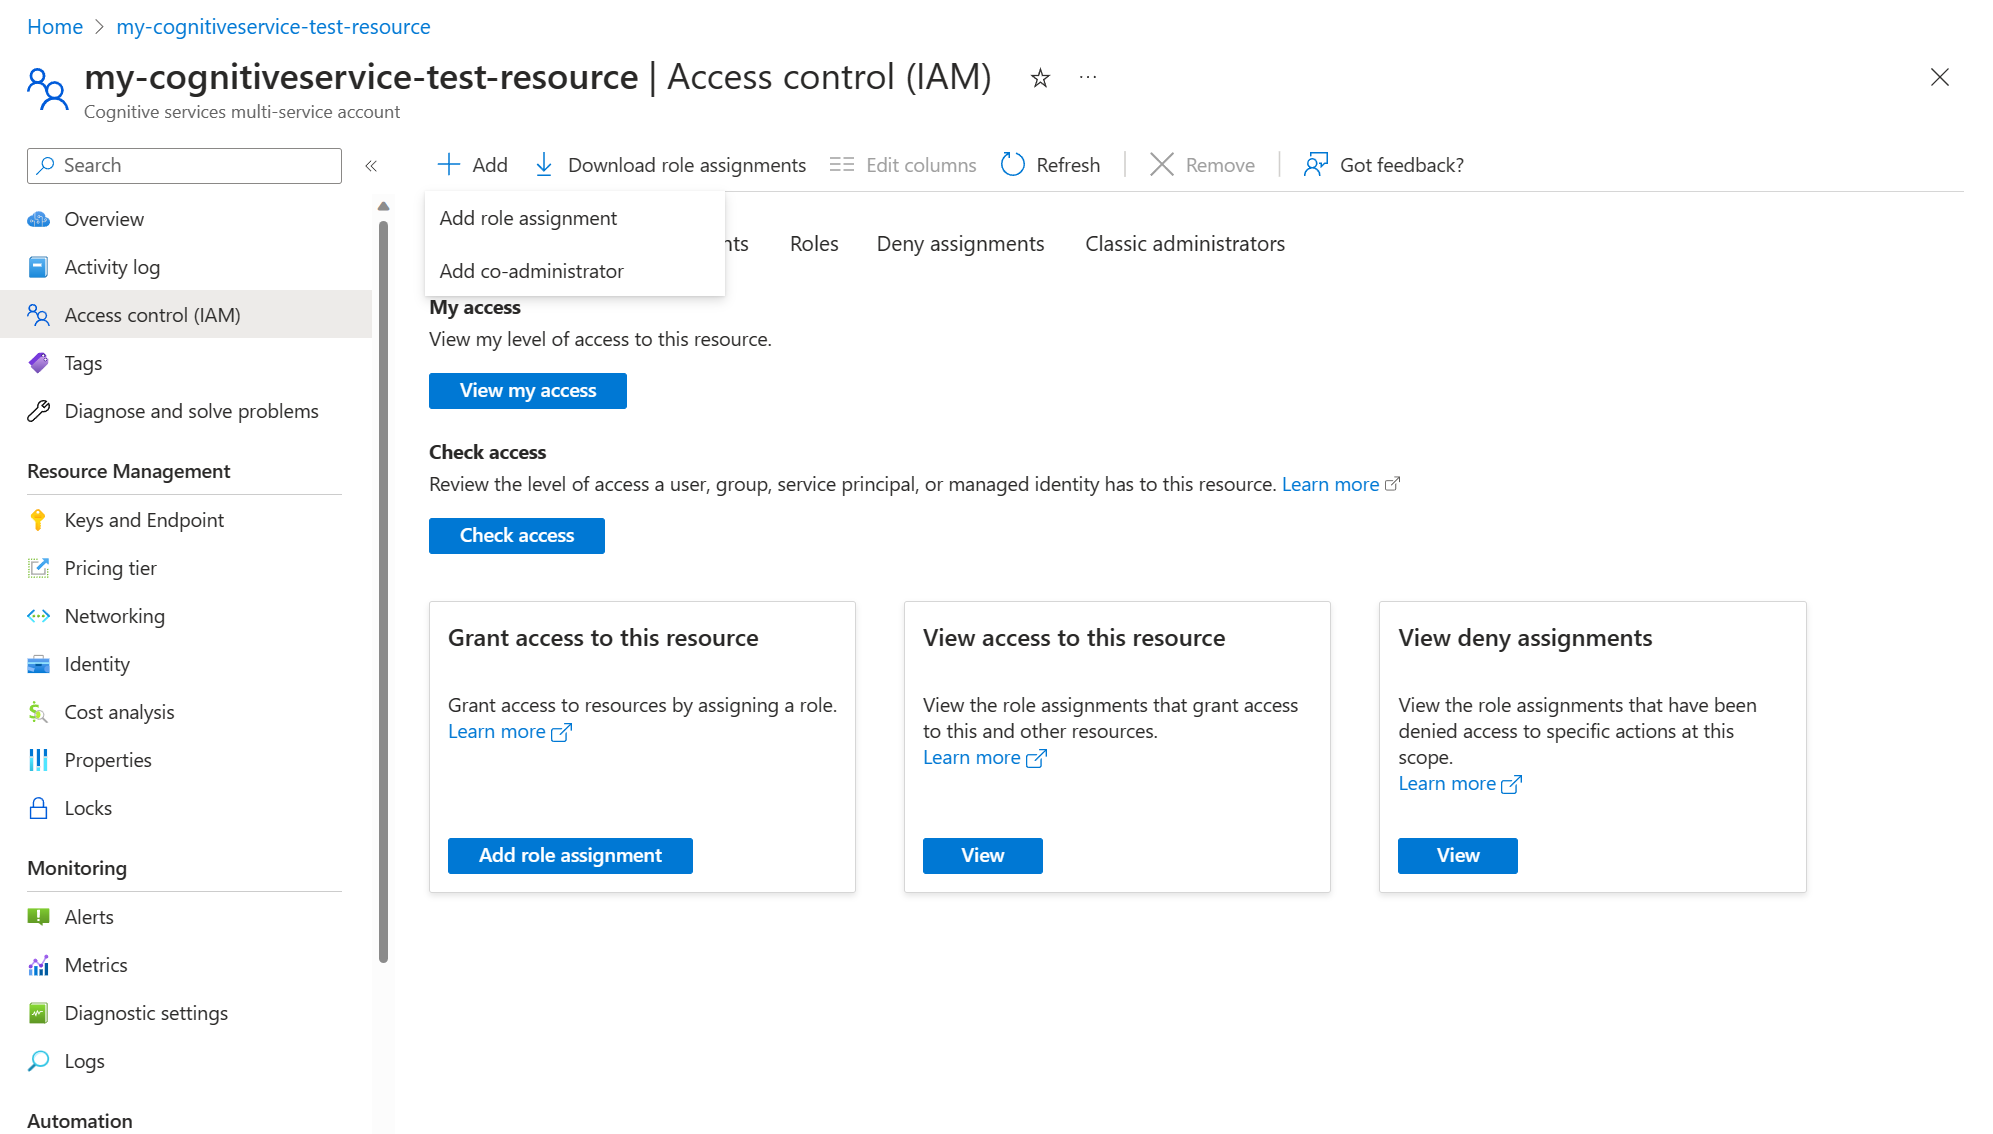
- Navigate to your Azure Cognitive Services resource.
- Select the "Access control (IAM)" tab.
- Click the "+ Add" button.
- Select "Add role assignments" from the menu.
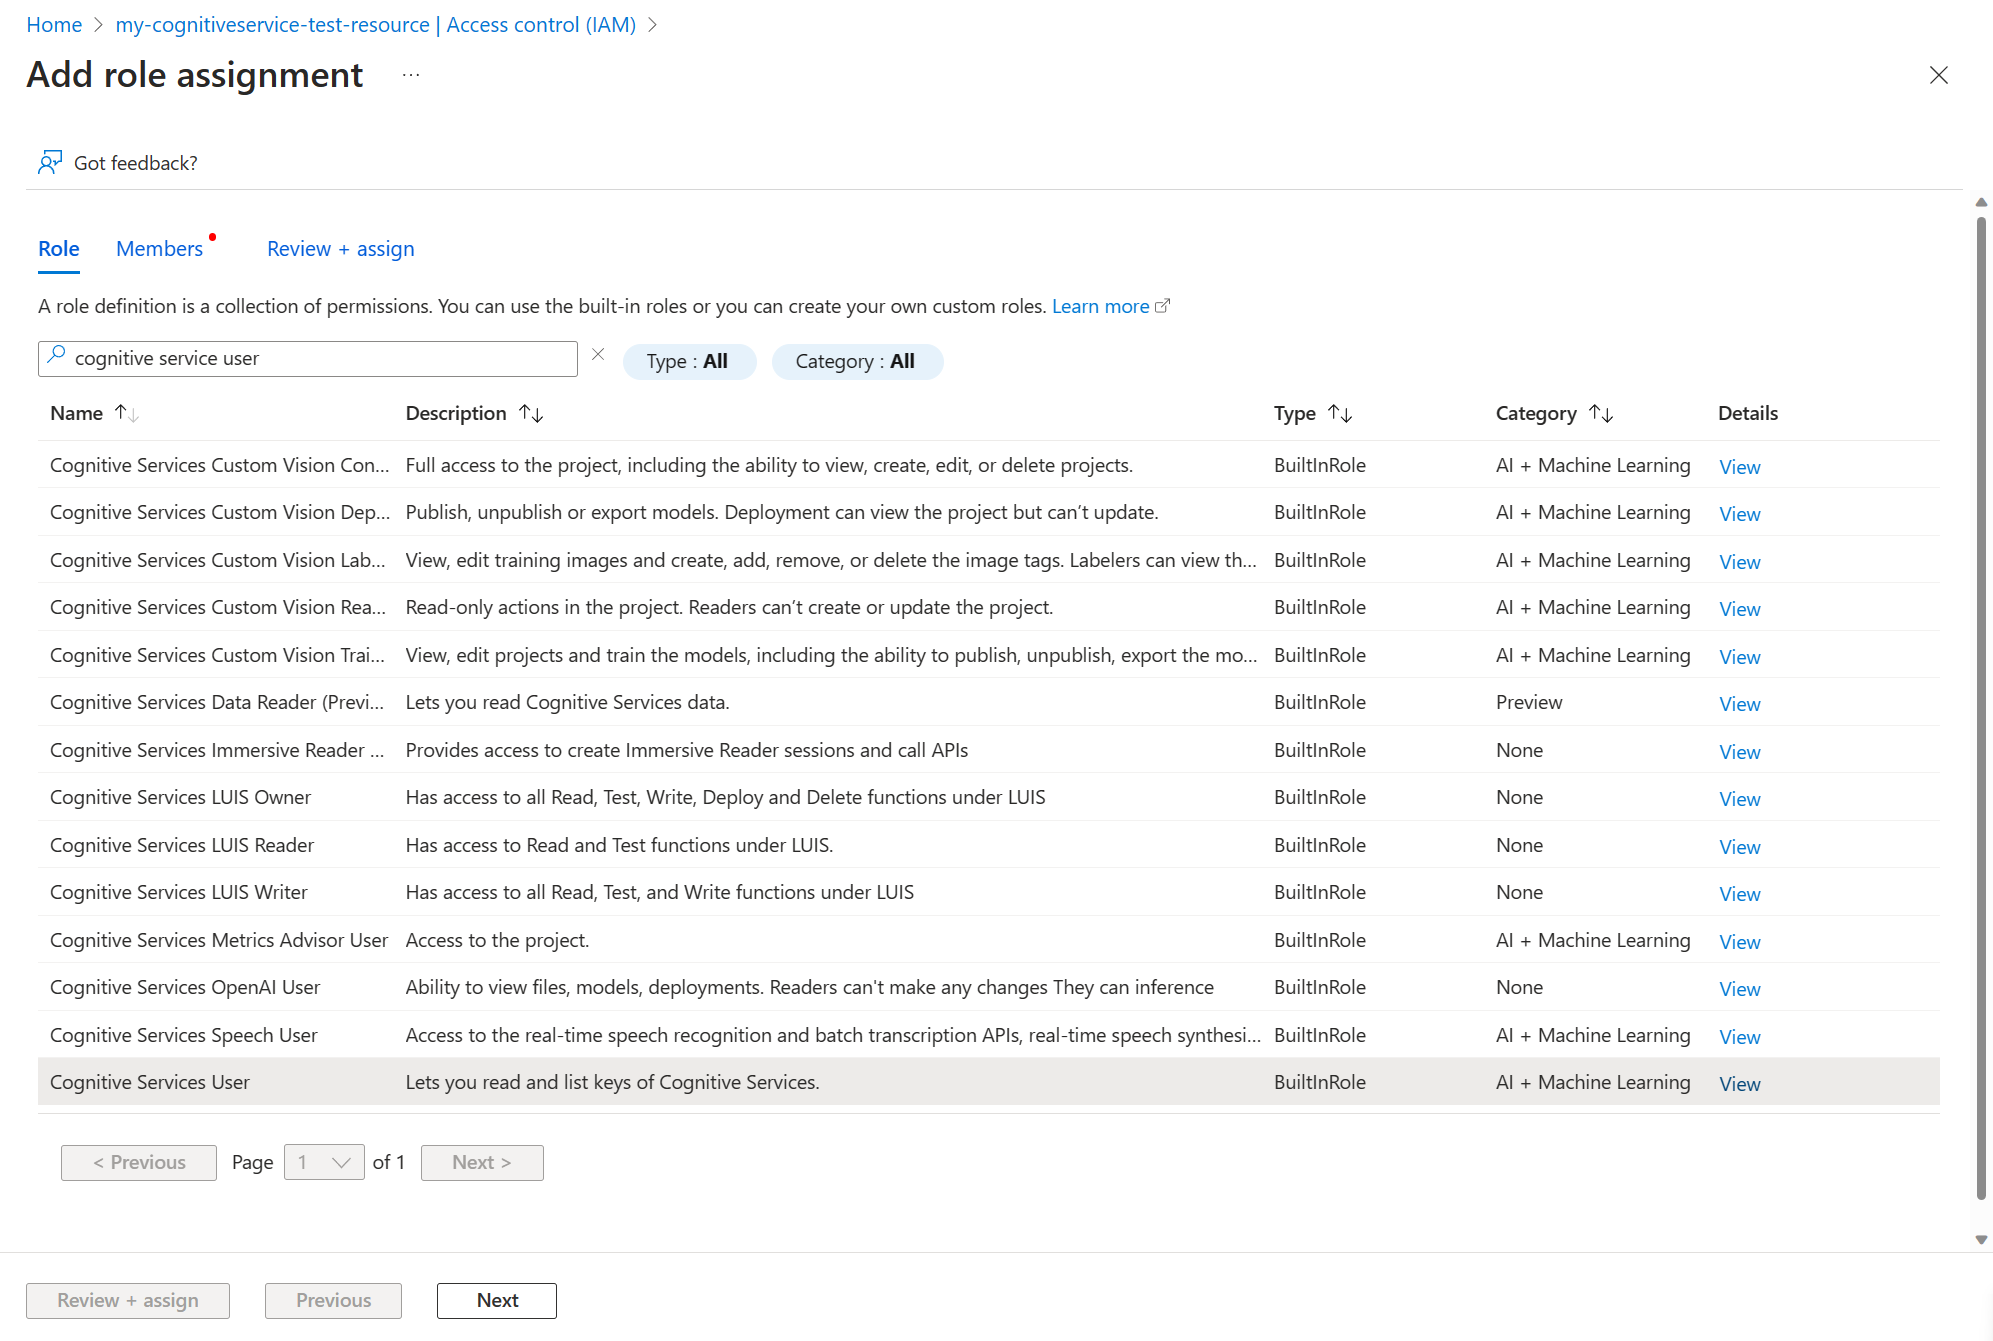
- Choose the "Cognitive Services User" role to assign, then click "Next."
- For the field "Assign access to" choose the "User, group or service principal."
- Press "+ Select members" and a side tab opens.
- Search for your Azure Communication Services resource name in the text box and click it when it shows up, then click "Select."
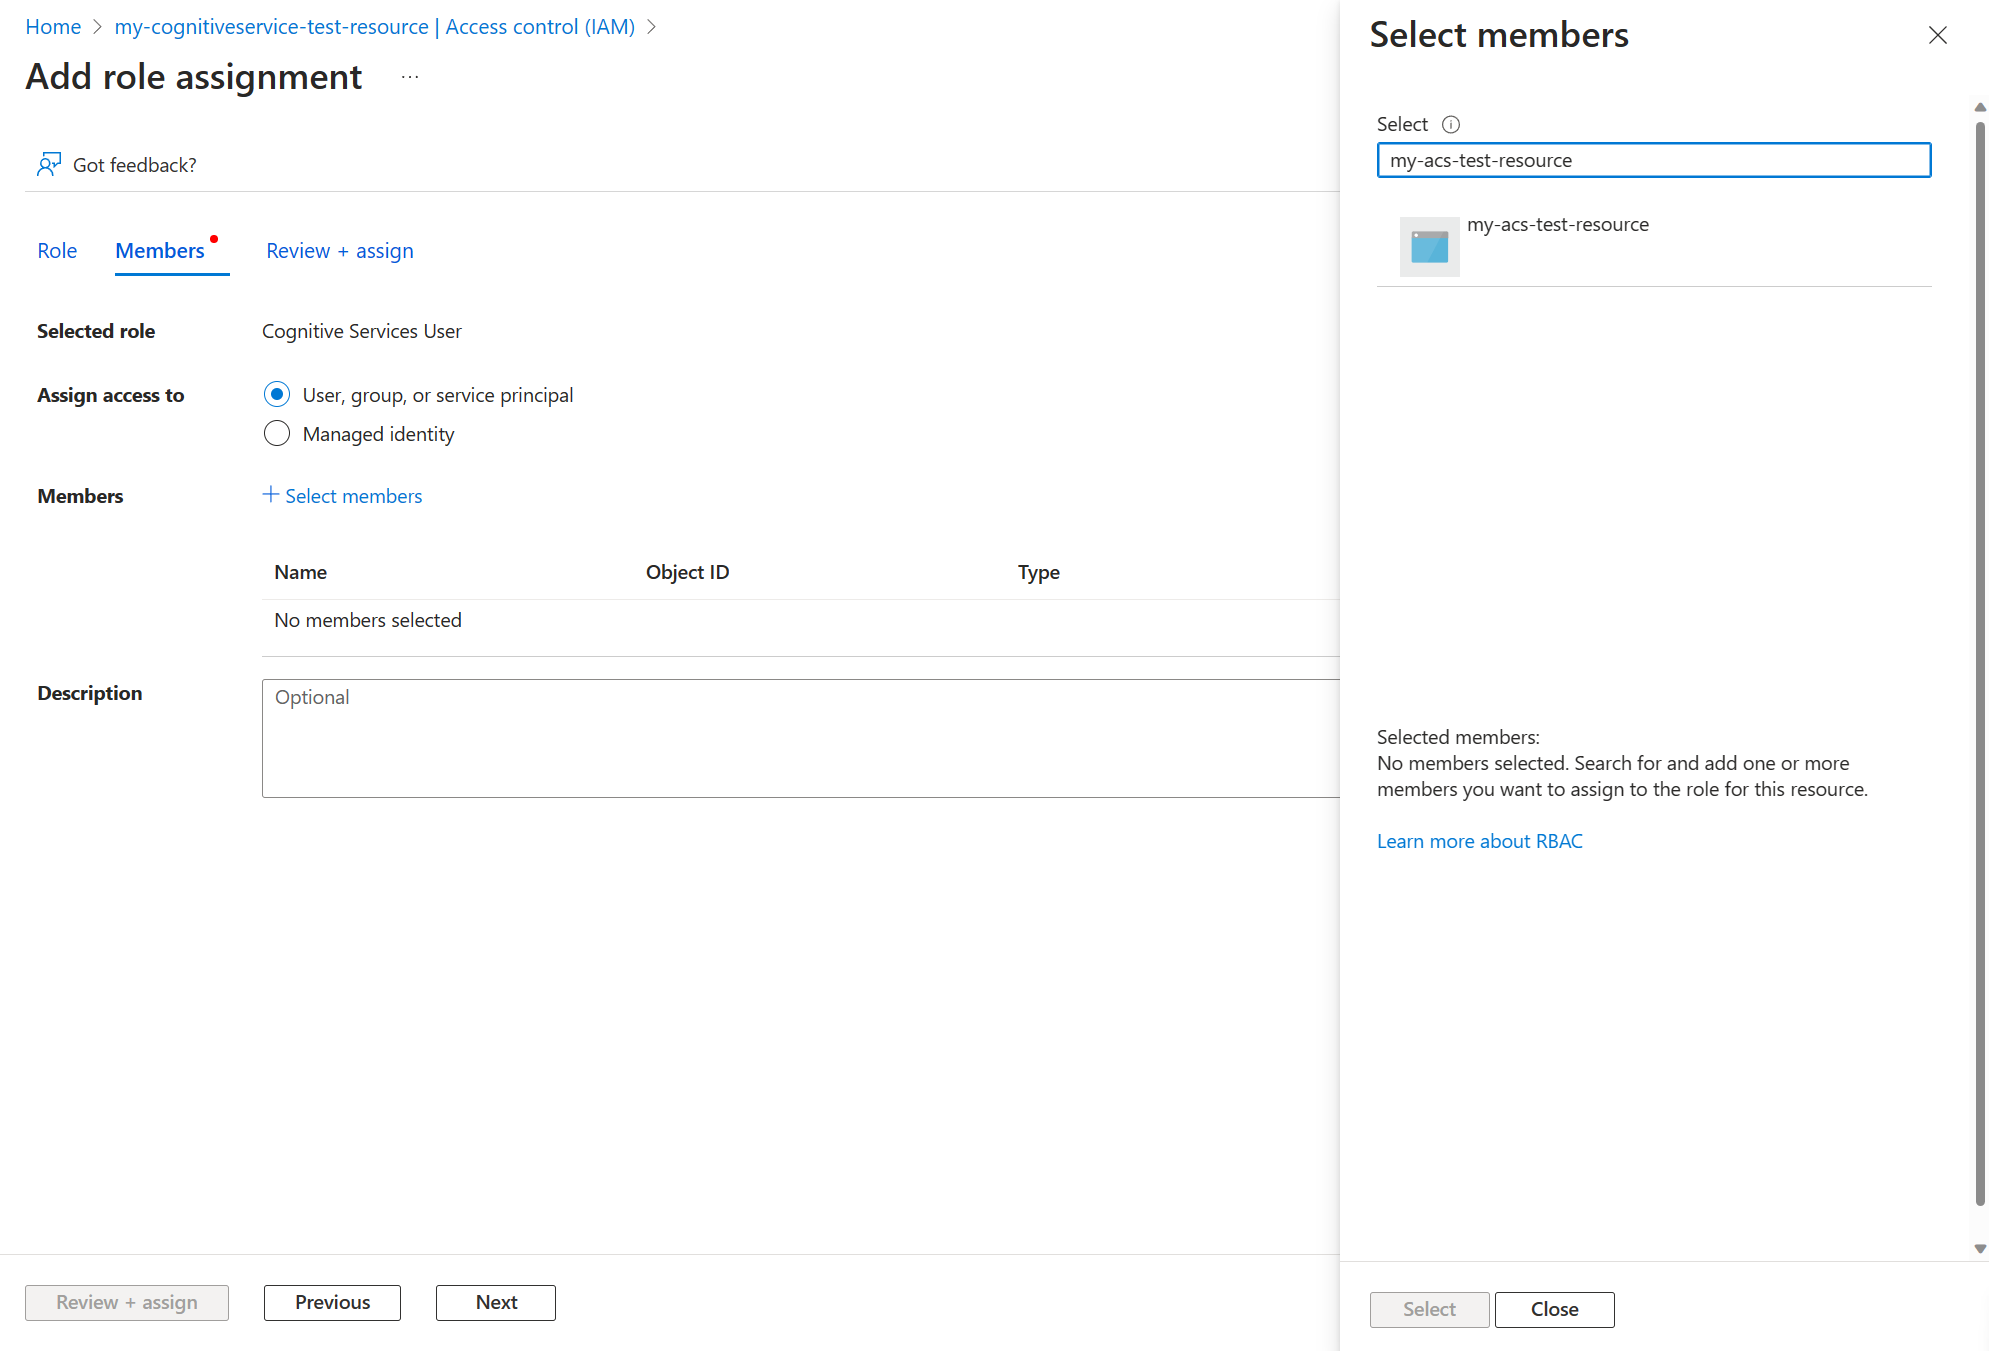
- Click "Review + assign," this assigns the role to the managed identity.


Option 2: Add role through Azure Communication Services Identity tab
- Navigate to your Azure Communication Services resource in the Azure portal.
- Select Identity tab.
- Click on "Azure role assignments."
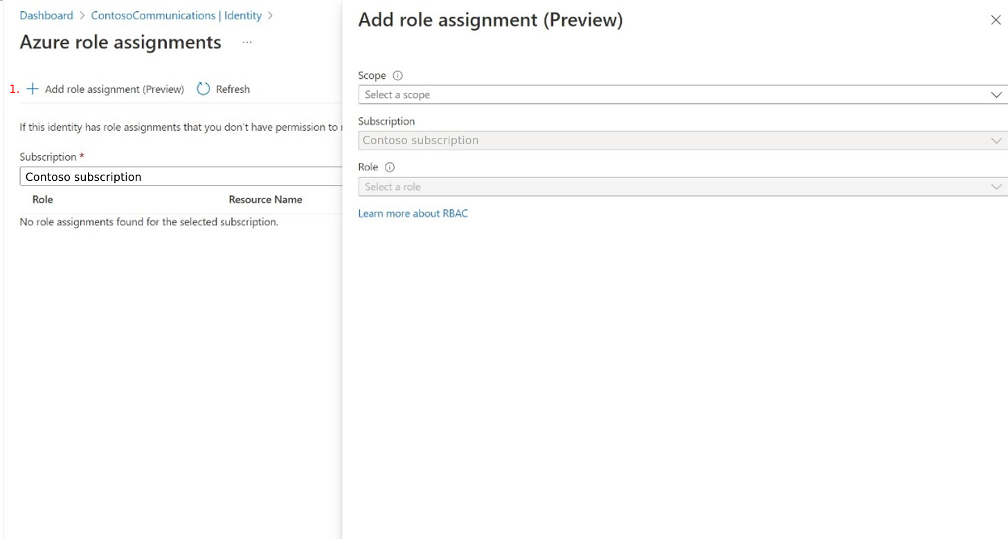
- Click the "Add role assignment (Preview)" button, which opens the "Add role assignment (Preview)" tab.
- Select the "Resource group" for "Scope."
- Select the "Subscription."
- Select the "Resource Group" containing the Cognitive Service.
- Select the Role "Cognitive Services User."
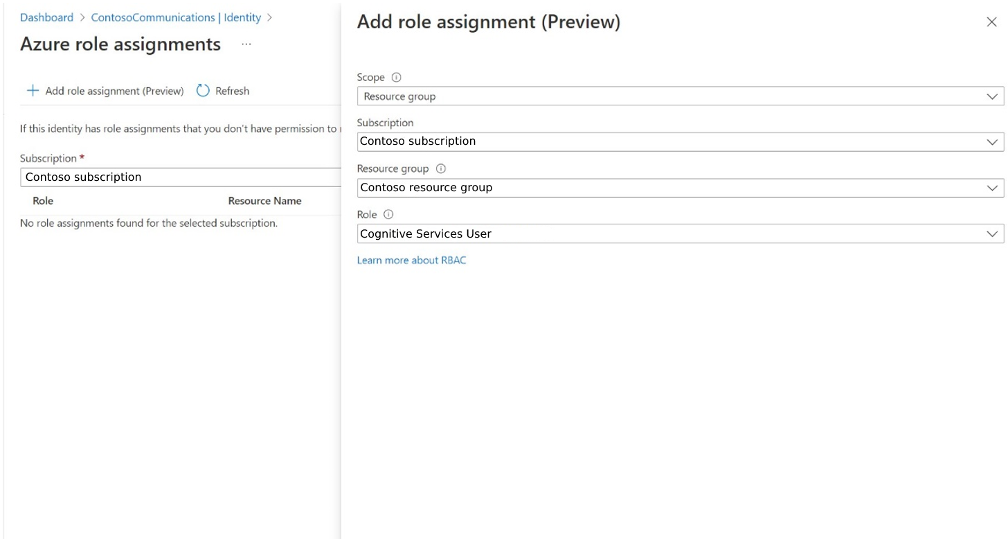
- Click Save.


Your Azure Communication Service has now been linked to your Azure Cognitive Service resource.
Azure AI services regions supported
Our integration between Azure Communication Services (ACS) and Azure AI is fully aligned with the regional availability of Azure AI Foundry. This means that ACS to Azure AI integration is supported in all regions where Azure AI Foundry is available.
For the most up-to-date list of supported regions, refer to the official Azure AI Foundry documentation.
Known limitations
- Text-to-Speech text prompts support a maximum of 4000 characters, if your prompt is longer than this we suggest using SSML for Text-to-Speech based play actions.
- For scenarios where you exceed your Speech service quota limit, you can request to increase this limit by following the steps outlined here.
Next steps
- Learn about playing audio to callers using Text-to-Speech.
- Learn about gathering user input with Speech-to-Text.