Tutorial: Create and use an Apache Kafka service for development
Article 06/22/2023
5 contributors
Feedback
In this article
Azure Container Apps allows you to connect to development and production-grade services to provide a wide variety of functionality to your applications.
In this tutorial, you learn to create and use a development Apache Kafka service.
Azure CLI commands and Bicep template fragments are featured in this tutorial. If you use Bicep, you can add all the fragments to a single Bicep file and deploy the template all at once .
Create a Container Apps environment to deploy your service and container app
Create an Apache Kafka service
Set up a command line app to use the dev Apache Kafka service
Deploy a kafka-ui app to view application data
Compile a final bicep template to deploy all resources using a consistent and predictable template deployment
Use an azd template for a one command deployment of all resources
Prerequisites
Note
For a one command deployment, skip to the last azd template step .
Setup
Define variables for common values.
RESOURCE_GROUP="kafka-dev"
LOCATION="northcentralus"
ENVIRONMENT="aca-env"
KAFKA_SVC="kafka01"
KAFKA_CLI_APP="kafka-cli-app"
KAFKA_UI_APP="kafka-ui-app"
The following variables allow you to use the CLI to deploy the Bicep template.
RESOURCE_GROUP="kafka-dev"
LOCATION="northcentralus"
For Bicep, start by creating a file called kafka-dev.bicep, then add parameters with the following default values.
targetScope = 'resourceGroup'
param location string = resourceGroup().location
param appEnvironmentName string = 'aca-env'
param kafkaSvcName string = 'kafka01'
param kafkaCliAppName string = 'kafka-cli-app'
param kafkaUiAppName string = 'kafka-ui'
As you deploy the bicep template at any stage, you can use the az deployment group create command.
az deployment group create -g $RESOURCE_GROUP \
    --query 'properties.outputs.*.value' \
    --template-file kafka-dev.bicep
Define your initial variables.
AZURE_ENV_NAME="azd-kafka-dev"
LOCATION="northcentralus"
Use the values to initialize a minimal azd template.
azd init \
    --environment "$AZURE_ENV_NAME" \
    --location "$LOCATION" \
    --no-prompt
Note
AZURE_ENV_NAME is different from the Container App environment name. In this context, AZURE_ENV_NAME in azd is for all resources in a template. These resources include resources not associated with Container Apps. You create a different name for the Container Apps environment.
Next, create infra/main.bicep and define parameters for later use.
param appEnvironmentName string = 'aca-env'
param kafkaSvcName string = 'kafka01'
param kafkaCliAppName string = 'kafka-cli-app'
param kafkaUiAppName string = 'kafka-ui'
Log in to Azure.
az login
Upgrade the CLI to the latest version.
az upgrade
Upgrade Bicep to the latest version.
az bicep upgrade
Add th containerapp extension.
az extension add --name containerapp --upgrade
Register required namespaces.
az provider register --namespace Microsoft.App
az provider register --namespace Microsoft.OperationalInsights
Create a Container Apps environment
Create a resource group.
az group create \
    --name "$RESOURCE_GROUP" \
    --location "$LOCATION"
az group create \
    --name "$RESOURCE_GROUP" \
    --location "$LOCATION"
No special setup is needed for managing resource groups in azd. The azd command gets the resource group from the AZURE_ENV_NAME/--environment value.
You can test the minimal template with the up command.
azd up
Running this command creates an empty resource group.
Create a Container Apps environment.
az containerapp env create \
  --name "$ENVIRONMENT" \
  --resource-group "$RESOURCE_GROUP" \
  --location "$LOCATION"
Add the following values to your kafka-dev.bicep file.
resource appEnvironment 'Microsoft.App/managedEnvironments@2023-04-01-preview' = {
  name: appEnvironmentName
  location: location
  properties: {
    appLogsConfiguration: {
      destination: 'azure-monitor'
    }
  }
}
The Azure CLI automatically creates a Log Analytics workspace for each environment. To generate a workspace using a Bicep template, you explicitly declare the environment and link to it in the template. This step makes your deployment more stable, even if at the cost of being a little verbose.
Add the following values to your environment.
resource logAnalytics 'Microsoft.OperationalInsights/workspaces@2022-10-01' = {
  name: '${appEnvironmentName}-log-analytics'
  location: location
  properties: {
    sku: {
      name: 'PerGB2018'
    }
  }
}

resource appEnvironment 'Microsoft.App/managedEnvironments@2023-04-01-preview' = {
  name: appEnvironmentName
  location: location
  properties: {
    appLogsConfiguration: {
      destination: 'log-analytics'
      logAnalyticsConfiguration: {
        customerId: logAnalytics.properties.customerId
        sharedKey: logAnalytics.listKeys().primarySharedKey
      }
    }
  }
}
The templates used by azd use bicep modules .
Create a folder named ./infra/core/host, then create a ./infra/core/host/container-apps-environment.bicep module with the following content.
param name string
param location string = resourceGroup().location
param tags object = {}

resource logAnalytics 'Microsoft.OperationalInsights/workspaces@2022-10-01' = {
  name: '${name}-log-analytics'
  location: location
  tags: tags
  properties: {
    sku: {
      name: 'PerGB2018'
    }
  }
}

resource appEnvironment 'Microsoft.App/managedEnvironments@2023-04-01-preview' = {
  name: name
  location: location
  tags: tags
  properties: {
    appLogsConfiguration: {
      destination: 'log-analytics'
      logAnalyticsConfiguration: {
        customerId: logAnalytics.properties.customerId
        sharedKey: logAnalytics.listKeys().primarySharedKey
      }
    }
  }
}

output appEnvironmentId string = appEnvironment.id
In the ./infra/main.bicep file, load the module using the following values.
module appEnvironment './core/host/container-apps-environment.bicep' = {
  name: 'appEnvironment'
  scope: rg
  params: {
    name: appEnvironmentName
    location: location
    tags: tags
  }
}
Run azd up to deploy the template.
Create an Apache Kafka service
Create an Apache Kafka service.
ENVIRONMENT_ID=$(az containerapp env show \
  --name "$ENVIRONMENT" \
  --resource-group "$RESOURCE_GROUP" \
  --output tsv \
  --query id)
Add the following values to kafka-dev.bicep.
resource kafka 'Microsoft.App/containerApps@2023-04-01-preview' = {
  name: kafkaSvcName
  location: location
  properties: {
    environmentId: appEnvironment.id
    configuration: {
      service: {
          type: 'kafka'
      }
    }
  }
}

output kafkaLogs string = 'az containerapp logs show -n ${kafka.name} -g ${resourceGroup().name} --follow --tail 30'
Create a ./infra/core/host/container-app-service.bicep module file with the following content.
param name string
param location string = resourceGroup().location
param tags object = {}
param environmentId string
param serviceType string


resource service 'Microsoft.App/containerApps@2023-04-01-preview' = {
  name: name
  location: location
  tags: tags
  properties: {
    environmentId: environmentId
    configuration: {
      service: {
          type: serviceType
      }
    }
  }
}

output serviceId string = service.id
Then update the ./infra/main.bicep module file with the following declaration.
module kafka './core/host/container-app-service.bicep' = {
  name: 'kafka'
  scope: rg
  params: {
    name: kafkaSvcName
    location: location
    tags: tags
    environmentId: appEnvironment.outputs.appEnvironmentId
    serviceType: 'kafka'
  }
}
Deploy the template.
    az containerapp add-on kafka create \
    --name "$KAFKA_SVC" \
    --resource-group "$RESOURCE_GROUP" \
    --environment "$ENVIRONMENT"
az deployment group create -g $RESOURCE_GROUP \
    --query 'properties.outputs.*.value' \
    --template-file kafka-dev.bicep
Tip
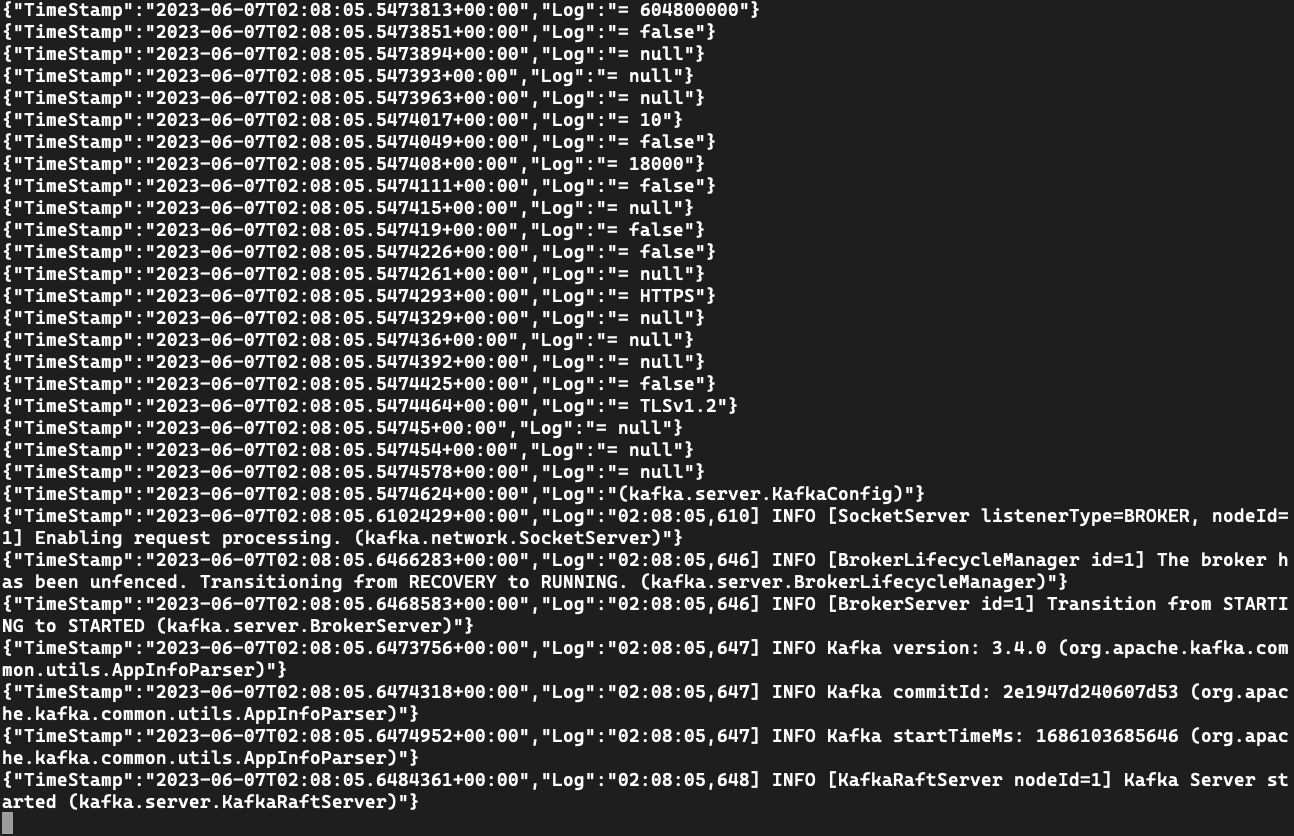
The output kafkaLogs outputs a CLI command to help you view the logs of kafka after deployment is complete. You can run the command to view the initialization logs of the new Kafka service.
View log output from the Kafka instance
Use the logs command to view log messages.
az containerapp logs show \
    --name $KAFKA_SVC \
    --resource-group $RESOURCE_GROUP \
    --follow --tail 30
The previous Bicep example includes the output for a command to view the logs.
For example:
[
  "az containerapp logs show -n kafka01 -g kafka-dev --follow --tail 30"
]
If you don't have the command, you can use the service name to view the logs using the CLI.
az containerapp logs show \
    --name $KAFKA_SVC \
    --resource-group $RESOURCE_GROUP \
    --follow --tail 30
Use the logs command to view log messages.
az containerapp logs show \
    --name kafka01 \
    --resource-group $RESOURCE_GROUP \
    --follow --tail 30
Create an app to test the service
When you create the app, you'll set it up to use ./kafka-topics.sh, ./kafka-console-producer.sh, and kafka-console-consumer.sh to connect to the Kafka instance.
Create a kafka-cli-app app that binds to the Kafka service.
az containerapp create \
    --name "$KAFKA_CLI_APP" \
    --image mcr.microsoft.com/k8se/services/kafka:3.4 \
    --bind "$KAFKA_SVC" \
    --environment "$ENVIRONMENT" \
    --resource-group "$RESOURCE_GROUP" \
    --min-replicas 1 \
    --max-replicas 1 \
    --command "/bin/sleep" "infinity"
Add the following to values kafka-dev.bicep.
resource kafkaCli 'Microsoft.App/containerApps@2023-04-01-preview' = {
  name: kafkaCliAppName
  location: location
  properties: {
    environmentId: appEnvironment.id
    template: {
      serviceBinds: [
        {
          serviceId: kafka.id
        }
      ]
      containers: [
        {
          name: 'kafka-cli'
          image: 'mcr.microsoft.com/k8se/services/kafka:3.4'
          command: [ '/bin/sleep', 'infinity' ]
        }
      ]
      scale: {
        minReplicas: 1
        maxReplicas: 1
      }
    }
  }
}

output kafkaCliExec string = 'az containerapp exec -n ${kafkaCli.name} -g ${resourceGroup().name} --command /bin/bash'
Tip
The output kafkaCliExec outputs a CLI command you can run to verify the application is deployed correctly.
Create a module under ./infra/core/host/container-app.bicep and add the following values.
param name string
param location string = resourceGroup().location
param tags object = {}

param environmentId string
param serviceId string = ''
param containerName string
param containerImage string
param containerCommands array = []
param containerArgs array = []
param minReplicas int
param maxReplicas int
param targetPort int = 0
param externalIngress bool = false

resource app 'Microsoft.App/containerApps@2023-04-01-preview' = {
  name: name
  location: location
  tags: tags
  properties: {
    environmentId: environmentId
    configuration: {
      ingress: targetPort > 0 ? {
        targetPort: targetPort
        external: externalIngress
      } : null
    }
    template: {
      serviceBinds: !empty(serviceId) ? [
        {
          serviceId: serviceId
        }
      ] : null
      containers: [
        {
          name: containerName
          image: containerImage
          command: !empty(containerCommands) ? containerCommands : null
          args: !empty(containerArgs) ? containerArgs : null
        }
      ]
      scale: {
        minReplicas: minReplicas
        maxReplicas: maxReplicas
      }
    }
  }
}
Now use the module in ./infra/main.bicep by adding the following values.
module kafkaCli './core/host/container-app.bicep' = {
  name: 'kafkaCli'
  scope: rg
  params: {
    name: kafkaCliAppName
    location: location
    tags: tags
    environmentId: appEnvironment.outputs.appEnvironmentId
    serviceId: kafka.outputs.serviceId
    containerImage: 'mcr.microsoft.com/k8se/services/kafka:3.4'
    containerName: 'kafka-cli'
    maxReplicas: 1
    minReplicas: 1
    containerCommands: [ '/bin/sleep', 'infinity' ]
  }
}
Deploy the template with azd up.
azd up
Run the CLI exec command to connect to the test app.
az containerapp exec \
    --name $KAFKA_CLI_APP \
    --resource-group $RESOURCE_GROUP \
    --command /bin/bash
The previous Bicep example includes output that shows you how to run the app.
For example:
[
  "az containerapp logs show -n kafka01 -g kafka-dev --follow --tail 30",
  "az containerapp exec -n kafka-cli-app -g kafka-dev --command /bin/bash"
]
If you don't have the command, you can use the app name to run the application using the exec command.
az containerapp exec \
    --name $KAFKA_CLI_APP \
    --resource-group $RESOURCE_GROUP \
    --command /bin/bash
az containerapp exec \
    --name kafka-cli-app \
    --resource-group $RESOURCE_GROUP \
    --command /bin/bash
When you use --bind or serviceBinds on the test app, the connection information is injected into the application environment. Once you connect to the test container, you can inspect the values using the env command.
env | grep "^KAFKA_"

KAFKA_SECURITYPROTOCOL=SASL_PLAINTEXT
KAFKA_BOOTSTRAPSERVER=kafka01:9092
KAFKA_HOME=/opt/kafka
KAFKA_PROPERTIES_SASL_JAAS_CONFIG=org.apache.kafka.common.security.plain.PlainLoginModule required username="kafka-user" password="7dw..." user_kafka-user="7dw..." ;
KAFKA_BOOTSTRAP_SERVERS=kafka01:9092
KAFKA_SASLUSERNAME=kafka-user
KAFKA_SASL_USER=kafka-user
KAFKA_VERSION=3.4.0
KAFKA_SECURITY_PROTOCOL=SASL_PLAINTEXT
KAFKA_SASL_PASSWORD=7dw...
KAFKA_SASLPASSWORD=7dw...
KAFKA_SASL_MECHANISM=PLAIN
KAFKA_SASLMECHANISM=PLAIN
Use kafka-topics.sh to create an event topic.
Create a kafka.props file.
echo "security.protocol=$KAFKA_SECURITY_PROTOCOL" >> kafka.props && \
echo "sasl.mechanism=$KAFKA_SASL_MECHANISM" >> kafka.props && \
echo "sasl.jaas.config=$KAFKA_PROPERTIES_SASL_JAAS_CONFIG" >> kafka.props
Create a quickstart-events event topic.
/opt/kafka/bin/kafka-topics.sh \
    --create --topic quickstart-events \
    --bootstrap-server $KAFKA_BOOTSTRAP_SERVERS \
    --command-config kafka.props
# Created topic quickstart-events.

/opt/kafka/bin/kafka-topics.sh \
    --describe --topic quickstart-events \
    --bootstrap-server $KAFKA_BOOTSTRAP_SERVERS \
    --command-config kafka.props
# Topic: quickstart-events	TopicId: lCkTKmvZSgSUCHozhhvz1Q	PartitionCount: 1	ReplicationFactor: 1	Configs: segment.bytes=1073741824
# Topic: quickstart-events	Partition: 0	Leader: 1	Replicas: 1	Isr: 1
Use kafka-console-producer.sh to write events to the topic.
/opt/kafka/bin/kafka-console-producer.sh \
    --topic quickstart-events \
    --bootstrap-server $KAFKA_BOOTSTRAP_SERVERS \
    --producer.config kafka.props

> this is my first event
> this is my second event
> this is my third event
> CTRL-C
Note
The ./kafka-console-producer.sh command prompts you to write events with >. Write some events as shown, then hit CTRL-C to exit.
Use kafka-console-consumer.sh to read events from the topic.
/opt/kafka/bin/kafka-console-consumer.sh \
     --topic quickstart-events \
    --bootstrap-server $KAFKA_BOOTSTRAP_SERVERS \
    --from-beginning \
    --consumer.config kafka.props

# this is my first event
# this is my second event
# this is my third event
Using a dev service with an existing app
If you already have an app that uses Apache Kafka, you can change how connection information is loaded.
First, create the following environment variables.
KAFKA_HOME=/opt/kafka
KAFKA_PROPERTIES_SASL_JAAS_CONFIG=org.apache.kafka.common.security.plain.PlainLoginModule required username="kafka-user" password="7dw..." user_kafka-user="7dw..." ;
KAFKA_BOOTSTRAP_SERVERS=kafka01:9092
KAFKA_SASL_USER=kafka-user
KAFKA_VERSION=3.4.0
KAFKA_SECURITY_PROTOCOL=SASL_PLAINTEXT
KAFKA_SASL_PASSWORD=7dw...
KAFKA_SASL_MECHANISM=PLAIN
Using the CLI (or Bicep) you can update the app to add --bind $KAFKA_SVC to use the dev service.
Binding to the dev service
Deploy kafka-ui to view and manage the Kafka instance.
See Bicep or azd example.
resource kafkaUi 'Microsoft.App/containerApps@2023-04-01-preview' = {
  name: kafkaUiAppName
  location: location
  properties: {
    environmentId: appEnvironment.id
    configuration: {
      ingress: {
        external: true
        targetPort: 8080
      }
    }
    template: {
      serviceBinds: [
        {
          serviceId: kafka.id
          name: 'kafka'
        }
      ]
      containers: [
        {
          name: 'kafka-ui'
          image: 'docker.io/provectuslabs/kafka-ui:latest'
          command: [
            '/bin/sh'
          ]
          args: [
            '-c'
            '''export KAFKA_CLUSTERS_0_BOOTSTRAPSERVERS="$KAFKA_BOOTSTRAP_SERVERS" && \
            export KAFKA_CLUSTERS_0_PROPERTIES_SASL_JAAS_CONFIG="$KAFKA_PROPERTIES_SASL_JAAS_CONFIG" && \
            export KAFKA_CLUSTERS_0_PROPERTIES_SASL_MECHANISM="$KAFKA_SASL_MECHANISM" && \
            export KAFKA_CLUSTERS_0_PROPERTIES_SECURITY_PROTOCOL="$KAFKA_SECURITY_PROTOCOL" && \
            java $JAVA_OPTS -jar kafka-ui-api.jar'''
          ]
          resources: {
            cpu: json('1.0')
            memory: '2.0Gi'
          }
        }
      ]
    }
  }
}

output kafkaUiUrl string = 'https://${kafkaUi.properties.configuration.ingress.fqdn}'
The Bicep command returns a URL. Copy this URL to your browser to visit the deployed site.
Update ./infra/main.bicep with the following values.
module kafkaUi './core/host/container-app.bicep' = {
  name: 'kafka-ui'
  scope: rg
  params: {
    name: kafkaUiAppName
    location: location
    tags: tags
    environmentId: appEnvironment.outputs.appEnvironmentId
    serviceId: kafka.outputs.serviceId
    containerImage: 'docker.io/provectuslabs/kafka-ui:latest'
    containerName: 'kafka-ui'
    maxReplicas: 1
    minReplicas: 1
    containerCommands: [ '/bin/sh' ]
    containerArgs: [
      '-c'
      '''export KAFKA_CLUSTERS_0_BOOTSTRAPSERVERS="$KAFKA_BOOTSTRAP_SERVERS" && \
      export KAFKA_CLUSTERS_0_PROPERTIES_SASL_JAAS_CONFIG="$KAFKA_PROPERTIES_SASL_JAAS_CONFIG" && \
      export KAFKA_CLUSTERS_0_PROPERTIES_SASL_MECHANISM="$KAFKA_SASL_MECHANISM" && \
      export KAFKA_CLUSTERS_0_PROPERTIES_SECURITY_PROTOCOL="$KAFKA_SECURITY_PROTOCOL" && \
      java $JAVA_OPTS -jar kafka-ui-api.jar'''
    ]
    targetPort: 8080
    externalIngress: true
  }
}
Deploy the template with azd up.
azd up
Deploy all resources
Use the following examples to if you want to deploy all resources at once.
Bicep
The following Bicep template contains all the resources in this tutorial.
You can create a kafka-dev.bicep file with this content.
targetScope = 'resourceGroup'
param location string = resourceGroup().location
param appEnvironmentName string = 'aca-env'
param kafkaSvcName string = 'kafka01'
param kafkaCliAppName string = 'kafka-cli-app'
param kafkaUiAppName string = 'kafka-ui'

resource logAnalytics 'Microsoft.OperationalInsights/workspaces@2022-10-01' = {
  name: '${appEnvironmentName}-log-analytics'
  location: location
  properties: {
    sku: {
      name: 'PerGB2018'
    }
  }
}

resource appEnvironment 'Microsoft.App/managedEnvironments@2023-04-01-preview' = {
  name: appEnvironmentName
  location: location
  properties: {
    appLogsConfiguration: {
      destination: 'log-analytics'
      logAnalyticsConfiguration: {
        customerId: logAnalytics.properties.customerId
        sharedKey: logAnalytics.listKeys().primarySharedKey
      }
    }
  }
}

resource kafka 'Microsoft.App/containerApps@2023-04-01-preview' = {
  name: kafkaSvcName
  location: location
  properties: {
    environmentId: appEnvironment.id
    configuration: {
      service: {
          type: 'kafka'
      }
    }
  }
}

resource kafkaCli 'Microsoft.App/containerApps@2023-04-01-preview' = {
  name: kafkaCliAppName
  location: location
  properties: {
    environmentId: appEnvironment.id
    template: {
      serviceBinds: [
        {
          serviceId: kafka.id
        }
      ]
      containers: [
        {
          name: 'kafka-cli'
          image: 'mcr.microsoft.com/k8se/services/kafka:3.4'
          command: [ '/bin/sleep', 'infinity' ]
        }
      ]
      scale: {
        minReplicas: 1
        maxReplicas: 1
      }
    }
  }
}

resource kafkaUi 'Microsoft.App/containerApps@2023-04-01-preview' = {
  name: kafkaUiAppName
  location: location
  properties: {
    environmentId: appEnvironment.id
    configuration: {
      ingress: {
        external: true
        targetPort: 8080
      }
    }
    template: {
      serviceBinds: [
        {
          serviceId: kafka.id
          name: 'kafka'
        }
      ]
      containers: [
        {
          name: 'kafka-ui'
          image: 'docker.io/provectuslabs/kafka-ui:latest'
          command: [
            '/bin/sh'
          ]
          args: [
            '-c'
            '''export KAFKA_CLUSTERS_0_BOOTSTRAPSERVERS="$KAFKA_BOOTSTRAP_SERVERS" && \
            export KAFKA_CLUSTERS_0_PROPERTIES_SASL_JAAS_CONFIG="$KAFKA_PROPERTIES_SASL_JAAS_CONFIG" && \
            export KAFKA_CLUSTERS_0_PROPERTIES_SASL_MECHANISM="$KAFKA_SASL_MECHANISM" && \
            export KAFKA_CLUSTERS_0_PROPERTIES_SECURITY_PROTOCOL="$KAFKA_SECURITY_PROTOCOL" && \
            java $JAVA_OPTS -jar kafka-ui-api.jar'''
          ]
          resources: {
            cpu: json('1.0')
            memory: '2.0Gi'
          }
        }
      ]
    }
  }
}

output kafkaUiUrl string = 'https://${kafkaUi.properties.configuration.ingress.fqdn}'

output kafkaCliExec string = 'az containerapp exec -n ${kafkaCli.name} -g ${resourceGroup().name} --command /bin/bash'

output kafkaLogs string = 'az containerapp logs show -n ${kafka.name} -g ${resourceGroup().name} --follow --tail 30'
Use the Azure CLI to deploy it the template.
RESOURCE_GROUP="kafka-dev"
LOCATION="northcentralus"

az group create \
    --name "$RESOURCE_GROUP" \
    --location "$LOCATION"

az deployment group create -g $RESOURCE_GROUP \
    --query 'properties.outputs.*.value' \
    --template-file kafka-dev.bicep
Azure Developer CLI
A final template is available on GitHub.
Use azd up to deploy the template.
git clone https://github.com/Azure-Samples/aca-dev-service-kafka-azd
cd aca-dev-service-kafka-azd
azd up
Clean up resources
Once you're done, run the following command to delete the resource group that contains your Container Apps resources.
Caution
The following command deletes the specified resource group and all resources contained within it. If resources outside the scope of this tutorial exist in the specified resource group, they will also be deleted.
az group delete \
    --resource-group $RESOURCE_GROUP