Configure a GitHub Action to create a container instance
GitHub Actions is a suite of features in GitHub to automate your software development workflows in the same place you store code and collaborate on pull requests and issues.
Use the Deploy to Azure Container Instances GitHub Actions to automate deployment of a single container to Azure Container Instances. The action allows you to set properties for a container instance similar to those in the az container create command.
This article shows how to set up a workflow in a GitHub repo that performs the following actions:
- Build an image from a Dockerfile
- Push the image to an Azure container registry
- Deploy the container image to an Azure container instance
This article shows two ways to set up the workflow:
- Configure GitHub workflow - Create a workflow in a GitHub repo using the Deploy to Azure Container Instances action and other actions.
- Use CLI extension - Use the
az container app upcommand in the Deploy to Azure extension in the Azure CLI. This command streamlines creation of the GitHub workflow and deployment steps.
Important
The GitHub Actions for Azure Container Instances is currently in preview. Previews are made available to you on the condition that you agree to the supplemental terms of use. Some aspects of this feature may change prior to general availability (GA).
Prerequisites
- GitHub account - Create an account on https://github.com if you don't already have one.
- Azure CLI - You can use the Azure Cloud Shell or a local installation of the Azure CLI to complete the Azure CLI steps. If you need to install or upgrade, see Install Azure CLI.
- Azure container registry - If you don't have one, create an Azure container registry in the Basic tier using the Azure CLI, Azure portal, or other methods. Take note of the resource group used for the deployment, which is used for the GitHub workflow.
Set up repo
For the examples in this article, use GitHub to fork the following repository: https://github.com/Azure-Samples/acr-build-helloworld-node
This repo contains a Dockerfile and source files to create a container image of a small web app.

Ensure Actions is enabled for your repository. Navigate to your forked repository and select Settings > Actions. In Actions permissions, ensure that Allow all actions is selected.
Configure GitHub workflow
Create credentials for Azure authentication
In the GitHub workflow, you need to supply Azure credentials to authenticate to the Azure CLI. The following example creates a service principal with the Contributor role scoped to the resource group for your container registry.
First, get the resource ID of your resource group. Substitute the name of your group in the following az group show command:
groupId=$(az group show \
  --name <resource-group-name> \
  --query id --output tsv)
Use az ad sp create-for-rbac to create the service principal:
az ad sp create-for-rbac \
  --scope $groupId \
  --role Contributor \
  --sdk-auth
Output is similar to:
{
  "clientId": "xxxx6ddc-xxxx-xxxx-xxx-ef78a99dxxxx",
  "clientSecret": "xxxx79dc-xxxx-xxxx-xxxx-aaaaaec5xxxx",
  "subscriptionId": "xxxx251c-xxxx-xxxx-xxxx-bf99a306xxxx",
  "tenantId": "xxxx88bf-xxxx-xxxx-xxxx-2d7cd011xxxx",
  "activeDirectoryEndpointUrl": "https://login.microsoftonline.com",
  "resourceManagerEndpointUrl": "https://management.azure.com/",
  "activeDirectoryGraphResourceId": "https://graph.windows.net/",
  "sqlManagementEndpointUrl": "https://management.core.windows.net:8443/",
  "galleryEndpointUrl": "https://gallery.azure.com/",
  "managementEndpointUrl": "https://management.core.windows.net/"
}
Save the JSON output because it is used in a later step. Also, take note of the clientId, which you need to update the service principal in the next section.
Update for registry authentication
Update the Azure service principal credentials to allow push and pull access to your container registry. This step enables the GitHub workflow to use the service principal to authenticate with your container registry and to push and pull a Docker image.
Get the resource ID of your container registry. Substitute the name of your registry in the following az acr show command:
registryId=$(az acr show \
  --name <registry-name> \
  --resource-group <resource-group-name> \
  --query id --output tsv)
Use az role assignment create to assign the AcrPush role, which gives push and pull access to the registry. Substitute the client ID of your service principal:
az role assignment create \
  --assignee <ClientId> \
  --scope $registryId \
  --role AcrPush
Save credentials to GitHub repo
In the GitHub UI, navigate to your forked repository and select Security > Secrets and variables > Actions.
Select New repository secret to add the following secrets:
| Secret | Value |
|---|---|
AZURE_CREDENTIALS |
The entire JSON output from the service principal creation step |
REGISTRY_LOGIN_SERVER |
The login server name of your registry (all lowercase). Example: myregistry.azurecr.io |
REGISTRY_USERNAME |
The clientId from the JSON output from the service principal creation |
REGISTRY_PASSWORD |
The clientSecret from the JSON output from the service principal creation |
RESOURCE_GROUP |
The name of the resource group you used to scope the service principal |
Create workflow file
- In the GitHub UI, select Actions.
- Select set up a workflow yourself.
- In Edit new file, paste the following YAML contents to overwrite the sample code. Accept the default filename
main.yml, or provide a filename you choose. - Select Start commit, optionally provide short and extended descriptions of your commit, and select Commit new file.
on: [push]
name: Linux_Container_Workflow

jobs:
    build-and-deploy:
        runs-on: ubuntu-latest
        steps:
        # checkout the repo
        - name: 'Checkout GitHub Action'
          uses: actions/checkout@main

        - name: 'Login via Azure CLI'
          uses: azure/login@v1
          with:
            creds: ${{ secrets.AZURE_CREDENTIALS }}

        - name: 'Build and push image'
          uses: azure/docker-login@v1
          with:
            login-server: ${{ secrets.REGISTRY_LOGIN_SERVER }}
            username: ${{ secrets.REGISTRY_USERNAME }}
            password: ${{ secrets.REGISTRY_PASSWORD }}
        - run: |
            docker build . -t ${{ secrets.REGISTRY_LOGIN_SERVER }}/sampleapp:${{ github.sha }}
            docker push ${{ secrets.REGISTRY_LOGIN_SERVER }}/sampleapp:${{ github.sha }}

        - name: 'Deploy to Azure Container Instances'
          uses: 'azure/aci-deploy@v1'
          with:
            resource-group: ${{ secrets.RESOURCE_GROUP }}
            dns-name-label: ${{ secrets.RESOURCE_GROUP }}${{ github.run_number }}
            image: ${{ secrets.REGISTRY_LOGIN_SERVER }}/sampleapp:${{ github.sha }}
            registry-login-server: ${{ secrets.REGISTRY_LOGIN_SERVER }}
            registry-username: ${{ secrets.REGISTRY_USERNAME }}
            registry-password: ${{ secrets.REGISTRY_PASSWORD }}
            name: aci-sampleapp
            location: 'west us'
Validate workflow
After you commit the workflow file, the workflow is triggered. To review workflow progress, navigate to Actions > Workflows.

See Viewing workflow run history for information about viewing the status and results of each step in your workflow. If the workflow doesn't complete, see Viewing logs to diagnose failures.
When the workflow completes successfully, get information about the container instance named aci-sampleapp by running the az container show command. Substitute the name of your resource group:
az container show \
  --resource-group <resource-group-name> \
  --name aci-sampleapp \
  --query "{FQDN:ipAddress.fqdn,ProvisioningState:provisioningState}" \
  --output table
Output is similar to:
FQDN ProvisioningState
--------------------------------- -------------------
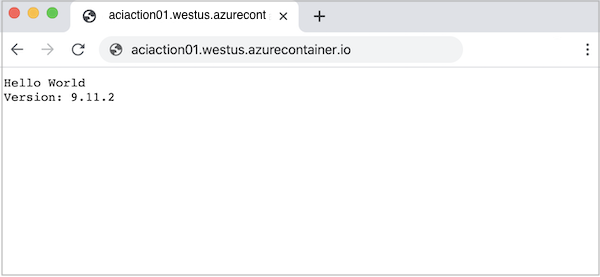
aci-action01.westus.azurecontainer.io Succeeded
After the instance is provisioned, navigate to the container's FQDN in your browser to view the running web app.
Use Deploy to Azure extension
Alternatively, use the Deploy to Azure extension in the Azure CLI to configure the workflow. The az container app up command in the extension takes input parameters from you to set up a workflow to deploy to Azure Container Instances.
The workflow created by the Azure CLI is similar to the workflow you can create manually using GitHub.
Additional prerequisite
In addition to the prerequisites and repo setup for this scenario, you need to install the Deploy to Azure extension for the Azure CLI.
Run the az extension add command to install the extension:
az extension add \
  --name deploy-to-azure
For information about finding, installing, and managing extensions, see Use extensions with Azure CLI.
Run az container app up
To run the az container app up command, provide at minimum:
- The name of your Azure container registry, for example, myregistry
- The URL to your GitHub repo, for example,
https://github.com/<your-GitHub-Id>/acr-build-helloworld-node
Sample command:
az container app up \
  --acr myregistry \
  --repository https://github.com/myID/acr-build-helloworld-node
Command progress
When prompted, provide your GitHub credentials or provide a GitHub personal access token (PAT) that has repo and user scopes to authenticate with your GitHub account. If you provide GitHub credentials, the command creates a PAT for you. Follow additional prompts to configure the workflow.
The command creates repo secrets for the workflow:
- Service principal credentials for the Azure CLI
- Credentials to access the Azure container registry
After the command commits the workflow file to your repo, the workflow is triggered.
Output is similar to:
[...]
Checking in file github/workflows/main.yml in the GitHub repository myid/acr-build-helloworld-node
Creating workflow...
GitHub Action Workflow has been created - https://github.com/myid/acr-build-helloworld-node/runs/515192398
GitHub workflow completed.
Workflow succeeded
Your app is deployed at:  http://acr-build-helloworld-node.eastus.azurecontainer.io:8080/
To view the workflow status and results of each step in the GitHub UI, see Viewing workflow run history.
Validate workflow
The workflow deploys an Azure container instance with the base name of your GitHub repo, in this case, acr-build-helloworld-node. When the workflow completes successfully, get information about the container instance named acr-build-helloworld-node by running the az container show command. Substitute the name of your resource group:
az container show \
  --resource-group <resource-group-name> \
  --name acr-build-helloworld-node \
  --query "{FQDN:ipAddress.fqdn,ProvisioningState:provisioningState}" \
  --output table
Output is similar to:
FQDN                                                   ProvisioningState
---------------------------------                      -------------------
acr-build-helloworld-node.westus.azurecontainer.io     Succeeded
After the instance is provisioned, navigate to the container's FQDN in your browser to view the running web app.
Clean up resources
Stop the container instance with the az container delete command:
az container delete \
  --name <instance-name>
  --resource-group <resource-group-name>
To delete the resource group and all the resources in it, run the az group delete command:
az group delete \
  --name <resource-group-name>
Next steps
Browse the GitHub Marketplace for more actions to automate your development workflow
Feedback
Coming soon: Throughout 2024 we will be phasing out GitHub Issues as the feedback mechanism for content and replacing it with a new feedback system. For more information see: https://aka.ms/ContentUserFeedback.
Submit and view feedback for