Note
Access to this page requires authorization. You can try signing in or changing directories.
Access to this page requires authorization. You can try changing directories.
APPLIES TO:
MongoDB
This article shows you how to connect to Azure Cosmos DB for MongoDB using the PyMongo driver package. Once connected, you can perform operations on databases, collections, and docs.
Note
The example code snippets are available on GitHub as a Python project.
This article shows you how to communicate with the Azure Cosmos DB's API for MongoDB by using one of the open-source MongoDB client drivers for Python, PyMongo.
Prerequisites
- An Azure account with an active subscription. Create an account for free.
- Python 3.8+
- Azure Command-Line Interface (CLI) or Azure PowerShell
- Azure Cosmos DB for MongoDB resource
Create a new Python app
Create a new empty folder using your preferred terminal and change directory to the folder.
Note
If you just want the finished code, download or fork and clone the example code snippets repo that has the full example. You can also
git clonethe repo in Azure Cloud Shell to walk through the steps shown in this quickstart.Create a requirements.txt file that lists the PyMongo and python-dotenv packages. The
dotenvpackage is used to read the environment variables from a.envfile during local development.# requirements.txt pymongo python-dotenvCreate a virtual environment and install the packages.
# py -3 uses the global python interpreter. You can also use python3 -m venv .venv.
py -3 -m venv .venv
source .venv/Scripts/activate
pip install -r requirements.txt
Connect with PyMongo driver to Azure Cosmos DB for MongoDB
To connect with the PyMongo driver to Azure Cosmos DB, create an instance of the MongoClient object. This class is the starting point to perform all operations against databases.
The most common constructor for MongoClient requires just the host parameter, which in this article is set to the COSMOS_CONNECTION_STRING environment variable. There are other optional parameters and keyword parameters you can use in the constructor. Many of the optional parameters can also be specified with the host parameter. If the same option is passed in with host and as a parameter, the parameter takes precedence.
Refer to the Troubleshooting guide for connection issues.
Get resource name
In the commands below, we show msdocs-cosmos as the resource group name. Change the name as appropriate for your situation.
Create a shell variable for resourceGroupName.
# Variable for resource group name
resourceGroupName="msdocs-cosmos"
Use the
az cosmosdb listcommand to retrieve the name of the first Azure Cosmos DB account in your resource group and store it in the accountName shell variable.# Retrieve most recently created account name accountName=$( az cosmosdb list \ --resource-group $resourceGroupName \ --query "[0].name" \ --output tsv )
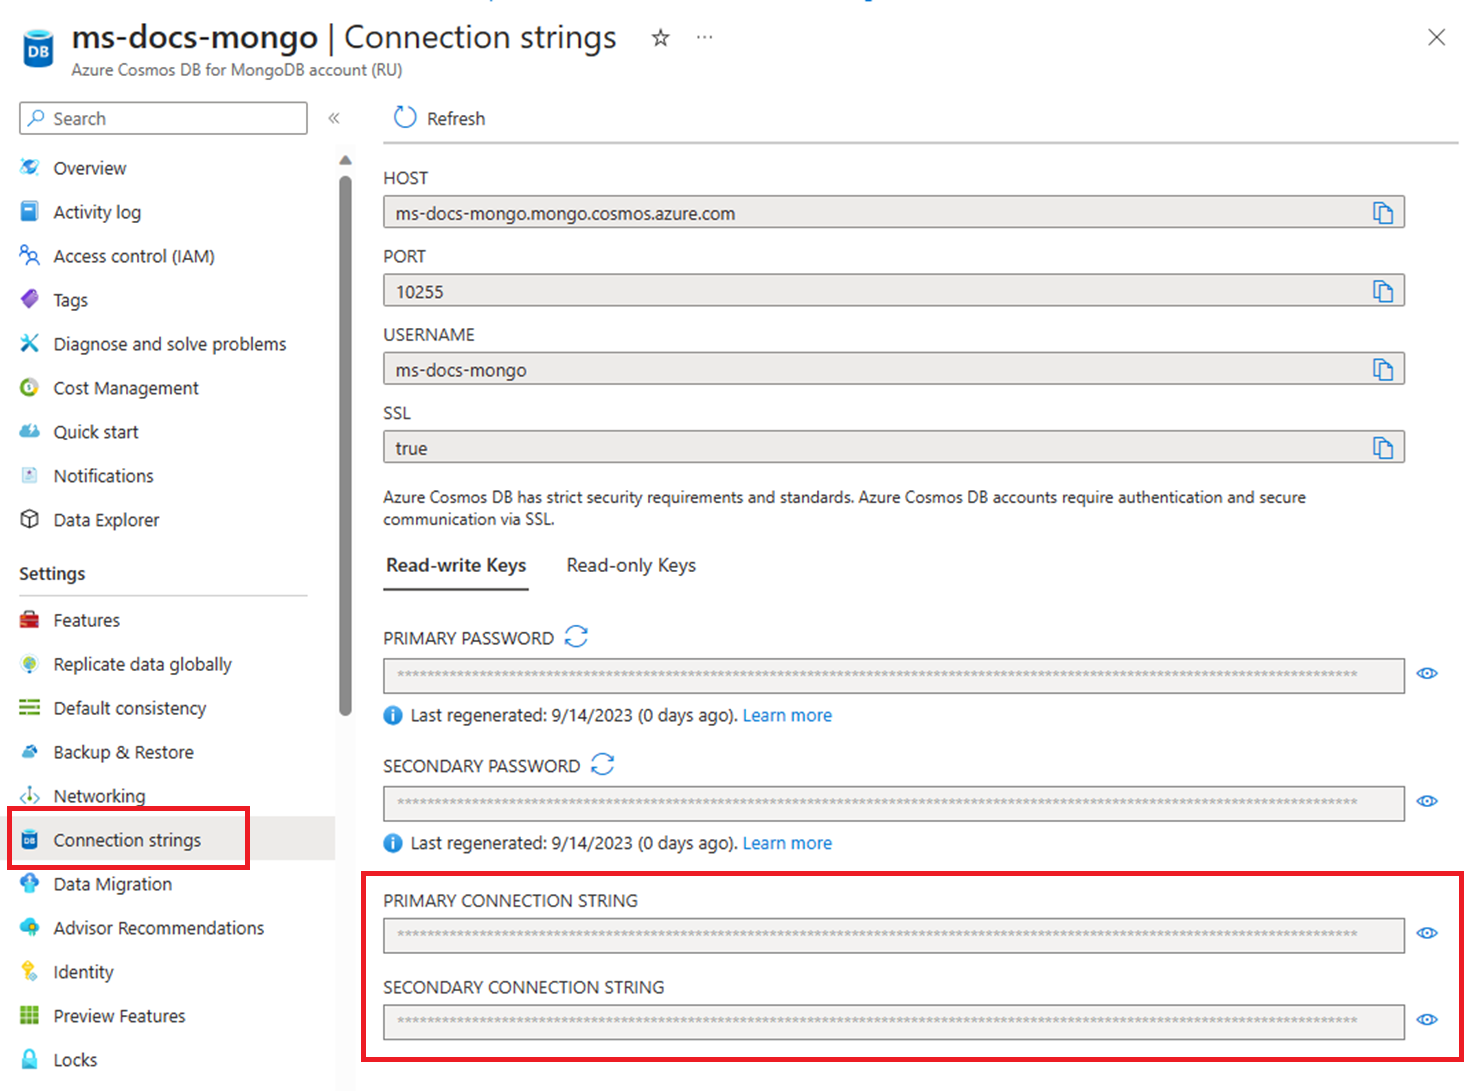
Retrieve your connection string
Find the API for MongoDB connection string from the list of connection strings for the account with the
az cosmosdb keys listcommand.az cosmosdb keys list --type connection-strings \ --resource-group $resourceGroupName \ --name $accountNameRecord the PRIMARY KEY values. You'll use these credentials later.
Configure environment variables
To use the CONNECTION STRING values within your code, set this value in the local environment running the application. To set the environment variable, use your preferred terminal to run the following commands:
$env:COSMOS_CONNECTION_STRING = "<cosmos-connection-string>"
Create MongoClient with connection string
Add dependencies to reference the PyMongo and python-dotenv packages.
import os
import sys

import pymongo
from dotenv import load_dotenv
Define a new instance of the
MongoClientclass using the constructor and the connection string read from an environment variable.load_dotenv() CONNECTION_STRING = os.environ.get("COSMOS_CONNECTION_STRING") client = pymongo.MongoClient(CONNECTION_STRING) for prop, value in vars(client.options).items(): print("Property: {}: Value: {} ".format(prop, value))
For more information on different ways to create a MongoClient instance, see Making a Connection with MongoClient.
Close the MongoClient connection
When your application is finished with the connection, remember to close it. That .close() call should be after all database calls are made.
client.close()
Use MongoDB client classes with Azure Cosmos DB for API for MongoDB
Before you start building the application, let's look into the hierarchy of resources in Azure Cosmos DB. Azure Cosmos DB has a specific object model used to create and access resources. The Azure Cosmos DB creates resources in a hierarchy that consists of accounts, databases, collections, and docs.

Hierarchical diagram showing an Azure Cosmos DB for MongoDB account at the top. The account has two child database nodes. One of the database nodes includes two child collection nodes. The other database node includes a single child collection node. That single collection node has three child doc nodes.
Each type of resource is represented by one or more associated Python classes. Here's a list of the most common classes:
MongoClient - The first step when working with PyMongo is to create a MongoClient to connect to Azure Cosmos DB's API for MongoDB. The client object is used to configure and execute requests against the service.
Database - Azure Cosmos DB's API for MongoDB can support one or more independent databases.
Collection - A database can contain one or more collections. A collection is a group of documents stored in MongoDB, and can be thought of as roughly the equivalent of a table in a relational database.
Document - A document is a set of key-value pairs. Documents have dynamic schema. Dynamic schema means that documents in the same collection don't need to have the same set of fields or structure. And common fields in a collection's documents may hold different types of data.
To learn more about the hierarchy of entities, see the Azure Cosmos DB resource model article.
See also
Next steps
Now that you've connected to an API for MongoDB account, use the next guide to create and manage databases.
