Note
Access to this page requires authorization. You can try signing in or changing directories.
Access to this page requires authorization. You can try changing directories.
APPLIES TO:
![]() MongoDB
MongoDB
Important
Are you looking to migrate an existing MongoDB application or use MongoDB Query Language (MQL) features? Consider Azure DocumentDB.
Are you looking for a database solution for high-scale scenarios with a 99.999% availability service level agreement (SLA), instant autoscale, and automatic failover across multiple regions? Consider Azure Cosmos DB for NoSQL.
This multi-part tutorial demonstrates how to create a new app written in Node.js with Express and Angular and then connect it to your Azure Cosmos DB account configured with Azure Cosmos DB's API for MongoDB.
Part 3 of the tutorial builds on Part 2 and covers the following tasks:
- Build the Angular UI
- Use CSS to set the look and feel
- Test the app locally
Video walkthrough
Prerequisites
Before starting this part of the tutorial, ensure you've completed the steps in Part 2 of the tutorial.
Tip
This tutorial walks you through the steps to build the application step-by-step. If you want to download the finished project, you can get the completed application from the angular-cosmosdb repo on GitHub.
Build the UI
In Visual Studio Code, click the Stop button
 to stop the Node app.
In your Windows Command Prompt or Mac Terminal window, enter the following command to generate a heroes component. In this code g=generate, c=component, heroes=name of component, and it's using a flat file structure (--flat) so that a subfolder isn't created for it.
ng g c heroes --flatThe terminal window displays confirmation of the new components.
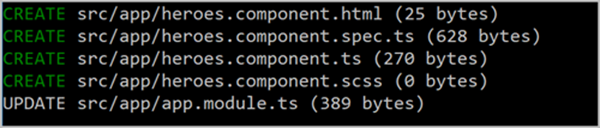
Let's take a look at the files that were created and updated.
In Visual Studio Code, in the Explorer pane, navigate to the new src\app folder and open the new heroes.component.ts file generated within the app folder. This TypeScript component file was created by the previous command.
Tip
If the app folder doesn't display in Visual Studio Code, enter CMD + SHIFT P on a Mac or Ctrl + Shift + P on Windows to open the Command Palette, and then type Reload Window to pick up the system change.
In the same folder, open the app.module.ts file, and notice that it added the
HeroesComponentto the declarations on line 5 and it imported it as well on line 10.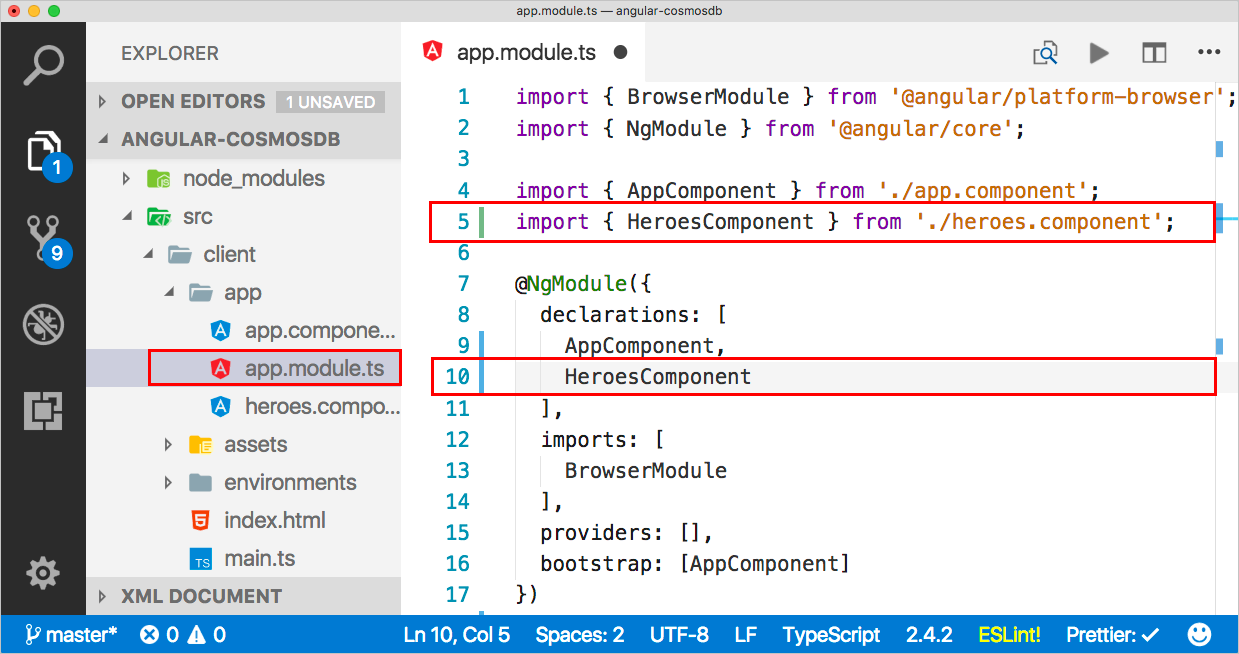
Go back to the heroes.component.html file and copy in this code. The
<div>is the container for the entire page. Inside of the container there is a list of heroes which we need to create so that when you click on one you can select it and edit it or delete it in the UI. Then in the HTML we've got some styling so you know which one has been selected. There's also an edit area so that you can add a new hero or edit an existing one.<div> <ul class="heroes"> <li *ngFor="let hero of heroes" (click)="onSelect(hero)" [class.selected]="hero === selectedHero"> <button class="delete-button" (click)="deleteHero(hero)">Delete</button> <div class="hero-element"> <div class="badge">{{hero.id}}</div> <div class="name">{{hero.name}}</div> <div class="saying">{{hero.saying}}</div> </div> </li> </ul> <div class="editarea"> <button (click)="enableAddMode()">Add New Hero</button> <div *ngIf="selectedHero"> <div class="editfields"> <div> <label>id: </label> <input [(ngModel)]="selectedHero.id" placeholder="id" *ngIf="addingHero" /> <label *ngIf="!addingHero" class="value">{{selectedHero.id}}</label> </div> <div> <label>name: </label> <input [(ngModel)]="selectedHero.name" placeholder="name" /> </div> <div> <label>saying: </label> <input [(ngModel)]="selectedHero.saying" placeholder="saying" /> </div> </div> <button (click)="cancel()">Cancel</button> <button (click)="save()">Save</button> </div> </div> </div>Now that we've got the HTML in place, we need to add it to the heroes.component.ts file so we can interact with the template. The following code adds the template to your component file. A constructor has been added that gets some heroes, and initializes the hero service component to go get all the data. This code also adds all of the necessary methods for handling events in the UI. You can copy the following code over the existing code in heroes.component.ts. It's expected to see errors at the Hero and HeroService areas as the corresponding components aren't imported yet, you will fix these error in the next section.
import { Component, OnInit } from '@angular/core';

@Component({
  selector: 'app-heroes',
  templateUrl: './heroes.component.html',
  styleUrls: ['./heroes.component.scss']
})
export class HeroesComponent implements OnInit {
  addingHero = false;
  heroes: any = [];
  selectedHero: Hero;

  constructor(private heroService: HeroService) {}

  ngOnInit() {
   this.getHeroes();
  }

  cancel() {
    this.addingHero = false;
    this.selectedHero = null;
  }

  deleteHero(hero: Hero) {
    this.heroService.deleteHero(hero).subscribe(res => {
      this.heroes = this.heroes.filter(h => h !== hero);
      if (this.selectedHero === hero) {
        this.selectedHero = null;
      }
    });
  }

  getHeroes() {
    return this.heroService.getHeroes().subscribe(heroes => {
      this.heroes = heroes;
    });
  }

  enableAddMode() {
    this.addingHero = true;
    this.selectedHero = new Hero();
  }

  onSelect(hero: Hero) {
    this.addingHero = false;
    this.selectedHero = hero;
  }

  save() {
    if (this.addingHero) {
      this.heroService.addHero(this.selectedHero).subscribe(hero => {
        this.addingHero = false;
        this.selectedHero = null;
        this.heroes.push(hero);
      });
    } else {
      this.heroService.updateHero(this.selectedHero).subscribe(hero => {
        this.addingHero = false;
        this.selectedHero = null;
      });
    }
  }
}
In Explorer, open the app/app.module.ts file and update the imports section to add an import for a
FormsModule. The import section should now look as follows:imports: [ BrowserModule, FormsModule ],In the app/app.module.ts file add an import for the new FormsModule module on line 3.
import { BrowserModule } from '@angular/platform-browser';
import { NgModule } from '@angular/core';
import { FormsModule } from '@angular/forms';
Use CSS to set the look and feel
In the Explorer pane, open the src/styles.scss file.
Copy the following code into the styles.scss file, replacing the existing content of the file.
/* You can add global styles to this file, and also import other style files */

* {
  font-family: Arial;
}
h2 {
  color: #444;
  font-weight: lighter;
}
body {
  margin: 2em;
}

body,
input[text],
button {
  color: #888;
  // font-family: Cambria, Georgia;
}
button {
  font-size: 14px;
  font-family: Arial;
  background-color: #eee;
  border: none;
  padding: 5px 10px;
  border-radius: 4px;
  cursor: pointer;
  cursor: hand;
  &:hover {
    background-color: #cfd8dc;
  }
  &.delete-button {
    float: right;
    background-color: gray !important;
    background-color: rgb(216, 59, 1) !important;
    color: white;
    padding: 4px;
    position: relative;
    font-size: 12px;
  }
}
div {
  margin: .1em;
}

.selected {
  background-color: #cfd8dc !important;
  background-color: rgb(0, 120, 215) !important;
  color: white;
}

.heroes {
  float: left;
  margin: 0 0 2em 0;
  list-style-type: none;
  padding: 0;
  li {
    cursor: pointer;
    position: relative;
    left: 0;
    background-color: #eee;
    margin: .5em;
    padding: .5em;
    height: 3.0em;
    border-radius: 4px;
    width: 17em;
    &:hover {
      color: #607d8b;
      color: rgb(0, 120, 215);
      background-color: #ddd;
      left: .1em;
    }
    &.selected:hover {
      /*background-color: #BBD8DC !important;*/
      color: white;
    }
  }
  .text {
    position: relative;
    top: -3px;
  }
  .saying {
    margin: 5px 0;
  }
  .name {
    font-weight: bold;
  }
  .badge {
    /* display: inline-block; */
    float: left;
    font-size: small;
    color: white;
    padding: 0.7em 0.7em 0 0.5em;
    background-color: #607d8b;
    background-color: rgb(0, 120, 215);
    background-color:rgb(134, 183, 221);
    line-height: 1em;
    position: relative;
    left: -1px;
    top: -4px;
    height: 3.0em;
    margin-right: .8em;
    border-radius: 4px 0 0 4px;
    width: 1.2em;
  }
}

.header-bar {
  background-color: rgb(0, 120, 215);
  height: 4px;
  margin-top: 10px;
  margin-bottom: 10px;
}

label {
  display: inline-block;
  width: 4em;
  margin: .5em 0;
  color: #888;
  &.value {
    margin-left: 10px;
    font-size: 14px;
  }
}

input {
  height: 2em;
  font-size: 1em;
  padding-left: .4em;
  &::placeholder {
      color: lightgray;
      font-weight: normal;
      font-size: 12px;
      letter-spacing: 3px;
  }
}

.editarea {
  float: left;
  input {
    margin: 4px;
    height: 20px;
    color: rgb(0, 120, 215);
  }
  button {
    margin: 8px;
  }
  .editfields {
    margin-left: 12px;
  }
}
Save the file.
Display the component
Now that we have the component, how do we get it to show up on the screen? Let's modify the default components in app.component.ts.
In the Explorer pane, open /app/app.component.ts, change the title to Heroes, and then put the name of the component we created in heroes.components.ts (app-heroes) to refer to that new component. The contents of the file should now look as follows:
import { Component } from '@angular/core';

@Component({
  selector: 'app-root',
  templateUrl: './app.component.html',
  styleUrls: ['./app.component.scss'],
  template: `
  <h1>Heroes</h1>
  <div class="header-bar"></div>
  <app-heroes></app-heroes>
`
})
export class AppComponent {
  title = 'app';
}
There are other components in heroes.components.ts that we're referring to, like the Hero component, so we need to go create that, too. In the Angular CLI command prompt, use the following command to create a hero model and a file named hero.ts, where g=generate, cl=class, and hero=name of class.
ng g cl heroIn the Explorer pane, open src\app\hero.ts. In hero.ts, replace the content of the file with the following code, which adds a Hero class with an ID, a name, and a saying.
  export class Hero {
  id: number;
  name: string;
  saying: string;
}
Go back to heroes.components.ts and notice that on the
selectedHero: Hero;line (line 10),Herohas a red line underneath.Left-click the term
Hero, and Visual Studio displays a lightbulb icon on the left side of the code block.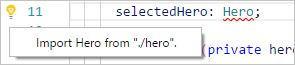
Click the lightbulb and then click Import Hero from "/app/hero". or Import Hero from "./hero". (The message changes depending on your setup)
A new line of code appears on line 2. If line 2 references /app/hero, modify it so that it references the hero file from the local folder (./hero). Line 2 should look like this:
import { Hero } from "./hero";That takes care of the model, but we still need to create the service.
Create the Service
In the Angular CLI command prompt, enter the following command to create a hero service in app.module.ts, where g=generate, s=service, hero=name of service, -m=put in app.module.
ng g s hero -m app.moduleIn Visual Studio Code, go back to heroes.components.ts. Notice that on the
constructor(private heroService: HeroService) {}line (line 13),HeroServicehas a red line underneath. ClickHeroService, and you'll get the lightbulb on the left side of code block. Click the light bulb and then click Import HeroService from "./hero.service ". or Import HeroService from "/app/hero.service ".Clicking the light bulb inserts a new line of code on line 2. If line 2 references the /app/hero.service folder, modify it so that it references the hero file from the local folder (./hero.service). Line 2 should look like this:
import { HeroService } from "./hero.service"In Visual Studio Code, open hero.service.ts and copy in the following code, replacing the content of the file.
import { Injectable } from '@angular/core';
import { HttpClient } from '@angular/common/http';

import { Hero } from './hero';

const api = '/api';

@Injectable()
export class HeroService {
  constructor(private http: HttpClient) {}

  getHeroes() {
    return this.http.get<Array<Hero>>(`${api}/heroes`)
  }

  deleteHero(hero: Hero) {
    return this.http.delete(`${api}/hero/${hero.id}`);
  }

  addHero(hero: Hero) {
    return this.http.post<Hero>(`${api}/hero/`, hero);
  }

  updateHero(hero: Hero) {
    return this.http.put<Hero>(`${api}/hero/${hero.id}`, hero);
  }
}
This code uses the newest version of the HttpClient that Angular offers, which is a module that you need to provide, so we'll do that next.
In Visual Studio Code, open app.module.ts and import the HttpClientModule by updating the import section to include HttpClientModule.
imports: [
  BrowserModule,
  FormsModule,
  HttpClientModule
],
In app.module.ts, add the HttpClientModule import statement the list of imports.
import { HttpClientModule } from '@angular/common/http';Save all files in Visual Studio Code.
Build the app
At the command prompt, enter the following command to build the Angular application.
ng bIf there are any problems, the terminal window displays information about the files to fix. When the build completes, the new files go into the dist folder. You can review the files new in the dist folder if you want.
Now let's run the app.
In Visual Studio Code, click the Debug button
 on the left side, then click the Start Debugging button
  .
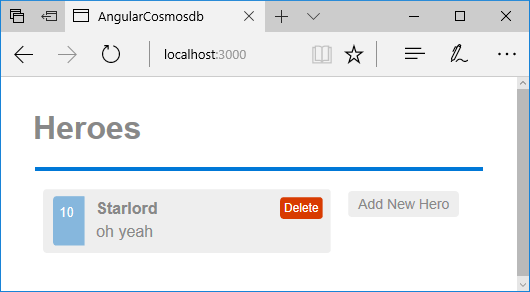
.Now open an internet browser and navigate to localhost:3000 and see the app running locally.
Next steps
In this part of the tutorial, you've done the following:
- Built the Angular UI
- Tested the app locally
You can proceed to the next part of the tutorial to create an Azure Cosmos DB account.
Trying to do capacity planning for a migration to Azure Cosmos DB? You can use information about your existing database cluster for capacity planning.
- If all you know is the number of vcores and servers in your existing database cluster, read about estimating request units using vCores or vCPUs
- If you know typical request rates for your current database workload, read about estimating request units using Azure Cosmos DB capacity planner