Note
Access to this page requires authorization. You can try signing in or changing directories.
Access to this page requires authorization. You can try changing directories.
APPLIES TO:
![]() MongoDB
MongoDB
Important
Are you looking to migrate an existing MongoDB application or use MongoDB Query Language (MQL) features? Consider Azure DocumentDB.
Are you looking for a database solution for high-scale scenarios with a 99.999% availability service level agreement (SLA), instant autoscale, and automatic failover across multiple regions? Consider Azure Cosmos DB for NoSQL.
This multi-part tutorial demonstrates how to create a new app written in Node.js with Express and Angular and then connect it to your Azure Cosmos DB account configured with Azure Cosmos DB's API for MongoDB. Part 6 of the tutorial builds on Part 5 and covers the following tasks:
- Create Post, Put, and Delete functions for the hero service
- Run the app
Prerequisites
Before starting this part of the tutorial, ensure you've completed the steps in Part 5 of the tutorial.
Tip
This tutorial walks you through the steps to build the application step-by-step. If you want to download the finished project, you can get the completed application from the angular-cosmosdb repo on GitHub.
Add a Post function to the hero service
In Visual Studio Code, open routes.js and hero.service.js side by side by pressing the Split Editor button
 .
.See that routes.js line 7 is calling the
getHeroesfunction on line 5 in hero.service.js. We need to create this same pairing for the post, put, and delete functions.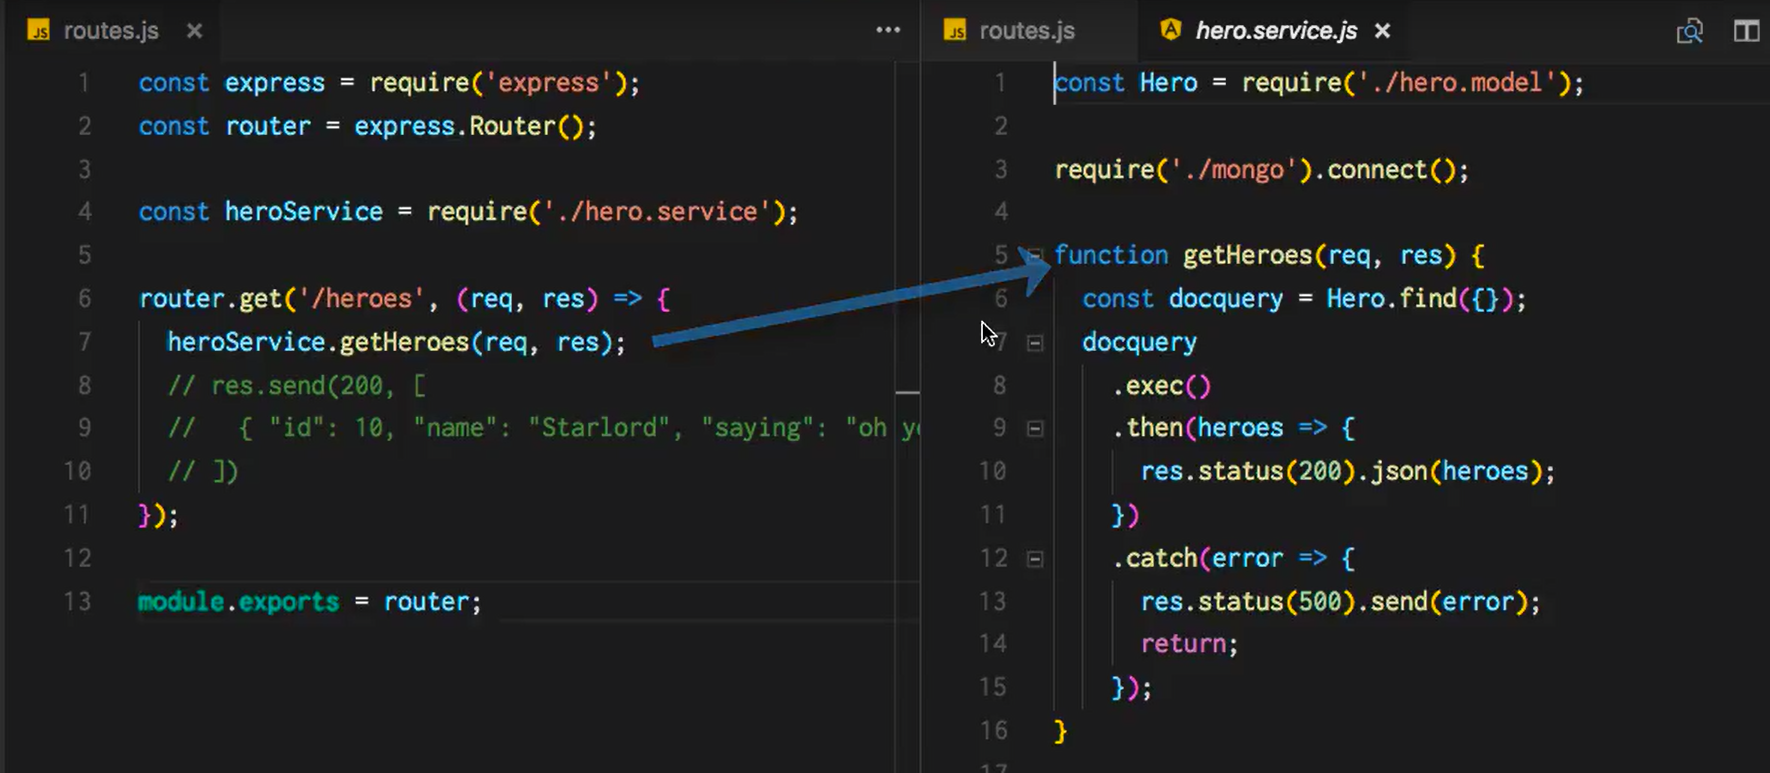
Let's start by coding up the hero service.
Copy the following code into hero.service.js after the
getHeroesfunction and beforemodule.exports. This code:- Uses the hero model to post a new hero.
- Checks the responses to see if there's an error and returns a status value of 500.
function postHero(req, res) {
  const originalHero = { uid: req.body.uid, name: req.body.name, saying: req.body.saying };
  const hero = new Hero(originalHero);
  hero.save(error => {
    if (checkServerError(res, error)) return;
    res.status(201).json(hero);
    console.log('Hero created successfully!');
  });
}

function checkServerError(res, error) {
  if (error) {
    res.status(500).send(error);
    return error;
  }
}
In hero.service.js, update the
module.exportsto include the newpostHerofunction.module.exports = { getHeroes, postHero };In routes.js, add a router for the
postfunction after thegetrouter. This router posts one hero at a time. Structuring the router file this way cleanly shows you all of the available API endpoints and leaves the real work to the hero.service.js file.router.post('/hero', (req, res) => { heroService.postHero(req, res); });Check that everything worked by running the app. In Visual Studio Code, save all your changes, select the Debug button
 on the left side, then select the Start Debugging button
  .
.Now go back to your internet browser and open the Developer tools Network tab by pressing F12 on most machines. Navigate to
http://localhost:3000to watch the calls made over the network.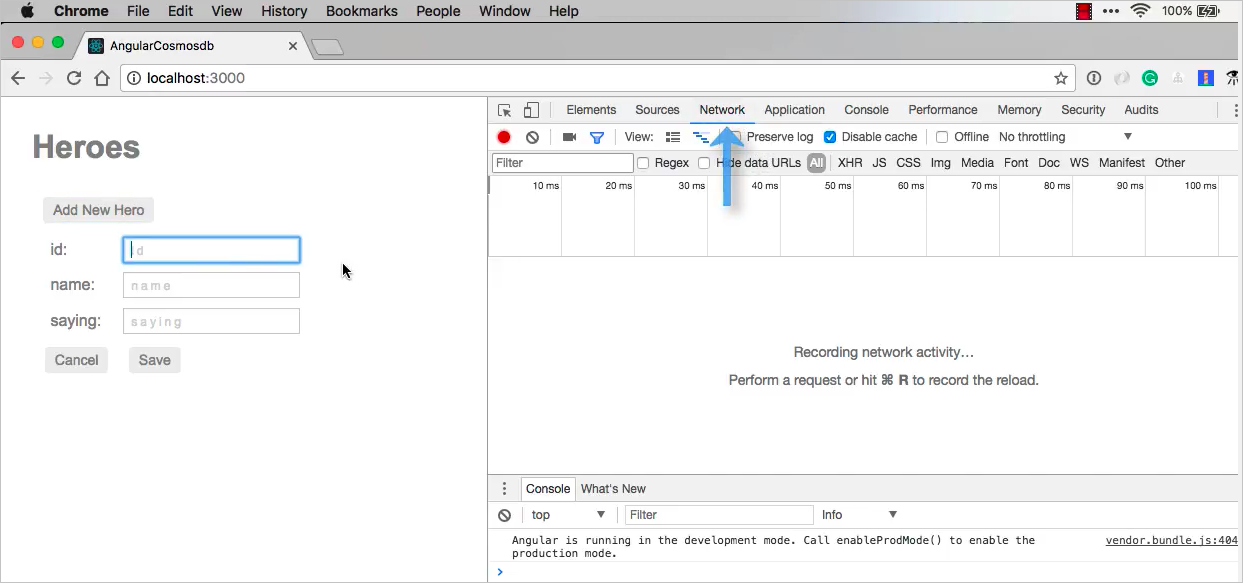
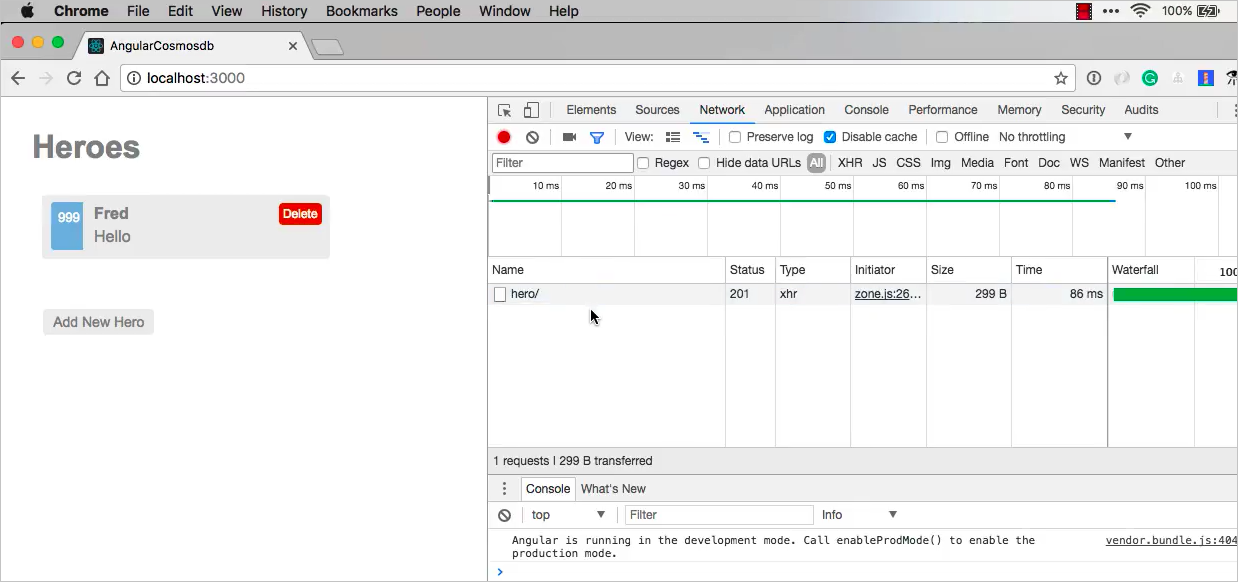
Add a new hero by selecting the Add New Hero button. Enter an ID of "999", name of "Fred", and saying of "Hello", then select Save. You should see in the Networking tab you've sent a POST request for a new hero.
Now let's go back and add the Put and Delete functions to the app.
Add the Put and Delete functions
In routes.js, add the
putanddeleterouters after the post router.router.put('/hero/:uid', (req, res) => { heroService.putHero(req, res); }); router.delete('/hero/:uid', (req, res) => { heroService.deleteHero(req, res); });Copy the following code into hero.service.js after the
checkServerErrorfunction. This code:- Creates the
putanddeletefunctions - Performs a check on whether the hero was found
- Performs error handling
function putHero(req, res) { const originalHero = { uid: parseInt(req.params.uid, 10), name: req.body.name, saying: req.body.saying }; Hero.findOne({ uid: originalHero.uid }, (error, hero) => { if (checkServerError(res, error)) return; if (!checkFound(res, hero)) return; hero.name = originalHero.name; hero.saying = originalHero.saying; hero.save(error => { if (checkServerError(res, error)) return; res.status(200).json(hero); console.log('Hero updated successfully!'); }); }); } function deleteHero(req, res) { const uid = parseInt(req.params.uid, 10); Hero.findOneAndRemove({ uid: uid }) .then(hero => { if (!checkFound(res, hero)) return; res.status(200).json(hero); console.log('Hero deleted successfully!'); }) .catch(error => { if (checkServerError(res, error)) return; }); } function checkFound(res, hero) { if (!hero) { res.status(404).send('Hero not found.'); return; } return hero; }- Creates the
In hero.service.js, export the new modules:
module.exports = {
  getHeroes,
  postHero,
  putHero,
  deleteHero
};
Now that we've updated the code, select the Restart button
 in Visual Studio Code.
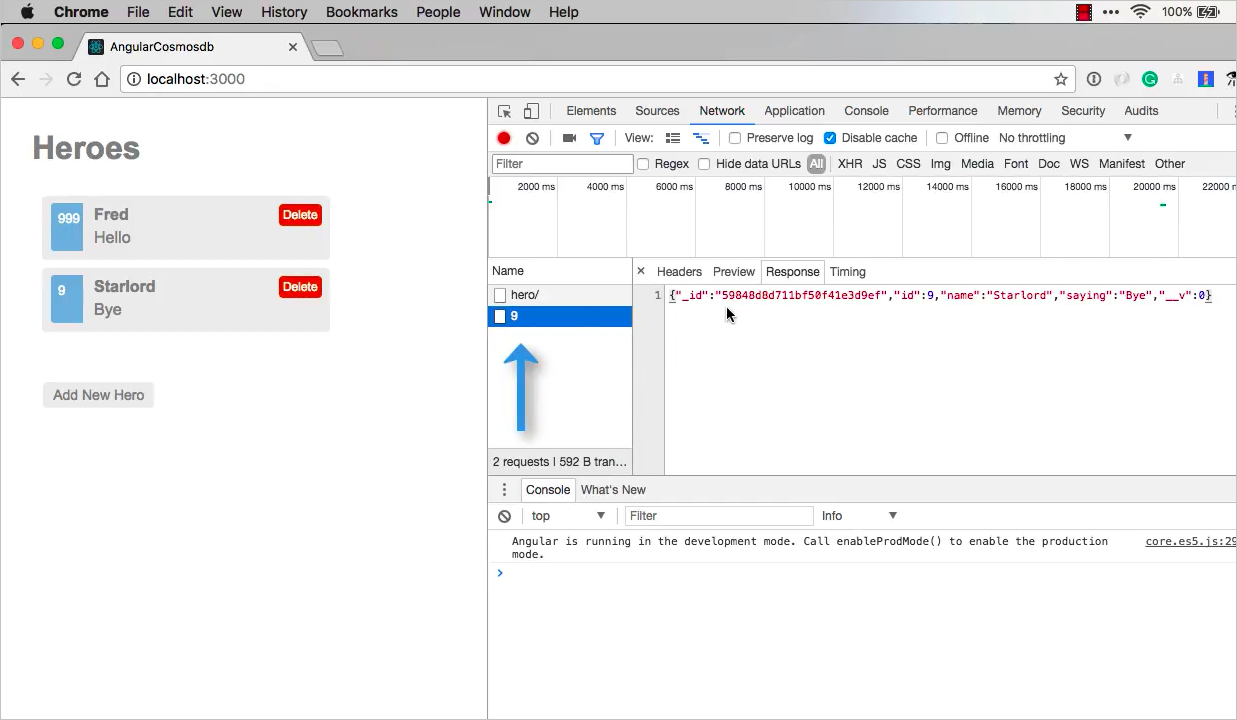
Refresh the page in your internet browser and select the Add New Hero button. Add a new hero with an ID of "9", name of "Starlord", and saying "Hi". Select the Save button to save the new hero.
Now select the Starlord hero, and change the saying from "Hi" to "Bye", then select the Save button.
You can now select the ID in the Network tab to show the payload. You can see in the payload that the saying is now set to "Bye".
You can also delete one of the heroes in the UI, and see the times it takes to complete the delete operation. Try this out by selecting the "Delete" button for the hero named "Fred".
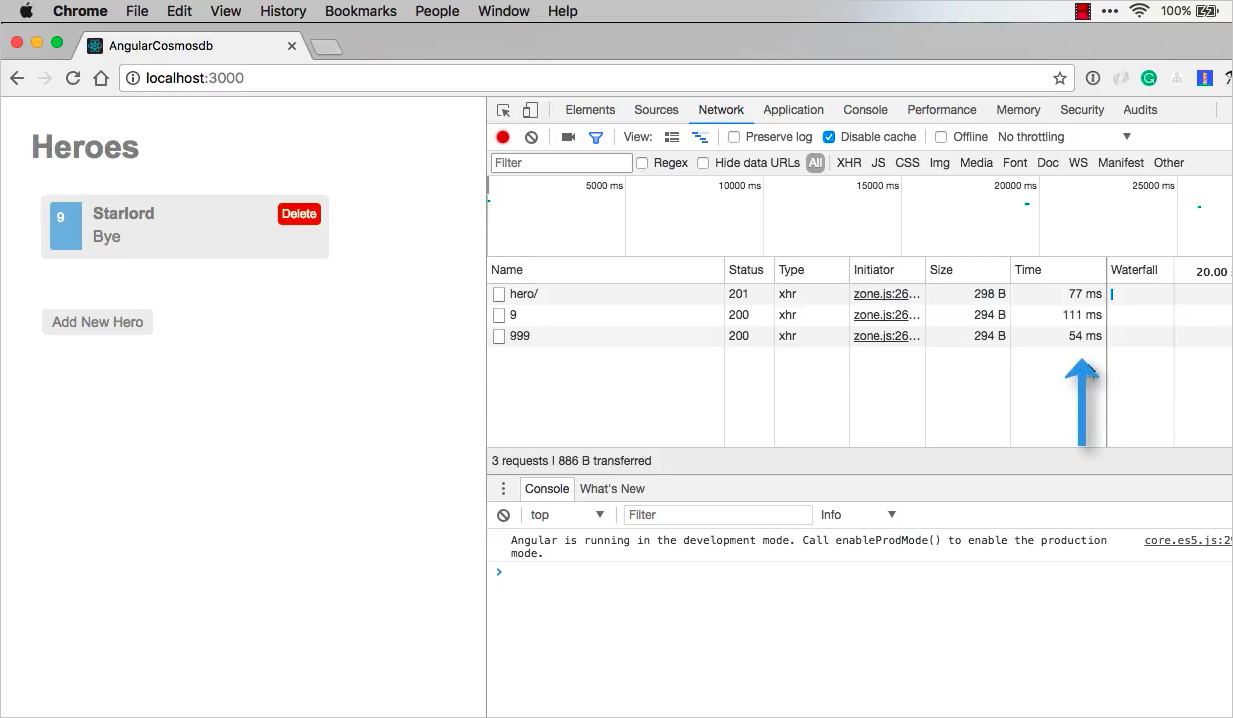
If you refresh the page, the Network tab shows the time it takes to get the heroes. While these times are fast, a lot depends on where your data is located in the world and your ability to geo-replicate it in an area close to your users. You can find out more about geo-replication in the next, soon to be released, tutorial.
Next steps
In this part of the tutorial, you've done the following:
- Added Post, Put, and Delete functions to the app
Check back soon for additional videos in this tutorial series.
Trying to do capacity planning for a migration to Azure Cosmos DB? You can use information about your existing database cluster for capacity planning.
- If all you know is the number of vcores and servers in your existing database cluster, read about estimating request units using vCores or vCPUs
- If you know typical request rates for your current database workload, read about estimating request units using Azure Cosmos DB capacity planner