Create and use a cross-region cluster replica in Azure Cosmos DB for MongoDB vCore
In this guide, you create a cluster replica in another region for an Azure Cosmos DB for MongoDB vCore cluster for disaster recovery (DR) purposes. This replica cluster stores a copy of all of your MongoDB resources - databases, collections, and documents - in another Azure region. The replica cluster provides a unique endpoint for various tools and SDKs to connect to and could be promoted to become available for writes if there's a primary region outage.
Prerequisites
- An Azure account with an active subscription. Create an account for free.
- MongoDB shell
Create a new cluster and its replica in another region
Create a MongoDB cluster with a cluster read replica in another region by using Azure Cosmos DB for MongoDB vCore.
Tip
For this guide, we recommend using the resource group name msdocs-cosmos-quickstart-rg.
Sign in to the Azure portal.
From the Azure portal menu or the Home page, select Create a resource.
On the New page, search for and select Azure Cosmos DB.
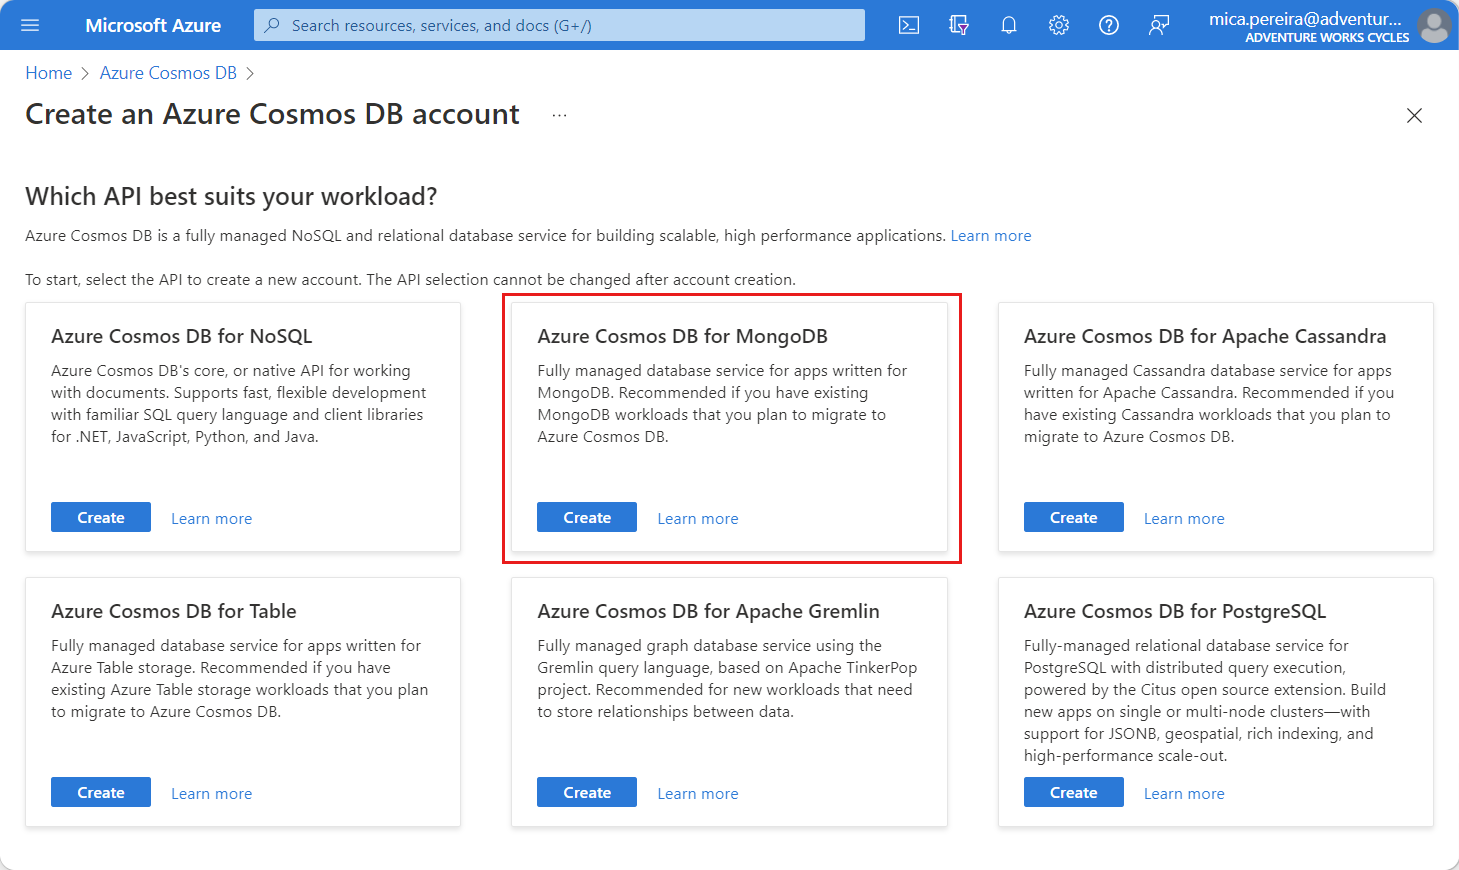
On the Which API best suits your workload? page, select the Create option within the Azure Cosmos DB for MongoDB section.
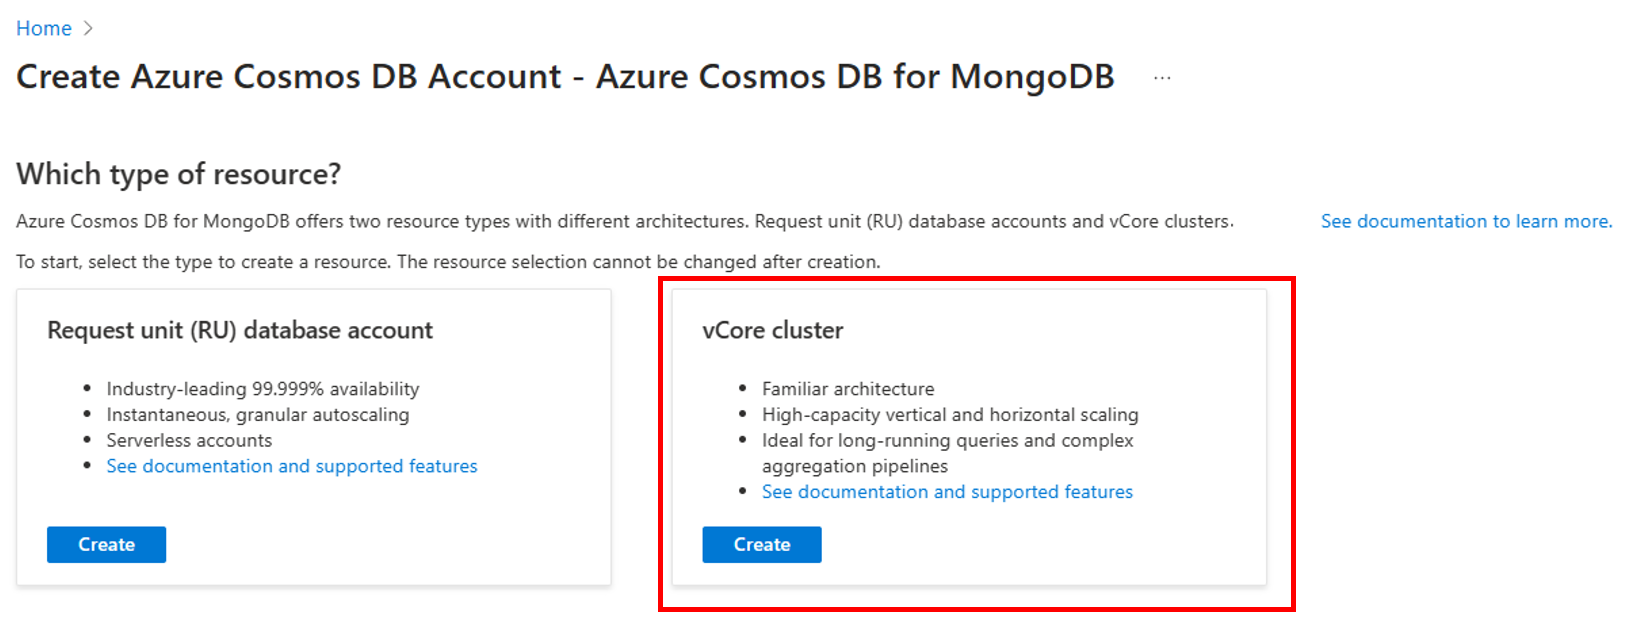
On the Which type of resource? page, select the Create option within the vCore cluster section. For more information, see overview of the vCore architecture in Azure Cosmos DB for MongoDB.
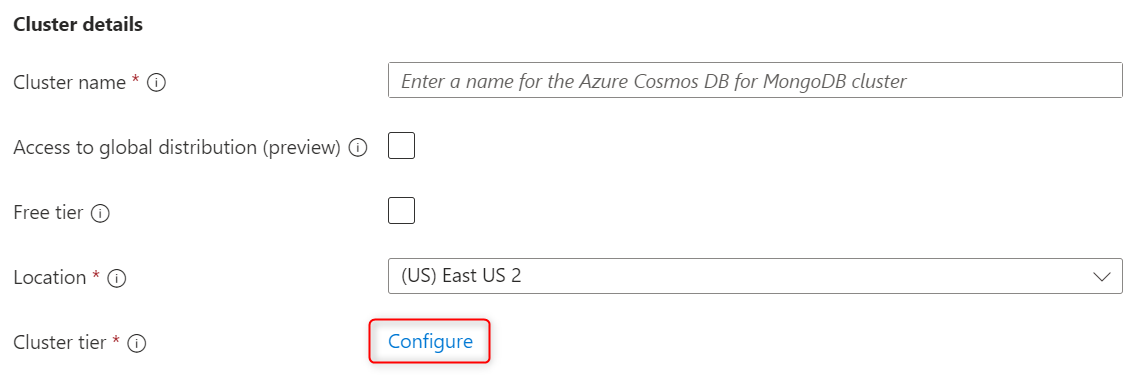
On the Create Azure Cosmos DB for MongoDB cluster page, select the Configure option within the Cluster tier section.
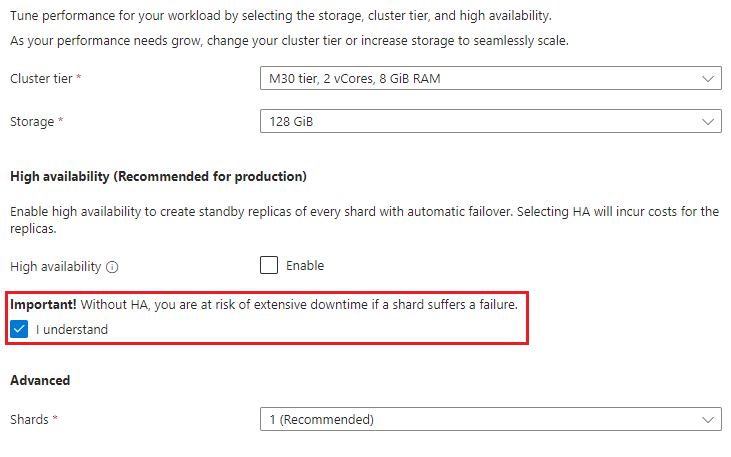
On the Scale page, leave the options set to their default values:
Setting Value Shard count 1 shard Cluster tier M30 Tier, 2 vCores, 8 GiB RAM Storage 128 GiB Unselect the High availability option. In the high availability (HA) acknowledgment section, select I understand. Finally, select Save to persist your changes to the cluster configuration.
In-region high availability provides an in-region solution where a copy of data from each shard in a cluster is streamed to its standby counterpart located in the same region but in a different availability zone (AZ). High availability uses synchronous replication with zero data loss and automatic failure detection and failover while preserving the connection string intact after failover. High availability might be enabled on the primary cluster for an additional layer of protection from failures.
Back on the cluster page, enter the following information:
Setting Value Description Subscription Subscription name Select the Azure subscription that you wish to use for this Azure Cosmos DB for MongoDB cluster and its replica cluster. Resource group Resource group name Select a resource group, or select Create new, then enter a unique name for the new resource group. Cluster name A globally unique name Enter a name to identify your Azure Cosmos DB for MongoDB cluster. The name is used as part of a fully qualified domain name (FQDN) with a suffix of mongodbcluster.cosmos.azure.com, so the name must be globally unique. The name can only contain lowercase letters, numbers, and the hyphen (-) character. The name must also be between 3 and 40 characters in length. Location The region closest to your users Select a geographic location to host your Azure Cosmos DB for MongoDB cluster with read and write capabilities, the primary cluster. Use the location that is closest to your users to give them the fastest access to the data. MongoDB version Version of MongoDB to run on your cluster This value is set to a default of the most recent MongoDB version available. Admin username Provide a username to access the cluster This user is created on the cluster as a user administrator. Password Use a unique password to pair with the username Password must be at least 8 characters and at most 128 characters. 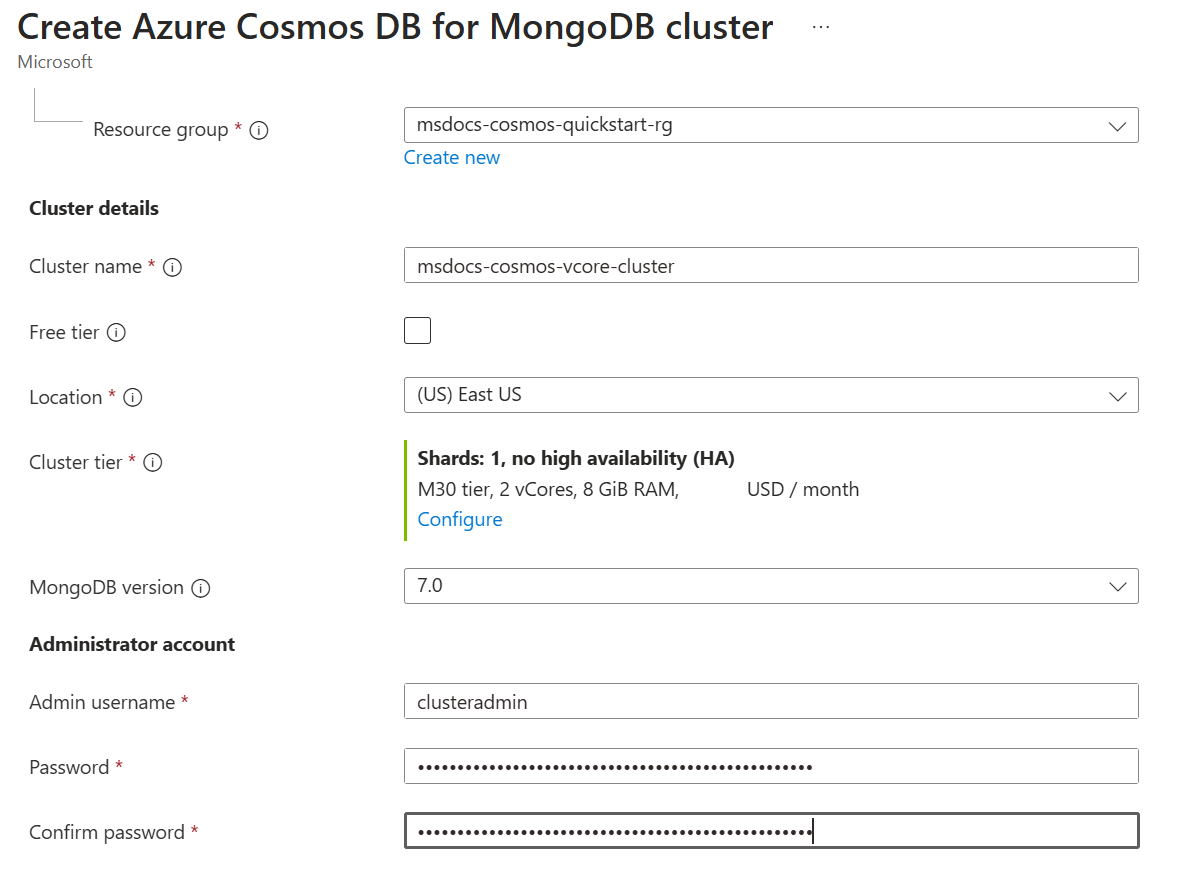
Select Next: Global distribution.
On the Global distribution tab, select Enable for Read replica in another region to create a cluster read replica as a part of this new primary cluster provisioning.
In the Read replica name field, enter a name for the cluster read replica. It should be a globally unique cluster name.
Select a value from the Read replica region drop-down list.

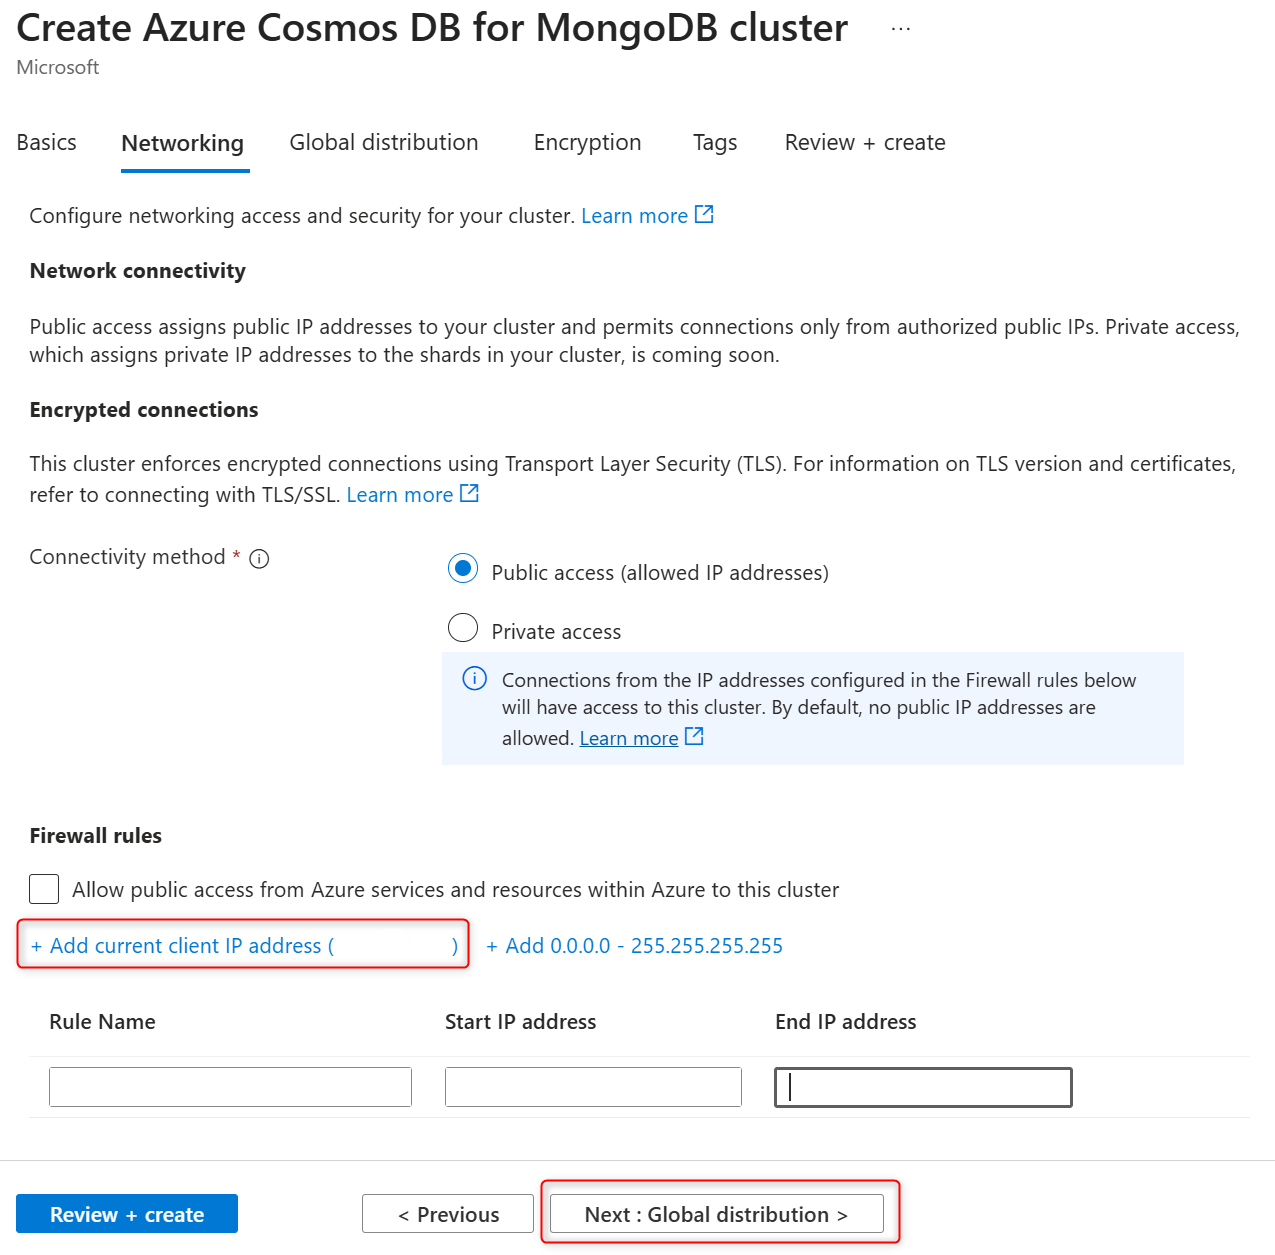
Select Next: Networking.
On the Networking tab, select Add current client IP address to create a firewall rule with the public IP address of your computer, as perceived by the Azure system.

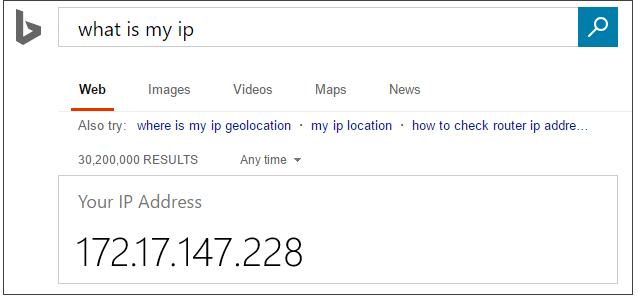
Verify your IP address before saving this configuration. In some situations, the IP address observed by Azure portal differs from the IP address used when accessing the Internet and Azure services. Thus, you may need to change the start IP and end IP to make the rule function as expected. Use a search engine or other online tool to check your own IP address. For example, search for what is my IP.
You can also select add 0.0.0.0 - 255.255.255.255 firewall rule to allow not just your IP, but the whole Internet to access the cluster. In this situation, clients still must log in with the correct username and password to use the cluster. Nevertheless, it's best to allow worldwide access for only short periods of time and for only non-production databases.
Select Review + create.
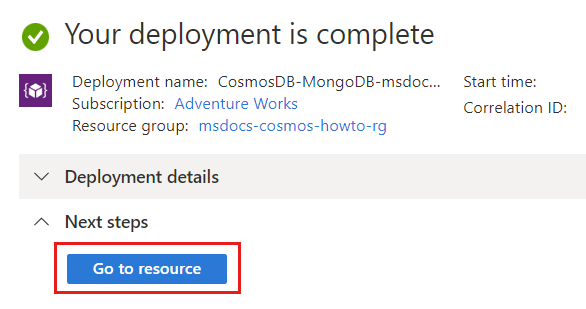
Review the settings you provided, and then select Create. It takes a few minutes to create the cluster. Wait for the portal page to display Your deployment is complete before moving on.
Select Go to resource to go to the Azure Cosmos DB for MongoDB cluster page.
Connect to primary cluster and ingest data
Get the connection string you need to connect to the primary (read-write) cluster in the Azure portal.
From the Azure Cosmos DB for MongoDB vCore primary cluster page, select the Connection strings navigation menu option under Settings.

Copy the value from the Self (always this cluster) field.
In command line, use the MongoDB shell to connect to the primary cluster using the connection string.
mongosh "mongodb+srv://<user>@<primary_cluster_name>.mongocluster.cosmos.azure.com/?tls=true&authMechanism=SCRAM-SHA-256&retrywrites=false&maxIdleTimeMS=120000"
Ingest data
Create a my_script.js script file to run it from the MongoDB shell.
let dogDocs = [
  {
    name: "pooch",
    breed: "poodle",
    weight: "6 lbs"
  },
  {
    name: "mutt",
    breed: "bulldog",
    weight: "10 lbs"
  }
];

let catDocs = [
  {
    name: "minni",
    breed: "persian",
    color: "white"
  },
  {
    name: "tinkle",
    breed: "bombay",
    color: "black"
  }
];

let dogIndex = { name : 1 };
let catIndex = { name : 1 };

let collInfoObjs = [
  { coll: "dogs", data: dogDocs, index: dogIndex },
  { coll: "cats", data: catDocs, index: catIndex }
];

for (obj of collInfoObjs) {
    db[obj.coll].insertMany(obj.data);
    db[obj.coll].createIndex(obj.index);
}
This script file creates two collections and inserts documents with data into those collections. Save my_script.js file in a folder accessible to the MongoDB shell session.
Run the script from the MongoDB shell connected to the primary MongoDB cluster.
load(my_script.js);
In the MongoDB shell connected to the primary MongoDB cluster, read data from the database.
db.dogs.find();
db.cats.find();
Enable access to replica cluster
Important
Replica clusters are always created with networking access disabled. You should add firewall rules or create private endpoints on the replica cluster after it is created to enable read operations.
From the Azure Cosmos DB for MongoDB vCore primary cluster page, select the Global distribution page under Settings.
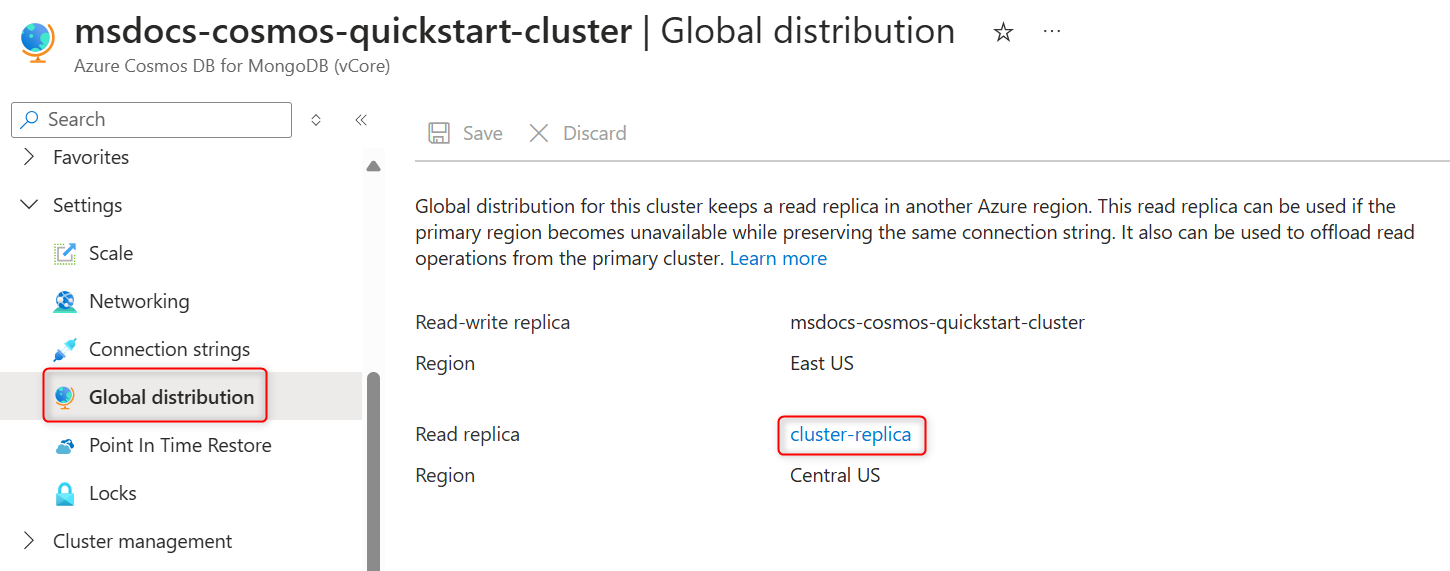
Select cluster replica name in the Read replica field to open the read cluster replica properties in the Azure portal.
On the MongoDB vCore replica cluster page, under Settings, select Networking.
On the Networking page, select Add current client IP address to create a firewall rule with the public IP address of your computer, as perceived by the Azure system.
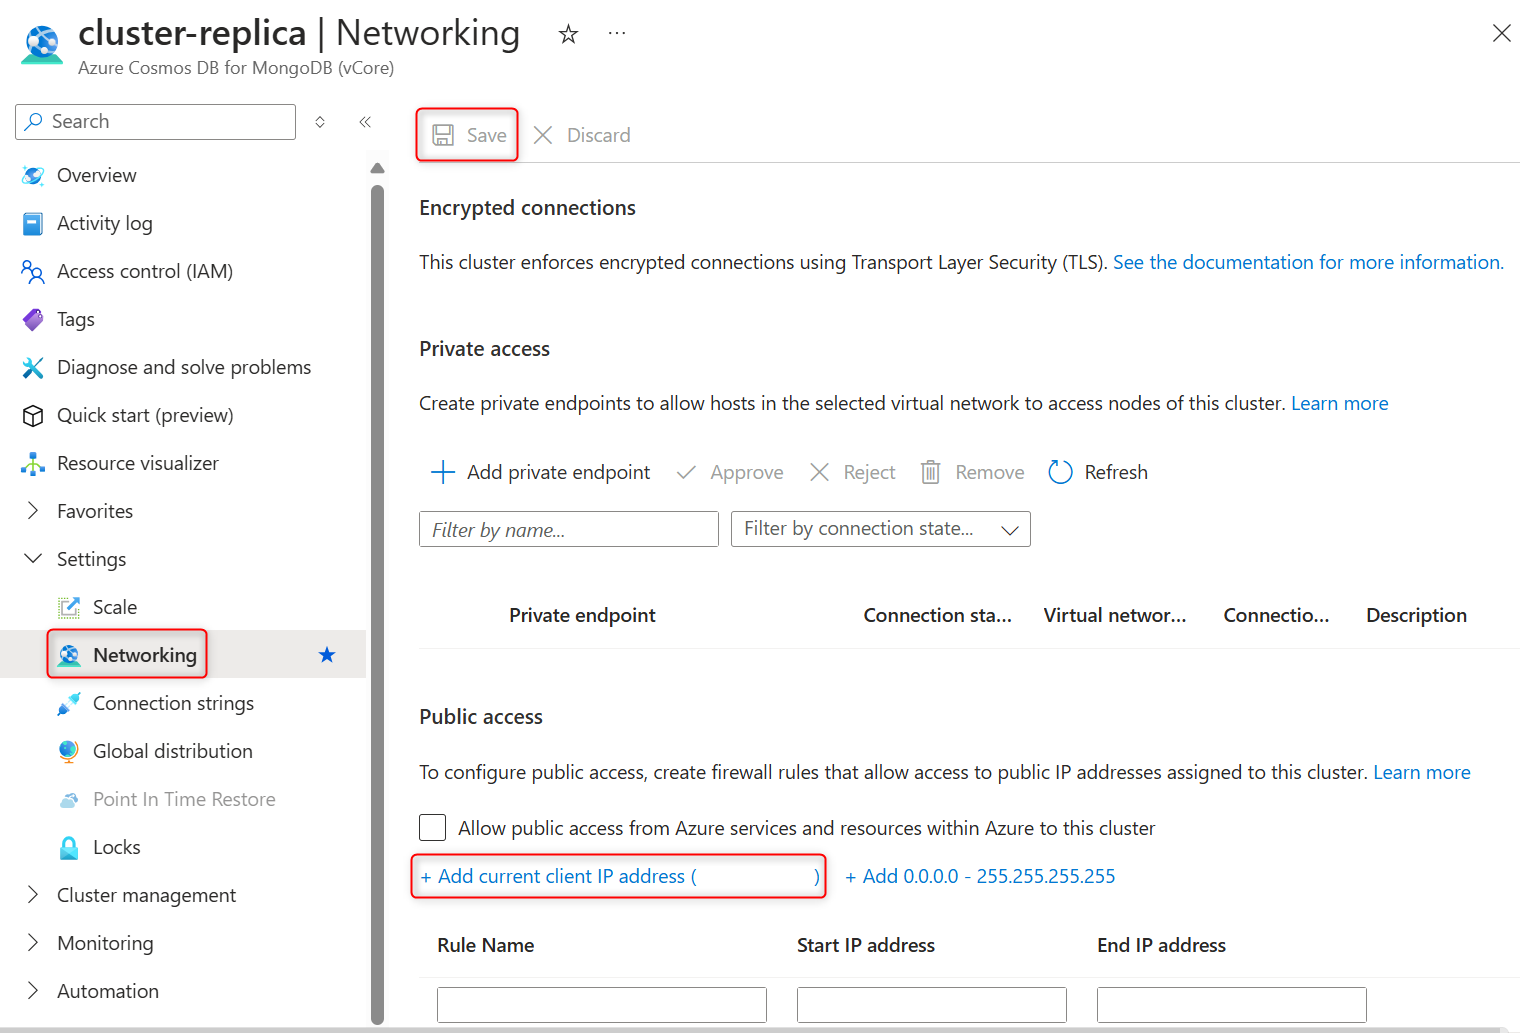
Verify your IP address before saving this configuration. In some situations, the IP address observed by Azure portal differs from the IP address used when accessing the Internet and Azure services. You can also select add 0.0.0.0 - 255.255.255.255 firewall rule to allow not just your IP, but the whole Internet to access the cluster. In this situation, clients still must log in with the correct username and password to use the cluster.
Select Save on the toolbar to save the settings. It might take a few minutes for the updated networking settings to become effective.
Connect to read replica cluster in another region and read data
Get the connection string for the read cluster replica in another region.
On the replica cluster sidebar, under Cluster management, select Connection strings.
Copy the value from the Connection string field.
Important
The connection string of the read replica cluster contains unique replica cluster name that you selected during replica creation. The username and password values for the read replica cluster are always the same as the ones on its primary cluster.
In command line, use the MongDB shell to connect to the read replica cluster using its connection string.
mongosh "mongodb+srv://<user>@<cluster_replica_name>.mongocluster.cosmos.azure.com/?tls=true&authMechanism=SCRAM-SHA-256&retrywrites=false&maxIdleTimeMS=120000"
Read data from replica cluster
In the MongoDB shell connected to the replica cluster, read data from the database.
db.dogs.find();
db.cats.find();
Promote replica cluster
To promote a cluster read replica to a read-write cluster, follow these steps:
Select the read replica cluster in the portal.
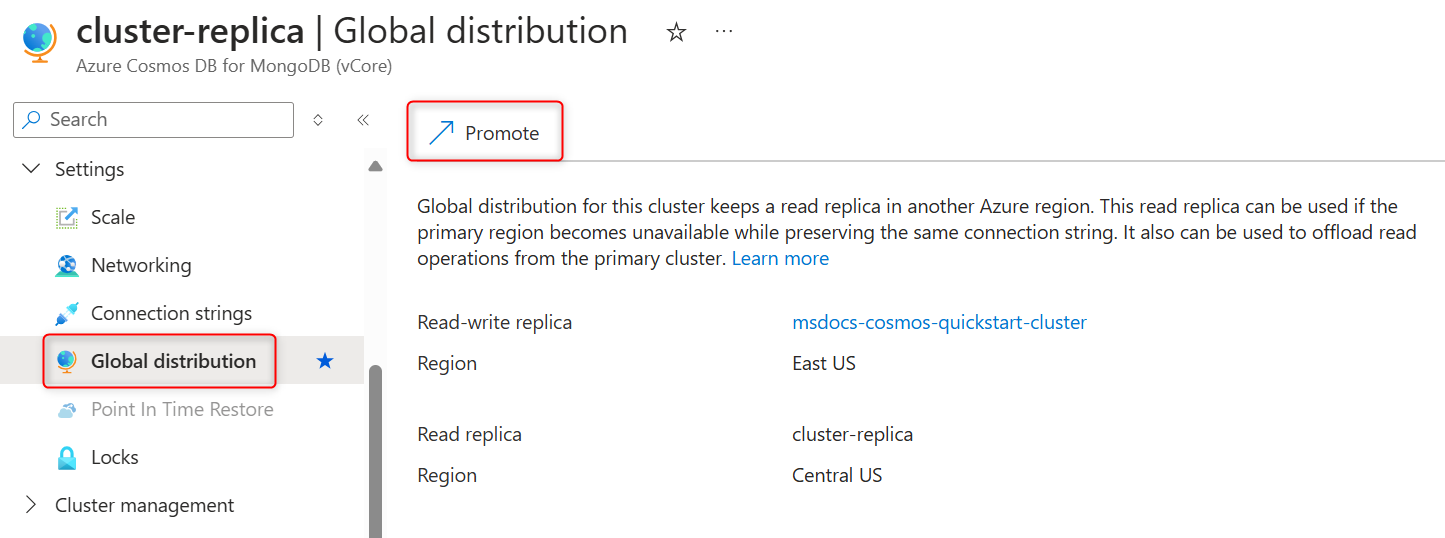
On the cluster sidebar, under Cluster management, select Global distribution.
On the Global distribution page, select Promote on the toolbar to initiate read replica promotion to read-write cluster.
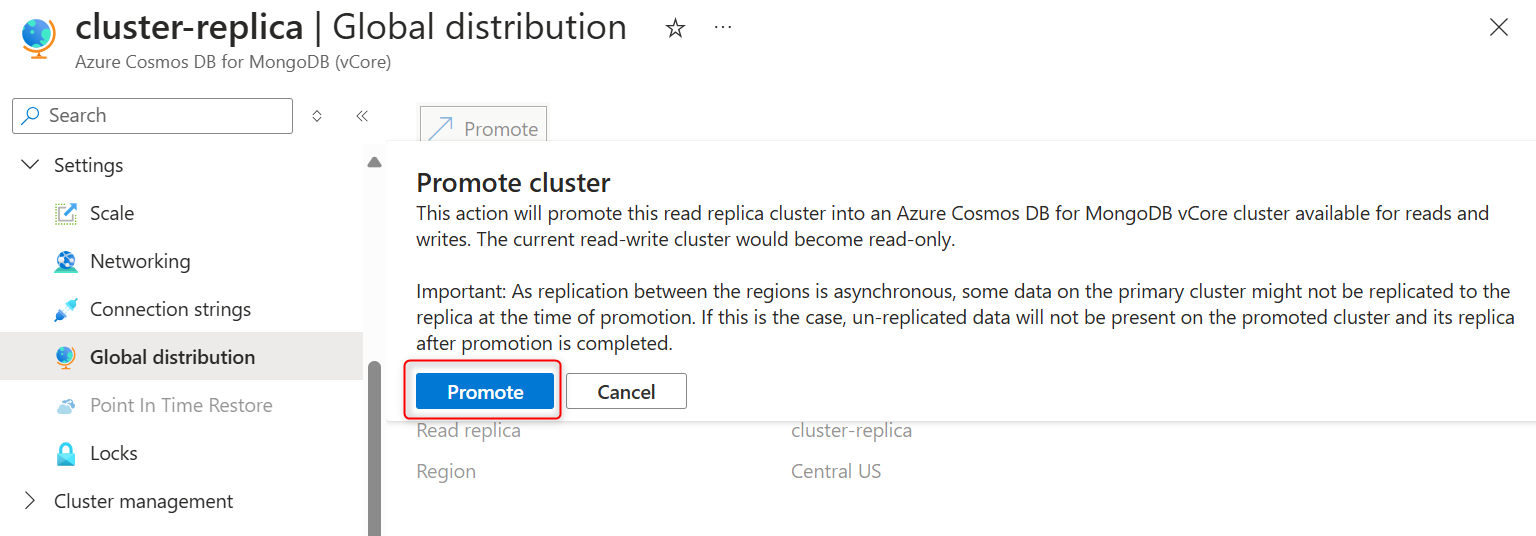
In the Promote cluster pop-up window, confirm that you understand how replica promotion works, and select Promote. Replica promotion might take a few minutes to complete.
Write to promoted cluster replica
Once replica promotion is completed, the promoted replica becomes available for writes and the former primary cluster is set to read-only.
Use the MongDB shell in command line to connect to the promoted replica cluster using its connection string.
mongosh "mongodb+srv://<user>@<promoted_replica_cluster_name>.mongocluster.cosmos.azure.com/?tls=true&authMechanism=SCRAM-SHA-256&retrywrites=false&maxIdleTimeMS=120000"
In the MongoDB shell session, perform a write operation.
db.createCollection('foxes')
Use the MongDB shell in command line to connect to the new replica cluster (former primary cluster) using its connection string. You can use self connection string or the global read-write connection string.
mongosh "mongodb+srv://<user>@<new_replica_cluster_name>.mongocluster.cosmos.azure.com/?tls=true&authMechanism=SCRAM-SHA-256&retrywrites=false&maxIdleTimeMS=120000"
In the MongoDB shell, confirm that writes are now disabled on the new replica (former primary cluster).
db.createCollection('bears')