Note
Access to this page requires authorization. You can try signing in or changing directories.
Access to this page requires authorization. You can try changing directories.
Important
Azure Cosmos DB for PostgreSQL is no longer supported for new projects. Don't use this service for new projects. Instead, use one of these two services:
Use Azure Cosmos DB for NoSQL for a distributed database solution designed for high-scale scenarios with a 99.999% availability service level agreement (SLA), instant autoscale, and automatic failover across multiple regions.
Use the Elastic Clusters feature of Azure Database For PostgreSQL for sharded PostgreSQL using the open-source Citus extension.
This quickstart shows you how to use the psql connection string in Azure Cloud Shell to connect to an Azure Cosmos DB for PostgreSQL cluster.
Prerequisites
- An Azure account with an active subscription. If you don't have one, create an account for free.
- An Azure Cosmos DB for PostgreSQL cluster. To create a cluster, see Create a cluster in the Azure portal.
Connect
Your cluster has a default database named citus. To connect to the database, you use a connection string and the admin password.
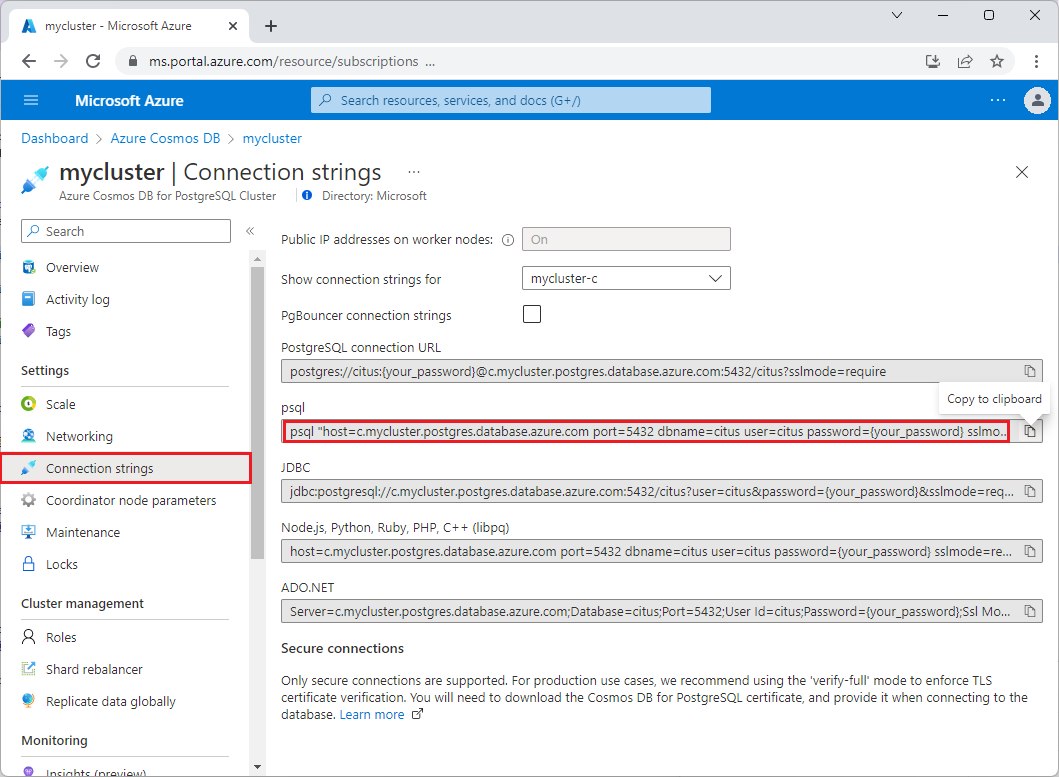
In the Azure portal, on your cluster page, select the Connection strings menu item, and then copy the psql connection string.

The psql string is of the form
psql "host=c-<cluster>.<uniqueID>.postgres.cosmos.azure.com port=5432 dbname=citus user=citus password={your_password} sslmode=require". Notice that the host name starts with ac., for examplec-mycluster.12345678901234.postgres.cosmos.azure.com. This prefix indicates the coordinator node of the cluster. The defaultdbnameiscitusand can be changed only at cluster provisioning time. Theusercan be any valid Postgres role on your cluster.Open Azure Cloud Shell by selecting the Cloud Shell icon on the top menu bar.

If prompted, choose an Azure subscription in which to store Cloud Shell data.
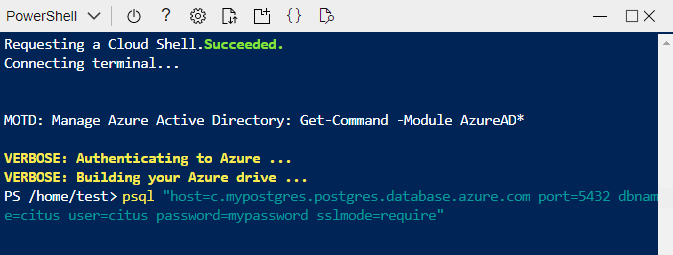
Paste your psql connection string into the shell.
In the connection string, replace
{your_password}with your cluster password or Microsoft Entra ID token, and then press Enter.
When psql successfully connects to the database, you see a new
citus=>(or the custom name of your database) prompt:psql (14.2, server 14.5) SSL connection (protocol: TLSv1.2, cipher: ECDHE-RSA-AES256-GCM-SHA384, bits: 256, compression: off) Type "help" for help. citus=>Run a test query. Paste the following command into the psql prompt, and then press Enter.
SHOW server_version;You should see a result matching the PostgreSQL version you selected during cluster creation. For instance:
 server_version
----------------
 14.5
(1 row)
Next steps
Now that you've connected to the cluster, the next step is to create tables and shard them for horizontal scaling.