Note
Access to this page requires authorization. You can try signing in or changing directories.
Access to this page requires authorization. You can try changing directories.
After you prepare the prerequisites, follow these steps to integrate the external Slurm Scheduler node with the CycleCloud cluster:
Import a cluster by using the Slurm headless template in CycleCloud
- Run this step on the CycleCloud VM.
- Make sure that the CycleCloud 8.6.4 VM is running and accessible through the
cyclecloudCLI. - Run the
cyclecloud-project-build.shscript and enter the cluster name you want (for example,hpc1). The script sets a custom project based on thecyclecloud-slurm-3.0.9version and imports the cluster by using the Slurm headless template. - In the following example,
<clustername>is the cluster name. You can choose any cluster name you want, but you must use the same name throughout the entire setup.
git clone https://github.com/Azure/cyclecloud-slurm.git
cd cyclecloud-slurm/cloud_bursting/slurm-23.11.9-1/cyclecloud
sh cyclecloud-project-build.sh
Output:
[user1@cc86vm ~]$ cd cyclecloud-slurm/cloud_bursting/slurm-23.11.9-1/cyclecloud
[user1@cc86vm cyclecloud]$ sh cyclecloud-project-build.sh
Enter Cluster Name: <clustername>
Cluster Name: <clustername>
Use the same cluster name: <clustername> in building the scheduler
Importing Cluster
Importing cluster Slurm_HL and creating cluster hpc1....
----------
<clustername> : off
----------
Resource group:
Cluster nodes:
Total nodes: 0
Locker Name: cyclecloud_storage
Fetching CycleCloud project
Uploading CycleCloud project to the locker
Slurm scheduler installation and configuration
- Deploy a VM by using the AlmaLinux HPC 8.7 or Ubuntu HPC 22.04 image.
- If you already have a Slurm scheduler installed, you can skip this step. However, we recommend that you review the script to make sure it's compatible with your current setup.
- Run the Slurm scheduler installation script (
slurm-scheduler-builder.sh) and enter the cluster name (<clustername>) when prompted. - The script sets up the NFS server and installs and configures the Slurm scheduler.
- If you're using an external NFS server, you can delete the NFS setup entries from the script.
git clone https://github.com/Azure/cyclecloud-slurm.git
cd cyclecloud-slurm/cloud_bursting/slurm-23.11.9-1/scheduler
sh slurm-scheduler-builder.sh
Output:
------------------------------------------------------------------------------------------------------------------------------
Building Slurm scheduler for cloud bursting with Azure CycleCloud
------------------------------------------------------------------------------------------------------------------------------

Enter Cluster Name: <clustername>
------------------------------------------------------------------------------------------------------------------------------

Summary of entered details:
Cluster Name: <clustername>
Scheduler Hostname: <scheduler hostname>
NFSServer IP Address: 10.222.xxx.xxx
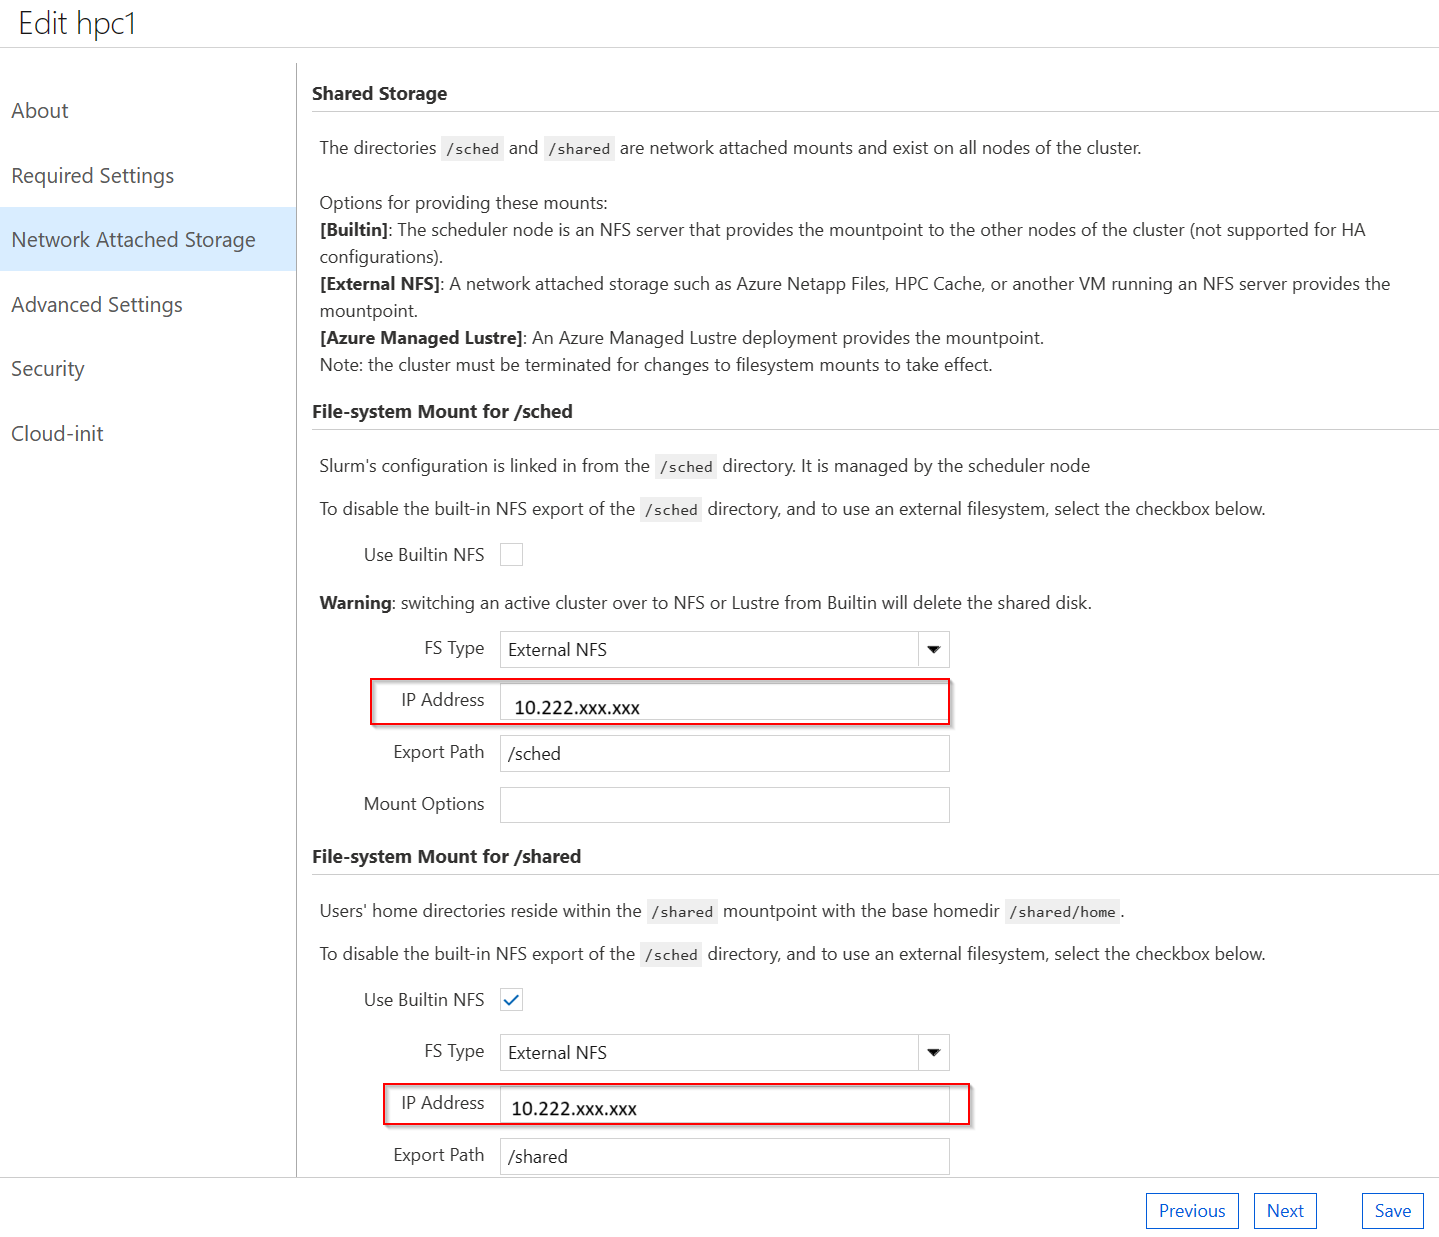
CycleCloud UI configuration
- Access the CycleCloud UI and go to the settings for the
<clustername>cluster. - Edit the cluster settings to set up the VM versions and networking options.
- In the Network Attached Storage section, enter the NFS server IP address for the
/schedand/sharedmounts. - On the Advance setting tab, from the dropdown menu choose the OS: either Ubuntu 22.04 or AlmaLinux 8 based on the scheduler VM.
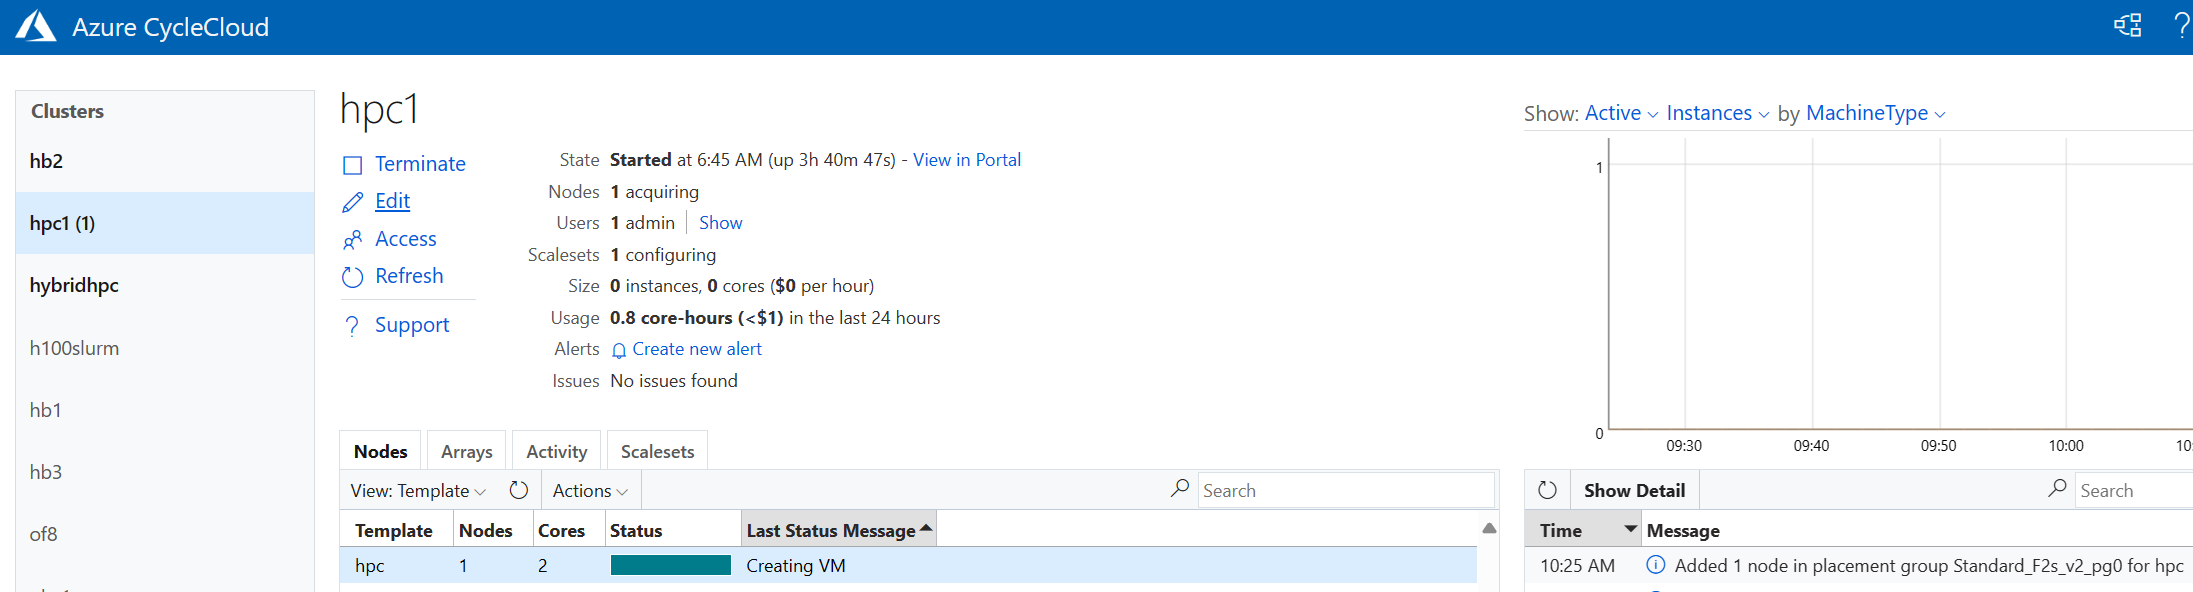
- When you finish configuring the settings, select Save and then Start the
<clustername>cluster.
CycleCloud Autoscaler Integration on Slurm Scheduler
- Integrate Slurm with CycleCloud by using the
cyclecloud-integrator.shscript. - Enter your CycleCloud username, password, and IP address when prompted.
cd cyclecloud-slurm/cloud_bursting/slurm-23.11.9-1/scheduler
sh cyclecloud-integrator.sh
Output:
[root@masternode2 scripts]# sh cyclecloud-integrator.sh
Please enter the CycleCloud details to integrate with the Slurm scheduler

Enter Cluster Name: <clustername>
Enter CycleCloud Username: <username>
Enter CycleCloud Password: <password>
Enter CycleCloud IP (e.g., 10.220.x.xx): <ip address>
------------------------------------------------------------------------------------------------------------------------------

Summary of entered details:
Cluster Name: <clustername>
CycleCloud Username: <username>
CycleCloud URL: https://<ip address>

------------------------------------------------------------------------------------------------------------------------------
User and Group Setup (Optional)
- Make sure user and group IDs are consistent across all nodes.
- To keep UID and GID consistent across all nodes, use a centralized User Management system like LDAP.
- In this example, use the
useradd_example.shscript to create a test user<username>and a group for job submission. (User<username>already exists in CycleCloud)
cd cyclecloud-slurm/cloud_bursting/slurm-23.11.9-1/scheduler
sh useradd_example.sh
Testing the setup
- Sign in as a test user (for example,
<username>) on the scheduler node. - Submit a test job to verify that the setup is working correctly.
su - <username>
srun hostname &
Output:
[root@masternode2 scripts]# su - <username>
Last login: Tue May 14 04:54:51 UTC 2024 on pts/0
[<username>@masternode2 ~]$ srun hostname &
[1] 43448
[<username>@masternode2 ~]$ squeue
              JOBID  PARTITION     NAME      USER ST         TIME     NODES     NODELIST(REASON)
                 1       hpc     hostname    <username> CF    0:04      1       <clustername>-hpc-1
[user1@masternode2 ~]$ <clustername>-hpc-1
You should see the job running successfully, which indicates a successful integration with CycleCloud.
For more information and advanced configurations, see the scripts and documentation within this repository.