Note
Access to this page requires authorization. You can try signing in or changing directories.
Access to this page requires authorization. You can try changing directories.
Azure Data Factory (ADF) is a cloud-based data integration service that you can use to perform a combination of activities on the data. Use ADF to create data-driven workflows for orchestrating and automating data movement and data transformation. The Azure Data Explorer Command activity in Azure Data Factory enables you to run Azure Data Explorer management commands within an ADF workflow. This article shows you how to create a pipeline with a lookup activity and ForEach activity containing an Azure Data Explorer command activity.
Prerequisites
- An Azure subscription. Create a free Azure account.
- An Azure Data Explorer cluster and database. Create a cluster and database.
- A source of data.
- A data factory. Create a data factory.
Create a new pipeline
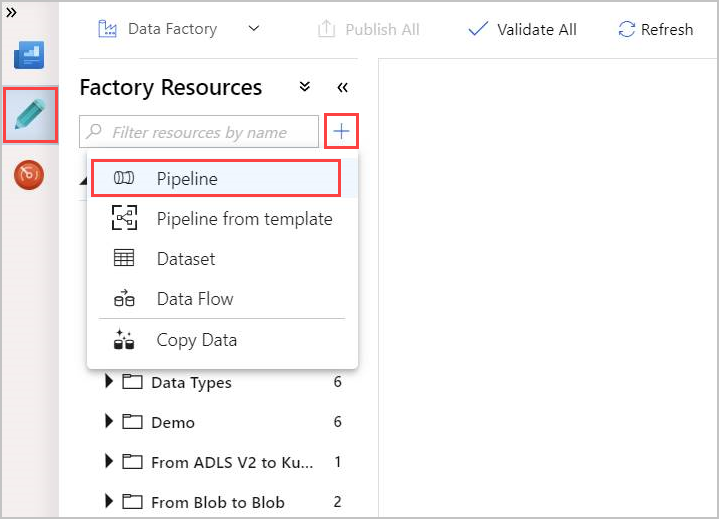
Select the Author pencil tool.
Create a new pipeline by selecting + and then select Pipeline from the dropdown.
Create a Lookup activity
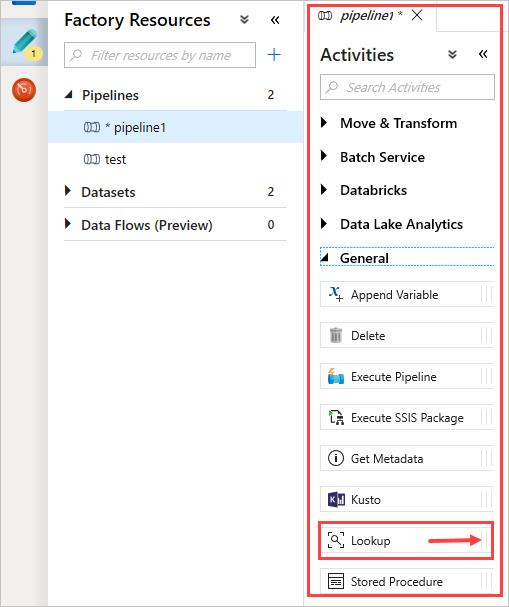
A lookup activity can retrieve a dataset from any Azure Data Factory-supported data source. You can use the output from the Lookup activity in a ForEach or other activity.
In the Activities pane, under General, select the Lookup activity. Drag and drop it into the main canvas on the right.
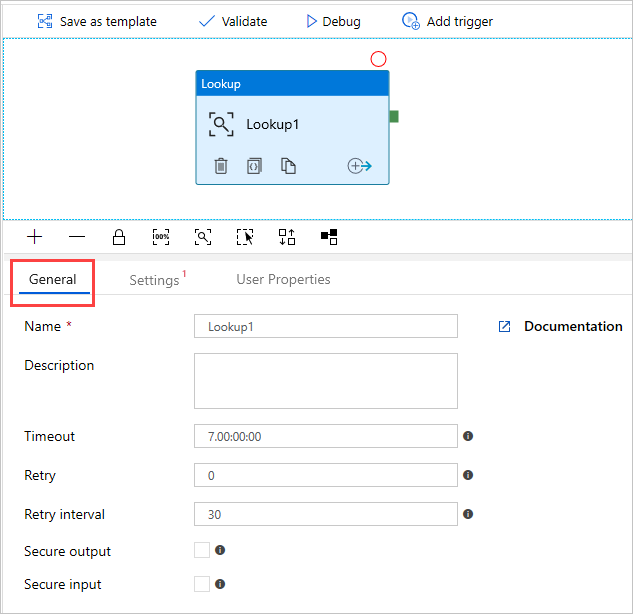
The canvas now contains the Lookup activity you created. Use the tabs under the canvas to change any relevant parameters. In General, rename the activity.
Tip
Select the empty canvas area to view the pipeline properties. Use the General tab to rename the pipeline. The pipeline is named pipeline-4-docs.
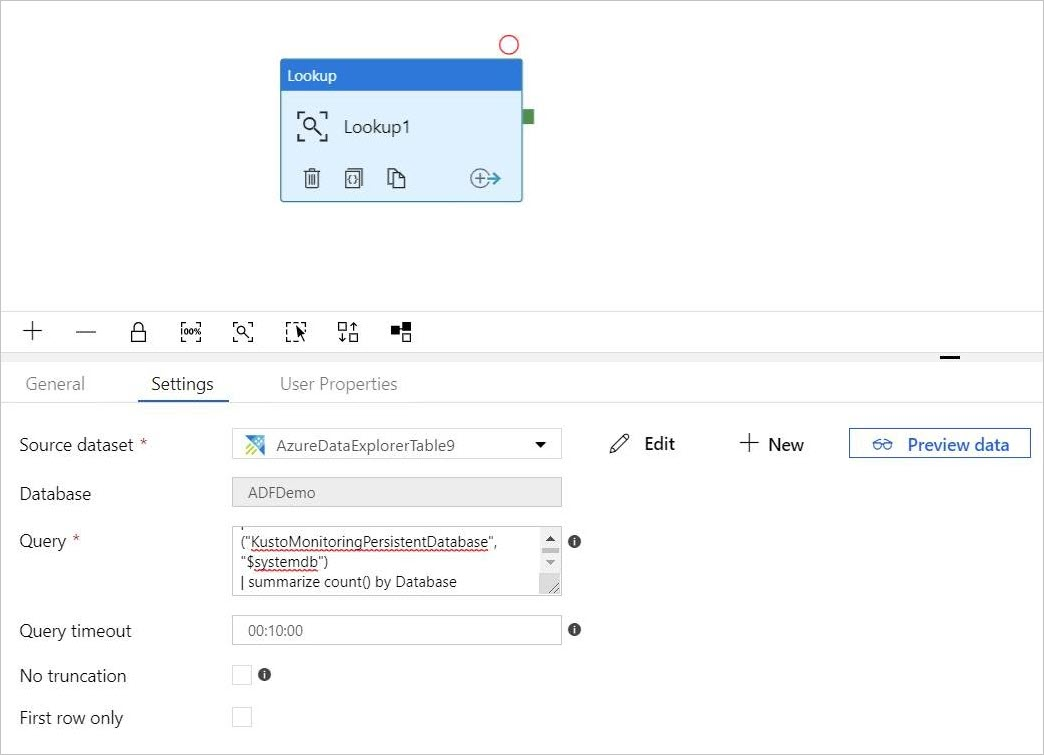
Create an Azure Data Explorer dataset in lookup activity
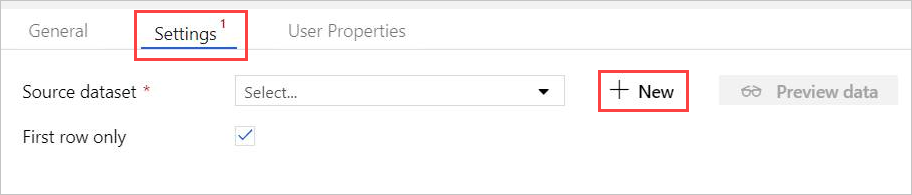
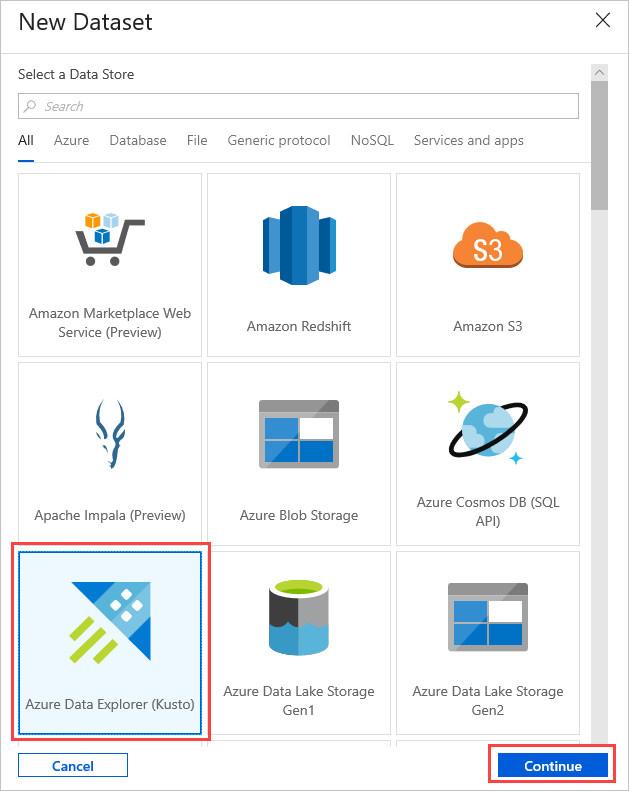
In Settings, select your pre-created Azure Data Explorer Source dataset, or select + New to create a new dataset.
Select the Azure Data Explorer (Kusto) dataset from New Dataset window. Select Continue to add the new dataset.
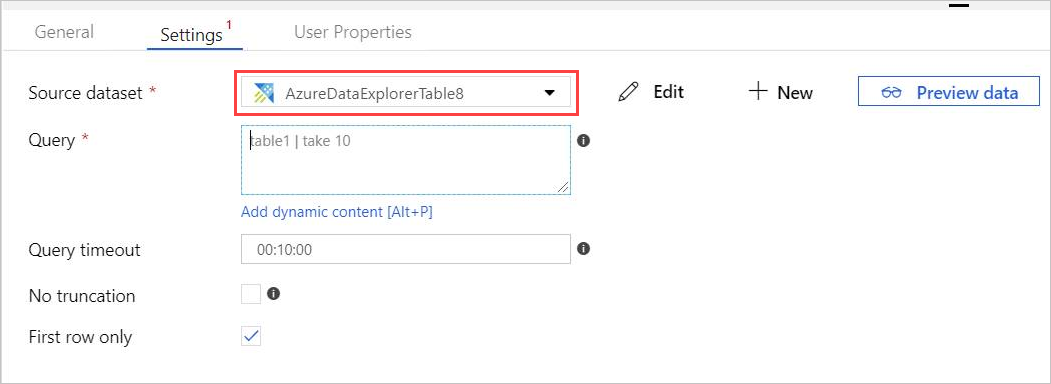
The new Azure Data Explorer dataset parameters are visible in Settings. To update the parameters, select Edit.
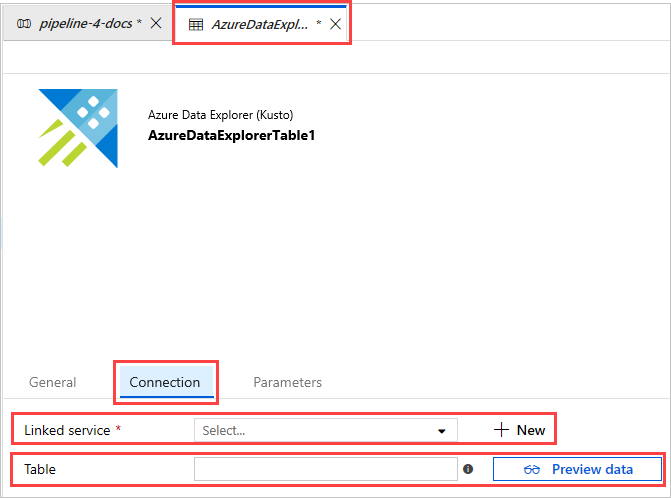
The AzureDataExplorerTable new tab opens in the main canvas.
- Select General and edit the dataset name.
- Select Connection to edit the dataset properties.
- Select the Linked service from the dropdown, or select + New to create a new linked service.
When creating a new linked service, the New Linked Service (Azure Data Explorer) page opens:
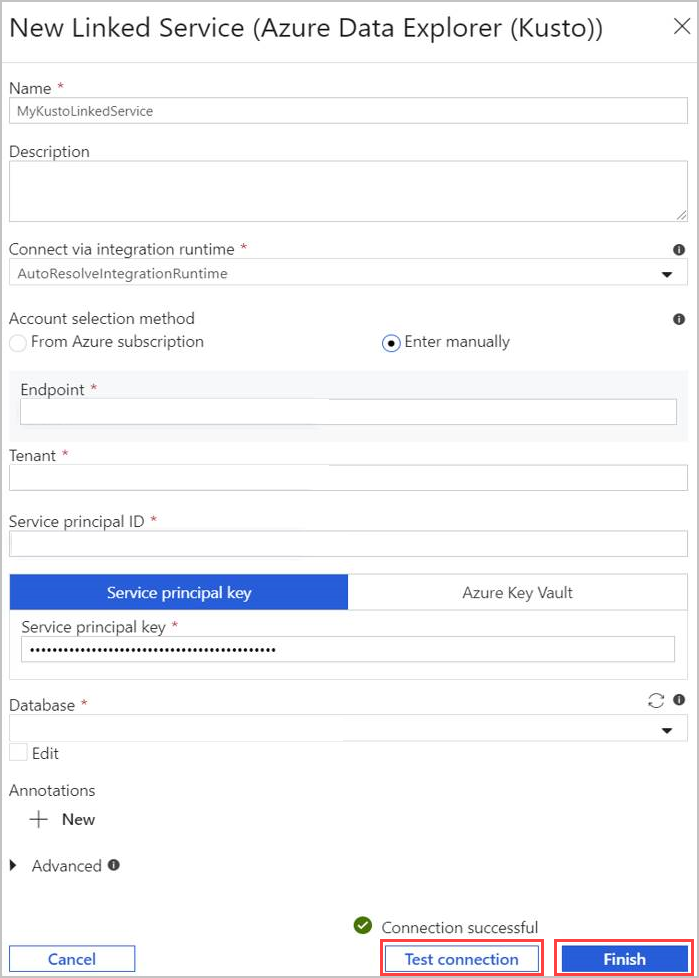
- Select Name for Azure Data Explorer linked service. Add Description if needed.
- In Connect via integration runtime, change current settings, if needed.
- In Account selection method select your cluster using one of two methods:
- Select the From Azure subscription radio button and select your Azure subscription account. Then, select your Cluster. The dropdown only lists clusters that belong to you.
- Instead, select Enter manually radio button and enter your Endpoint (cluster URL).
- Specify the Tenant.
- Enter Service principal ID. Find this value in the Azure portal under App Registrations > Overview > Application (client) ID. The principal must have the adequate permissions, according to the permission level required by the command being used.
- Select Service principal key button and enter Service Principal Key.
- Select your Database from the dropdown menu. Alternatively, select Edit checkbox and enter your database name.
- Select Test Connection to test the linked service connection you created. If you can connect to your setup, a green checkmark Connection successful appears.
- Select Finish to complete linked service creation.
After you set up a linked service, In AzureDataExplorerTable > Connection, add Table name. Select Preview data, to make sure that the data is presented properly.
Your dataset is ready, and you can continue editing your pipeline.
Add a query to your lookup activity
In pipeline-4-docs > Settings, add a query in the Query text box, for example:
ClusterQueries
| where Database !in ("KustoMonitoringPersistentDatabase", "$systemdb")
| summarize count() by Database
Change the Query timeout or No truncation and First row only properties, as needed. In this flow, keep the default Query timeout and uncheck the checkboxes.
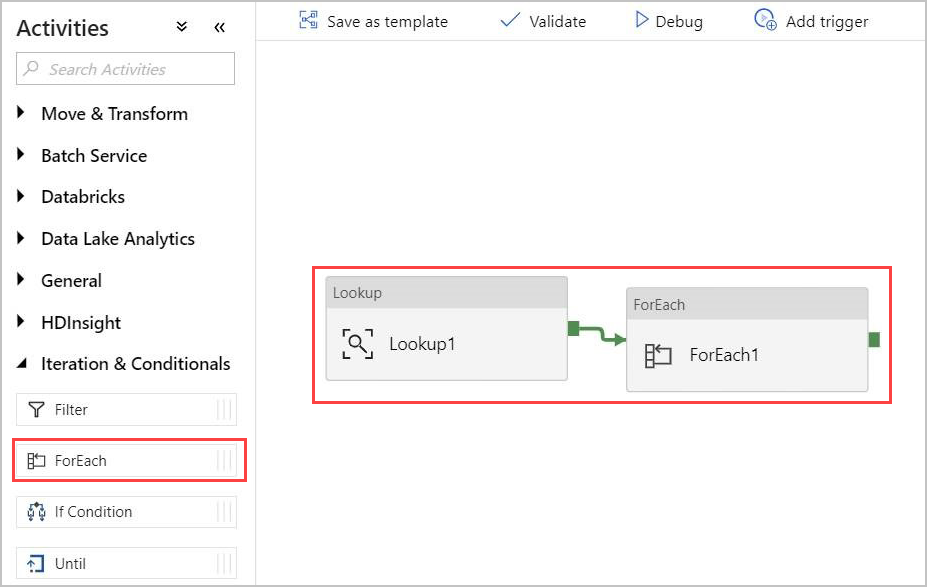
Create a For-Each activity
Use the For-Each activity to iterate over a collection and execute specified activities in a loop.
Add a For-Each activity to the pipeline. This activity processes the data returned from the Lookup activity.
In the Activities pane, under Iteration & Conditionals, select the ForEach activity. Drag and drop it into the canvas.
Draw a line between the output of the Lookup activity and the input of the ForEach activity in the canvas to connect them.
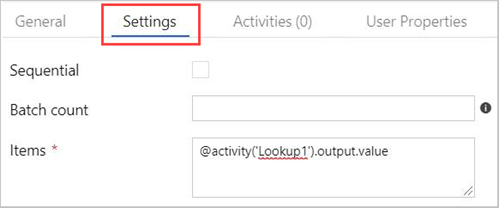
Select the ForEach activity in the canvas. In the Settings tab:
Check the Sequential checkbox for a sequential processing of the Lookup results, or leave it unchecked to create parallel processing.
Set Batch count.
In Items, provide the following reference to the output value: @activity('Lookup1').output.value
Create an Azure Data Explorer Command activity within the ForEach activity
Double-click the ForEach activity in the canvas to open it in a new canvas. Specify the activities within ForEach.
In the Activities pane, under Azure Data Explorer, select the Azure Data Explorer Command activity and drag and drop it into the canvas.
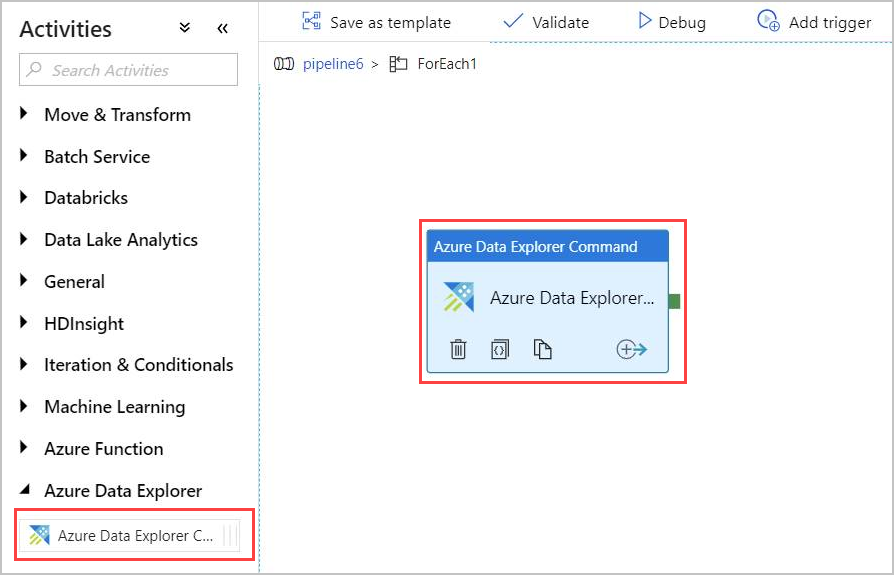
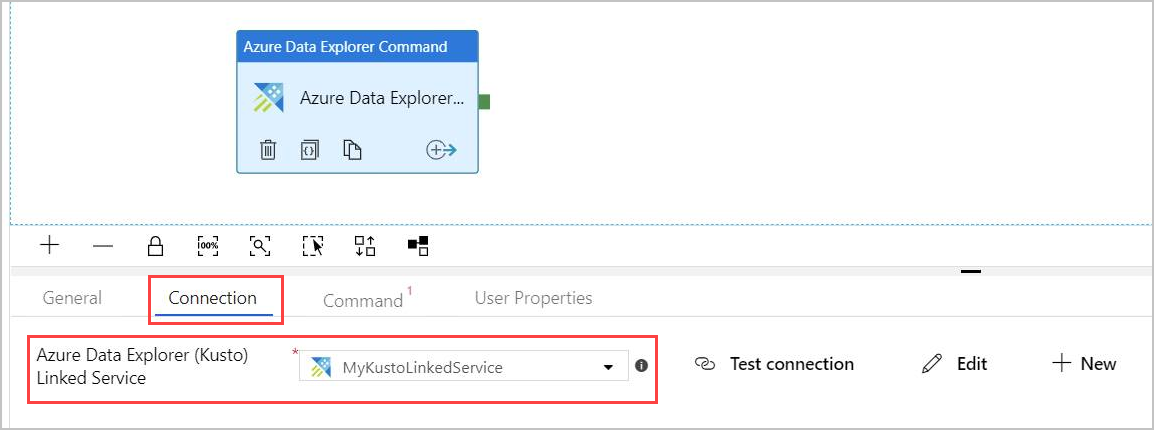
In the Connection tab, select the same Linked Service you previously created.
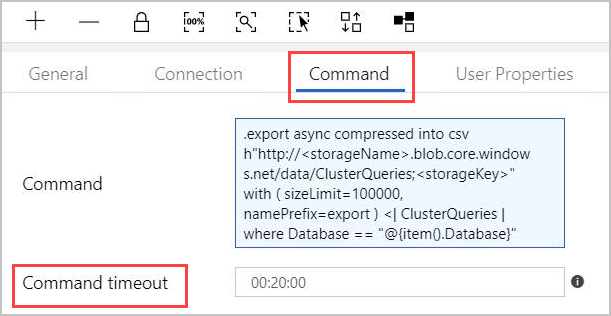
In the Command tab, provide the following command:
.export
async compressed
into csv h"http://<storageName>.blob.core.windows.net/data/ClusterQueries;<storageKey>" with (
sizeLimit=100000,
namePrefix=export
)
<| ClusterQueries | where Database == "@{item().Database}"
The Command instructs Azure Data Explorer to export the results of a given query into a blob storage, in a compressed format. It runs asynchronously (using the async modifier). The query addresses the database column of each row in the Lookup activity result. You can leave the Command timeout unchanged.
Note
The command activity has the following limits:
- Size limit: 1 MB response size
- Time limit: 20 minutes (default), 1 hour (maximum).
- If needed, you can append a query to the result using AdminThenQuery, to reduce resulting size or time.
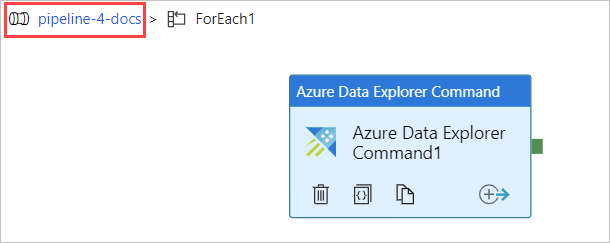
Now the pipeline is ready. You can go back to the main pipeline view by selecting the pipeline name.
Select Debug before publishing the pipeline. You can monitor the pipeline progress in the Output tab.

Select Publish All and then Add trigger to run the pipeline.
Management command outputs
The following section describes the structure of the command activity output. The next activity in the pipeline can use this output.
Returned value of a non-async management command
In a non-async management command, the structure of the returned value is similar to the structure of the Lookup activity result. The count field shows the number of returned records. A fixed array field value contains a list of records.
{
    "count": "2",
    "value": [
        {
            "ExtentId": "1b9977fe-e6cf-4cda-84f3-4a7c61f28ecd",
            "ExtentSize": 1214.0,
            "CompressedSize": 520.0
        },
        {
            "ExtentId": "b897f5a3-62b0-441d-95ca-bf7a88952974",
            "ExtentSize": 1114.0,
            "CompressedSize": 504.0
        }
    ]
}
Returned value of an async management command
In an async management command, the activity polls the operations table behind the scenes, until the async operation is completed or times out. Therefore, the returned value contains the result of .show operations OperationId for that given OperationId property. Check the values of State and Status properties, to verify successful completion of the operation.
{
    "count": "1",
    "value": [
        {
            "OperationId": "910deeae-dd79-44a4-a3a2-087a90d4bb42",
            "Operation": "TableSetOrAppend",
            "NodeId": "",
            "StartedOn": "2019-06-23T10:12:44.0371419Z",
            "LastUpdatedOn": "2019-06-23T10:12:46.7871468Z",
            "Duration": "00:00:02.7500049",
            "State": "Completed",
            "Status": "",
            "RootActivityId": "f7c5aaaf-197b-4593-8ba0-e864c94c3c6f",
            "ShouldRetry": false,
            "Database": "MyDatabase",
            "Principal": "<some principal id>",
            "User": "<some User id>"
        }
    ]
}