Note
Access to this page requires authorization. You can try signing in or changing directories.
Access to this page requires authorization. You can try changing directories.
Note
This article provides steps about how to delete personal data from the device or service and can be used to support your obligations under the GDPR. For general information about GDPR, see the GDPR section of the Microsoft Trust Center and the GDPR section of the Service Trust portal.
Azure Data Explorer supports the ability to delete individual records. Data deletion through the .purge command protects personal data and shouldn't be used in other scenarios. It isn't designed to support frequent delete requests, or deletion of massive quantities of data, and may have a significant performance impact on the service.
Executing a .purge command triggers a process that can take a few days to complete. If the "density" of records on which the predicate is applied is large, the process will reingest all the data in the table. This process has a significant impact on performance and COGS (cost of goods sold). For more information, see Data purge in Azure Data Explorer.
Methods of invoking purge operations
Azure Data Explorer supports both individual record deletion and purging an entire table. The .purge command can be invoked in two ways for differing usage scenarios:
Programmatic invocation: A single step that is intended to be invoked by applications. Calling this command directly triggers the purge execution sequence.
Human invocation: A two-step process that requires an explicit confirmation as a separate step. Invocation of the command returns a verification token, which should be provided to run the actual purge. This process reduces the risk of inadvertently deleting incorrect data. Using this option may take a long time to complete on large tables with significant cold cache data.
Prerequisites
- If you don't have an Azure subscription, create a free Azure account before you begin.
- Sign in to the Azure Data Explorer web UI.
- Create an Azure Data Explorer cluster and database
Enable data purge on your cluster
Warning
- Enabling data purge requires service restart that may result in query drop.
- Please review the limitations prior to enabling data purge.
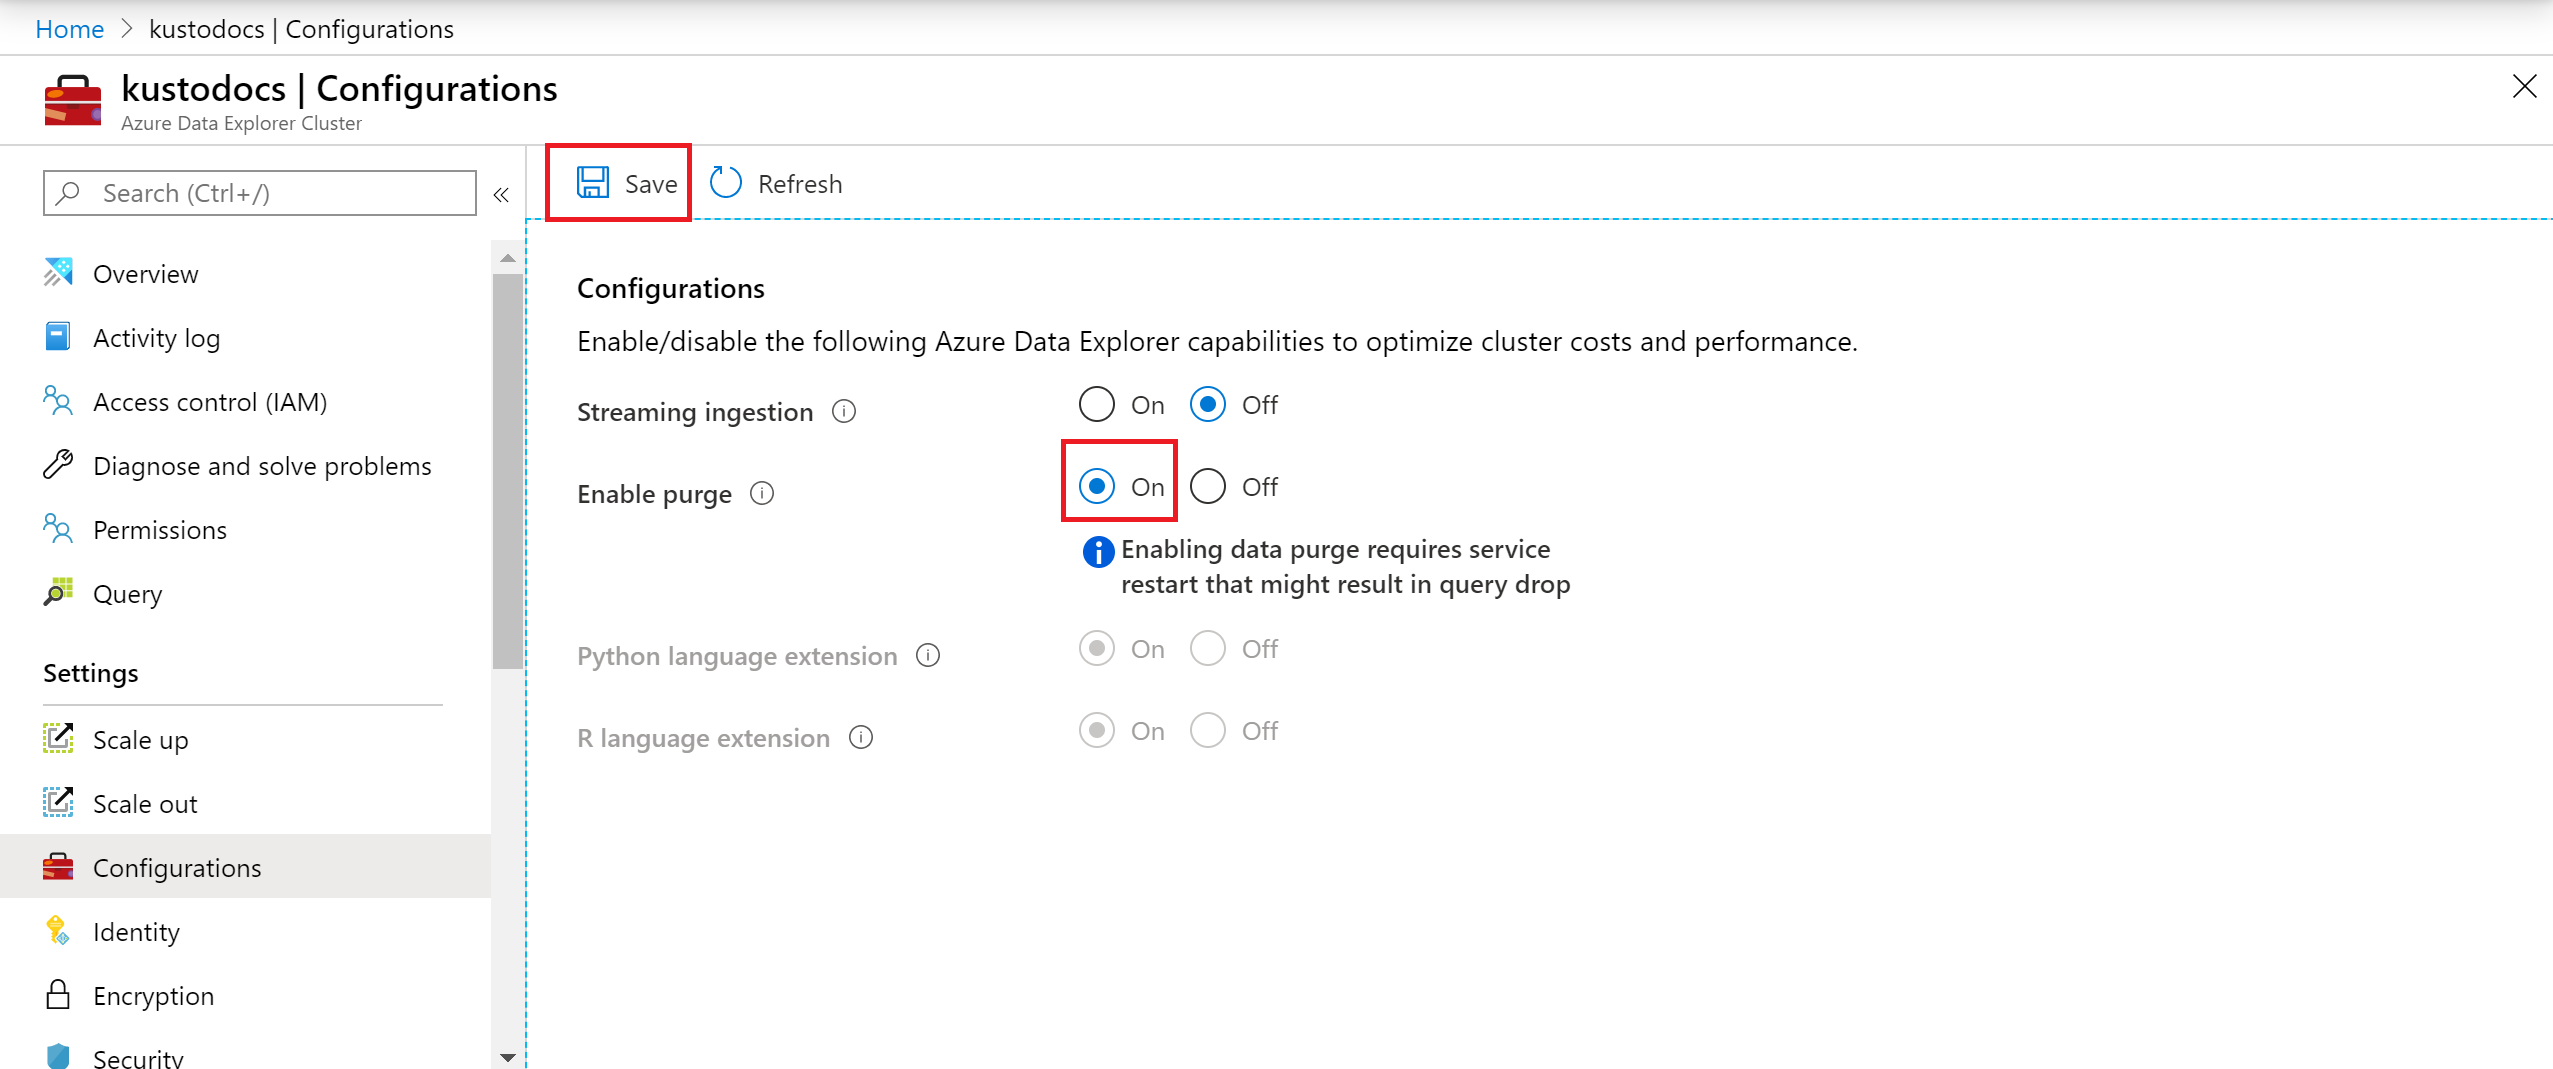
In the Azure portal, go to your Azure Data Explorer cluster.
In Settings, select Configurations.
In the Configurations pane, select On to enable Enable Purge.
Select Save.
Disable data purge on your cluster
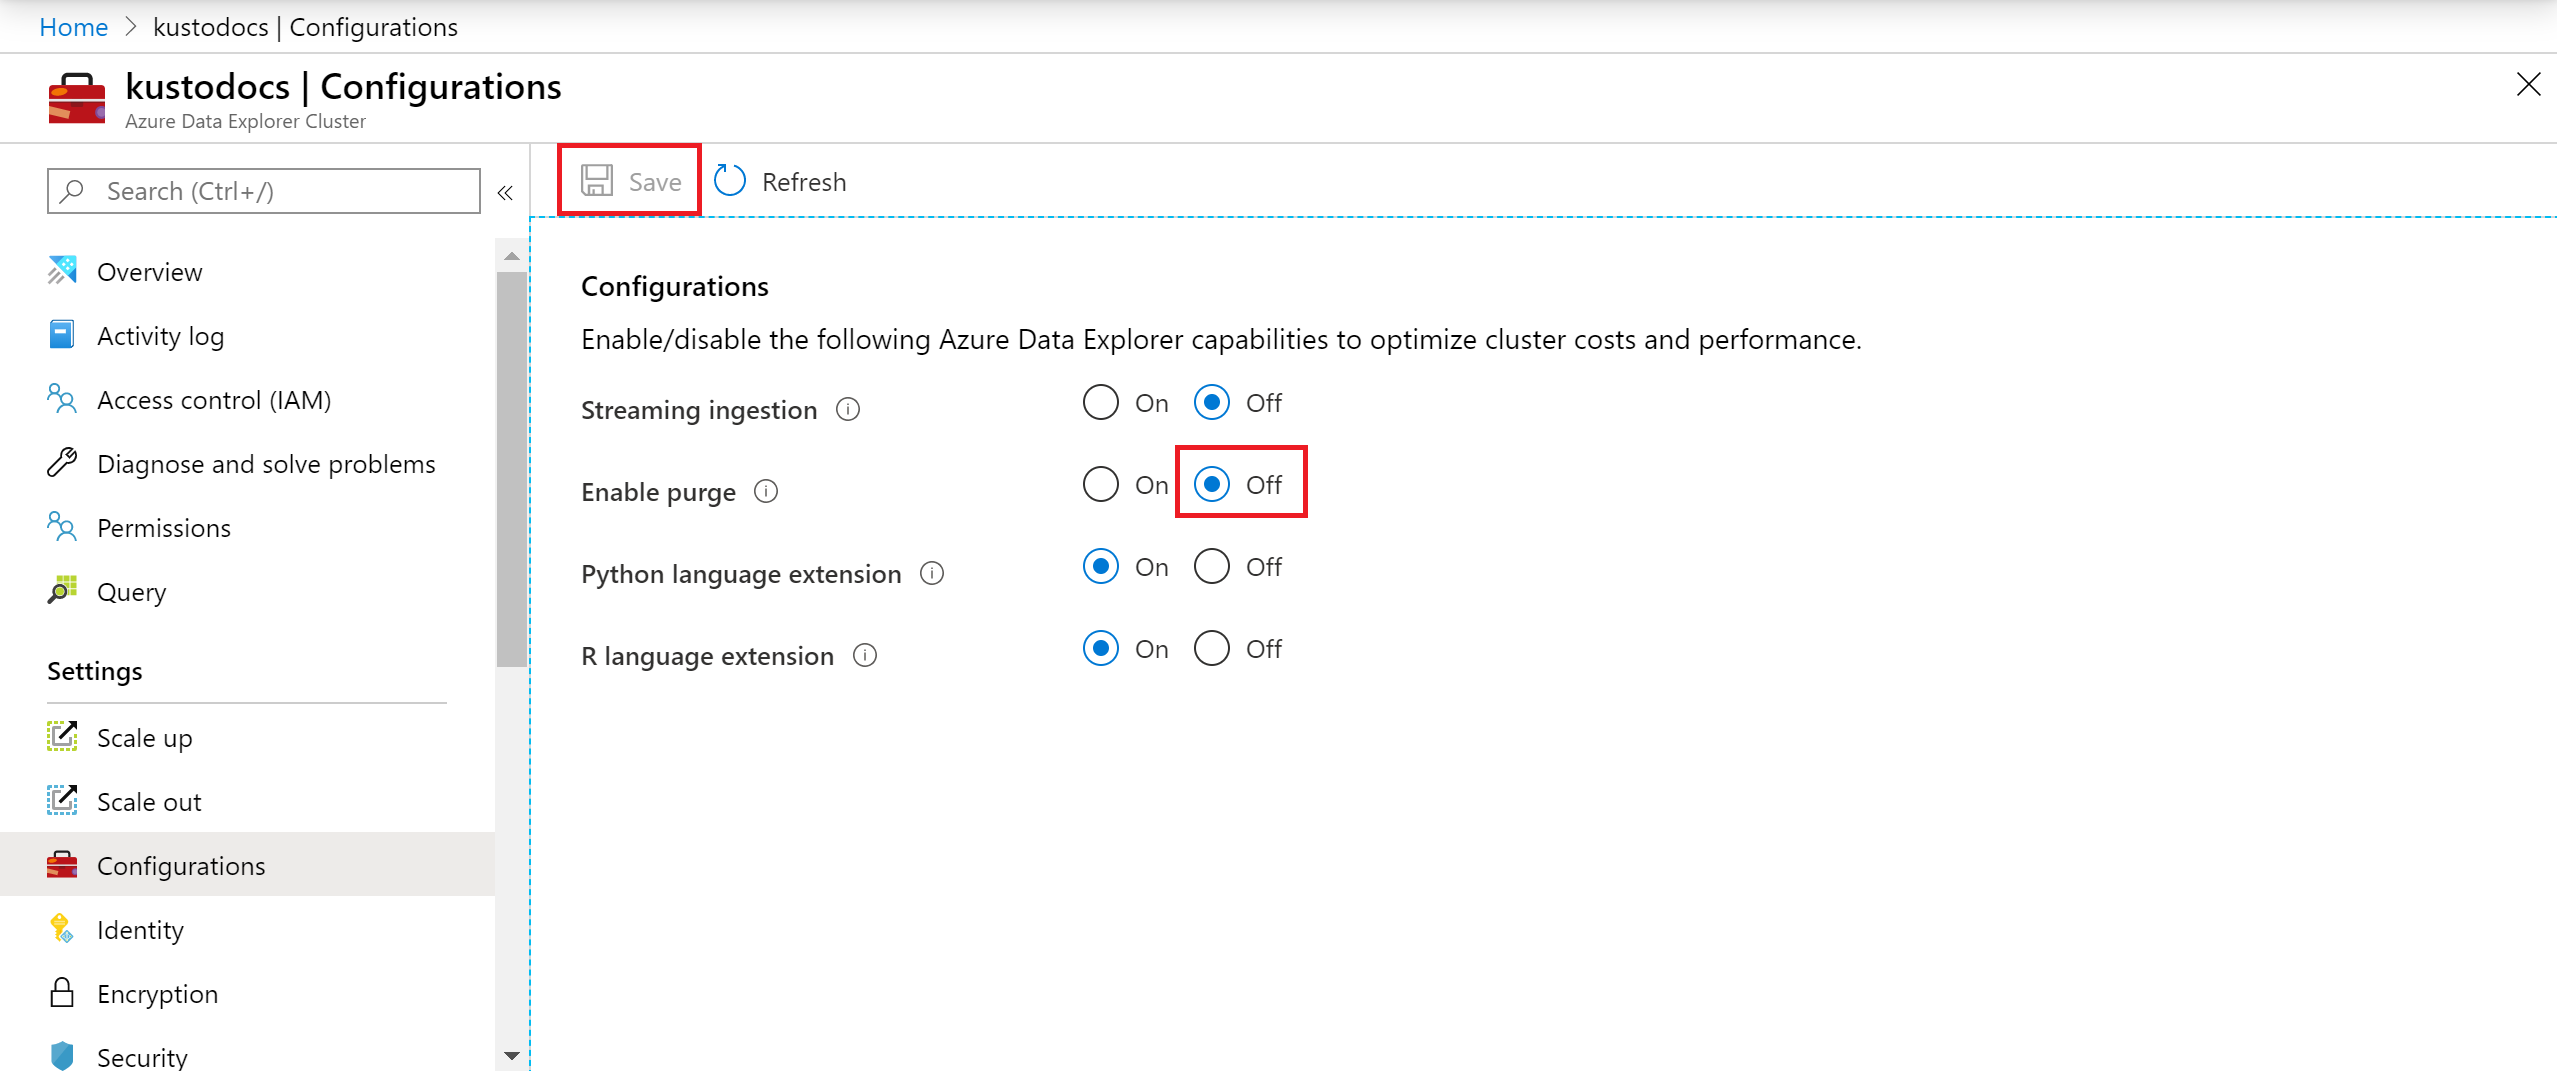
In the Azure portal, go to your Azure Data Explorer cluster.
In Settings, select Configurations.
In the Configurations pane, select Off to disable Enable purge.
Select Save.
Limitations
- The purge process is final and irreversible. It isn't possible to "undo" this process or recover data that has been purged. Therefore, commands such as undo table drop can't recover purged data, and rollback of the data to a previous version can't go to "before" the latest purge.
- The
.purgecommand is executed against the Data Management endpoint: https://ingest-[YourClusterName].[Region].kusto.windows.net. The command requires database admin permissions on the relevant databases. - Due to the purge process performance impact, the caller is expected to modify the data schema so that minimal tables include relevant data, and batch commands per table to reduce the significant COGS impact of the purge process.
- The
predicateparameter of the purge command is used to specify which records to purge.Predicatesize is limited to 63 KB.