How to ingest historical data into Azure Data Explorer
A common scenario when onboarding to Azure Data Explorer is to ingest historical data, sometimes called backfill. The process involves ingesting data from an existing storage system into a table, which is a collection of extents.
We recommend ingesting historical data using the creationTime ingestion property to set the creation time of extents to the time the data was created. Using the creation time as the ingestion partitioning criterion can age your data in accordance with your cache and retention policies, and make time filters more efficient.
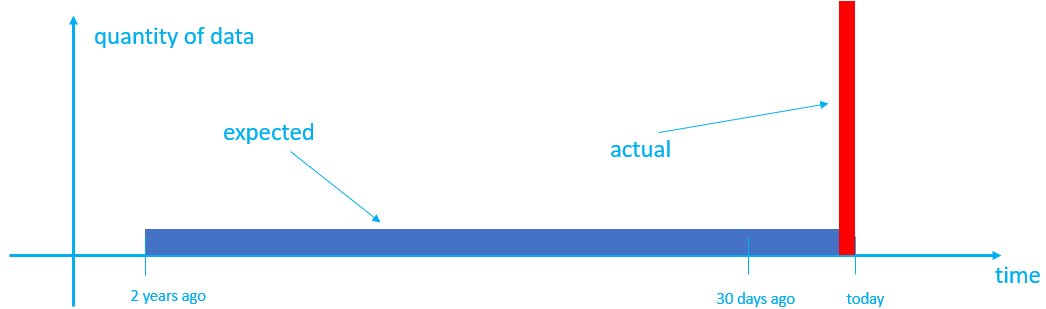
By default, the creation time for extents is set to the time when the data is ingested, which might not produce the behavior you're expecting. For example, suppose you have a table that has a cache period of 30 days and a retention period of two years. In the normal flow, data ingested as it's produced is cached for 30 days and then moved to cold storage. After two years, based on it's creation time, older data is removed one day at a time. However, if you ingest two years of historical data where, by default, the data is marked with creation time as the time the data is ingested. This might not produce the desired outcome because:
- All the data lands in cache and stays there for 30 days, using more cache than you anticipated.
- Older data isn't removed one day at a time; hence data is retained in the cluster for longer than necessary and, after two years, is all removed at once.
- Data, previously grouped by date in the source system, may now be batched together in the same extent leading to inefficient queries.
In this article, you learn how to partition historical data:
Using the
creationTimeingestion property during ingestion (recommended)Where possible, ingest historical data using the
creationTimeingestion property, which allows you to set the creation time of the extents by extracting it from the file or blob path. If your folder structure doesn't use a creation date pattern, we recommend that you restructure your file or blob path to reflect the creation time. By using this method, the data is ingested into the table with the correct creation time, and the cache and retention periods are applied correctly.Note
By default, extents are partitioned by time of creation (ingestion), and in most cases there's no need to set a data partitioning policy.
Using a partitioning policy post ingestion
If you can't use the
creationTimeingestion property, for example if you're ingesting data using the Azure Cosmos DB connector where you can't control the creation time or if you can't restructure your folder structure, you can repartition the table post ingestion to achieve the same effect using the partitioning policy. However, this method may require some trial and error to optimize policy properties and is less efficient than using thecreationTimeingestion property. We only recommended this method when using thecreationTimeingestion property isn't possible.
Prerequisites
- A Microsoft account or a Microsoft Entra user identity. An Azure subscription isn't required.
- An Azure Data Explorer cluster and database. Create a cluster and database.
- A storage account.
- For the recommended method of using the
creationTimeingestion property during ingestion, install LightIngest.
Ingest historical data
We highly recommend partitioning historical data using the creationTime ingestion property during ingestion. However, if you can't use this method, you can repartition the table post ingestion using a partitioning policy.
LightIngest can be useful to load historical data from an existing storage system to Azure Data Explorer. While you can build your own command using the list of Command-line arguments, this article shows you how to autogenerate this command through an ingestion wizard. In addition to creating the command, you can use this process to create a new table, and create schema mapping. This tool infers schema mapping from your dataset.
Destination
In the Azure Data Explorer web UI, from the left menu, select Query.
Right-click the database in which you want to ingest the data, and then select LightIngest.
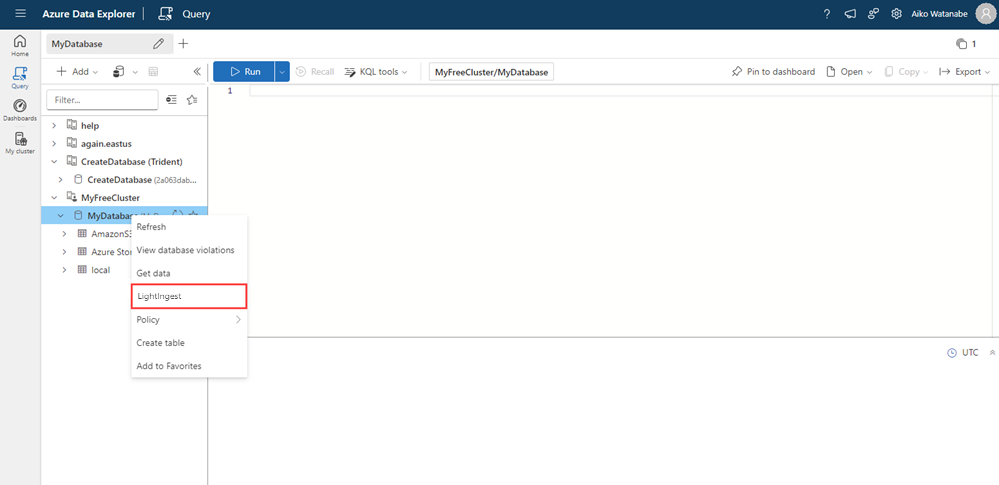
The Ingest data window opens with the Destination tab selected. The Cluster and Database fields are automatically populated.
Select a target table. If you want to ingest data into a new table, select New table, and then enter a table name.
Note
Table names can be up to 1024 characters including spaces, alphanumeric, hyphens, and underscores. Special characters aren't supported.
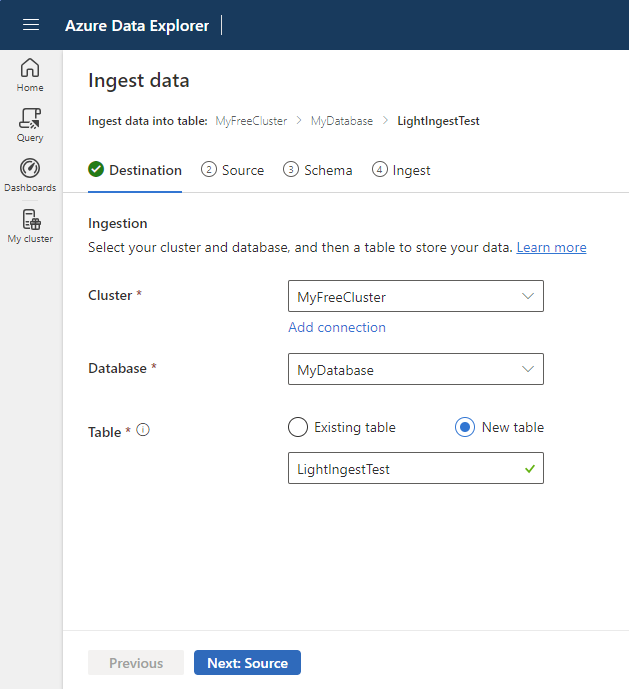
Select Next: Source.

Source
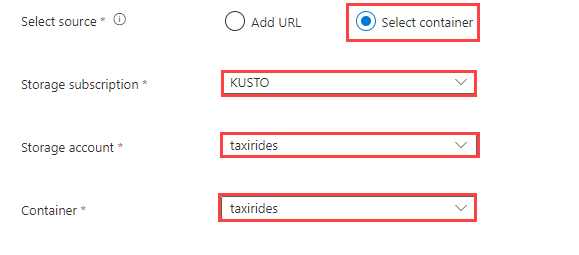
Under Select source, select either Add URL or Select container.
When adding a URL, under Link to source, specify the account key or SAS URL to a container. You can create the SAS URL manually or automatically.
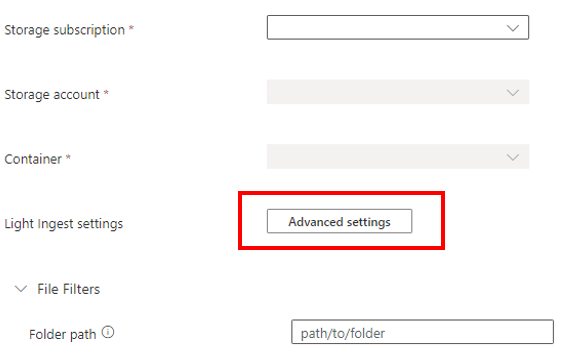
When selecting a container from your storage account, select your Storage subscription, Storage account, and Container from the dropdown menus.
Note
Ingestion supports a maximum file size of 6 GB. The recommendation is to ingest files between 100 MB and 1 GB.
Select Advanced settings to define additional settings for the ingestion process using LightIngest.
In the Advanced configuration pane, define the LightIngest settings according to the following table.
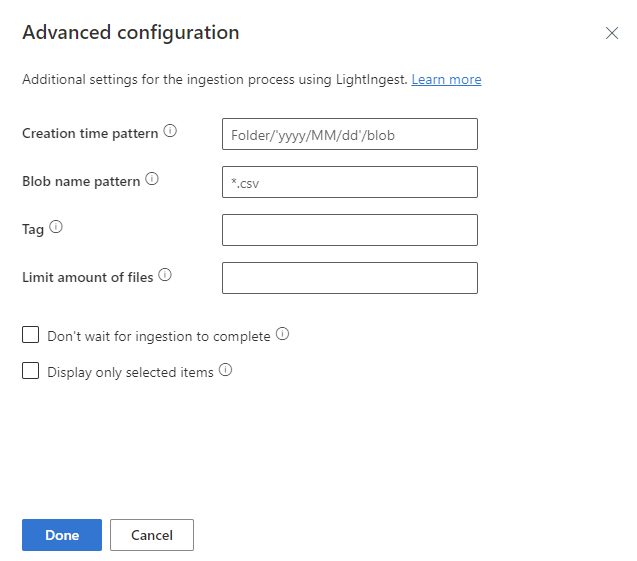
Property Description Creation time pattern Specify to override the ingestion time property of the created extent with a pattern, for example, to apply a date based on the folder structure of the container. See also Creation time pattern. Blob name pattern Specify the pattern used to identify the files to be ingested. Ingest all the files that match the blob name pattern in the given container. Supports wildcards. We recommended enclosing in double quotes. Tag A tag assigned to the ingested data. The tag can be any string. Limit amount of files Specify the number of files that can be ingested. Ingests the first nfiles that match the blob name pattern, up to the number specified.Don't wait for ingestion to complete If set, queues the blobs for ingestion without monitoring the ingestion process. If not set, LightIngest continues to poll the ingestion status until ingestion is complete. Display only selected items List the files in the container, but doesn't ingest them. Select Done to return to the Source tab.
Optionally, select File Filters to filter the data to ingest only files in a specific folder path or with a particular file extension.
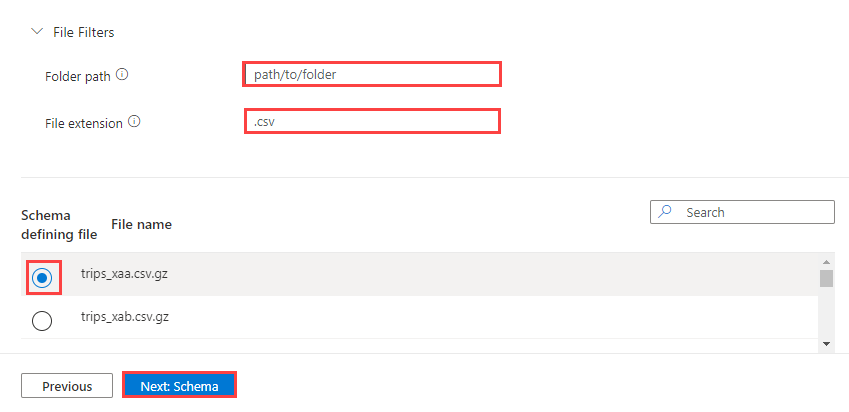
By default, one of the files in the container is randomly selected and used to generate the schema for the table.
Optionally, under Schema defining file, you can specify the file to use.
Select Next: Schema to view and edit your table column configuration.
Schema
The schema tab provides a preview of the data.
To generate the LightIngest command, select Next: Start Ingestion.
Optionally:
- Change the automatically inferred Data format by selecting the desired format from the dropdown menu.
- Change the automatically inferred Mapping name. You can use alphanumeric characters and underscores. Spaces, special characters, and hyphens aren't supported.
- When using an existing table, you can Keep current table schema if the table schema matches the selected format.
- Select Command viewer to view and copy the automatic commands generated from your inputs.
- Edit columns. Under Partial data preview, select the column dropdown menus to alter various aspects of the table.
The changes you can make in a table depend on the following parameters:
- Table type is new or existing
- Mapping type is new or existing
| Table type | Mapping type | Available adjustments |
|---|---|---|
| New table | New mapping | Change data type, Rename column, New column, Delete column, Update column, Sort ascending, Sort descending |
| Existing table | New mapping | New column (on which you can then change data type, rename, and update), Update column, Sort ascending, Sort descending |
| Existing mapping | Sort ascending, Sort descending |
Note
When adding a new column or updating a column, you can change mapping transformations. For more information, see Mapping transformations
Ingest
Once the table, mapping, and LightIngest command are marked with green check marks, select the copy icon on the top-right of the Generated command box to copy the generated LightIngest command.

Note
If required, you can download the LightIngest tool by selecting Download LightIngest.
To complete the ingestion process, you must run LightIngest using the copied command.

Feedback
Coming soon: Throughout 2024 we will be phasing out GitHub Issues as the feedback mechanism for content and replacing it with a new feedback system. For more information see: https://aka.ms/ContentUserFeedback.
Submit and view feedback for