Create a table in Azure Data Explorer
Creating a table is an important step in the process of data ingestion and query in Azure Data Explorer. The following article shows how to create a table and schema mapping quickly and easily using the Azure Data Explorer web UI.
Note
To create a new table based on existing data, see Get data from file or Get data from Azure storage.
Prerequisites
- A Microsoft account or a Microsoft Entra user identity. An Azure subscription isn't required.
- An Azure Data Explorer cluster and database. Create a cluster and database.
- Database User or Database Admin permissions. For more information, see Kusto role-based access control.
- Sign in to the Azure Data Explorer web UI and add a connection to your cluster.
Note
To enable access between a cluster and a storage account without public access (restricted to private endpoint/service endpoint), see Create a Managed Private Endpoint.
Create a table
In the navigation pane, select Query.
Select + Add > Table or right-click on the database where you want to create the table and select Create table.
Destination tab
The Create table window opens with the Destination tab selected.
The Cluster and Database fields are prepopulated. You may select different values from the drop-down menu.
In Table name, enter a name for your table.
Tip
Table names can be up to 1024 characters including alphanumeric, hyphens, and underscores. Special characters aren't supported.
Select Next: Schema
Schema tab
Select Add new column and the Edit columns panel opens.
For each column, enter Column name and Data type. Create more columns by selecting Add column.
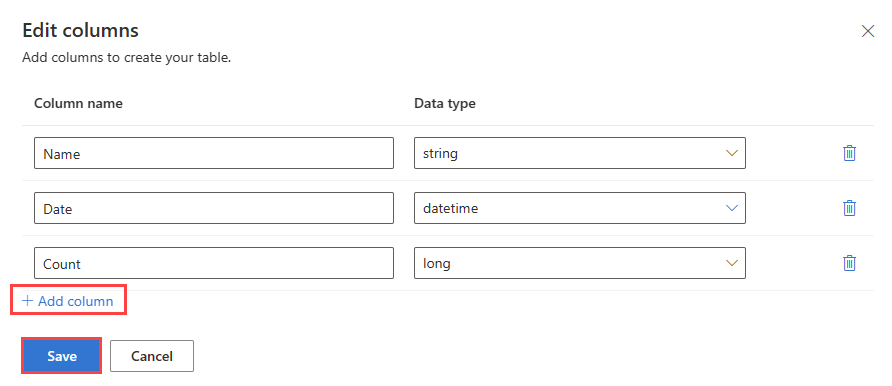
Select Save. The schema is displayed.
Select Next: Create table.
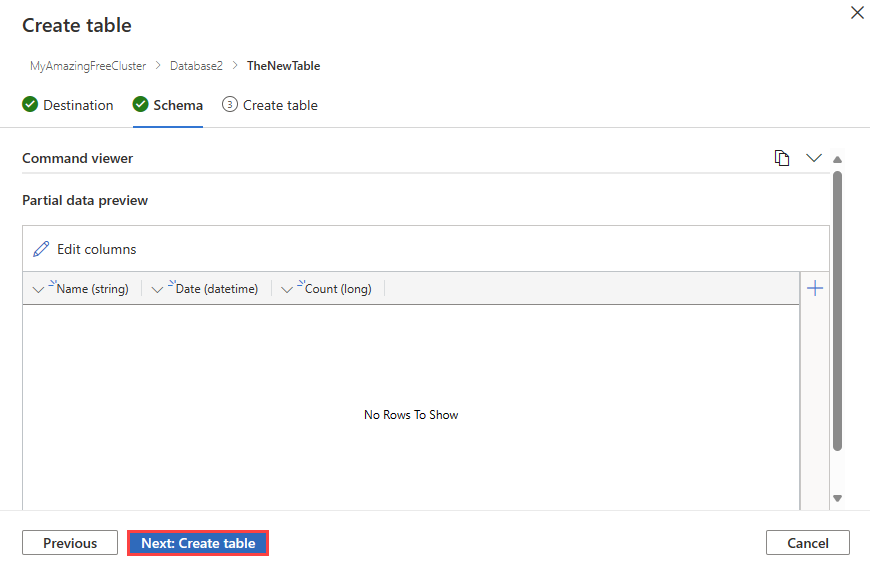
A new table is created in your target destination, with the schema you defined.
Related content
Feedback
Coming soon: Throughout 2024 we will be phasing out GitHub Issues as the feedback mechanism for content and replacing it with a new feedback system. For more information see: https://aka.ms/ContentUserFeedback.
Submit and view feedback for