Note
Access to this page requires authorization. You can try signing in or changing directories.
Access to this page requires authorization. You can try changing directories.
The retention policy controls the mechanism that automatically removes data from tables. It's used to remove data whose relevance is age-based.
The cache policy lets Azure Data Explorer describe the data artifacts that it uses so that important data can take priority. The cache policy defines how much data will be available in a local SSD or RAM. Data is queried faster when it's in a local SSD, particularly for queries that scan large amounts of data. However, a local SSD can cost much more.
In this article, you can define and assign a retention policy and a cache policy for a table using the table retention policy wizard.
Prerequisites
- A Microsoft account or a Microsoft Entra user identity. An Azure subscription isn't required.
- An Azure Data Explorer cluster and database. Create a cluster and database.
Define and assign a table retention policy
In the left menu of the Azure Data Explorer web UI select the Data tab, or use the link.

In the Table retention policy tile, select Update.
The Table retention policy window opens with the Policy update tab selected.
Policy update
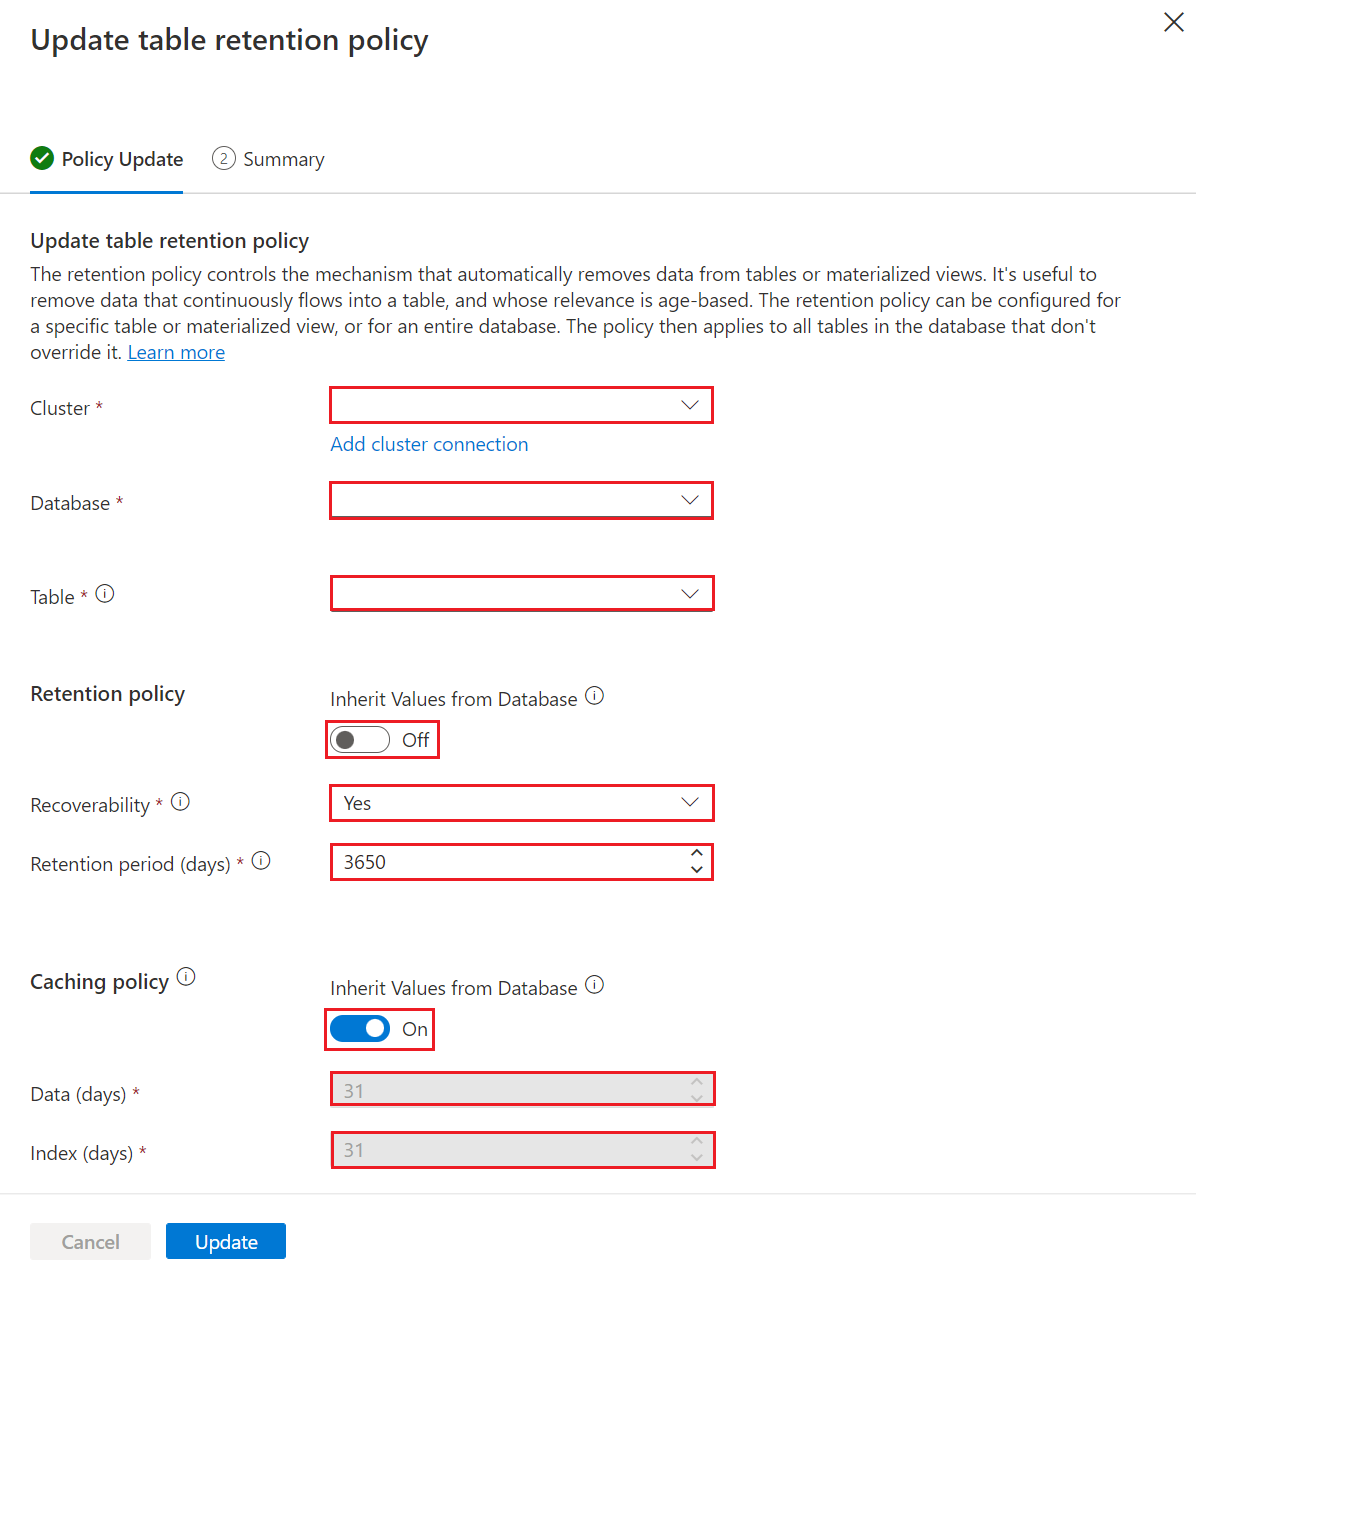
The Cluster and Database fields are auto-populated. You may select a different cluster or database from the dropdown menus, or add a cluster connection.
Under Table, select a table from the dropdown menus.
Under Retention policy, toggle On to apply the retention policy values from the database to the table. To create or update a separate policy for the table, toggle to Off.
If you selected Off for a separate retention policy, you can fill in the following fields:
Setting Default value Field description Recoverability Yes Enable or disable data recoverability. Retention period 365 The number of days that data is stored in long-term storage before it's deleted. The period is measured from the time that the data is ingested. Under Cache policy, toggle On to apply the caching policy values from the database to the table. To create or update a separate policy for the table, toggle to Off.
If you selected Off for a separate cache policy, fill in the following fields:
Setting Default value Field description Data (days) 31 The number of days that frequently queried data is available in RAM or SSD storage where it can be rapidly accessed to optimize query performance. Index (days) 31 The amount of time for indexed access to data stored in external storage. Select Update.
Summary
In the Summary tab, all steps will be marked with green check marks when the update finishes successfully. The tiles below these steps give you options to explore your data with Quick queries, or undo changes made using Tools.
