Note
Access to this page requires authorization. You can try signing in or changing directories.
Access to this page requires authorization. You can try changing directories.
APPLIES TO:  Azure Data Factory
Azure Synapse Analytics
Azure Data Factory
Azure Synapse Analytics
Tip
Try out Data Factory in Microsoft Fabric, an all-in-one analytics solution for enterprises. Microsoft Fabric covers everything from data movement to data science, real-time analytics, business intelligence, and reporting. Learn how to start a new trial for free!
This article describes the feature of Azure-enabled SQL Server Integration Services (SSIS) projects on SQL Server Data Tools (SSDT). It allows you to assess the cloud compatibility of your SSIS packages and run them on Azure-SSIS Integration Runtime (IR) in Azure Data Factory (ADF). You can use this feature to test your existing packages before you lift & shift/migrate them to Azure or to develop new packages to run in Azure.
With this feature, you can attach a newly created/existing Azure-SSIS IR to SSIS projects and then execute your packages on it. We support running packages to be deployed into SSIS catalog (SSISDB) hosted by your Azure SQL Database server or managed instance in Project Deployment Model. We also support running packages to be deployed into file system/Azure Files/SQL Server database (MSDB) hosted by your Azure SQL managed instance in Package Deployment Model.
Prerequisites
To use this feature, please download and install the latest SSDT with SSIS Projects extension for Visual Studio (VS) from here. Alternatively, you can also download and install the latest SSDT as a standalone installer from here.
Azure-enable SSIS projects
Creating new Azure-enabled SSIS projects
On SSDT, you can create new Azure-enabled SSIS projects using the Integration Services Project (Azure-Enabled) template.

After the Azure-enabled project is created, you will be prompted to connect to SSIS in Azure Data Factory.
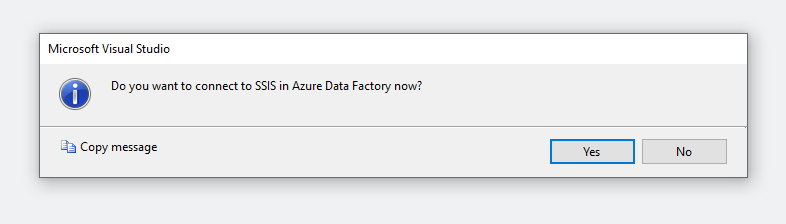
If you want to connect to your Azure-SSIS IR right away, see Connecting to Azure-SSIS IR for more details. You can also connect later by right-clicking on your project node in the Solution Explorer window of SSDT to pop up a menu. Next, select the Connect to SSIS in Azure Data Factory item in SSIS in Azure Data Factory submenu.
Azure-enabling existing SSIS projects
For existing SSIS projects, you can Azure-enable them by following these steps:
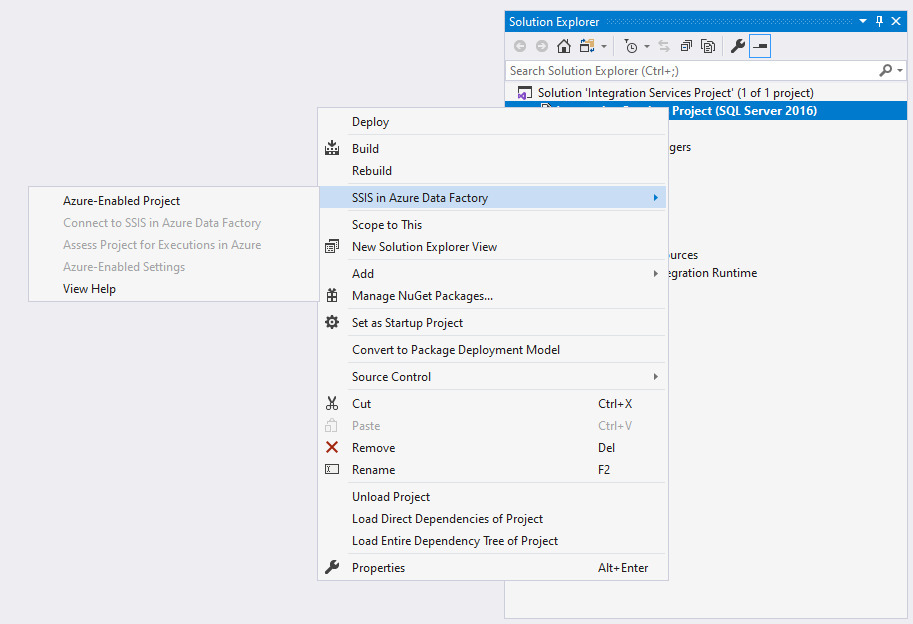
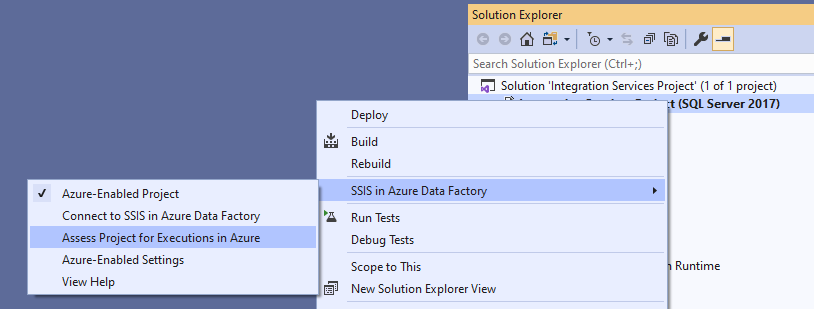
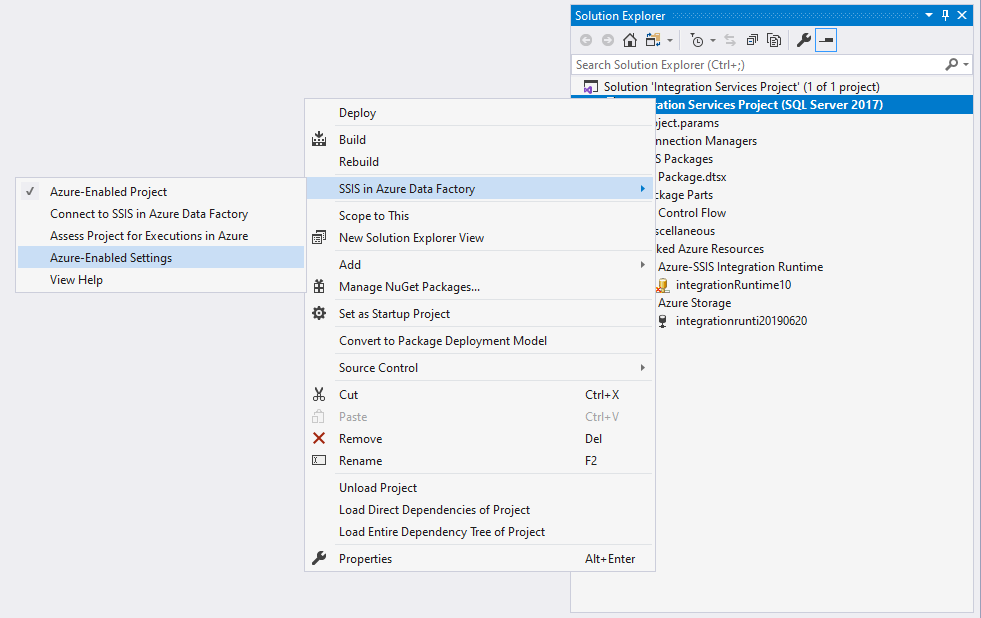
Right-click on your project node in the Solution Explorer window of SSDT to pop up a menu. Next, select the Azure-Enabled Project item in SSIS in Azure Data Factory submenu to launch the Azure-Enabled Project Wizard.
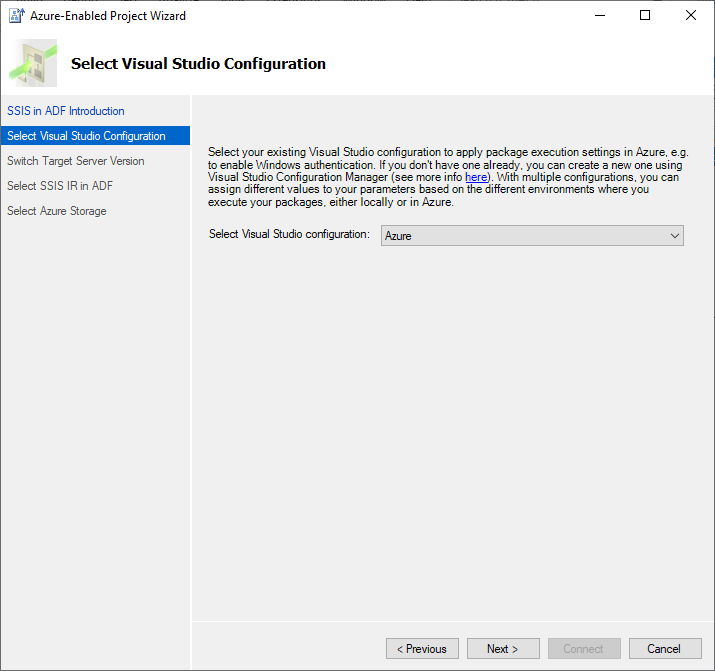
On the Select Visual Studio Configuration page, select your existing VS configuration to apply package execution settings in Azure. You can also create a new one if you haven't done so already, see Creating a new VS configuration. We recommend that you have at least two different VS configurations for package executions in the local and cloud environments, so you can Azure-enable your project against the cloud configuration. In this way, if you've parameterized your project or packages, you can assign different values to your project or package parameters at run-time based on the different execution environments (either on your local machine or in Azure). For example, see Switching package execution environments.
Azure-enabling your existing SSIS projects requires you to set their target server version to be the latest one supported by Azure-SSIS IR. Azure-SSIS IR is currently based on SQL Server 2017. Please ensure that your packages don't contain additional components that are unsupported on SQL Server 2017. Please also ensure that all compatible additional components have also been installed on your Azure-SSIS IR via custom setups, see Customizing your Azure-SSIS IR. Select the Next button to continue.

See Connecting to Azure-SSIS IR to complete connecting your project to Azure-SSIS IR.
Connect Azure-enabled projects to SSIS in Azure Data Factory
By connecting your Azure-enabled projects to SSIS in ADF, you can upload your packages into Azure Files and run them on Azure-SSIS IR. You can do so by following these steps:
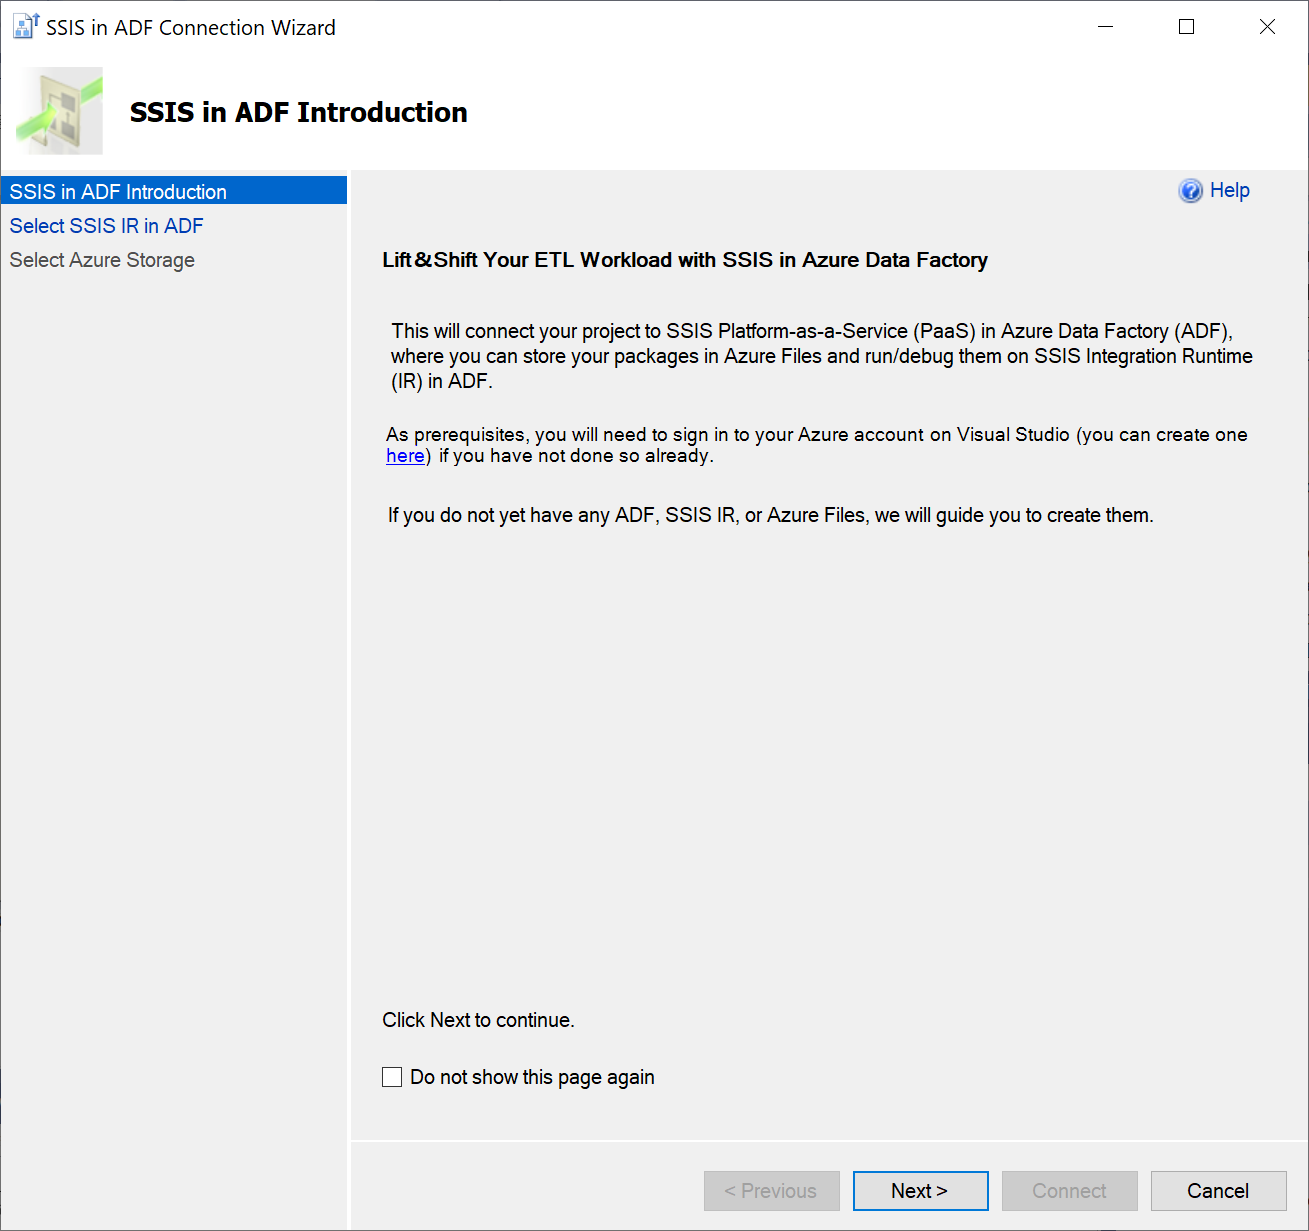
On the SSIS in ADF Introduction page, review the introduction and select the Next button to continue.
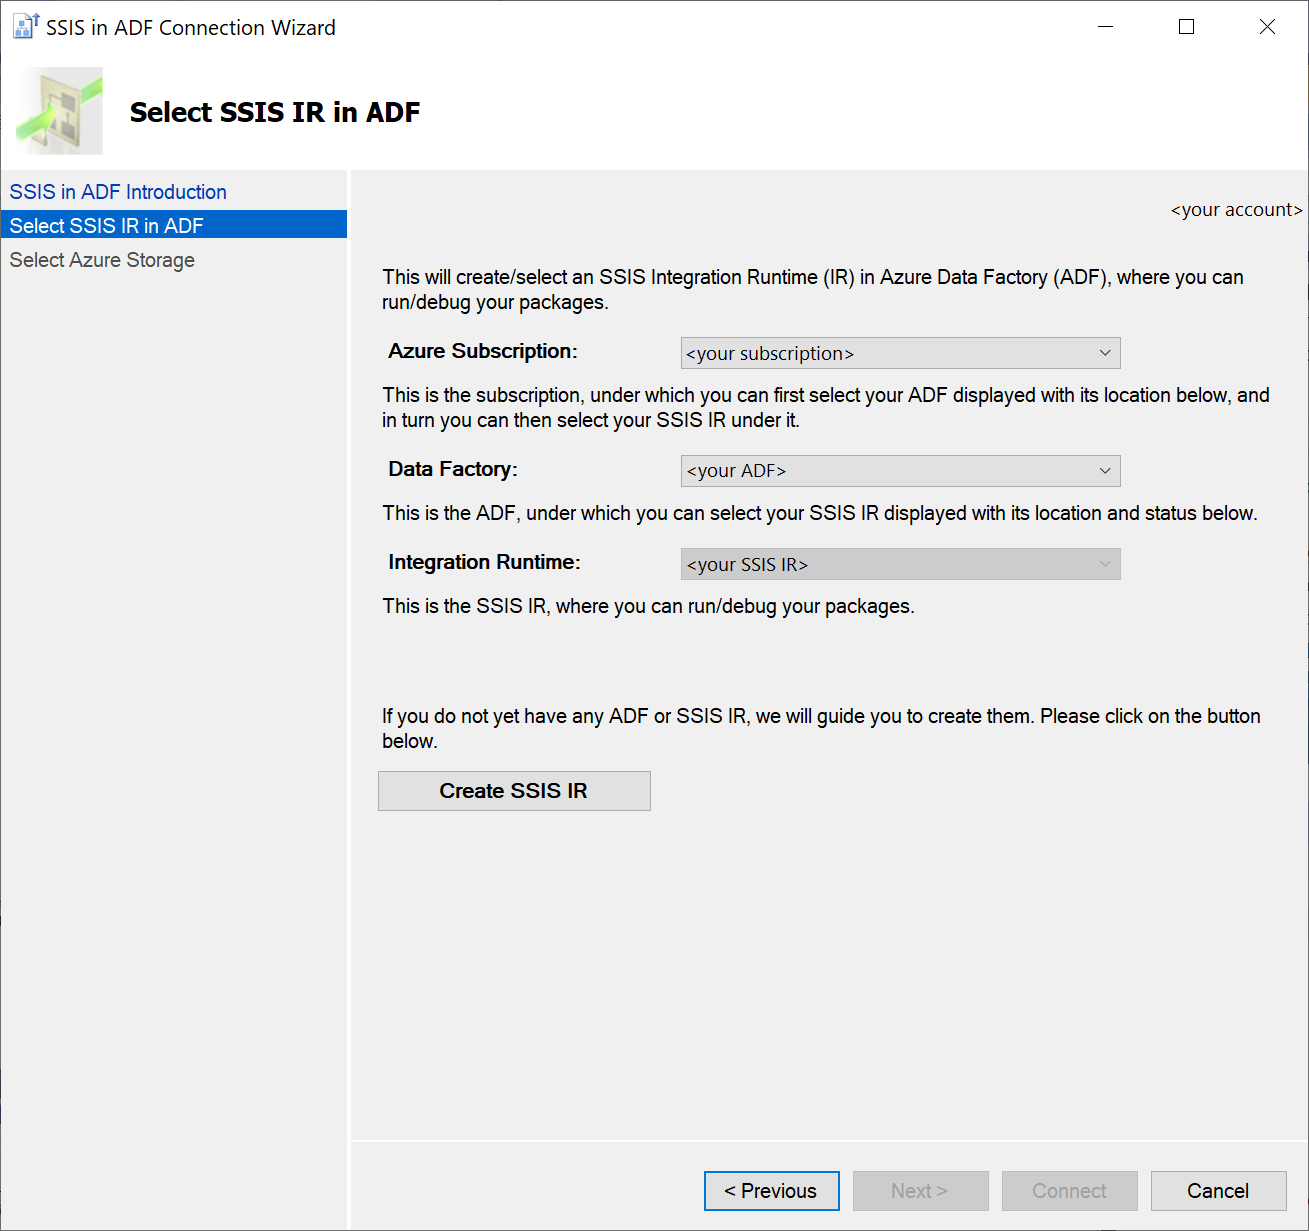
On the Select SSIS IR in ADF page, select your existing ADF and Azure-SSIS IR to run packages. You can also create new ones if you don't have any.
- To select your existing Azure-SSIS IR, select the relevant Azure subscription and ADF first.
- If you select your existing ADF that doesn't have any Azure-SSIS IR, select the Create SSIS IR button to create a new one on ADF portal. Once created, you can return to this page to select your new Azure-SSIS IR.
- If you select your existing Azure subscription that doesn't have any ADF, select the Create SSIS IR button to launch the Integration Runtime Creation Wizard. On the wizard, you can enter your designated location and prefix for us to automatically create a new Azure Resource Group, Data Factory, and SSIS IR on your behalf, named in the following pattern: YourPrefix-RG/DF/IR-YourCreationTime. Once created, you can return to this page to select your new ADF and Azure-SSIS IR.
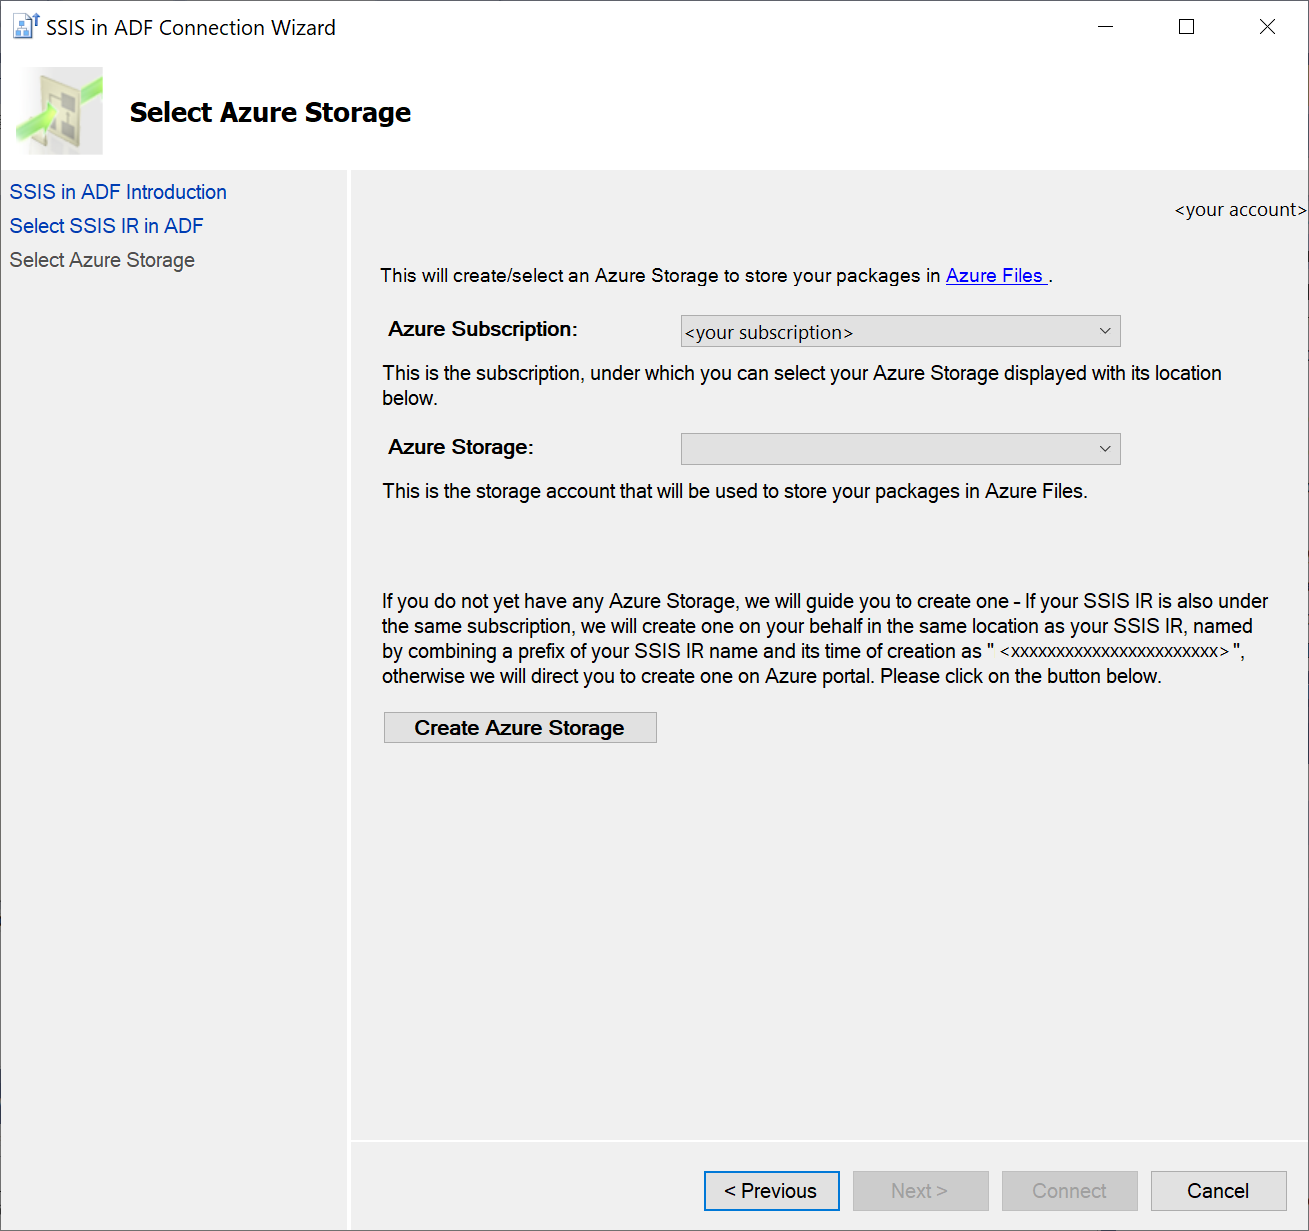
On the Select Azure Storage page, select your existing Azure Storage account to upload packages into Azure Files. You can also create a new one if you don't have any.
- To select your existing Azure Storage account, select the relevant Azure subscription first.
- If you select the same Azure subscription as your Azure-SSIS IR that doesn't have any Azure Storage account, select the Create Azure Storage button. We'll automatically create a new one on your behalf in the same location as your Azure-SSIS IR, named by combining a prefix of your Azure-SSIS IR name and its creation date. Once created, you can return to this page to select your new Azure Storage account.
- If you select a different Azure subscription that doesn't have any Azure Storage account, select the Create Azure Storage button to create a new one on Azure portal. Once created, you can return to this page to select your new Azure Storage account.
Select the Connect button to complete connecting your project to Azure-SSIS IR. We'll display your selected Azure-SSIS IR and Azure Storage account under the Linked Azure Resources node in Solution Explorer window of SSDT. We'll also regularly refresh and display the status of your Azure-SSIS IR there. You can manage your Azure-SSIS IR by right-clicking on its node to pop up a menu and then selecting the Start\Stop\Manage item that takes you to ADF portal to do so.
Assess SSIS project\packages for executions in Azure
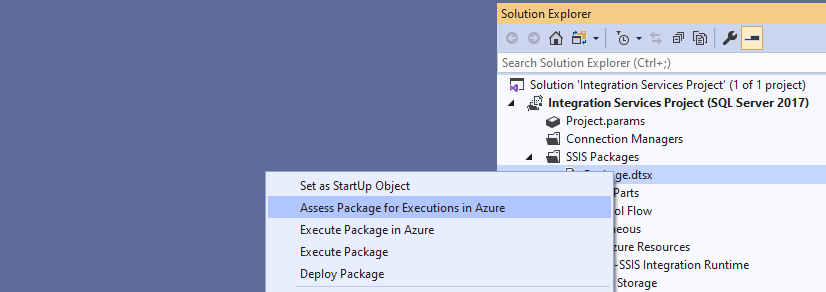
Assessing single or multiple packages
Before executing your packages in Azure, you can assess them to surface any potential cloud compatibility issues. These include migration blockers and additional information that you should be aware of.
You have the options to assess single packages one-by-one or all packages at the same time under your project.
On the Assessment Report window of SSDT, you can find all potential cloud compatibility issues that are surfaced, each with its own detailed description and recommendation. You can also export the assessment report into a CSV file that can be shared with anyone who should mitigate these issues.

Suppressing assessment rules
Once you're sure that some potential cloud compatibility issues aren't applicable or have been properly mitigated in your packages, you can suppress the relevant assessment rules that surface them. This will reduce the noise in your subsequent assessment reports.
Select the Configure Assessment Rule Suppression link in Assessment Report window of SSDT to pop up the Assessment Rule Suppression Settings window, where you can select the assessment rules to suppress.
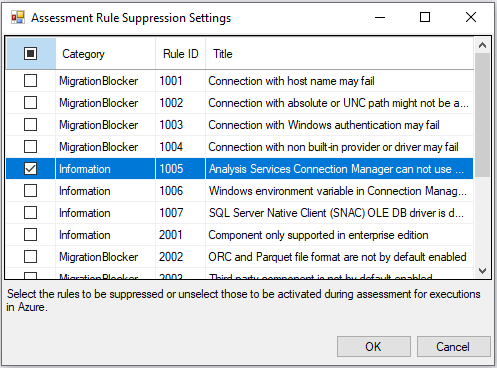
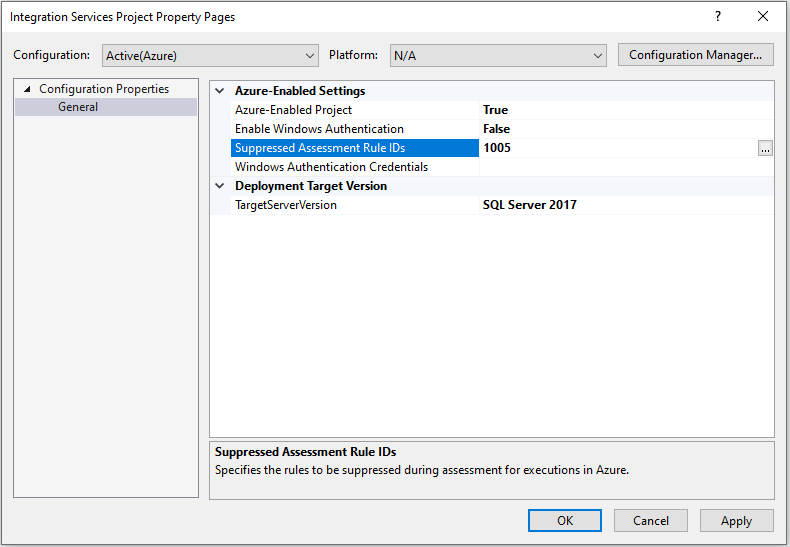
Alternatively, right-click on your project node in the Solution Explorer window of SSDT to pop up a menu. Select the Azure-Enabled Settings item in SSIS in Azure Data Factory submenu to pop up a window containing your project property pages. Select the Suppressed Assessment Rule IDs property in Azure-Enabled Settings section. Finally, select its ellipsis (...) button to pop up the Assessment Rule Suppression Settings window, where you can select the assessment rules to suppress.
Execute SSIS packages in Azure
Configuring Azure-enabled settings
Before executing your packages in Azure, you can configure your Azure-enabled settings for them. For example, you can enable Windows authentication on your Azure-SSIS IR to access on-premises/cloud data stores by following these steps:
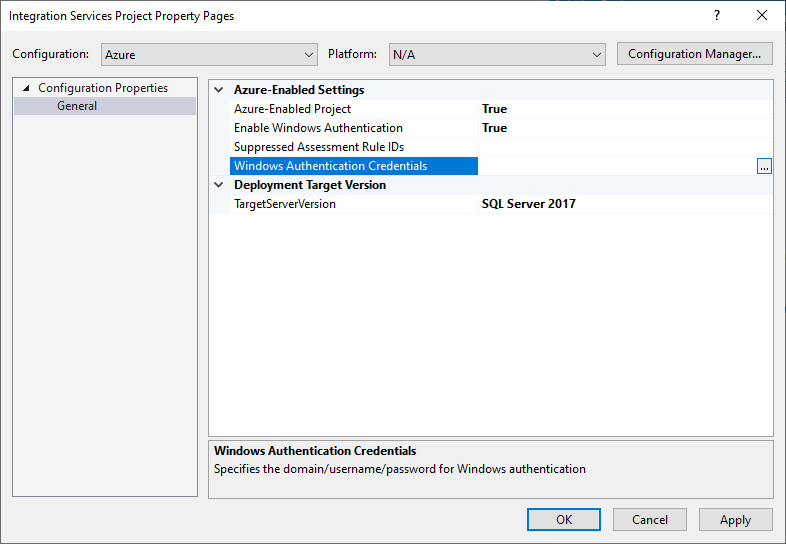
Right-click on your project node in the Solution Explorer window of SSDT to pop up a menu. Next, select the Azure-Enabled Settings item in SSIS in Azure Data Factory submenu to pop up a window containing your project property pages.
Select the Enable Windows Authentication property in Azure-Enabled Settings section and then select True in its dropdown menu. Next, select the Windows Authentication Credentials property and then select its ellipsis (...) button to pop up the Windows Authentication Credentials window.
Enter your Windows authentication credentials. For example, to access Azure Files, you can enter
Azure,YourStorageAccountName, andYourStorageAccountKeyfor Domain, Username, and Password, respectively.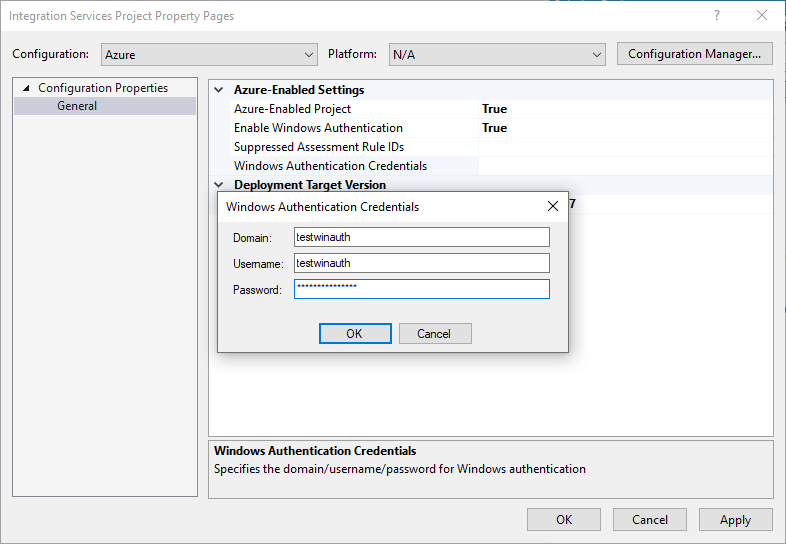
Starting package executions
After connecting your Azure-enabled projects to SSIS in ADF, assessing their cloud compatibility, and mitigating potential issues, you can execute/test your packages on Azure-SSIS IR.
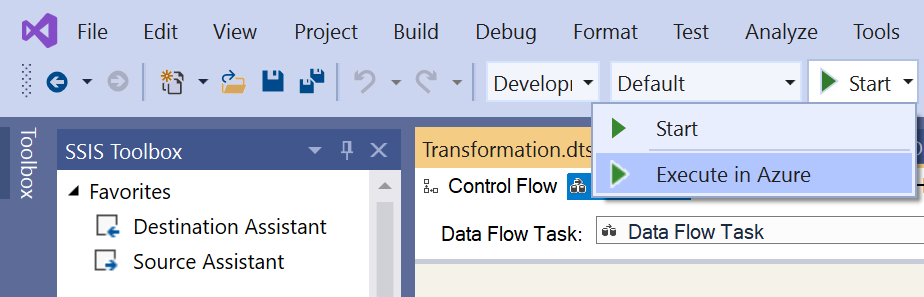
Select the Start button in SSDT toolbar to drop down a menu. Next, select the Execute in Azure item.
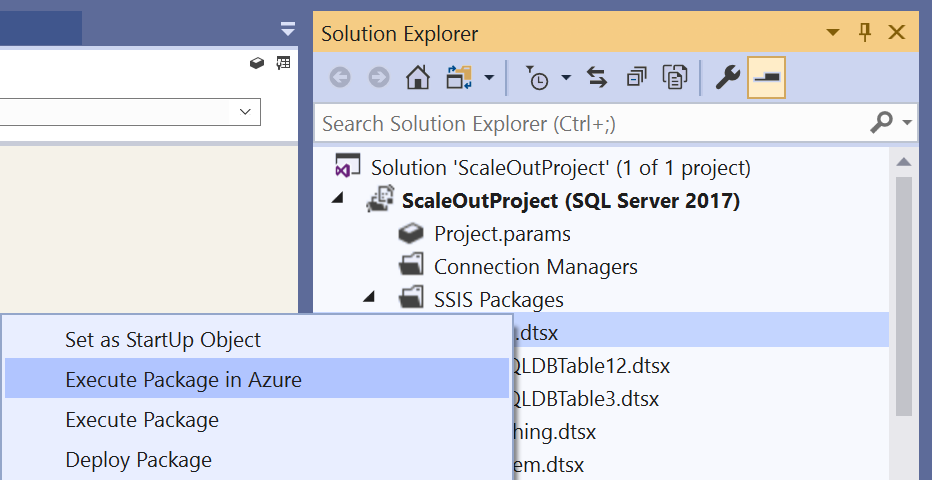
Alternatively, right-click on your package node in the Solution Explorer window of SSDT to pop up a menu. Next, select the Execute Package in Azure item.
Note
Executing your packages in Azure requires you to have a running Azure-SSIS IR, so if your Azure-SSIS IR is stopped, a dialog window will pop up to start it. Excluding any custom setup time, this process should be completed within 5 minutes, but could take approximately 20 - 30 minutes for Azure-SSIS IR joining a virtual network. After executing your packages in Azure, you can stop your Azure-SSIS IR to manage its running cost by right-clicking on its node in the Solution Explorer window of SSDT to pop up a menu and then selecting the Start\Stop\Manage item that takes you to ADF portal to do so.
Using Execute Package Task
If your packages contain Execute Package Tasks that refer to child packages stored on local file systems, follow these additional steps:
Upload the child packages into Azure Files under the same Azure Storage account connected to your projects and get their new Universal Naming Convention (UNC) path, e.g.
\\YourStorageAccountName.file.core.windows.net\ssdtexecution\YourChildPackage1.dtsxReplace the file path of those child packages in the File Connection Manager of Execute Package Tasks with their new UNC path
- If your local machine running SSDT can't access the new UNC path, you can enter it on the Properties panel of File Connection Manager
- Alternatively, you can use a variable for the file path to assign the right value at run-time
If your packages contain Execute Package Tasks that refer to child packages in the same project, no additional step is necessary.
Switching package protection level
Executing SSIS packages in Azure doesn't support EncryptSensitiveWithUserKey/EncryptAllWithUserKey protection levels. Consequently, if your packages are configured to use those, we'll temporarily convert them into using EncryptSensitiveWithPassword/EncryptAllWithPassword protection levels, respectively. We'll also randomly generate encryption passwords when we upload your packages into Azure Files for executions on your Azure-SSIS IR.
Note
If your packages contain Execute Package Tasks that refer to child packages configured to use EncryptSensitiveWithUserKey/EncryptAllWithUserKey protection levels, you need to manually reconfigure those child packages to use EncryptSensitiveWithPassword/EncryptAllWithPassword protection levels, respectively, before executing your packages.
If your packages are already configured to use EncryptSensitiveWithPassword/EncryptAllWithPassword protection levels, we'll keep them unchanged. We'll still randomly generate encryption passwords when we upload your packages into Azure Files for executions on your Azure-SSIS IR.
Switching package execution environments
If you parameterize your project/packages in Project Deployment Model, you can create multiple VS configurations to switch package execution environments. In this way, you can assign environment-specific values to your project/package parameters at run-time. We recommend that you have at least two different VS configurations for package executions in the local and cloud environments, so you can Azure-enable your projects against the cloud configuration. Here's a step-by-step example of switching package execution environments between your local machine and Azure:
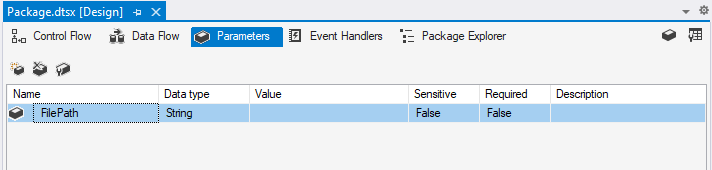
Let's say your package contains a File System Task that sets the attributes of a file. When you run it on your local machine, it sets the attributes of a file stored on your local file system. When you run it on your Azure-SSIS IR, you want it to set the attributes of a file stored in Azure Files. First, create a package parameter of string type and name it FilePath to hold the value of target file path.
Next, on the General page of File System Task Editor window, parameterize the SourceVariable property in Source Connection section with the FilePath package parameter.

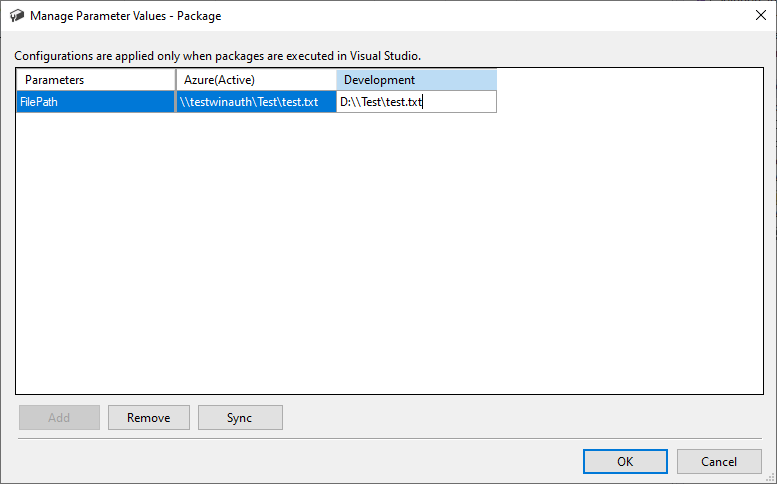
By default, you have an existing VS configuration for package executions in the local environment named Development. Create a new VS configuration for package executions in the cloud environment named Azure, see Creating a new VS configuration, if you haven't done so already.
When viewing the parameters of your package, select the Add Parameters to Configurations button to open the Manage Parameter Values window for your package. Next, assign different values of target file path to the FilePath package parameter under the Development and Azure configurations.
Azure-enable your project against the cloud configuration, see Azure-enabling existing SSIS projects, if you haven't done so already. Next, configure Azure-enabled settings to enable Windows authentication for your Azure-SSIS IR to access Azure Files, see Configuring Azure-enabled settings, if you haven't done so already.
Execute your package in Azure. You can switch your package execution environment back to your local machine by selecting the Development configuration.

Using package configuration file
If you use package configuration files in Package Deployment Model, you can assign environment-specific values to your package properties at run-time. We'll automatically upload those files with your packages into Azure Files for executions on your Azure-SSIS IR.
Checking package execution logs
After starting your package execution, we'll format and display its logs in the Progress window of SSDT. For a long-running package, we'll periodically update its logs by the minutes. You can immediately cancel your package execution by selecting the Stop button in SSDT toolbar. You can also temporarily find the raw data of its logs in the following UNC path: \\<YourStorageAccountName>.file.core.windows.net\ssdtexecution\<YourProjectName-FirstConnectTime>\<YourPackageName-tmp-ExecutionTime>\logs, but we'll clean it up after one day.
Current limitations
- The Azure-enabled SSDT supports only commercial/global cloud regions and doesn't support governmental/national cloud regions for now.
Related content
Once you're satisfied with running your packages in Azure from SSDT, you can deploy and run them as Execute SSIS Package activities in ADF pipelines, see Running SSIS packages as Execute SSIS Package activities in ADF pipelines.