Note
Access to this page requires authorization. You can try signing in or changing directories.
Access to this page requires authorization. You can try changing directories.
APPLIES TO:  Azure Data Factory
Azure Synapse Analytics
Azure Data Factory
Azure Synapse Analytics
Tip
Try out Data Factory in Microsoft Fabric, an all-in-one analytics solution for enterprises. Microsoft Fabric covers everything from data movement to data science, real-time analytics, business intelligence, and reporting. Learn how to start a new trial for free!
This article shows you how to use the Data Factory load data from Microsoft 365 (Office 365) into Azure Blob storage. You can follow similar steps to copy data to Azure Data Lake Gen1 or Gen2. Refer to Microsoft 365 (Office 365) connector article on copying data from Microsoft 365 (Office 365) in general.
Create a data factory
If you have not created your data factory yet, follow the steps in Quickstart: Create a data factory by using the Azure portal and Azure Data Factory Studio to create one. After creating it, browse to the data factory in the Azure portal.
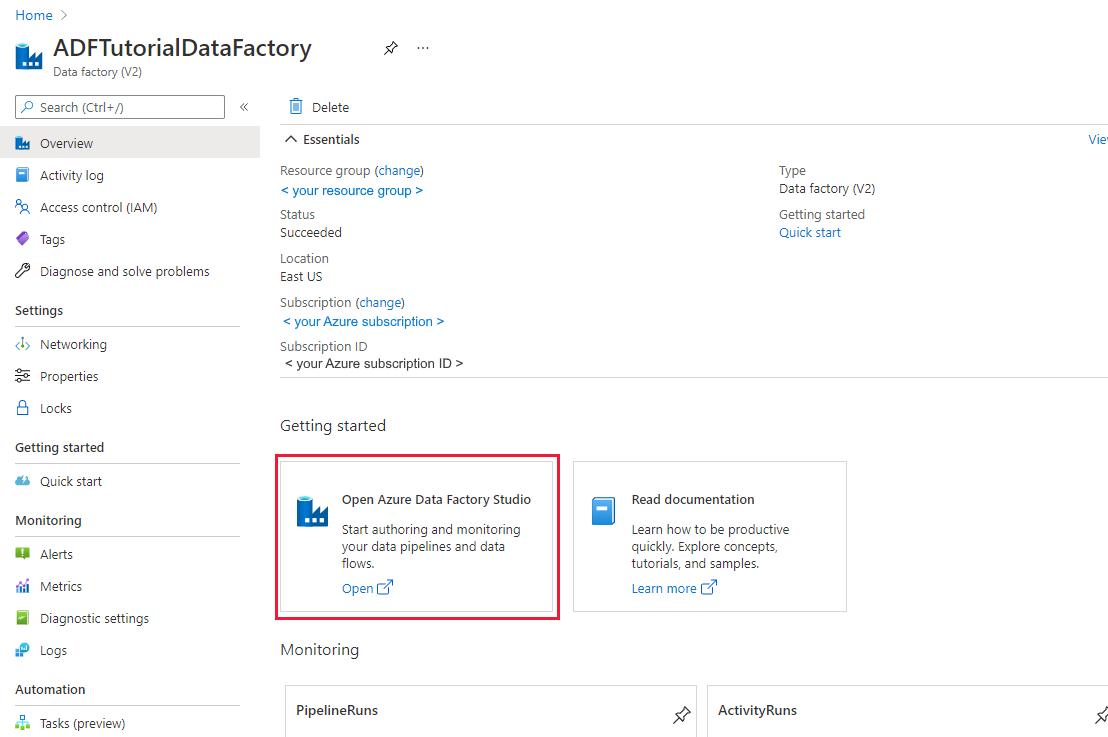
Select Open on the Open Azure Data Factory Studio tile to launch the Data Integration application in a separate tab.
Create a pipeline
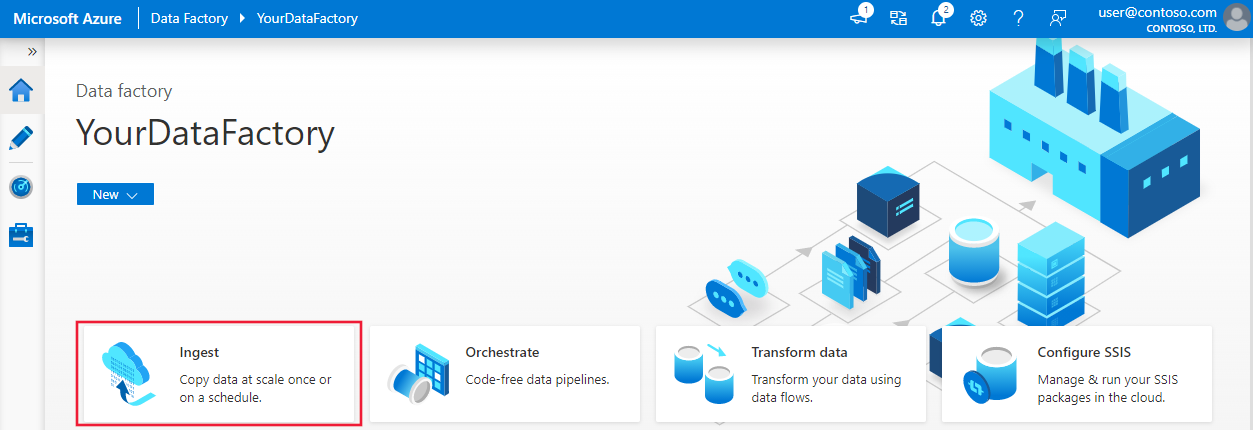
On the home page, select Orchestrate.
In the General tab for the pipeline, enter "CopyPipeline" for Name of the pipeline.
In the Activities tool box > Move & Transform category > drag and drop the Copy activity from the tool box to the pipeline designer surface. Specify "CopyFromOffice365ToBlob" as activity name.
Note
Please use Azure integration runtime in both source and sink linked services. The self-hosted integration runtime and the managed virtual network integration runtime are not supported.
Configure source
Go to the pipeline > Source tab, select + New to create a source dataset.
In the New Dataset window, select Microsoft 365 (Office 365), and then select Continue.
You are now in the copy activity configuration tab. Select on the Edit button next to the Microsoft 365 (Office 365) dataset to continue the data configuration.
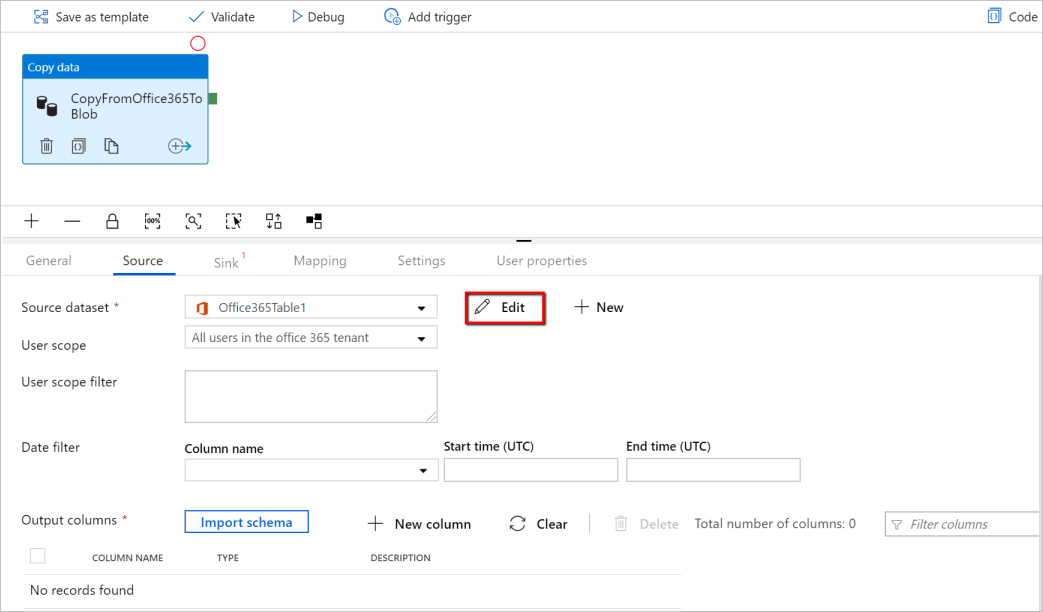
You see a new tab opened for Microsoft 365 (Office 365) dataset. In the General tab at the bottom of the Properties window, enter "SourceOffice365Dataset" for Name.
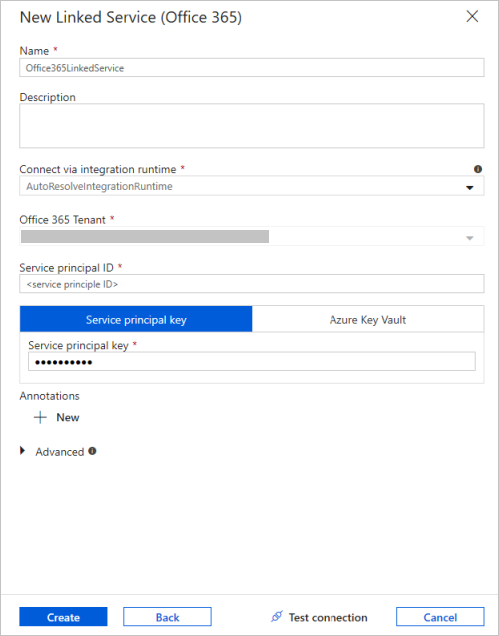
Go to the Connection tab of the Properties window. Next to the Linked service text box, select + New.
In the New Linked Service window, enter "Office365LinkedService" as name, enter the service principal ID and service principal key, then test connection and select Create to deploy the linked service.
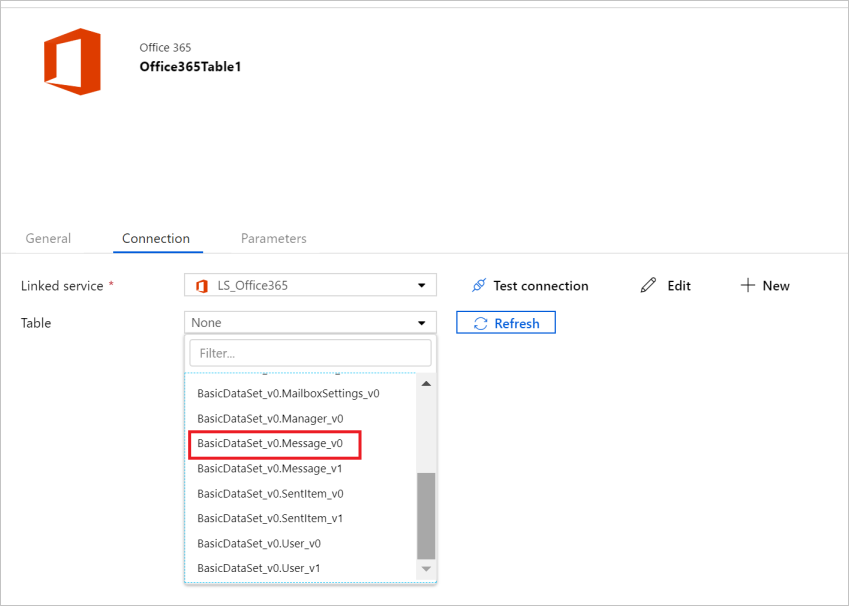
After the linked service is created, you are back in the dataset settings. Next to Table, choose the down-arrow to expand the list of available Microsoft 365 (Office 365) datasets, and choose "BasicDataSet_v0.Message_v0" from the drop-down list:
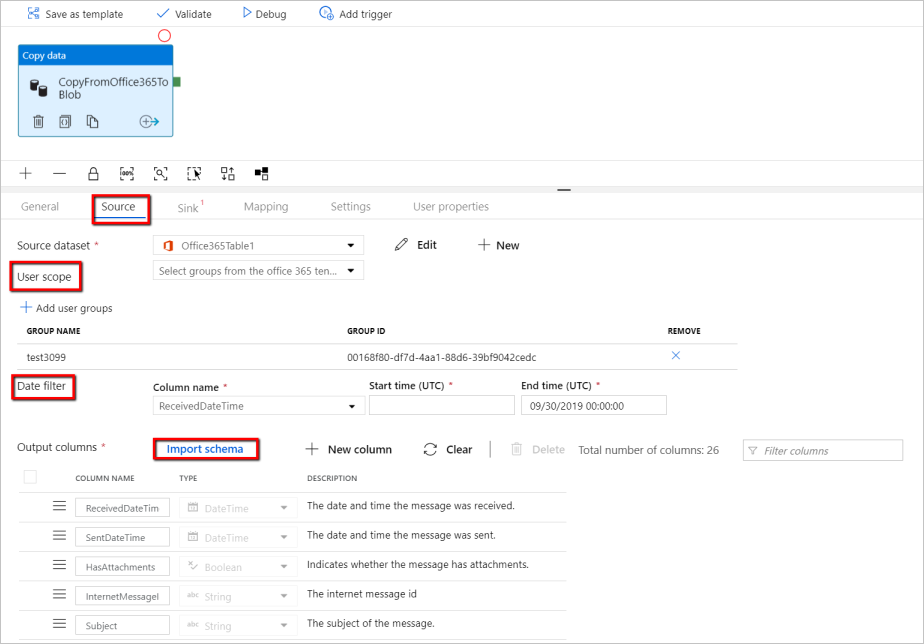
Now go back to the pipeline > Source tab to continue configuring additional properties for Microsoft 365 (Office 365) data extraction. User scope and user scope filter are optional predicates that you can define to restrict the data you want to extract out of Microsoft 365 (Office 365). See Microsoft 365 (Office 365) dataset properties section for how you configure these settings.
You are required to choose one of the date filters and provide the start time and end time values.
Select on the Import Schema tab to import the schema for Message dataset.
Configure sink
Go to the pipeline > Sink tab, and select + New to create a sink dataset.
In the New Dataset window, notice that only the supported destinations are selected when copying from Microsoft 365 (Office 365). Select Azure Blob Storage, select Binary format, and then select Continue. In this tutorial, you copy Microsoft 365 (Office 365) data into an Azure Blob Storage.
Select on Edit button next to the Azure Blob Storage dataset to continue the data configuration.
On the General tab of the Properties window, in Name, enter "OutputBlobDataset".
Go to the Connection tab of the Properties window. Next to the Linked service text box, select + New.
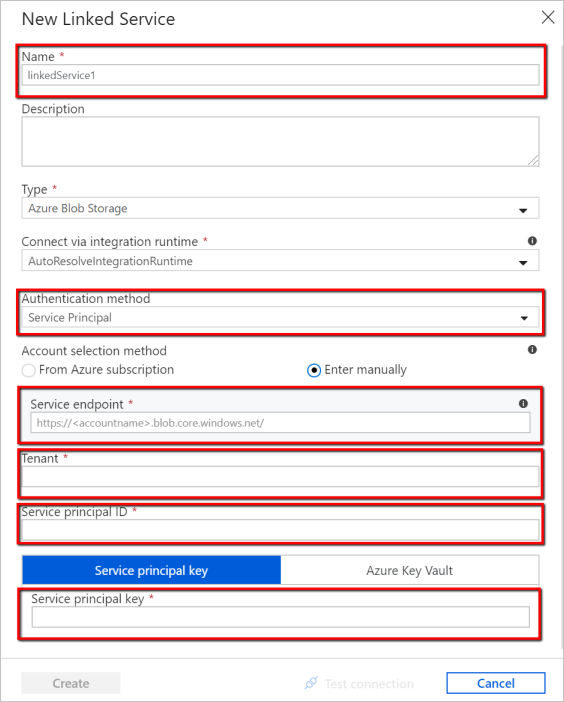
In the New Linked Service window, enter "AzureStorageLinkedService" as name, select "Service Principal" from the dropdown list of authentication methods, fill in the Service Endpoint, Tenant, Service principal ID, and Service principal key, then select Save to deploy the linked service. Refer here for how to set up service principal authentication for Azure Blob Storage.
Validate the pipeline
To validate the pipeline, select Validate from the tool bar.
You can also see the JSON code associated with the pipeline by clicking Code on the upper-right.
Publish the pipeline
In the top toolbar, select Publish All. This action publishes entities (datasets, and pipelines) you created to Data Factory.

Trigger the pipeline manually
Select Add Trigger on the toolbar, and then select Trigger Now. On the Pipeline Run page, select Finish.
Monitor the pipeline
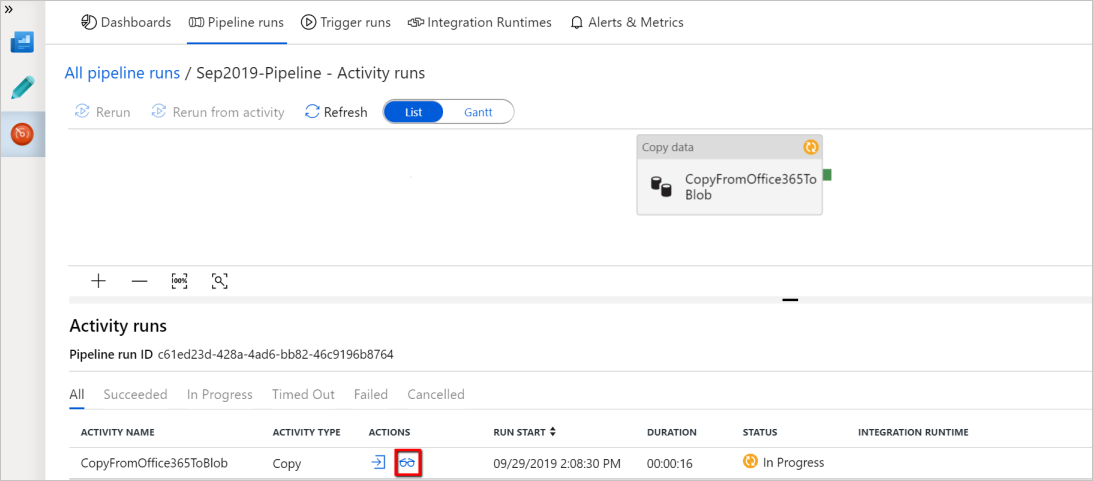
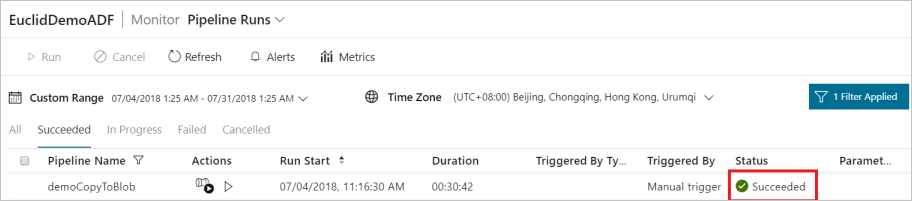
Go to the Monitor tab on the left. You see a pipeline run that is triggered by a manual trigger. You can use links in the Actions column to view activity details and to rerun the pipeline.

To see activity runs associated with the pipeline run, select the View Activity Runs link in the Actions column. In this example, there is only one activity, so you see only one entry in the list. For details about the copy operation, select the Details link (eyeglasses icon) in the Actions column.
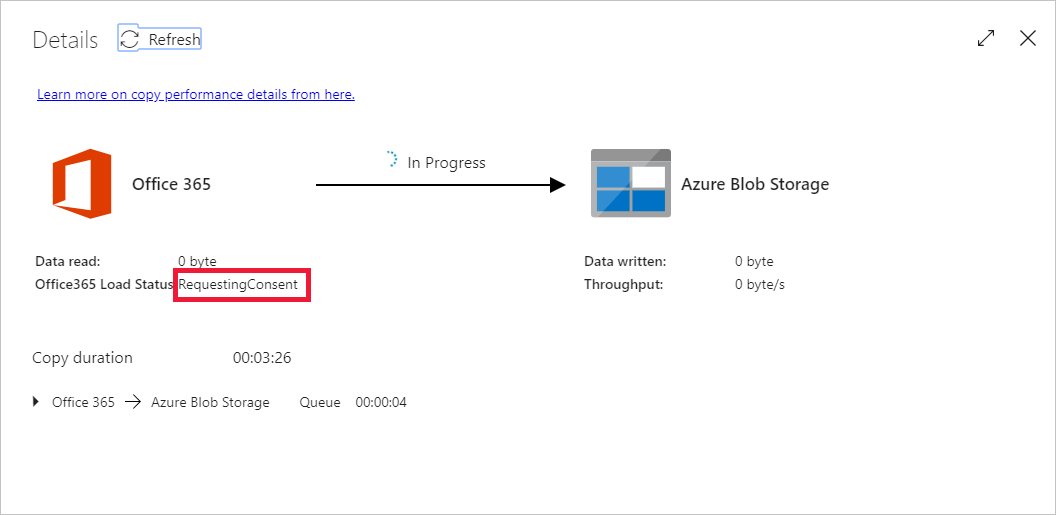
If this is the first time you are requesting data for this context (a combination of which data table is being access, which destination account is the data being loaded into, and which user identity is making the data access request), you will see the copy activity status as In Progress, and only when you select into "Details" link under Actions will you see the status as RequestingConsent. A member of the data access approver group needs to approve the request in the Privileged Access Management before the data extraction can proceed.
Status as requesting consent:
Status as extracting data:
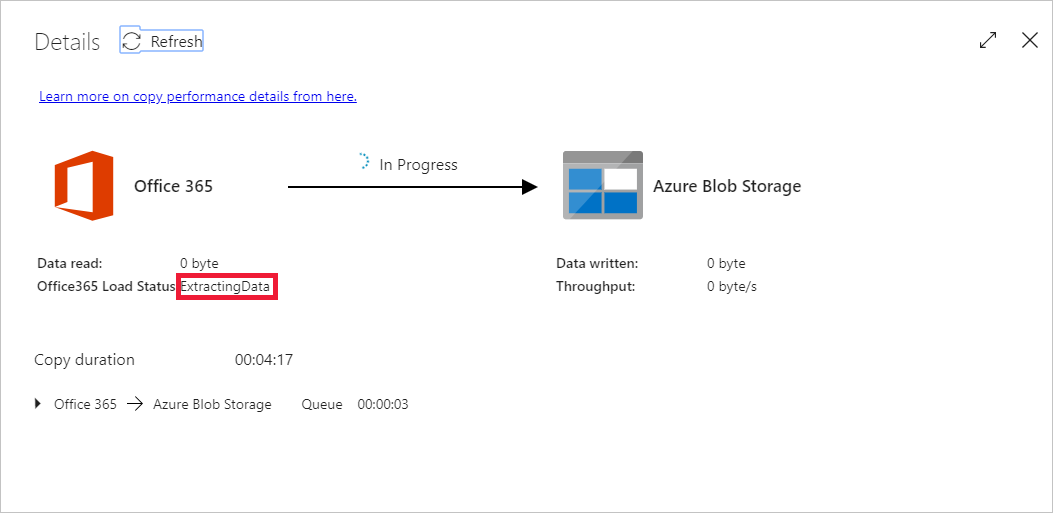
Once the consent is provided, data extraction will continue and, after some time, the pipeline run will show as succeeded.
Now go to the destination Azure Blob Storage and verify that Microsoft 365 (Office 365) data has been extracted in Binary format.
Related content
Advance to the following article to learn about Azure Synapse Analytics support: