Incrementally copy new and changed files based on LastModifiedDate by using the Copy Data tool
APPLIES TO:  Azure Data Factory
  Azure Synapse Analytics
Tip
Try out Data Factory in Microsoft Fabric, an all-in-one analytics solution for enterprises. Microsoft Fabric covers everything from data movement to data science, real-time analytics, business intelligence, and reporting. Learn how to start a new trial for free!
In this tutorial, you'll use the Azure portal to create a data factory. You'll then use the Copy Data tool to create a pipeline that incrementally copies new and changed files only, from Azure Blob storage to Azure Blob storage. It uses LastModifiedDate to determine which files to copy.
After you complete the steps here, Azure Data Factory will scan all the files in the source store, apply the file filter by LastModifiedDate, and copy to the destination store only files that are new or have been updated since last time. Note that if Data Factory scans large numbers of files, you should still expect long durations. File scanning is time consuming, even when the amount of data copied is reduced.
Note
If you're new to Data Factory, see Introduction to Azure Data Factory.
In this tutorial, you'll complete these tasks:
- Create a data factory.
- Use the Copy Data tool to create a pipeline.
- Monitor the pipeline and activity runs.
Prerequisites
- Azure subscription: If you don't have an Azure subscription, create a free account before you begin.
- Azure Storage account: Use Blob storage for the source and sink data stores. If you don't have an Azure Storage account, follow the instructions in Create a storage account.
Create two containers in Blob storage
Prepare your Blob storage for the tutorial by completing these steps:
Create a container named source. You can use various tools to perform this task, like Azure Storage Explorer.
Create a container named destination.
Create a data factory
In the left pane, select Create a resource. Select Integration > Data Factory:
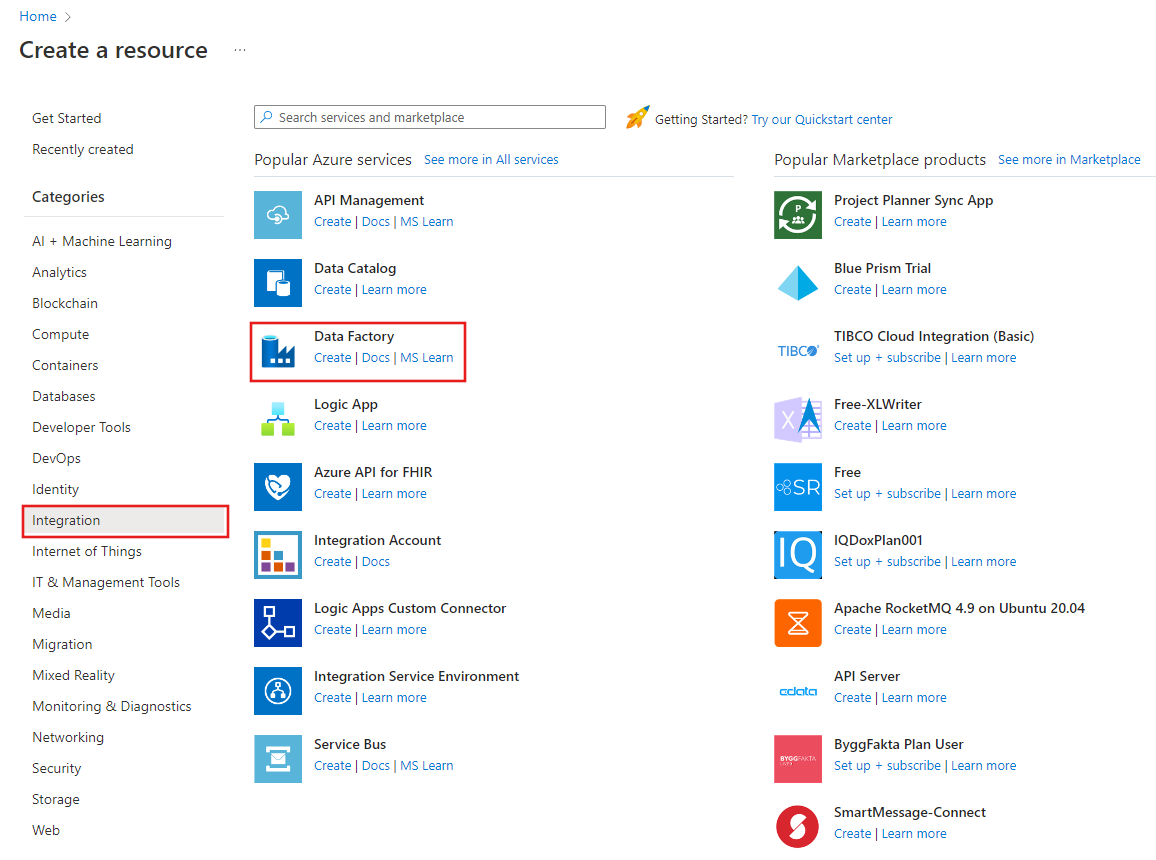
On the New data factory page, under Name, enter ADFTutorialDataFactory.
The name for your data factory must be globally unique. You might receive this error message:
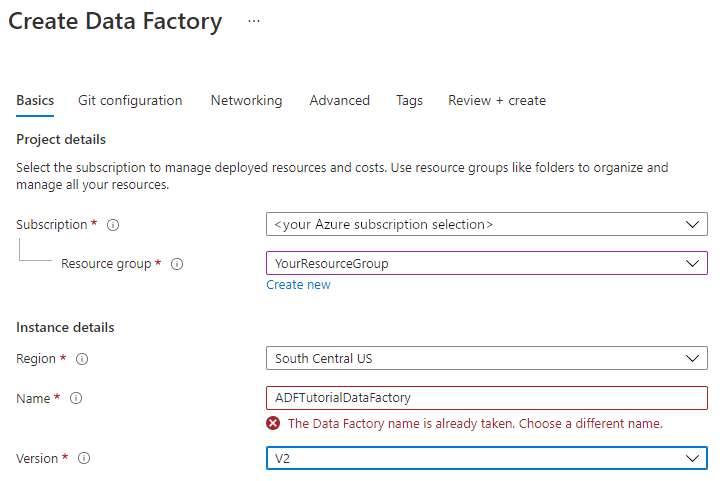
If you receive an error message about the name value, enter a different name for the data factory. For example, use the name yournameADFTutorialDataFactory. For the naming rules for Data Factory artifacts, see Data Factory naming rules.
Under Subscription, select the Azure subscription in which you'll create the new data factory.
Under Resource Group, take one of these steps:
Select Use existing and then select an existing resource group in the list.
Select Create new and then enter a name for the resource group.
To learn about resource groups, see Use resource groups to manage your Azure resources.
Under Version, select V2.
Under Location, select the location for the data factory. Only supported locations appear in the list. The data stores (for example, Azure Storage and Azure SQL Database) and computes (for example, Azure HDInsight) that your data factory uses can be in other locations and regions.
Select Create.
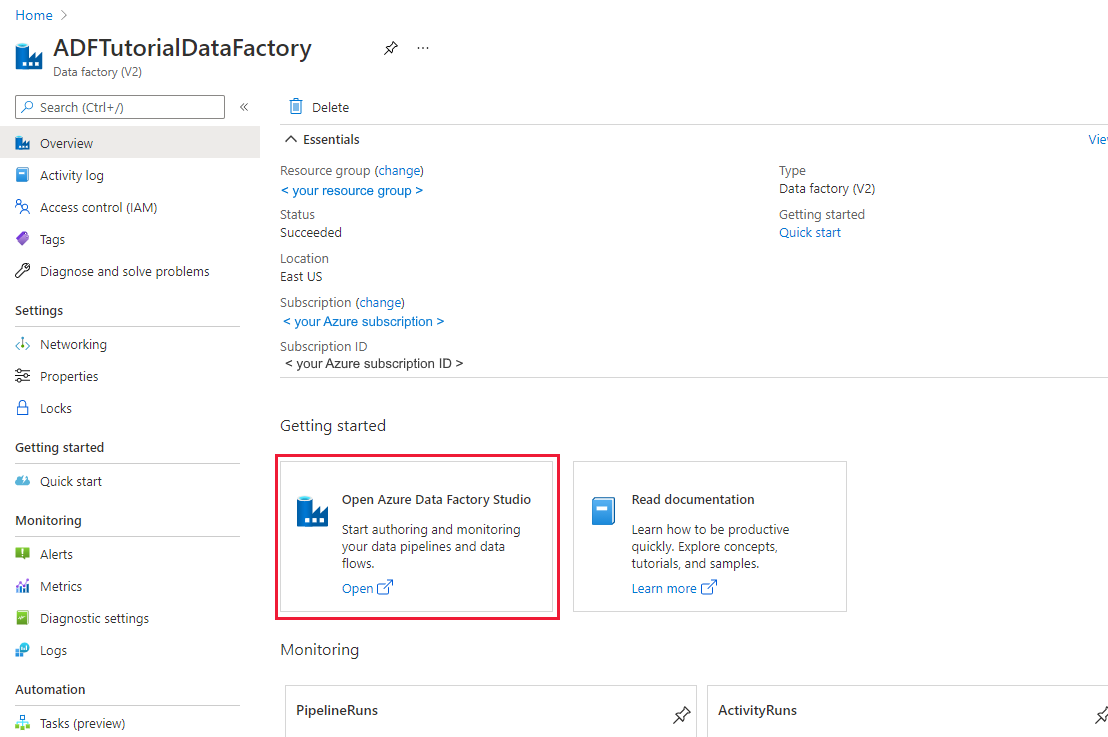
After the data factory is created, the data factory home page appears.
To open the Azure Data Factory user interface (UI) on a separate tab, select Open on the Open Azure Data Factory Studio tile:
Use the Copy Data tool to create a pipeline
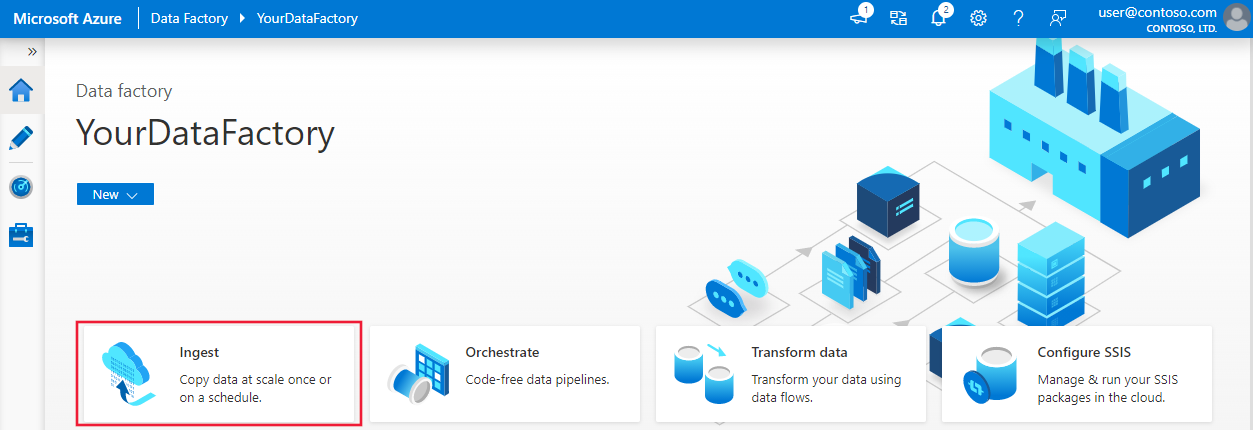
On the Azure Data Factory home page, select the Ingest tile to open the Copy Data tool:
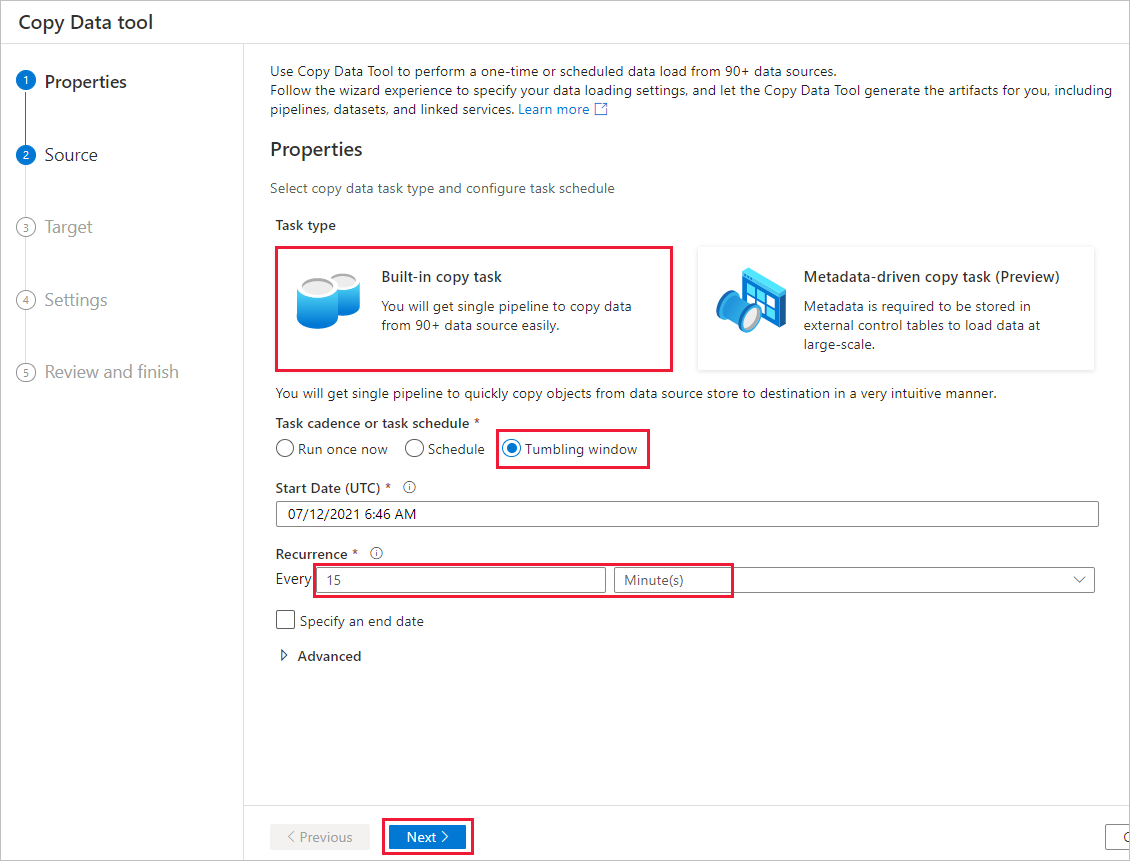
On the Properties page, take the following steps:
Under Task type, select Built-in copy task.
Under Task cadence or task schedule, select Tumbling window.
Under Recurrence, enter 15 Minute(s).
Select Next.
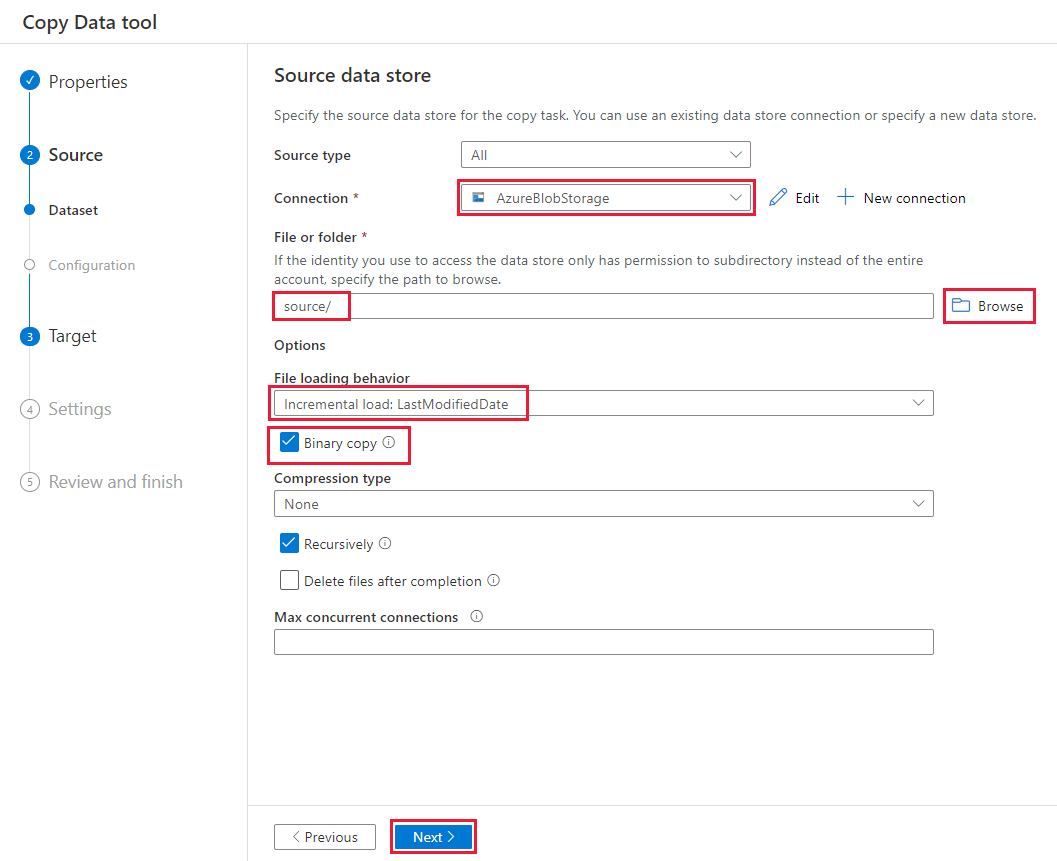
On the Source data store page, complete these steps:
Select + New connection to add a connection.
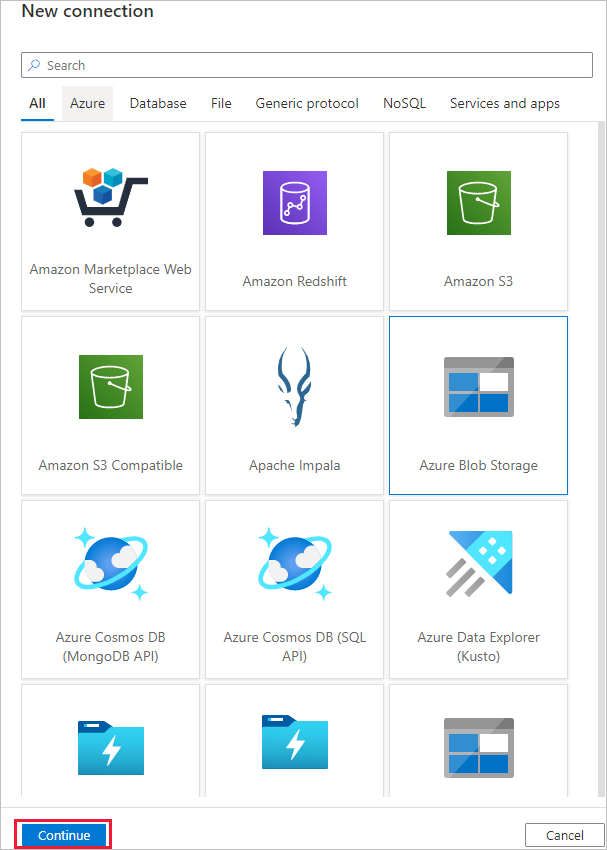
Select Azure Blob Storage from the gallery, and then select Continue:
On the New connection (Azure Blob Storage) page, select your Azure subscription from the Azure subscription list and your storage account from the Storage account name list. Test the connection and then select Create.
Select the newly created connection in the Connection block.
In the File or folder section, select Browse and choose the source folder, and then select OK.
Under File loading behavior, select Incremental load: LastModifiedDate, and choose Binary copy.
Select Next.
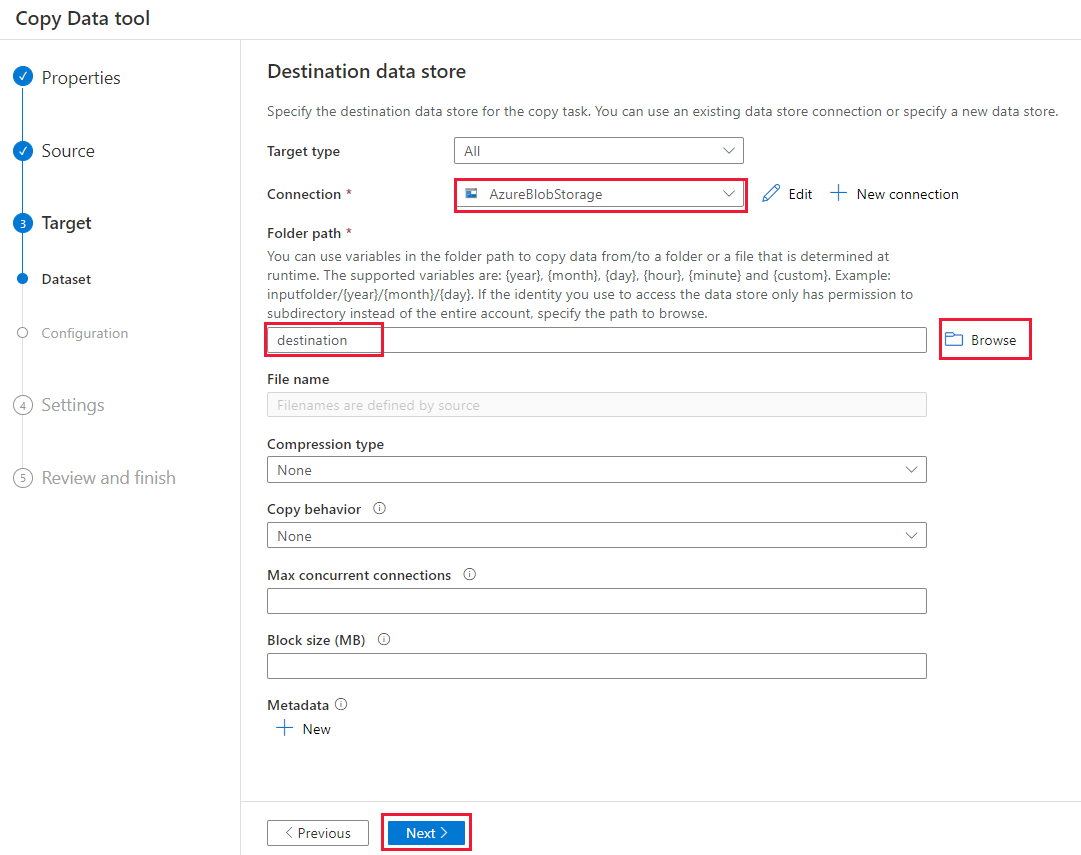
On the Destination data store page, complete these steps:
Select the AzureBlobStorage connection that you created. This is the same storage account as the source data store.
In the Folder path section, browse for and select the destination folder, and then select OK.
Select Next.
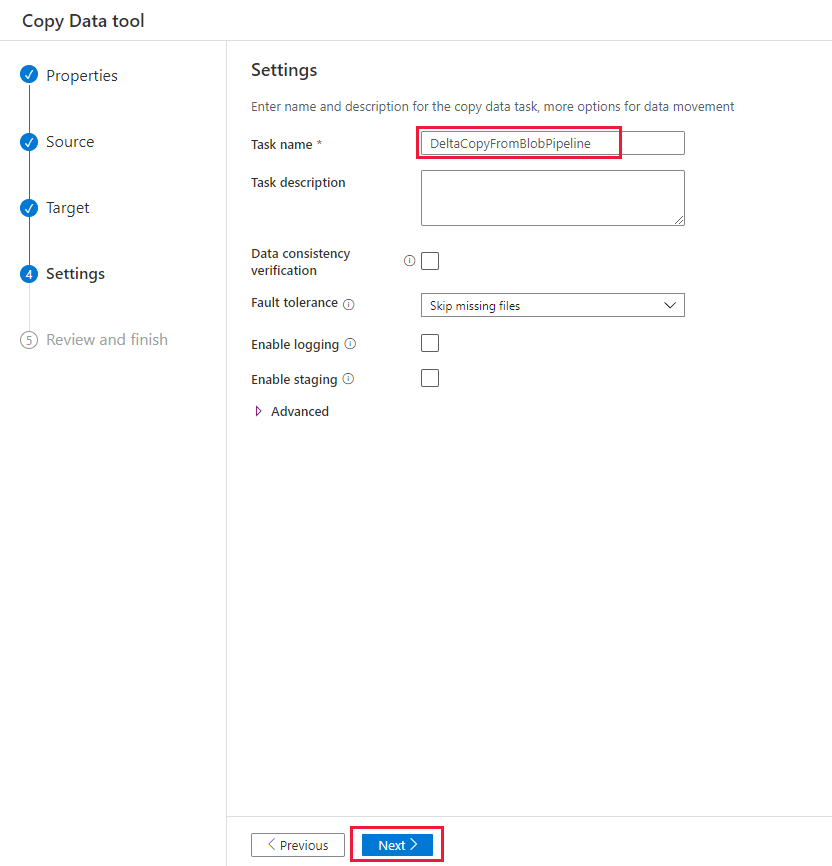
On the Settings page, under Task name, enter DeltaCopyFromBlobPipeline, then select Next. Data Factory creates a pipeline with the specified task name.
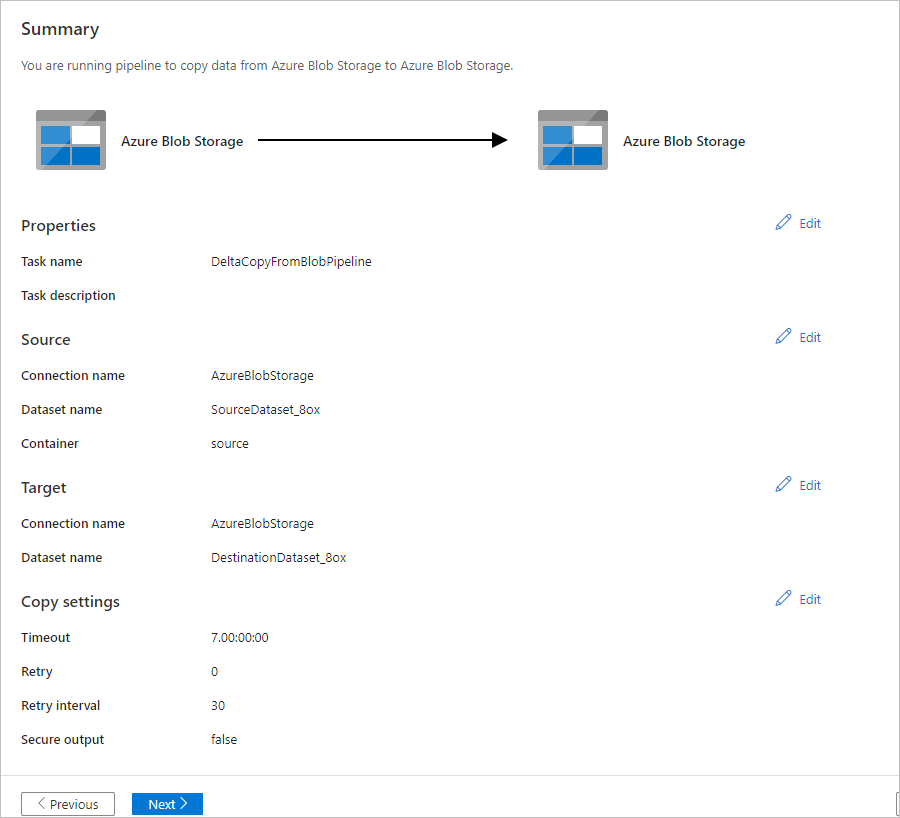
On the Summary page, review the settings and then select Next.
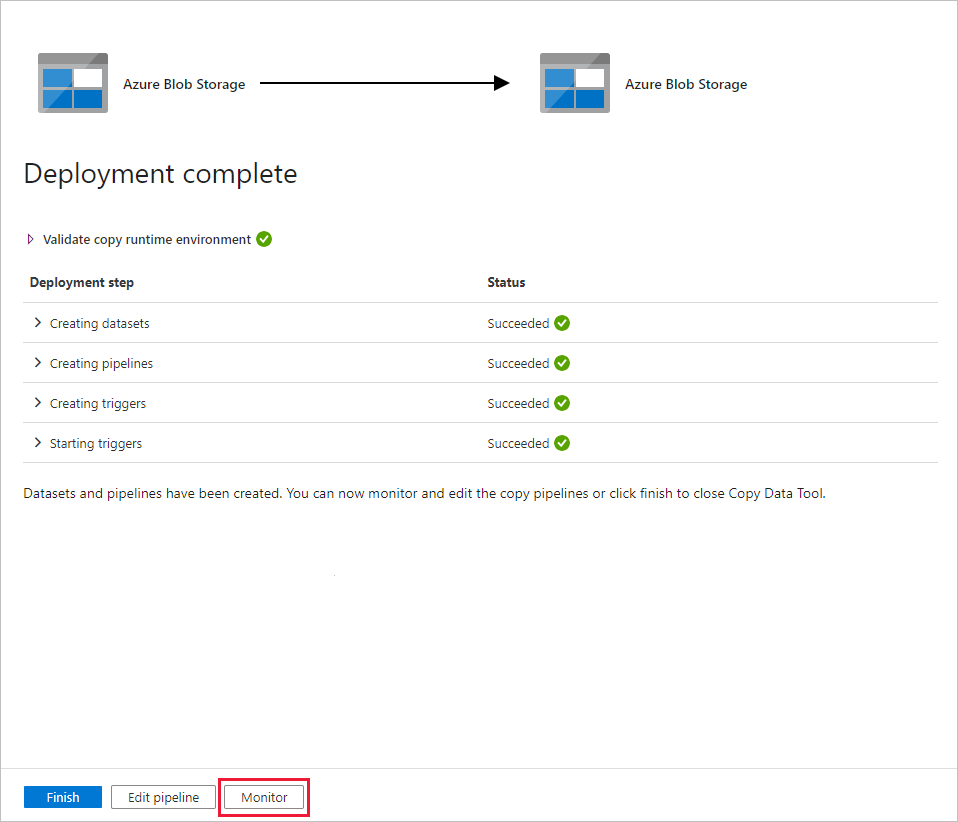
On the Deployment page, select Monitor to monitor the pipeline (task).
Notice that the Monitor tab on the left is automatically selected. The application switches to the Monitor tab. You see the status of the pipeline. Select Refresh to refresh the list. Select the link under Pipeline name to view activity run details or to run the pipeline again.

There's only one activity (the copy activity) in the pipeline, so you see only one entry. For details about the copy operation, on the Activity runs page, select the Details link (the eyeglasses icon) in the Activity name column. For details about the properties, see Copy activity overview.
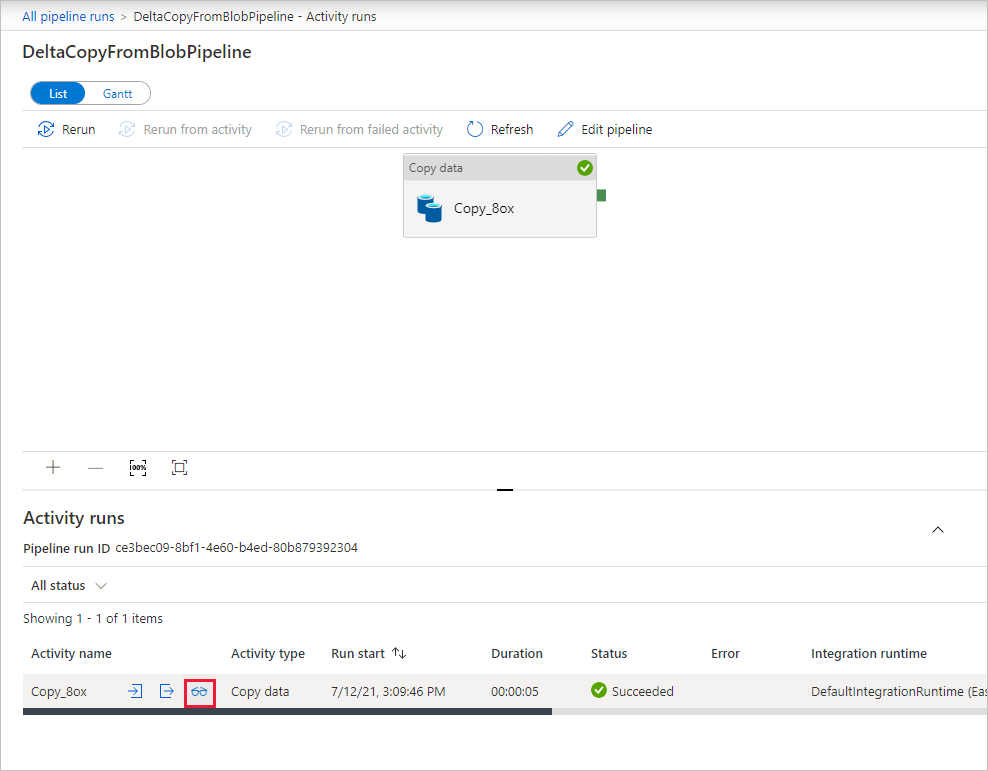
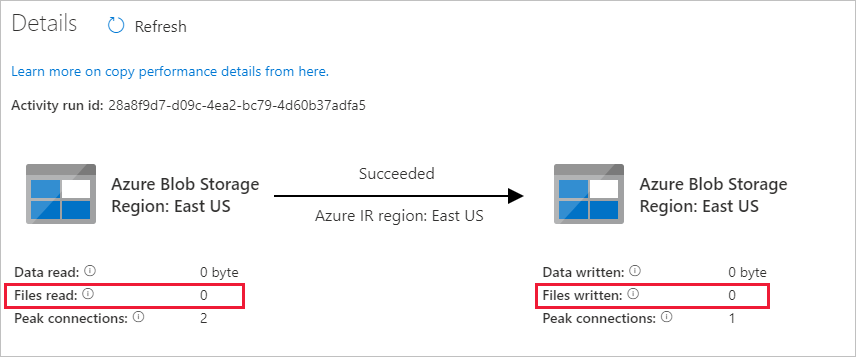
Because there are no files in the source container in your Blob storage account, you won't see any files copied to the destination container in the account:
Create an empty text file and name it file1.txt. Upload this text file to the source container in your storage account. You can use various tools to perform these tasks, like Azure Storage Explorer.

To go back to the Pipeline runs view, select All pipeline runs link in the breadcrumb menu on the Activity runs page, and wait for the same pipeline to be automatically triggered again.
When the second pipeline run completes, follow the same steps mentioned previously to review the activity run details.
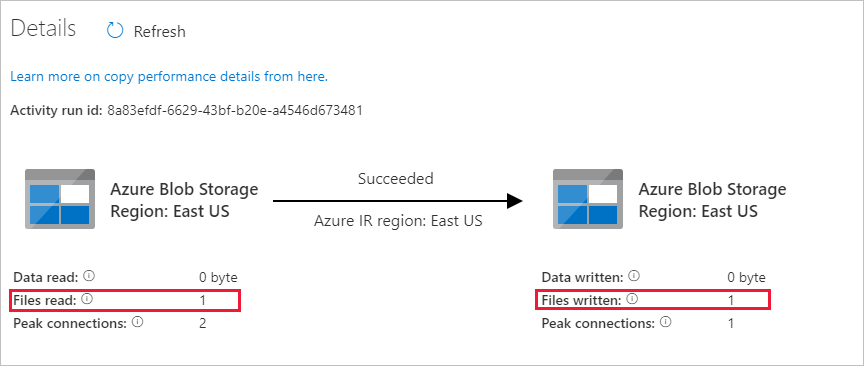
You'll see that one file (file1.txt) has been copied from the source container to the destination container of your Blob storage account:
Create another empty text file and name it file2.txt. Upload this text file to the source container in your Blob storage account.
Repeat steps 11 and 12 for the second text file. You'll see that only the new file (file2.txt) was copied from the source container to the destination container of your storage account during this pipeline run.
You can also verify that only one file has been copied by using Azure Storage Explorer to scan the files:

Related content
Go to the following tutorial to learn how to transform data by using an Apache Spark cluster on Azure:
Feedback
Coming soon: Throughout 2024 we will be phasing out GitHub Issues as the feedback mechanism for content and replacing it with a new feedback system. For more information see: https://aka.ms/ContentUserFeedback.
Submit and view feedback for