Note
Access to this page requires authorization. You can try signing in or changing directories.
Access to this page requires authorization. You can try changing directories.
APPLIES TO:  Azure SQL Database
Azure Synapse Analytics (formerly Azure SQL DW)
Azure Synapse Analytics (workspace) SQL pool
Azure SQL Database
Azure Synapse Analytics (formerly Azure SQL DW)
Azure Synapse Analytics (workspace) SQL pool
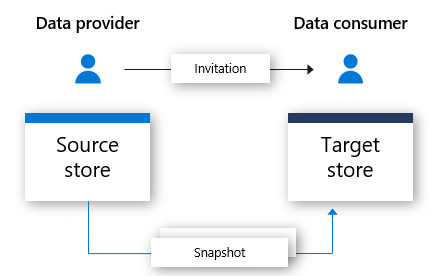
Azure Data Share allows you to securely share data snapshots from your Azure SQL Database and Azure Synapse Analytics resources, to other Azure subscriptions. Including Azure subscriptions outside your tenant.
This article describes sharing data from Azure SQL Database and Azure Synapse Analytics.
This article guides you through:
- What kinds of data can be shared
- How to prepare your environment
- How to create a share
- How to receive shared data
You can use the table of contents to jump to the section you need, or continue with this article to follow the process from start to finish.
What's supported
Share data
Azure Data Share supports sharing full data snapshots from several SQL resources in Azure. Incremental snapshots aren't currently supported for these resources.
| Resource type | Share tables | Share views |
|---|---|---|
| Azure SQL Database | Yes | Yes |
| Azure Synapse Analytics (formerly Azure SQL DW) | Yes | Yes |
| Synapse Analytics (workspace) dedicated SQL pool | Yes | No |
Note
Currently, Azure Data Share doesn't support sharing from these resources:
- Azure Synapse Analytics (workspace) serverless SQL pool
- Azure SQL databases with Always Encrypted configured
Receive data
Data consumers can choose to accept shared data into several Azure resources:
- Azure Data Lake Storage Gen2
- Azure Blob Storage
- Azure SQL Database
- Azure Synapse Analytics
Shared data in Azure Data Lake Storage Gen 2 or Azure Blob Storage can be stored as a csv or parquet file. Full data snapshots overwrite the contents of the target file if already exists.
Shared data in Azure SQL Database and Azure Synapse Analytics is stored in tables. If the target table doesn't already exist, Azure Data Share creates the SQL table with the source schema. If a target table with the same name already exists, it is dropped and overwritten with the latest full snapshot.
Note
For source SQL tables with dynamic data masking, data appear masked on the recipient side.
Supported data types
When you share data from a SQL source, the following mappings are used from SQL Server data types to Azure Data Share interim data types during the snapshot process.
Note
- For data types that map to the Decimal interim type, currently snapshot supports precision up to 28. If you have data that requires precision larger than 28, consider converting to a string.
- If you're sharing data from Azure SQL database to Azure Synapse Analytics, not all data types are supported. Refer to Table data types in dedicated SQL pool for details.
| SQL Server data type | Azure Data Share interim data type |
|---|---|
| bigint | Int64 |
| binary | Byte[] |
| bit | Boolean |
| char | String, Char[] |
| date | DateTime |
| Datetime | DateTime |
| datetime2 | DateTime |
| Datetimeoffset | DateTimeOffset |
| Decimal | Decimal |
| FILESTREAM attribute (varbinary(max)) | Byte[] |
| Float | Double |
| image | Byte[] |
| int | Int32 |
| money | Decimal |
| nchar | String, Char[] |
| ntext | String, Char[] |
| numeric | Decimal |
| nvarchar | String, Char[] |
| real | Single |
| rowversion | Byte[] |
| smalldatetime | DateTime |
| smallint | Int16 |
| smallmoney | Decimal |
| sql_variant | Object |
| text | String, Char[] |
| time | TimeSpan |
| timestamp | Byte[] |
| tinyint | Int16 |
| uniqueidentifier | Guid |
| varbinary | Byte[] |
| varchar | String, Char[] |
| xml | String |
Prerequisites to share data
To share data snapshots from your Azure SQL resources, you first need to prepare your environment. You need:
- An Azure subscription: If you don't have an Azure subscription, create a free account before you begin.
- An Azure SQL Database or Azure Synapse Analytics (formerly Azure SQL DW) with tables and views that you want to share.
- An Azure Data Share account.
- Your data recipient's Azure sign-in e-mail address (using their e-mail alias won't work).
- If your Azure SQL resource is in a different Azure subscription than your Azure Data Share account, register the Microsoft.DataShare resource provider in the subscription where your source Azure SQL resource is located.
Source-specific prerequisites
There are also prerequisites for sharing that depend on where your data is coming from. Select your data share source and follow the steps:
- Azure SQL Database or Azure Synapse Analytics (formerly Azure SQL DW)
- Azure Synapse Analytics (workspace) SQL pool
Prerequisites for sharing from Azure SQL Database or Azure Synapse Analytics (formerly Azure SQL DW)
You can use one of these methods to authenticate with Azure SQL Database or Azure Synapse Analytics (formerly Azure SQL DW):
Microsoft Entra authentication
These prerequisites cover the authentication you need so Azure Data Share can connect with your Azure SQL Database:
- You need permission to write to the databases on SQL server: Microsoft.Sql/servers/databases/write. This permission exists in the Contributor role.
- SQL Server Microsoft Entra Admin permissions.
- SQL Server Firewall access:
- In the Azure portal, navigate to your SQL server. Select Firewalls and virtual networks from left navigation.
- Select Yes for Allow Azure services and resources to access this server.
- Select +Add client IP. Client IP address can change, so you might need to add your client IP again next time you share data from the portal.
- Select Save.
SQL authentication
You can follow the step by step demo video to configure authentication, or complete each of these prerequisites:
Permission to write to the databases on SQL server: Microsoft.Sql/servers/databases/write. This permission exists in the Contributor role.
Permission for the Azure Data Share resource's managed identity to access the database:
In the Azure portal, navigate to the SQL server and set yourself as the Microsoft Entra Admin.
Connect to the Azure SQL Database/Data Warehouse using the Query Editor or SQL Server Management Studio with Microsoft Entra authentication.
Execute the following script to add the Data Share resource-Managed Identity as a db_datareader. Connect using Active Directory and not SQL Server authentication.
create user "<share_acct_name>" from external provider;
exec sp_addrolemember db_datareader, "<share_acct_name>";
Note
The <share_acc_name> is the name of your Data Share resource.
An Azure SQL Database User with 'db_datareader' access to navigate and select the tables or views you wish to share.
SQL Server Firewall access:
- In the Azure portal, navigate to SQL server. Select Firewalls and virtual networks from left navigation.
- Select Yes for Allow Azure services and resources to access this server.
- Select +Add client IP. Client IP address can change, so you might need to add your client IP again next time you share data from the portal.
- Select Save.
Prerequisites for sharing from Azure Synapse Analytics (workspace) SQL pool
Permission to write to the SQL pool in Synapse workspace: Microsoft.Synapse/workspaces/sqlPools/write. This permission exists in the Contributor role.
Permission for the Data Share resource's managed identity to access Synapse workspace SQL pool:
In the Azure portal, navigate to your Synapse workspace. Select SQL Active Directory admin from left navigation and set yourself as the Microsoft Entra admin.
Open the Synapse Studio, select Manage from the left navigation. Select Access control under Security. Assign yourself the SQL admin or Workspace admin role.
Select Develop from the left navigation in the Synapse Studio. Execute the following script in SQL pool to add the Data Share resource-Managed Identity as a db_datareader.
create user "<share_acct_name>" from external provider;
exec sp_addrolemember db_datareader, "<share_acct_name>";
Note
The <share_acc_name> is the name of your Data Share resource.
Synapse workspace Firewall access:
- In the Azure portal, navigate to Synapse workspace. Select Firewalls from left navigation.
- Select ON for Allow Azure services and resources to access this workspace.
- Select +Add client IP. Client IP address can change, so you might need to add your client IP again next time you share data from the portal.
- Select Save.
Create a share
Navigate to your Data Share Overview page.
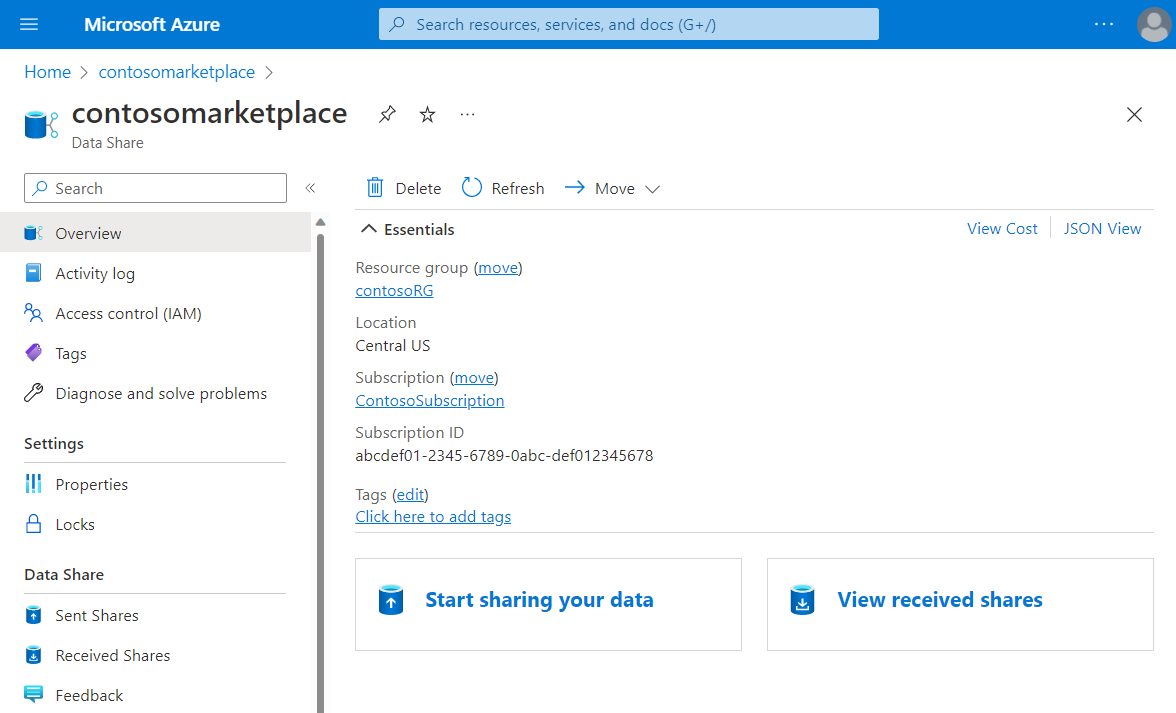
Select Start sharing your data.
Select Create.
Fill out the details for your share. Specify a name, share type, description of share contents, and terms of use (optional).
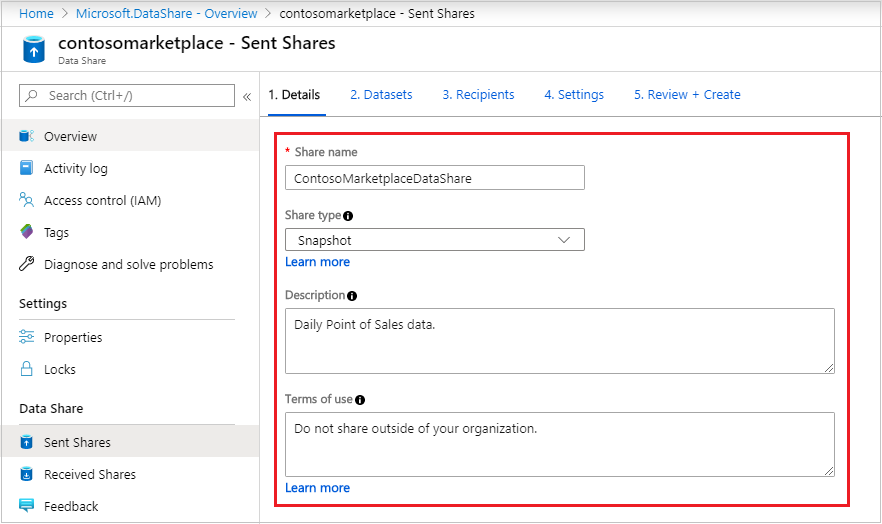
Select Continue.
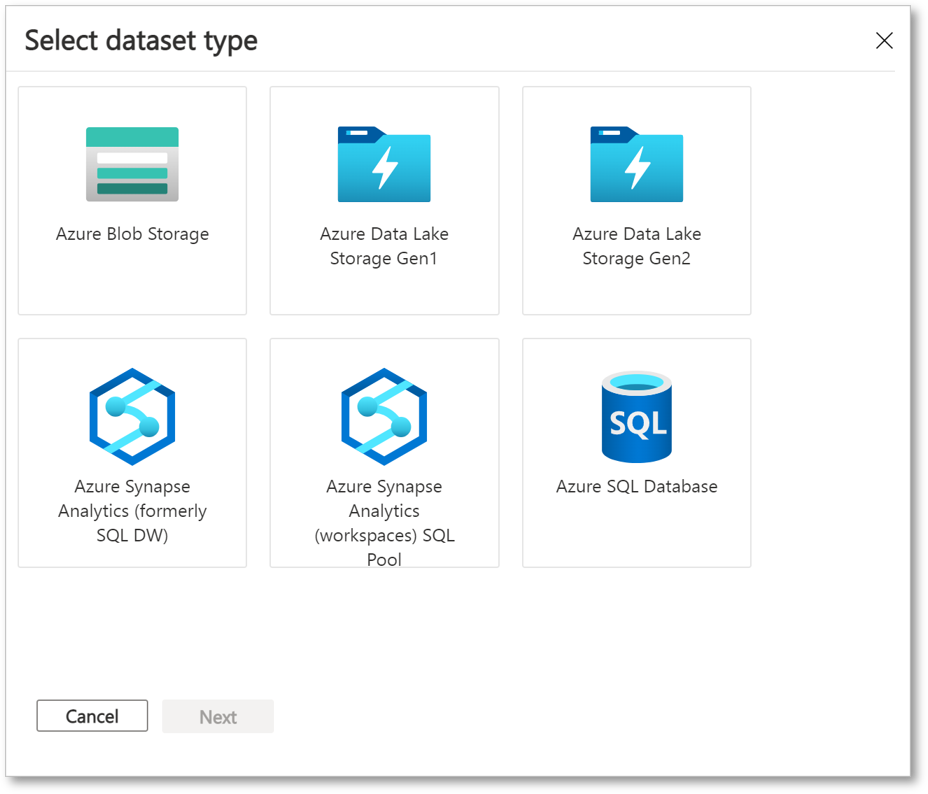
To add Datasets to your share, select Add Datasets.
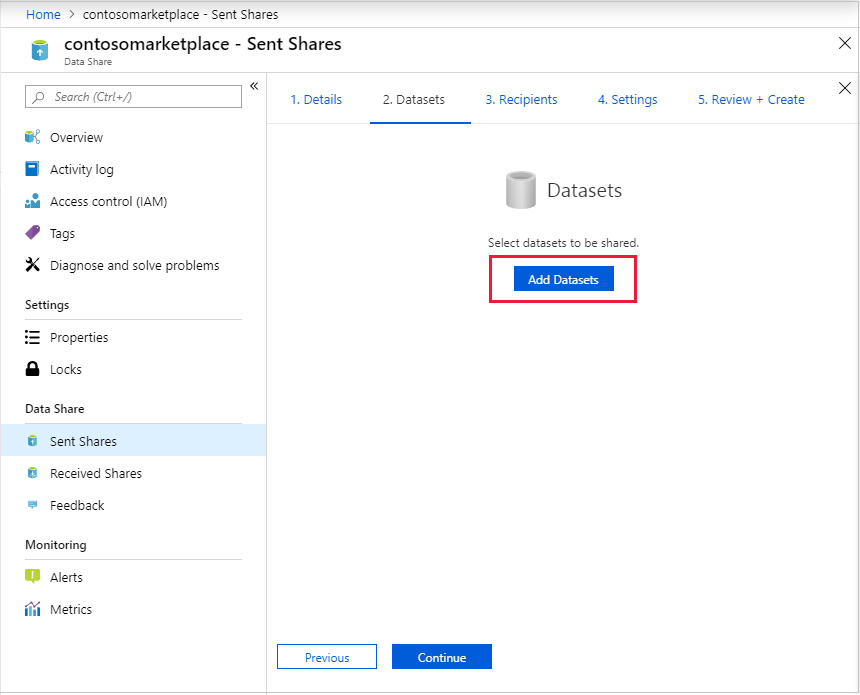
Select the dataset type that you would like to add. There will be a different list of dataset types depending on the share type (snapshot or in-place) you selected in the previous step.
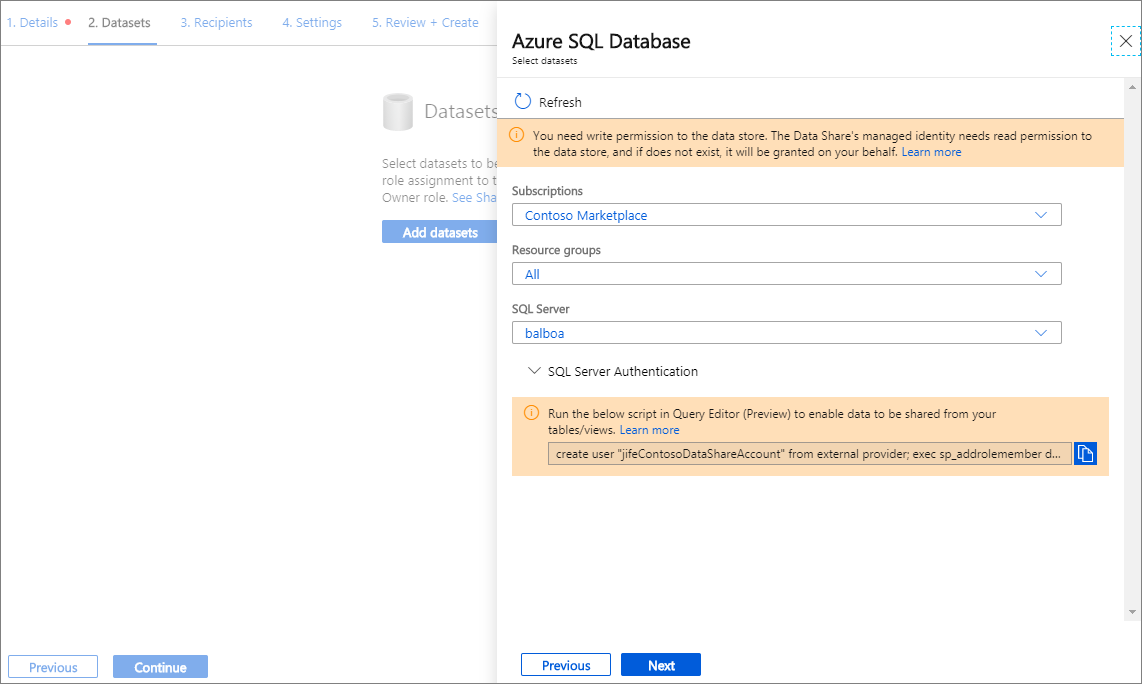
Select your SQL server or Synapse workspace. If you're using Microsoft Entra authentication and the checkbox Allow Data Share to run the above 'create user' SQL script on my behalf appears, check the checkbox. If you're using SQL authentication, provide credentials, and be sure you've followed the prerequisites so that you have permissions.
Select Next to navigate to the object you would like to share and select 'Add Datasets'. You can select tables and views from Azure SQL Database and Azure Synapse Analytics (formerly Azure SQL DW), or tables from Azure Synapse Analytics (workspace) dedicated SQL pool.
In the Recipients tab, enter in the email addresses of your Data Consumer by selecting '+ Add Recipient'. The email address needs to be recipient's Azure sign-in email.
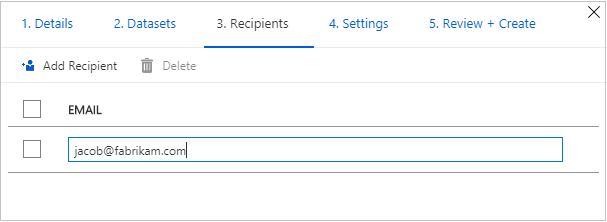
Select Continue.
If you have selected snapshot share type, you can configure snapshot schedule to provide updates of your data to your data consumer.
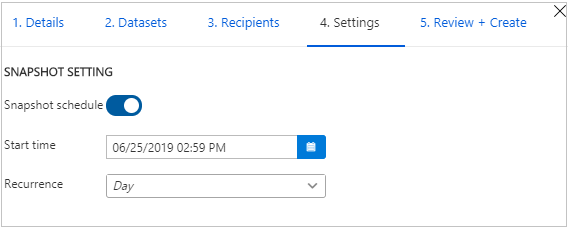
Select a start time and recurrence interval.
Select Continue.
In the Review + Create tab, review your Package Contents, Settings, Recipients, and Synchronization Settings. Select Create.
Your Azure Data Share has now been created and the recipient of your Data Share can now accept your invitation.
Prerequisites to receive data
Before you can accept a data share invitation, you need to prepare your environment.
Confirm that all prerequisites are complete before accepting a data share invitation:
- Azure Subscription: If you don't have an Azure subscription, create a free account before you begin.
- A Data Share invitation: An invitation from Microsoft Azure with a subject titled "Azure Data Share invitation from yourdataprovider@domain.com".
- Register the Microsoft.DataShare resource provider in the Azure subscription where you'll create a Data Share resource and the Azure subscription where your target Azure data stores are located.
- You need a resource in Azure to store the shared data. You can use these kinds of resources:
There are also prerequisites for the resource where the received data will be stored. Select your resource type and follow the steps:
- Azure Storage prerequisites
- Azure SQL Database or Azure Synapse Analytics (formerly Azure SQL DW) prerequisites
- Azure Synapse Analytics (workspace) SQL pool prerequisites
Prerequisites for target storage account
If you choose to receive data into Azure Storage, complete these prerequisites before accepting a data share:
- An Azure Storage account.
- Permission to write to the storage account: Microsoft.Storage/storageAccounts/write. This permission exists in the Contributor role.
- Permission to add role assignment of the Data Share resource's managed identity to the storage account: which is present in Microsoft.Authorization/role assignments/write. This permission exists in the Owner role.
Prerequisites for receiving data into Azure SQL Database or Azure Synapse Analytics (formerly Azure SQL DW)
For a SQL server where you're the Microsoft Entra admin of the SQL server, complete these prerequisites before accepting a data share:
- An Azure SQL Database or Azure Synapse Analytics (formerly Azure SQL DW).
- Permission to write to the databases on SQL server: Microsoft.Sql/servers/databases/write. This permission exists in the Contributor role.
- SQL Server Firewall access:
- In the Azure portal, navigate to your SQL server. Select Firewalls and virtual networks from left navigation.
- Select Yes for Allow Azure services and resources to access this server.
- Select +Add client IP. Client IP address can change, so you might need to add your client IP again next time you share data from the portal.
- Select Save.
For a SQL server where you're not the Microsoft Entra admin, complete these prerequisites before accepting a data share:
You can follow the step by step demo video, or the steps below to configure prerequisites.
An Azure SQL Database or Azure Synapse Analytics (formerly Azure SQL DW).
Permission to write to databases on the SQL server: Microsoft.Sql/servers/databases/write. This permission exists in the Contributor role.
Permission for the Data Share resource's managed identity to access the Azure SQL Database or Azure Synapse Analytics:
In the Azure portal, navigate to the SQL server and set yourself as the Microsoft Entra Admin.
Connect to the Azure SQL Database/Data Warehouse using the Query Editor or SQL Server Management Studio with Microsoft Entra authentication.
Execute the following script to add the Data Share Managed Identity as a 'db_datareader, db_datawriter, db_ddladmin'.
create user "<share_acc_name>" from external provider;
exec sp_addrolemember db_datareader, "<share_acc_name>";
exec sp_addrolemember db_datawriter, "<share_acc_name>";
exec sp_addrolemember db_ddladmin, "<share_acc_name>";
Note
The <share_acc_name> is the name of your Data Share resource.
SQL Server Firewall access:
- In the Azure portal, navigate to the SQL server and select Firewalls and virtual networks.
- Select Yes for Allow Azure services and resources to access this server.
- Select +Add client IP. Client IP address can change, so you might need to add your client IP again next time you share data from the portal.
- Select Save.
Prerequisites for receiving data into Azure Synapse Analytics (workspace) SQL pool
An Azure Synapse Analytics (workspace) dedicated SQL pool. Receiving data into serverless SQL pool isn't currently supported.
Permission to write to the SQL pool in Synapse workspace: Microsoft.Synapse/workspaces/sqlPools/write. This permission exists in the Contributor role.
Permission for the Data Share resource's managed identity to access the Synapse workspace SQL pool:
In the Azure portal, navigate to Synapse workspace.
Select SQL Active Directory admin from left navigation and set yourself as the Microsoft Entra admin.
Open Synapse Studio, select Manage from the left navigation. Select Access control under Security. Assign yourself the SQL admin or Workspace admin role.
In Synapse Studio, select Develop from the left navigation. Execute the following script in SQL pool to add the Data Share resource-Managed Identity as a 'db_datareader, db_datawriter, db_ddladmin'.
create user "<share_acc_name>" from external provider;
exec sp_addrolemember db_datareader, "<share_acc_name>";
exec sp_addrolemember db_datawriter, "<share_acc_name>";
exec sp_addrolemember db_ddladmin, "<share_acc_name>";
Note
The <share_acc_name> is the name of your Data Share resource.
Synapse workspace Firewall access:
- In the Azure portal, navigate to Synapse workspace. Select Firewalls from left navigation.
- Select ON for Allow Azure services and resources to access this workspace.
- Select +Add client IP. Client IP address is subject to change. This process might need to be repeated the next time you're sharing SQL data from Azure portal.
- Select Save.
Receive shared data
Open invitation
You can open invitation from email or directly from the Azure portal.
To open an invitation from email, check your inbox for an invitation from your data provider. The invitation is from Microsoft Azure, titled Azure Data Share invitation from yourdataprovider@domain.com. Select View invitation to see your invitation in Azure.
To open an invitation from Azure portal directly, search for Data Share Invitations in the Azure portal, which takes you to the list of Data Share invitations.
If you're a guest user on a tenant, you need to verify your email address for the tenant before viewing a Data Share invitation for the first time. Once verified, your email is valid for 12 months.
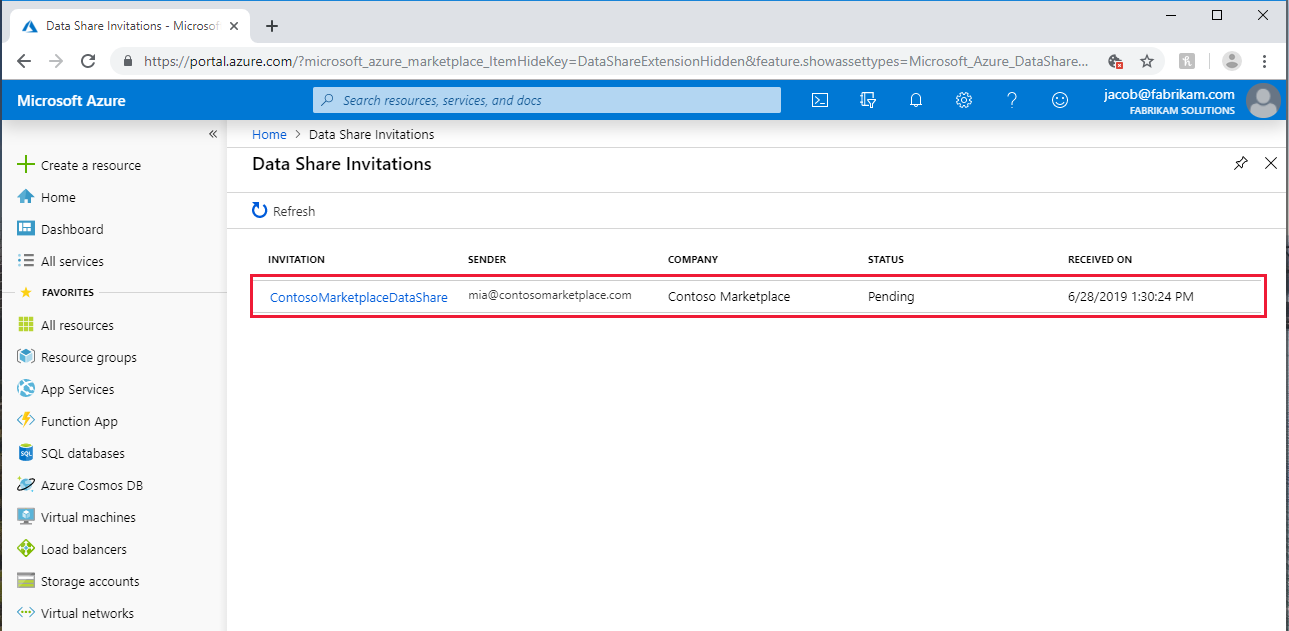
Then, select the share you would like to view.
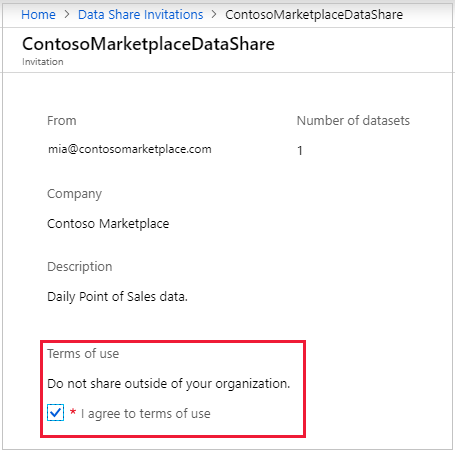
Accept invitation
Make sure all fields are reviewed, including the Terms of Use. If you agree to the terms of use, you are required to check the box to indicate you agree.
Under Target Data Share Account, select the Subscription and Resource Group that you are deploying your Data Share into.
For the Data Share Account field, select Create new if you don't have an existing Data Share account. Otherwise, select an existing Data Share account that you'd like to accept your data share into.
For the Received Share Name field, you might leave the default specified by the data provide, or specify a new name for the received share.
Once you've agreed to the terms of use and specified a Data Share account to manage your received share, Select Accept and configure. A share subscription is created.
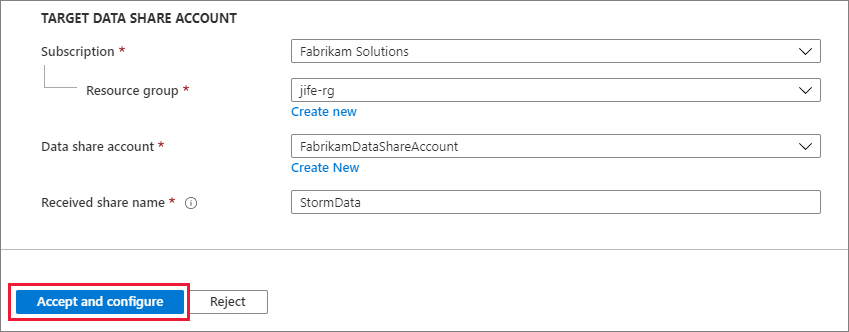
If you don't want to accept the invitation, Select Reject.
Configure received share
Follow the steps below to configure where you want to receive data.
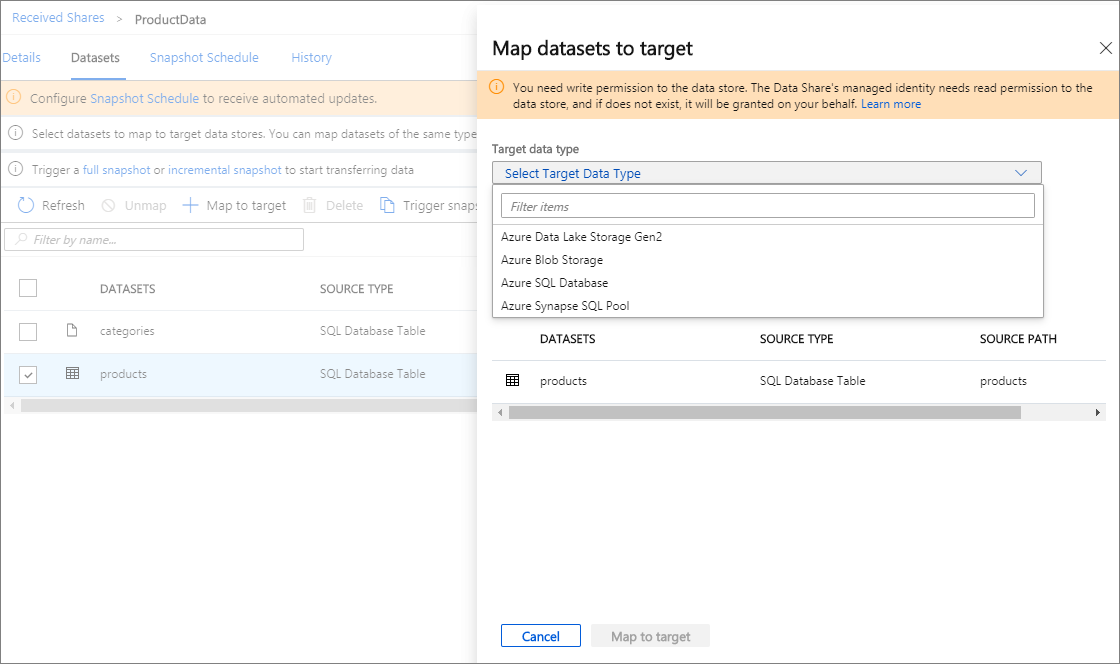
Select Datasets tab. Check the box next to the dataset you'd like to assign a destination to. Select + Map to target to choose a target data store.

Select the target resource to store the shared data. Any data files or tables in the target data store with the same path and name will be overwritten. If you're receiving data into a SQL store and the Allow Data Share to run the above 'create user' SQL script on my behalf checkbox appears, check the checkbox. Otherwise, follow the instruction in prerequisites to run the script appear on the screen. This gives Data Share resource write permission to your target SQL DB.
For snapshot-based sharing, if the data provider has created a snapshot schedule to provide regular updates to the data, you can also enable snapshot schedule by selecting the Snapshot Schedule tab. Check the box next to the snapshot schedule and select + Enable.
Note
The first scheduled snapshot will start within one minute of the schedule time and the next snapshots will start within seconds of the scheduled time.

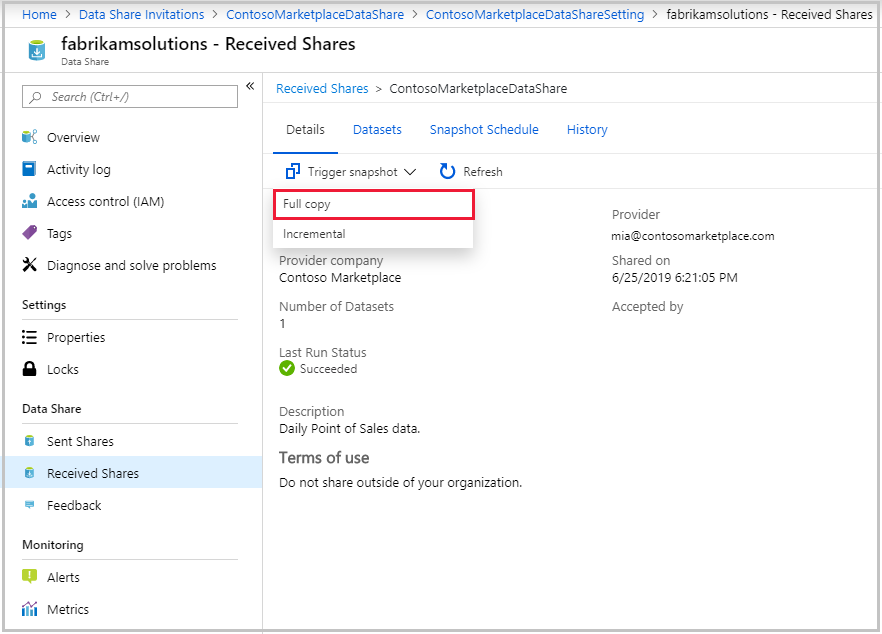
Trigger a snapshot
These steps only apply to snapshot-based sharing.
You can trigger a snapshot by selecting Details tab followed by Trigger snapshot. Here, you can trigger a full snapshot of your data. If it's your first time receiving data from your data provider, select full copy. When a snapshot is executing, the next snapshots won't start until the previous one is complete.
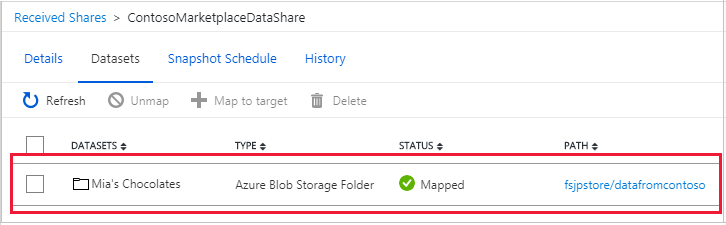
When the last run status is successful, go to target data store to view the received data. Select Datasets, and select the link in the Target Path.
View history
This step only applies to snapshot-based sharing. To view history of your snapshots, select History tab. Here you find history of all snapshots that were generated for the past 30 days.
Snapshot performance
SQL snapshot performance is impacted by many factors. It's always recommended to conduct your own performance testing. Below are some example factors impacting performance.
- Source or destination data store input/output operations per second (IOPS) and bandwidth.
- Hardware configuration (For example: vCores, memory, DWU) of the source and target SQL data store.
- Concurrent access to the source and target data stores. If you're sharing multiple tables and views from the same SQL data store, or receive multiple tables and views into the same SQL data store, performance is impacted.
- Network bandwidth between the source and destination data stores, and location of source and target data stores.
- Size of the tables and views being shared. SQL snapshot sharing does a full copy of the entire table. If the size of the table grows over time, snapshot will take longer.
For large tables where incremental updates are desired, you can export updates to storage account and use the storage account’s incremental sharing capability for faster performance.
Troubleshoot snapshot failure
The most common cause of snapshot failure is that Data Share doesn't have permission to the source or target data store. In order to grant Data Share permission to the source or target Azure SQL Database or Azure Synapse Analytics (formerly Azure SQL DW), you must run the provided SQL script when connecting to the SQL database using Microsoft Entra authentication. To troubleshoot other SQL snapshot failures, refer to Troubleshoot snapshot failure.
Related content
You've learned how to share and receive data from SQL sources using Azure Data Share service. To learn more about sharing from other data sources, continue to supported data stores.