Note
Access to this page requires authorization. You can try signing in or changing directories.
Access to this page requires authorization. You can try changing directories.
Overview
This tutorial describes how to provision a Data Box Gateway on a host system running VMware ESXi 6.7, 7.0 or 8.0.
You need administrator privileges to provision and connect to a virtual device. The provisioning and initial setup can take around 10 minutes to complete.
In this tutorial, you learn how to:
- Ensure your host meets minimum device requirements
- Provision a virtual device using VMware
- Start your virtual device and get its IP address
If you don't have an Azure subscription, create a free account before you begin.
Prerequisites
The prerequisites to provision a virtual device on a host system running VMware ESXi 6.7, 7.0, or 8.0, are as follows.
For the Data Box Gateway resource
Before you begin, make sure that:
You complete the steps in Prepare the portal for Data Box Gateway.
You download the virtual device image for VMware from the Azure portal as described in Prepare the portal for Data Box Gateway.
Important
The software running on the Data Box Gateway may only be used with the Data Box Gateway resource.
For the Data Box Gateway virtual device
Before you deploy a virtual device, make sure that:
You have access to a host system running VMware (ESXi 6.7, 7.0 or 8.0) that can be used to a provision a device.
The host system is able to dedicate the following resources to provision your virtual device:
- A minimum of 4 cores.
- At least 8 GB of RAM. We strongly recommend at least 16 GB of RAM.
- One network interface.
- A 250-GB OS disk.
- A 2-TB virtual disk for system data.
For the network in datacenter
Before you begin:
- Review the networking requirements to deploy a Data Box Gateway and configure the datacenter network as per the requirements. For more information, see Data Box Gateway networking requirements.
- Make sure that the minimum Internet bandwidth is 20 Mbps to allow for optimal working of the device.
Check the host system
To create a virtual device, you need:
- Access to a host system running VMware ESXi Server 6.7, 7.0 or 8.0. The host system is able to dedicate the following resources to your virtual device:
- A minimum of 4 virtual processors.
- At least 8 GB of RAM.
- One network interface connected to the network capable of routing traffic to Internet.
- A 250-GB OS disk.
- A 2-TB virtual disk for data.
- VMware vSphere client on your system to manage the ESXi host.
Provision a virtual device in hypervisor
Perform the following steps to provision a virtual device in your hypervisor.
Copy the virtual device image to a location on your system. You downloaded this virtual image through the Azure portal. Make a note of the image's location for use in a subsequent step.
Sign in to the ESXi server via a browser at this URL:
https://<IP address of the ESXi server>. You need to have administrator privileges to create a virtual machine.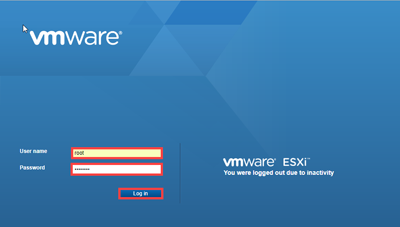
Upload the VMDK to the ESXi server. In the Navigator pane, select Storage.
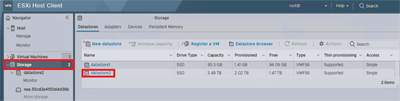
In the right pane, under Datastores, select the datastore where you want to upload the VMDK.
- The datastore can be either VMFS5 or VMFS6. Data Box Gateway has been tested for use on VMware with the VMFS5 and VMFS6 Datastore.
- The datastore must also have enough free space for the OS and data disks.
Right-click and select Browse Datastore.
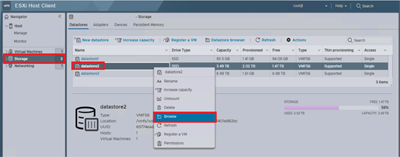
A Datastore Browser window appears.
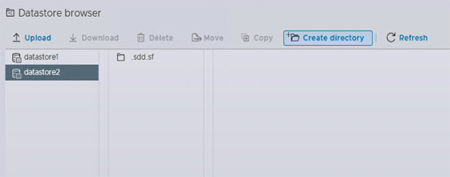
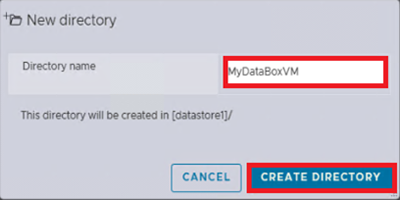
In the tool bar, select Create directory icon to create a new folder. Specify the folder name and make a note of it. This folder name is used in a subsequent step to create a virtual machine (recommended best practice). Select Create directory.
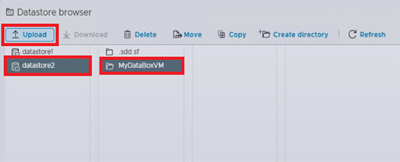
The new folder appears in the left pane of the Datastore Browser. Select the Upload icon and select Upload File.
Browse and point to the VMDK files that you downloaded. Select the file to upload.
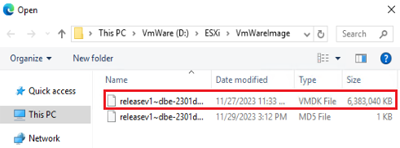
Select Open. The upload of the VMDK file to the specified datastore starts. It might take several minutes for the file to upload.
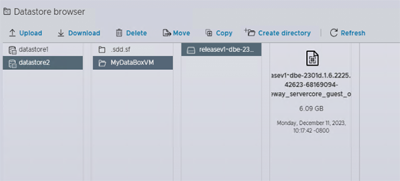
After the upload is complete, you see the file in the datastore in the folder you created.
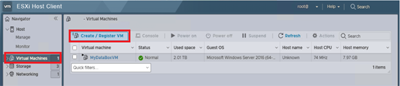
Return to the vSphere client window. In the Navigator pane, select Virtual Machines. In the right pane, select Create/Register VM.
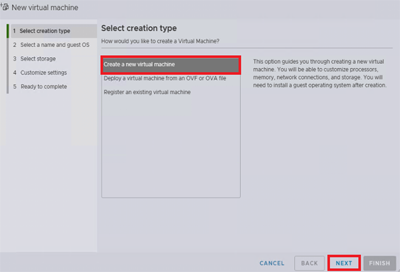
A New Virtual Machine appears. Under Select creation type, choose Create a new virtual machine and select Next.
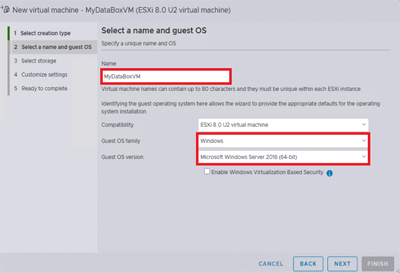
On the Select a name and guest OS page, specify the Name of your virtual machine. This name should match the folder name (recommended best practice) you specified earlier in Step 7. Choose Guest OS family as Windows and Guest OS version as Microsoft Windows Server 2016 (64-bit). Select Next.
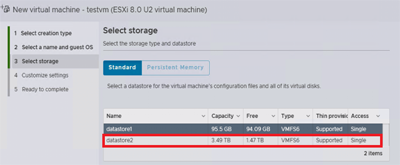
On the Select storage page, select a datastore you want to use to provision your VM. Select Next.
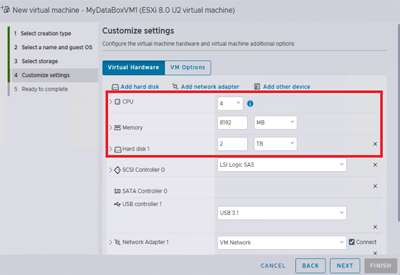
On the Customize settings page, set the CPU to 4, Memory to 8192 MB (or more), Hard disk 1 as 2 TB (or more). Choose SCSI hard disk to add. In this case, it was LSI Logic SAS. The static IDE disks are not supported. The Hard disk 1 is the virtual data disk. The disk can't be shrunk after it's provisioned. Attempting to shrink the disk results in a loss of all local data on the device. CD/DVD Drive 1 isn't needed and should be removed.
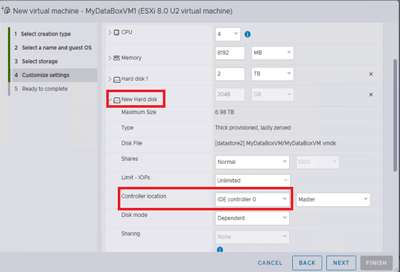
On the same page, select Add hard disk and then select Existing hard disk. Select the VMDK file in the datastore to add an OS disk.

Scroll toward the bottom until you see the New hard disk and expand it to view the settings. Set the Virtual Device Node to IDE controller 0.
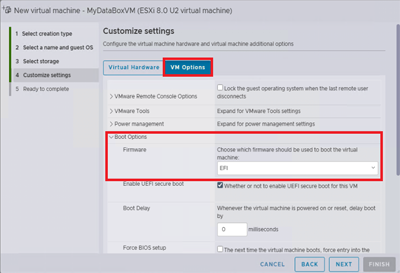
On the Customize settings page, select VM options. Expand Boot options. Ensure that the Firmware field's drop-down list value is set to EFI for ESXi 7.0 or 8.0. Select Next.
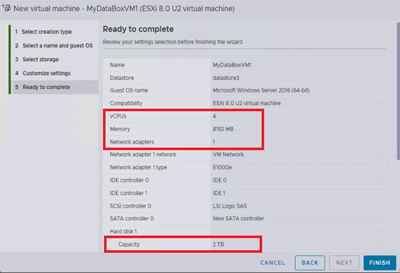
On the Ready to Complete page, review all the settings associated with the new virtual machine. Verify that CPU is 4, memory is 8192 MB, network interface is 1 and Hard disk 2 has IDE controller 0. Select Finish.


Your virtual machine is now provisioned. You'll see a notification to the effect and the new virtual machine is added to the list of VMs.

Perform the steps described in the next section to turn on your new VM and retrieve the IP address.
Note
We recommend that you do not install VMware tools on a virtual device provisioned as previously described. Installation of VMware tools will result in an unsupported configuration.
Start the virtual device and get the IP
Perform the following steps to start your virtual device and connect to it.
To start the virtual device
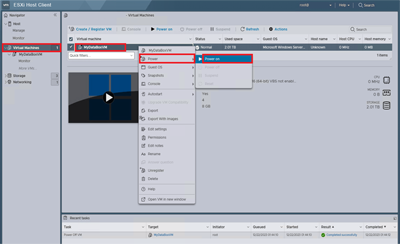
In the right pane, select your device from the list of VMs and right-click to bring up the context menu. To Start the virtual device, select Power, then Power on. You can view the status in the bottom pane of the web client.
Again, select your VM. Right-click, select Console, and then select Open in a new window.
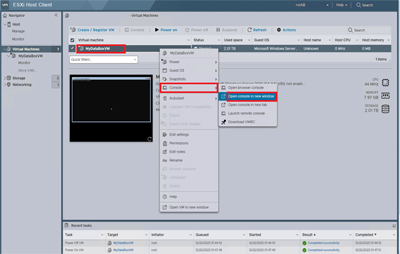
The virtual machine console opens up in a new window.
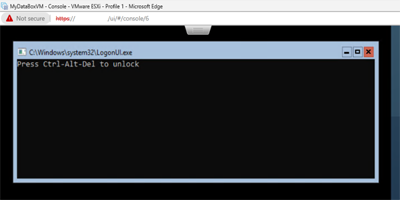
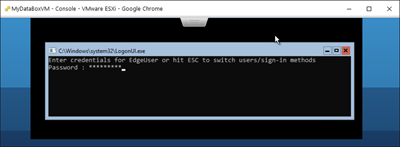
After the device is running, drag the cursor to the tab in the upper middle part of the console window and click. Select Guest OS > Send keys > Ctrl+Alt+Delete to unlock the VM.
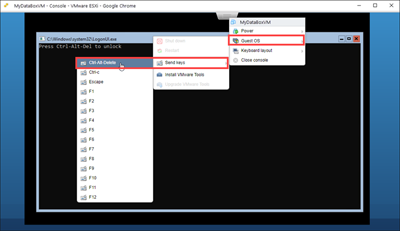
Provide the password to sign into the machine. The default password is Password1.
Steps 6-8 only apply when booting up in a non-DHCP environment. If you are in a DHCP environment, then skip these steps and go to step 9. If you booted up your device in non-DHCP environment, you will see a message to the effect: Use the Set-HcsIPAddress cmdlet to configure the network.
To configure the network, at the command prompt, use the
Get-HcsIpAddresscommand to list the network interfaces enabled on your virtual device. If your device has a single network interface enabled, the default name assigned to this interface isEthernet.Use the
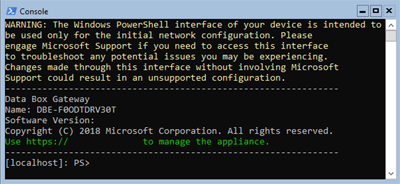
Set-HcsIpAddresscmdlet to configure the network. An example is shown below:Set-HcsIpAddress –Name Ethernet0 –IpAddress 10.161.22.90 –Netmask 255.255.255.0 –Gateway 10.161.22.1After the initial setup is complete and the device has booted up, you will see the device banner text. Make a note of the IP address and the URL displayed in the banner text to manage the device. You will use this IP address to connect to the web UI of your virtual device and complete the local setup and activation.


If your device does not meet the minimum configuration requirements, you will see an error in the banner text (shown below). Modify the device configuration so that it has adequate resources to meet the minimum requirements, then restart and connect to the device. Refer to the minimum configuration requirements in the Check the host system section.
If you face any other error during the initial configuration using the local web UI, refer to the following workflows:
Next steps
In this tutorial, you learned about Data Box Gateway topics such as:
- Ensure host meets minimum device requirements
- Provision a virtual device in VMware
- Start the virtual device and get the IP address
Advance to the next tutorial to learn how to connect, set up, and activate your virtual device.