Note
Access to this page requires authorization. You can try signing in or changing directories.
Access to this page requires authorization. You can try changing directories.
APPLIES TO:  Azure Stack Edge Pro - GPUAzure Stack Edge Pro 2Azure Stack Edge Pro RAzure Stack Edge Mini R
On your Azure Stack Edge Pro device, a Kubernetes cluster is created when you configure compute role. Once the Kubernetes cluster is created, then you can connect to and manage the cluster locally from a client machine via a native tool such as kubectl.
This article describes how to connect to a Kubernetes cluster on your Azure Stack Edge Pro device and then manage it using kubectl.
Prerequisites
Before you begin, make sure that:
You've access to an Azure Stack Edge Pro device.
You've activated your Azure Stack Edge Pro device as described in Activate Azure Stack Edge Pro.
You've enabled compute role on the device. A Kubernetes cluster was also created on the device when you configured compute on the device as per the instructions in Configure compute on your Azure Stack Edge Pro device.
You've access to a Windows client system running PowerShell 5.0 or later to access the device. You can have any other client with a Supported operating system as well.
You have the Kubernetes API endpoint from the Device page of your local web UI. For more information, see the instructions in Get Kubernetes API endpoint
Connect to PowerShell interface
After the Kubernetes cluster is created, you can access this cluster to create namespaces and users and assign users to namespaces. This will require you to connect to the PowerShell interface of the device. Follow these steps on the Windows client running PowerShell.
Depending on the operating system of client, the procedures to remotely connect to the device are different.
Remotely connect from a Windows client
Prerequisites
Before you begin, make sure that:
Your Windows client is running Windows PowerShell 5.0 or later.
Your Windows client has the signing chain (root certificate) corresponding to the node certificate installed on the device. For detailed instructions, see Install certificate on your Windows client.
The
hostsfile located atC:\Windows\System32\drivers\etcfor your Windows client has an entry corresponding to the node certificate in the following format:<Device IP> <Node serial number>.<DNS domain of the device>Here is an example entry for the
hostsfile:10.100.10.10 1HXQG13.wdshcsso.com
Detailed steps
Follow these steps to remotely connect from a Windows client.
Run a Windows PowerShell session as an administrator.
Make sure that the Windows Remote Management service is running on your client. At the command prompt, type:
winrm quickconfigFor more information, see Installation and configuration for Windows Remote Management.
Assign a variable to the connection string used in the
hostsfile.$Name = "<Node serial number>.<DNS domain of the device>"Replace
<Node serial number>and<DNS domain of the device>with the node serial number and DNS domain of your device. You can get the values for node serial number from the Certificates page and DNS domain from the Device page in the local web UI of your device.To add this connection string for your device to the client’s trusted hosts list, type the following command:
Set-Item WSMan:\localhost\Client\TrustedHosts $Name -Concatenate -ForceStart a Windows PowerShell session on the device:
Enter-PSSession -ComputerName $Name -Credential ~\EdgeUser -ConfigurationName Minishell -UseSSLIf you see an error related to trust relationship, then check if the signing chain of the node certificate uploaded to your device is also installed on the client accessing your device.
Provide the password when prompted. Use the same password that is used to sign into the local web UI. The default local web UI password is Password1. When you successfully connect to the device using remote PowerShell, you see the following sample output:
Windows PowerShell
Copyright (C) Microsoft Corporation. All rights reserved.

PS C:\WINDOWS\system32> winrm quickconfig
WinRM service is already running on this machine.
PS C:\WINDOWS\system32> $Name = "1HXQG13.wdshcsso.com"
PS C:\WINDOWS\system32> Set-Item WSMan:\localhost\Client\TrustedHosts $Name -Concatenate -Force
PS C:\WINDOWS\system32> Enter-PSSession -ComputerName $Name -Credential ~\EdgeUser -ConfigurationName Minishell -UseSSL

WARNING: The Windows PowerShell interface of your device is intended to be used only for the initial network configuration. Please engage Microsoft Support if you need to access this interface to troubleshoot any potential issues you may be experiencing. Changes made through this interface without involving Microsoft Support could result in an unsupported configuration.
[1HXQG13.wdshcsso.com]: PS>
When you use the -UseSSL option, you are remoting via PowerShell over https. We recommend that you always use https to remotely connect via PowerShell. Within trusted networks, remoting via PowerShell over http is acceptable. You first enable remote PowerShell over http in the local UI. Then you can connect to PowerShell interface of the device by using the preceding procedure without the -UseSSL option.
If you are not using the certificates (we recommend that you use the certificates!), you can skip the certificate validation check by using the session options: -SkipCACheck -SkipCNCheck -SkipRevocationCheck.
$sessOptions = New-PSSessionOption -SkipCACheck -SkipCNCheck -SkipRevocationCheck
Enter-PSSession -ComputerName $Name -Credential ~\EdgeUser -ConfigurationName Minishell -UseSSL -SessionOption $sessOptions
Here is an example output when skipping the certificate check:
PS C:\WINDOWS\system32> $Name = "1HXQG13.wdshcsso.com"
PS C:\WINDOWS\system32> $sessOptions = New-PSSessionOption -SkipCACheck -SkipCNCheck -SkipRevocationCheck
PS C:\WINDOWS\system32> $sessOptions

MaximumConnectionRedirectionCount : 5
NoCompression                     : False
NoMachineProfile                  : False
ProxyAccessType                   : None
ProxyAuthentication               : Negotiate
ProxyCredential                   :
SkipCACheck                       : True
SkipCNCheck                       : True
SkipRevocationCheck               : True
OperationTimeout                  : 00:03:00
NoEncryption                      : False
UseUTF16                          : False
IncludePortInSPN                  : False
OutputBufferingMode               : None
MaxConnectionRetryCount           : 0
Culture                           :
UICulture                         :
MaximumReceivedDataSizePerCommand :
MaximumReceivedObjectSize         :
ApplicationArguments              :
OpenTimeout                       : 00:03:00
CancelTimeout                     : 00:01:00
IdleTimeout                       : -00:00:00.0010000

PS C:\WINDOWS\system32> Enter-PSSession -ComputerName $Name -Credential ~\EdgeUser -ConfigurationName Minishell -UseSSL -SessionOption $sessOptions
WARNING: The Windows PowerShell interface of your device is intended to be used only for the initial network configuration. Please
engage Microsoft Support if you need to access this interface to troubleshoot any potential issues you may be experiencing.
Changes made through this interface without involving Microsoft Support could result in an unsupported configuration.
[1HXQG13.wdshcsso.com]: PS>
Important
In the current release, you can connect to the PowerShell interface of the device only via a Windows client. The -UseSSL option does not work with the Linux clients.
Configure cluster access via Kubernetes RBAC
After the Kubernetes cluster is created, you can use the kubectl via cmdline to access the cluster.
In this approach, you create a namespace and a user. You then associate the user with the namespace. You also need to get config file that allows you to use a Kubernetes client to talk directly to the Kubernetes cluster that you created without having to connect to PowerShell interface of your Azure Stack Edge Pro device.
Create a namespace. Type:
New-HcsKubernetesNamespace -Namespace <string>Note
For both namespace and user names, the DNS subdomain naming conventions apply.
Here is a sample output:
[10.100.10.10]: PS> New-HcsKubernetesNamespace -Namespace "myasetest1"Create a user and get a config file. Type:
New-HcsKubernetesUser -UserName <string>Note
You can't use aseuser as the username as it is reserved for a default user associated with IoT namespace for Azure Stack Edge Pro.
Here is a sample output of the config file:
[10.100.10.10]: PS> New-HcsKubernetesUser -UserName "aseuser1"
    apiVersion: v1
    clusters:
    - cluster:
        certificate-authority-data: LS0tLS1CRUdJTiBDRVJUSUZJQ0FURS0tLS0tCk1JSUN5RENDQWJDZ0F3SUJBZ0lCQURBTkJna3Foa2lHOXcwQkFRc0ZBREFWTVJNd0VRWURWUVFERXdwcmRXSmwKY201bGRHVnpNQjRYRFRJd01ERXlPVEUyTlRFeE4xb1hEVE13TURFeU5qRTJOVEV4TjFvd0ZURVRNQkVHQTFVRQpBeE1LYTNWaVpYSnVaWFJsY3pDQ0FTSXdEUVlKS29aSWh2Y05BUUVCQlFBRGdnRVBBRENDQVFvQ2dnRUJBTXNpCkdZUHB0U1VWcDhKZEdVcHE1MVBURWhsZm8wWkk3YXFBdUlrOHZWdUFCZHJQK1FBSzFxcEN1di93NjIwbUtpZ0QKak1aT3Q4QkREREppWHF6UDZRZm5Oc0U2VXBHMnh0YnYrcTZHV2R5K0t6WkxMbXlwWGY3VjlzZEJnejVKVDNvYQpIdzFja2NTUklHSlV3UWxTbklNaHJUS3JUNDZFUUp3d282TmlNUzZMZDZieVk3WkUrTGg3OS9aNEhLanhTRmhMClc5ZG8veThZR3FXUDZmZTFmMmVmSkhUeGtwR05HZE1UVjNuOFlCZ0pSRzdrNjh0N2MrZ1NhbUlVWVJpTUNSNFAKYlFxcFpscWYvV2REZEJHOFh6aDJ0M1l4SkVIMm00T0Z1cSsvUitMYm95aHdKbmNMdVJ5OEpNZWlwTEQ3UlN0QwpZTDNNR0EzN2JieTRyYm4zVzg4Q0F3RUFBYU1qTUNFd0RnWURWUjBQQVFIL0JBUURBZ0trTUE4R0ExVWRFd0VCCi93UUZNQU1CQWY4d0RRWUpLb1pJaHZjTkFRRUxCUUFEZ2dFQkFNbzFwWlBtQzV1cmRPZUJhSWQ4eEQzRkxCMG8KTlErbXBXMWpDd0ZtY3h6dUtlWmRsNXc2N0tuS2JTcDR0TXo1cXg3bUtSc0UxcnBoWkh2VHlKUXg1ZFk2ZE1Kdgp5d2FQZjBpT05TNlU2cC9INE12U1dJaEtJZ1FuTnE1dDh4TjJCNnZpQW41RmZoRkx6WEQrUlZGSm42cnovWkZnCmV6MHpxTkNKYmcvelFucFROcmQ2cnFFRHpoSVFZOVdYVWQycFh3ZXRqUXJpMkpZamh4NmtEcTVoRkZTM0FLUnIKOWlQTVQxaWNkR1NUMFVvM1hIZ1k2ck45WGp3MHFrY2I0Sy83UlVVWlRvS3dKamROR3lNTnpad000L2puR0p5SwpQTE9ycU5Ddlkvb0lkVEM5eVZVY3VRbXVlR0VqT20xUnN1RDFHYVE0RTZwakppVWJpMVdrajJ1bFhOWT0KLS0tLS1FTkQgQ0VSVElGSUNBVEUtLS0tLQo=
        server: https://10.128.47.90:6443
        name: kubernetes
    contexts:
    - context:
        cluster: kubernetes
        user: aseuser1
        name: aseuser1@kubernetes
    current-context: aseuser1@kubernetes
    kind: Config
    preferences: {}
    users:
    - name: aseuser1
        user:
        client-certificate-data: LS0tLS1CRUdJTiBDRVJUSUZJQ0FURS0tLS0tCk1JSUMwVENDQWJtZ0F3SUJBZ0lJWlFXcjY2cGFWSm93RFFZSktvWklodmNOQVFFTEJRQXdGVEVUTUJFR0ExVUUKQXhNS2EzVmlaWEp1WlhSbGN6QWVGdzB5TURBeE1qa3hOalV4TVRkYUZ3MHlNVEF4TWpneU1qVTJNVGRhTUJNeApFVEFQQmdOVkJBTVRDR0Z6WlhWelpYSXhNSUlCSWpBTkJna3Foa2lHOXcwQkFRRUZBQU9DQVE4QU1JSUJDZ0tDCkFRRUF4R3RDaXJ2cVhGYm5wVmtaYlVPRWQ3cXg2UzNVZ092MlhHRHNKM2VYWXN0bUxQVjMrQnlBcWwyN211L1AKaWdmaWt6MG9QSW1iYmtvcVJkamlYckxFZnk0N3dHcEhzdUhUOHNLY2tHTnJleFE2bXhaZ29xaU1nL2FuMUpMdwpiOFEvVnlQaWdVdUt6eVBseEhUZmlmSVM5MzR1VnZVZUc0dzlMRjAyZ2s2Nitpc0ZtanhsVmhseWRMNlc2UmZTCjl0OGpNMEFkdEpJL0xNbE13RHJJRVdFKzM4WDVNelJhQkJYNnlzNDFWSkZxekcwdW14dHdxN2pGOXp1UTE4ekIKalRZaDl3OWVKcDJwS2Fvak5tNE9SSDh4SzVSaUhocjJ2anFJWXkxRDd2WDh0b0U1K05HNmxHZjh5L1NvQnNRbQpmOG9vL1k3SEZmQXVGdlN6WUc1RUlQTFM4UUlEQVFBQm95Y3dKVEFPQmdOVkhROEJBZjhFQkFNQ0JhQXdFd1lEClZSMGxCQXd3Q2dZSUt3WUJCUVVIQXdJd0RRWUpLb1pJaHZjTkFRRUxCUUFEZ2dFQkFNR1BxY0YzS1BCbHZ0K24KN1NOcGE3anhWYkhZVGxyNTgwVWxzek93WEwwVnVPUUlCYmN2djIzZk9HNkhDZlQ0bWxBU0JRWVNZcmpLMjJTTwpTWld4cjNQUDlhVzNHajkxc0ttSnc1ZUF1WFhQbUJpK1RWQzBvY0ZLaEQvZ0o1aC93YnBaVndpVjVyRWE5Kzc2CnhNcFAzRld6dG5tT1hPaEl6UFNlR3B4YWpwQXd3ZXd4QU0yb0xGRFZFcy9XTFFMODJZM3NFcE93NVNaSVJJNXMKUHhMUTVnV1ZPM2x2SXcwZ3IrdkJlanZSOUZKaWVuTWFRdGdjSVgyRmpDaDBRMHVYRkdsTVNXWEljbjRLRTR0TApQSFFMalRSVUwyVnRXcW1YZ1RBM3RzN01DcGNRTFdPZFJUYkpSejZCbkc1aXVwcDdOSlFvYW9YcWpNVk5DVDZCCllYMEd0Skk9Ci0tLS0tRU5EIENFUlRJRklDQVRFLS0tLS0K
        client-key-data: LS0tLS1CRUdJTiBSU0EgUFJJVkFURSBLRVktLS0tLQpNSUlFb2dJQkFBS0NBUUVBeEd0Q2lydnFYRmJucFZrWmJVT0VkN3F4NlMzVWdPdjJYR0RzSjNlWFlzdG1MUFYzCitCeUFxbDI3bXUvUGlnZmlrejBvUEltYmJrb3FSZGppWHJMRWZ5NDd3R3BIc3VIVDhzS2NrR05yZXhRNm14WmcKb3FpTWcvYW4xSkx3YjhRL1Z5UGlnVXVLenlQbHhIVGZpZklTOTM0dVZ2VWVHNHc5TEYwMmdrNjYraXNGbWp4bApWaGx5ZEw2VzZSZlM5dDhqTTBBZHRKSS9MTWxNd0RySUVXRSszOFg1TXpSYUJCWDZ5czQxVkpGcXpHMHVteHR3CnE3akY5enVRMTh6QmpUWWg5dzllSnAycEthb2pObTRPUkg4eEs1UmlIaHIydmpxSVl5MUQ3dlg4dG9FNStORzYKbEdmOHkvU29Cc1FtZjhvby9ZN0hGZkF1RnZTellHNUVJUExTOFFJREFRQUJBb0lCQUVVSUVXM2kxMTQycU5raQo5RjNEWWZZV1pscTJZYjRoc0FjTmhWSGxwUTN5d0dsQ3FEUktDQ3BZSVF3MkJqSFR6WnpEM0xWU0E0K0NmMUxuCkE4QVdnaHJVcStsWE1QVzhpcG9DTGJaTlNzUUord0x3bld2dFl0MHFQaGZtd0p2M1UrK1RUQkwyOHNVVUw3ZVkKLzh0aWlhbno3ZU5mNklIMENyZmgxcnQ3WWhsemtRd1hBVHNScVJja0dMaTgrdGN5WnVzdGFhbENUSzBGRTdCaQpBUGE5a2w1SG56eCs4TTcvNWladHkwTUIxYWpWMnlGblBkUmlKSFVCb1AxVVV0QUthYjVZU0RvNllkZ2pIUTRHCjNWN1l1YWZobnVFMXA0VVIvUkloVVdjRlVVaTFBOFpZMFdnd1BDTmhnMWpQZU5vb2Y1UHpRbEY1OTRBREVwUUYKOFR2bG92RUNnWUVBOWZZbUxyY0tlQ0JiMTFoQVhoTi91Z1RTbU5xNnpFL1pPSWl6M0xwckdjRDhvWDdCVW9GcgplelkxbktSS2tkczE5OERnVjlQZUhuNzllQTRoMjM5RkIwNFFhMUJBdUVMRzRsdHJ3VlNxaFBENUR6YkcrSEhSCnJtYThVMEpUSmVVS0tJVjRUUGxlTzFtK2tjbkRJVXY1ckpwZDVXU3RvcUhXdk9RZkEvRUF0VlVDZ1lFQXpHOTcKTitCZVVvbFNiREttVUNGdTdPZGhYSXJYR3RnSEorZ2JOMDlnSHRURG5PY0IxZ1NzNkpZa1FPQU9qbWFxK05lRAp5SUF1NytheWlFRmpyT2tzTGhkSTREUXNkWFZveFFGVko1V1JwWlk3UTVRaFZpYUR2enR4NDlzSDlKSkplM2U0Cnl3NWdpNGkxKy90MnY2eWRKcWdNQ0xxOHlEdFRrcE9PSitkbkp5MENnWUJwZ3lpcURaZU9KTU9CUTdpSkl2QSsKQ21lVmJ1K0hTaEd6TU9HSHBPamc2V3IybEh1Mk94S3lqblM5TjdWTmtLNDhGQitwVFpnUm1RUi9CZ0Q4T2tLUQplYXFOZnFYazViQ1AxZ3dKcVpwazRVTFdoZmNoQ1NLY0lESlZ2VFFTSTRrU0RQK29kYWs0Nkt6WnVhWGRtTXdJCmdVZ2FhZkFhdmpaeVhhSDRmT0NDNlFLQmdHVXJCaDh3dVh5KzJEc1RGWnF4OE9McjNoS2Q0clUyRXRSODJIc1cKbk1xbEgraVZxU0x3VFdFTWJBUnUzTVU3cVlCYnBxdWlRNWdVNG1UcmR4Z3FpK0tEUTEwd2RJL3IrbDBEdTlCTApCRGlkajlaeGg4M0tZWWhSTXBzLzJULys1TDVsRU4zcnozczl2RkZtcisxS3pycENqeklDdDBtZmtrd0hHV0pGCjhaWkJBb0dBVXB3aUIrcWlHbkpxU1FtZHNSZFVabGFBaTRpbGhaa01RYTRHem95ZFQ3OTVHTm44ZThBRjd3WHMKTGpyYjdEV1FwakdCMnZpUlkySUZBVmIyKzZsdDlwOVJRMTZnSmxpNU5ZRXVvQWRoWXBsVWdBZGFHWHNGNHdabwo3SHFHTHBGdmUxVU5Gb0dQdkxpWUNrUFVYdGduQ3dNb0R2SEpKNzVYMXl6ckh6cmxUS1k9Ci0tLS0tRU5EIFJTQSBQUklWQVRFIEtFWS0tLS0tCg==

[10.100.10.10]: PS>
A config file is displayed in plain text. Copy this file and save it as a config file.
Important
Do not save the config file as .txt file, save the file without any file extension.
The config file should live in the
.kubefolder of your user profile on the local machine. Copy the file to that folder in your user profile.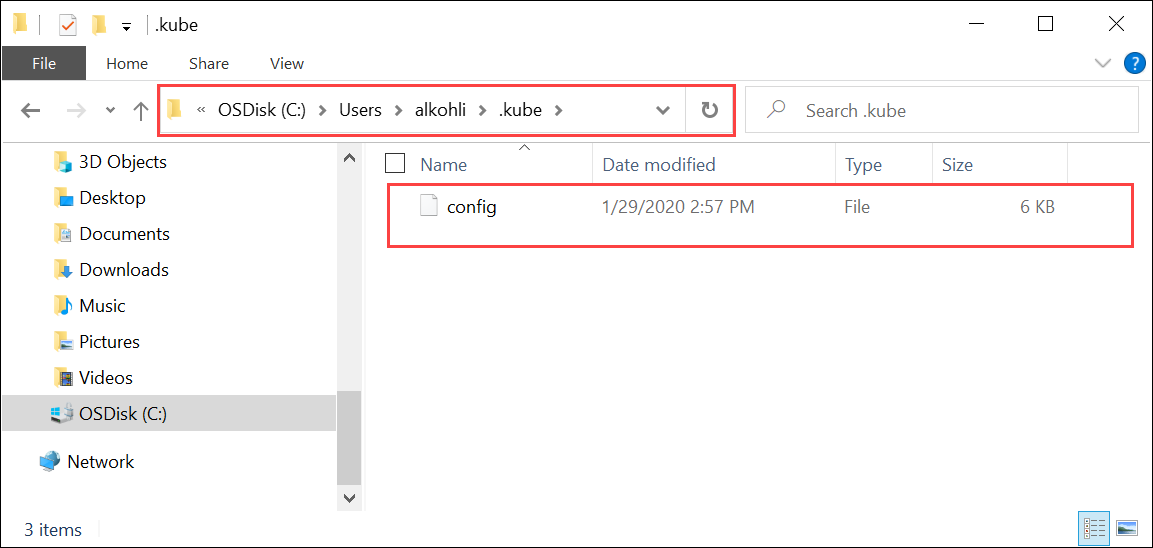
Associate the namespace with the user you created. Type:
Grant-HcsKubernetesNamespaceAccess -Namespace <string> -UserName <string>Here is a sample output:
[10.100.10.10]: PS>Grant-HcsKubernetesNamespaceAccess -Namespace "myasetest1" -UserName "aseuser1"Once you have the config file, you do not need physical access to the cluster. If your client can ping the Azure Stack Edge Pro device IP, you should be able to direct the cluster using kubectl commands.
Start a new PowerShell session on your client. You don't need to be connected to the device interface. You can now install
kubectlon your client using the following command:PS C:\windows\system32> curl.exe -LO "https://dl.k8s.io/release/v1.25.0/bin/windows/amd64/kubectl.exe" PS C:\windows\system32>For example, if the Kubernetes master node was running v1.25.0, install v1.25.0 on the client.
Important
Download a client that is skewed no more than one minor version from the master. The client version but may lead the master by up to one minor version. For example, a v1.3 master should work with v1.1, v1.2, and v1.3 nodes, and should work with v1.2, v1.3, and v1.4 clients. For more information on Kubernetes client version, see Kubernetes version and version skew support policy. For more information on Kubernetes server version on Azure Stack Edge Pro, go to Get Kubernetes server version. Sometimes,
kubectlis preinstalled on your system if you are running Docker for Windows or other tools. It is important to download the specific version ofkubectlas indicated in this section to work with this kubernetes cluster.The installation takes several minutes.
Verify the version installed is the one that you downloaded. You should specify the absolute path to where the
kubectl.exewas installed on your system.PS C:\Users\myuser> C:\windows\system32\kubectl.exe version Client Version: version.Info{Major:"1", Minor:"15", GitVersion:"v1.15.2", GitCommit:"f6278300bebbb750328ac16ee6dd3aa7d3549568", GitTreeState:"clean", BuildDate:"2019-08-05T09:23:26Z", GoVersion:"go1.12.5", Compiler:"gc", Platform:"windows/amd64"} Server Version: version.Info{Major:"1", Minor:"15", GitVersion:"v1.15.1", GitCommit:"4485c6f18cee9a5d3c3b4e523bd27972b1b53892", GitTreeState:"clean", BuildDate:"2019-07-18T09:09:21Z", GoVersion:"go1.12.5", Compiler:"gc", Platform:"linux/amd64"} PS C:\Users\myuser>For more information on
kubectlcommands used to manage the Kubernetes cluster, go to Overview of kubectl.Add a DNS entry to the hosts file on your system.
Run Notepad as administrator and open the
hostsfile located atC:\windows\system32\drivers\etc\hosts.Use the information that you saved from the Device page in the local UI in the earlier step to create the entry in the hosts file.
For example, copy this endpoint
https://compute.asedevice.microsoftdatabox.com/[10.100.10.10]to create the following entry with device IP address and DNS domain:10.100.10.10 compute.asedevice.microsoftdatabox.com
To verify that you can connect to the Kubernetes pods, type:
PS C:\Users\myuser> kubectl get pods -n "myasetest1"
No resources found.
PS C:\Users\myuser>
You can now deploy your applications in the namespace, then view those applications and their logs.
Important
There are many commands that you won't be able to run, for example, the commands that require you to have admin access. You can only perform operations that are allowed on the namespace.
Remove Kubernetes cluster
To remove the Kubernetes cluster, you will need to remove the IoT Edge configuration.
For detailed instructions, go to Manage IoT Edge configuration.