Tutorial: Connect to Azure Stack Edge Pro 2
This tutorial describes how you can connect to your Azure Stack Edge Pro 2 device by using the local web UI.
The connection process can take around 5 minutes to complete.
This tutorial describes how you can connect to the local web UI on your two-node Azure Stack Edge Pro 2 device.
The connection process can take around 10 minutes to complete.
In this tutorial, you learn about:
- Prerequisites
- Connect to a physical device
Prerequisites
Before you configure and set up your device, make sure that:
- You've installed the physical device as detailed in Install Azure Stack Edge Pro 2.
Connect to the local web UI setup
Configure the Ethernet adapter on your computer to connect to your device with a static IP address of 192.168.100.5 and subnet 255.255.255.0.
Connect the computer to PORT 1 on your device. If connecting the computer to the device directly (without a switch), use an Ethernet crossover cable or a USB Ethernet adapter. Use the following illustration to identify PORT 1 on your device.
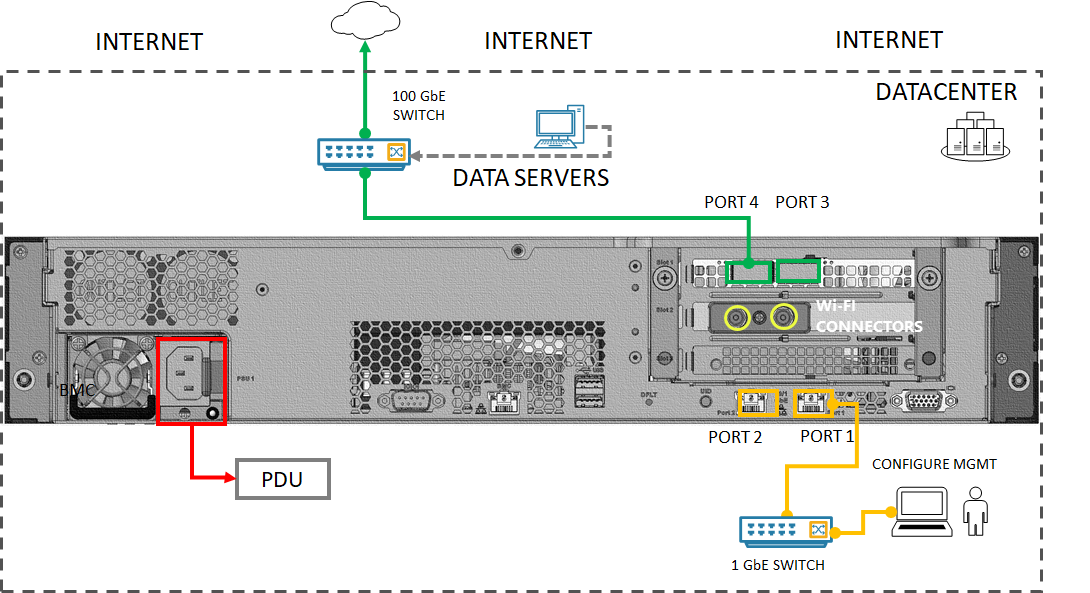
The back plane of the device may look slightly different depending on the exact model you’ve received. For more information, see Cable your device.
Open a browser window and access the local web UI of the device at
https://192.168.100.10.
This action may take a few minutes after you've turned on the device.You see an error or a warning indicating that there’s a problem with the website's security certificate.
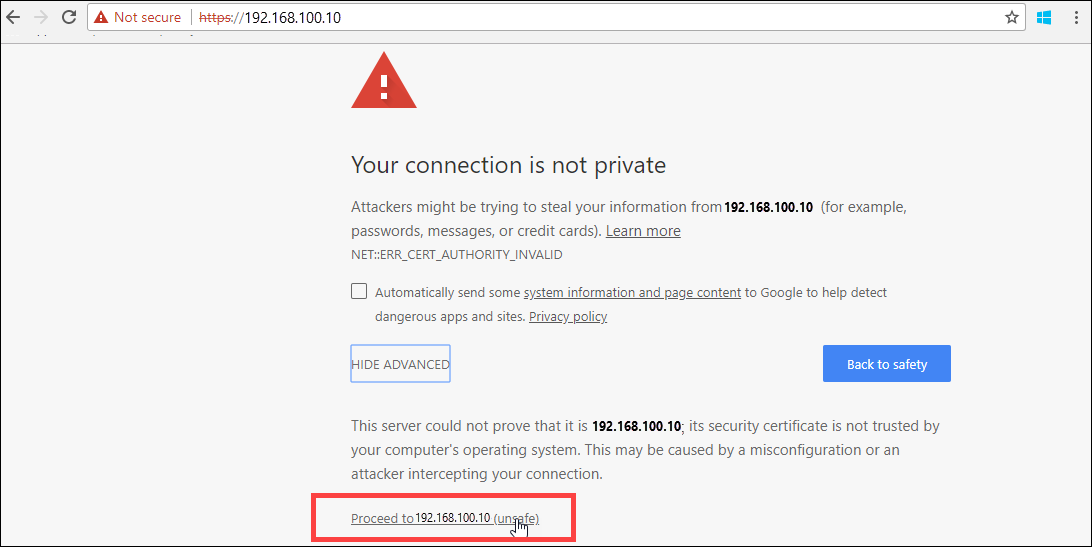
Select Continue to this webpage.
These steps might vary depending on the browser you're using.Sign in to the web UI of your device. The default password is Password1.
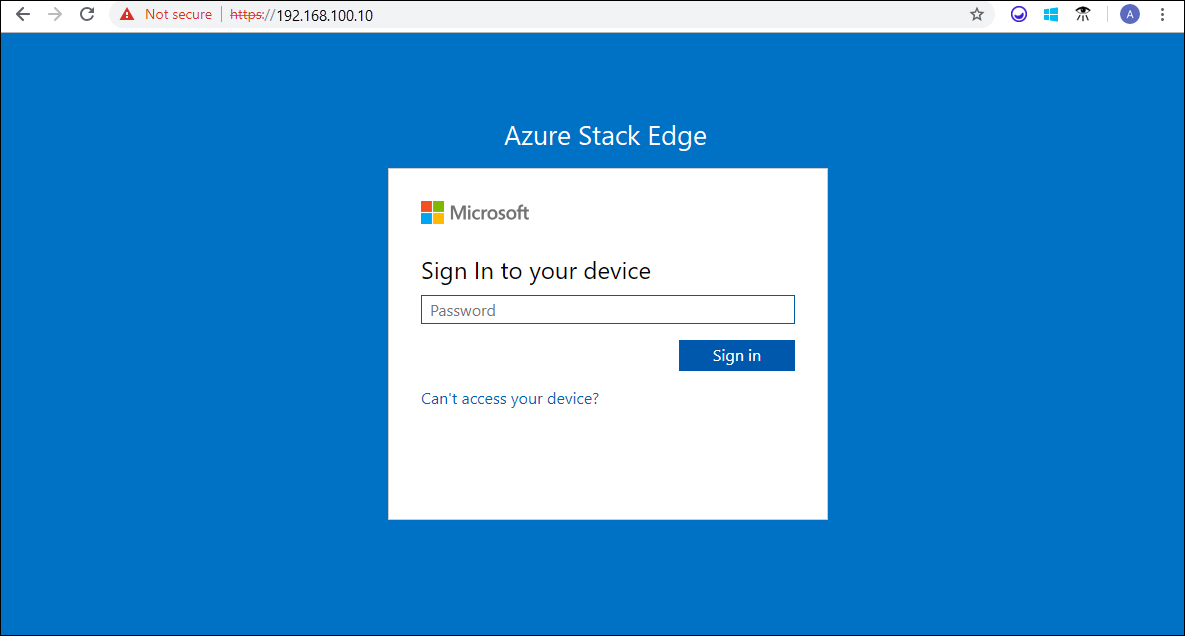
At the prompt, change the device administrator password.
The new password must contain between 8 and 16 characters. It must contain three of the following characters: uppercase, lowercase, numeric, and special characters.
You're now at the Overview page of your device. The next step is to configure the network settings for your device.
Configure the Ethernet adapter on your computer to connect to your device with a static IP address of 192.168.100.5 and subnet 255.255.255.0.
Connect the computer to PORT 1 on your device. If connecting the computer to the device directly (without a switch), use an Ethernet crossover cable or a USB Ethernet adapter.
Open a browser window and access the local web UI of the device at
https://192.168.100.10.
This action may take a few minutes after you've turned on the device.You see an error or a warning indicating that there’s a problem with the website's security certificate.
Select Continue to this webpage.
These steps might vary depending on the browser you're using.Sign in to the web UI of your device. The default password is Password1.
At the prompt, change the device administrator password.
The new password must contain between 8 and 16 characters. It must contain three of the following characters: uppercase, lowercase, numeric, and special characters. You're now at the Overview page of your 2-node device.Repeat the above steps to connect to the second node of your 2-node device.
The next step is to configure the network settings for your device.
Next steps
In this tutorial, you learned about:
- Prerequisites
- Connect to a physical device
To learn how to configure network settings on your Azure Stack Edge Pro 2 device, see: