Note
Access to this page requires authorization. You can try signing in or changing directories.
Access to this page requires authorization. You can try changing directories.
This tutorial describes how to return Azure Data Box and the data is erased once the device is received at the Azure data.
In this tutorial, you will learn about topics such as:
- Prerequisites
- Prepare to ship
- Ship Data Box to Microsoft
- Erasure of data from Data Box
Prerequisites
Before you begin, make sure:
- You've have completed the Tutorial: Copy data from Azure Data Box.
- Copy jobs are complete. Prepare to ship can't run if copy jobs are in progress.
Prepare to ship
Final step is to prepare the device to ship. In this step, all the device shares are taken offline. The shares cannot be accessed once you start this process. You can also choose to clean up device whereby the local data on the device is erased permanently. Once the step is complete, your e-ink display will show the return shipping label.
Important
- You can choose to erase the data on the device permanently in this step and clean up the device. The data in your Azure Storage account will stay and accrue charges. We recommend that you delete this data only after you have verified that data copy to an on-premises data server is complete.
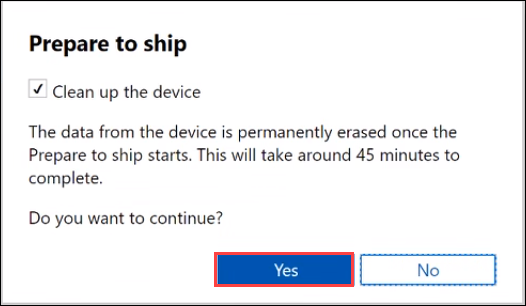
Go to Prepare to ship and select Start preparation.

The prepare to ship starts and the device shares go offline. By default, the device clean up is performed and Data Box erases the data on its disks.
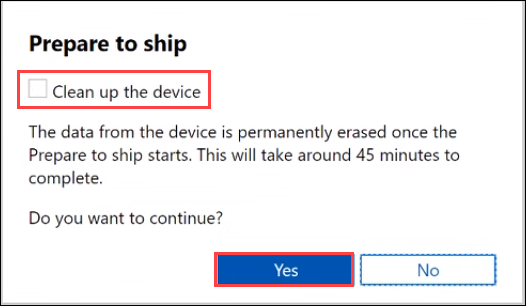
You can opt out of the cleanup procedure by unchecking the combo box. In this case, the device data is erased later at the datacenter.
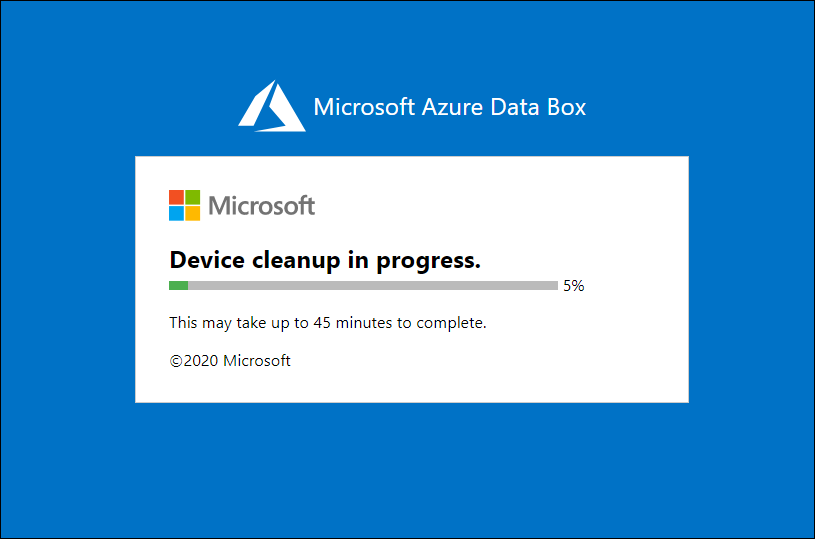
Once the Prepare to ship starts, you will see a progress notification with a progress bar.
After the prepare to ship and the device cleanup (if selected) is complete, the E-ink display on your device will also display the return the shipping label.
You also see a completion reference number which is used for different things depending on the country/region in which you are located. You can also view the instructions for return shipment. Depending on the type of shipping you chose, Microsoft managed or self managed, the instructions will vary.
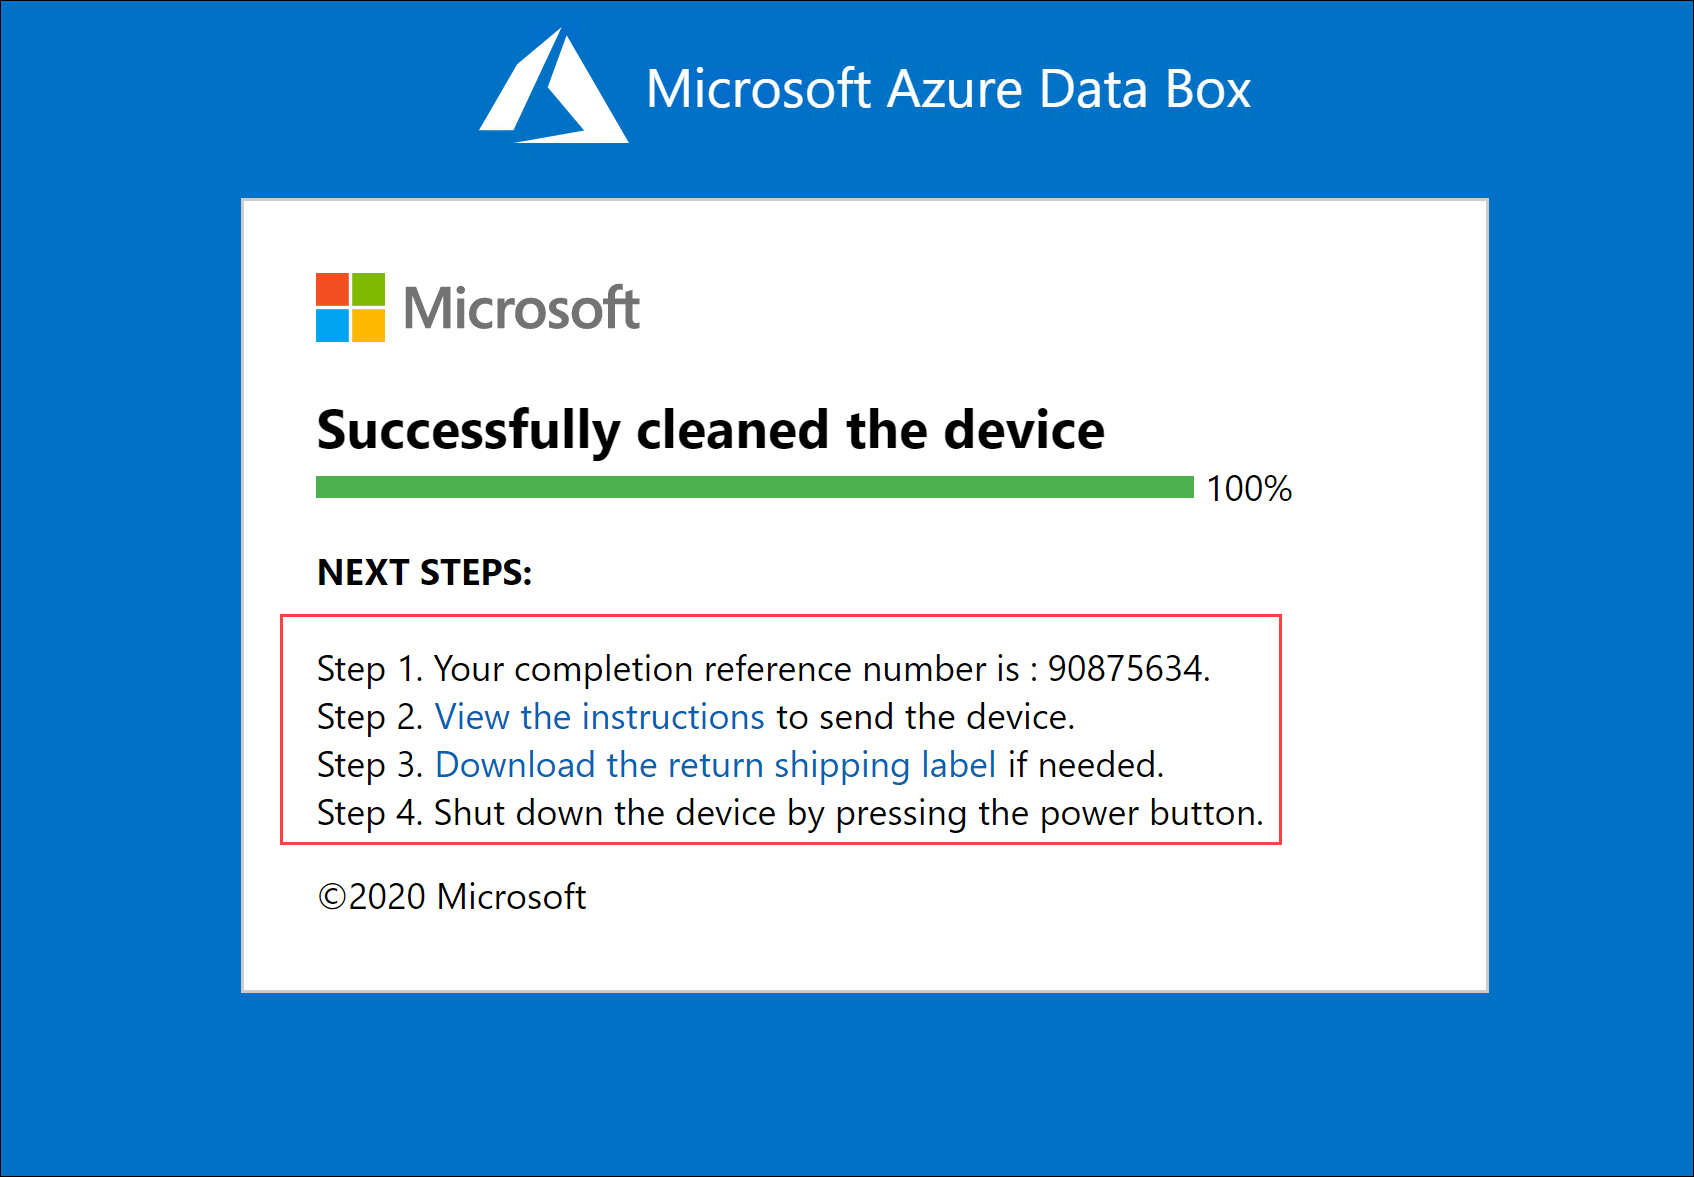
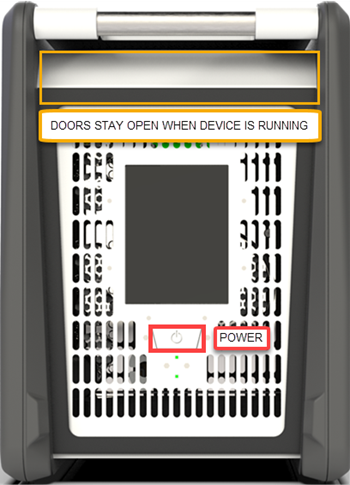
Shut down the device. Locate the power button on the front operating panel of the device. Turn off the device.
Remove the cables. The next step is to ship the device to Microsoft.
The next steps are determined by where you are returning the device.
Ship Data Box back
Based on the region where you're shipping the device, the procedure is different. In many countries/regions, you can use Microsoft managed shipping or self-managed shipping.
If using Microsoft managed shipping, follow these steps.
Shipping in Americas
US & Canada
Take the following steps if returning the device in US or Canada.
If you receive the device packaged in a box, retain the box, and DO NOT discard it.
Make sure the data copy to the device is complete, and the Prepare to ship step is completed successfully.
Note the tracking number. This tracking number is shown as reference number on the Prepare to Ship page of the Data Box local web UI. The tracking number is available after the Prepare to Ship step completes successfully. Download the shipping label from this page and paste it on the packing box. If you received a device without a box, ensure that the shipping label is displayed on the E-ink display. If the label is damaged or lost, or is not displayed on the E-ink display, contact Microsoft Support.
Make sure that the device is powered off and cables are removed.
Spool and securely place the power cord that was provided with device in the back of the device.
Package the device using the original box that was used for shipping. Ensure that the return label is included.
Schedule a pickup:
If your order was delivered via FedEx, schedule a pickup with FedEx. To schedule a pickup:
- Call the local FedEx number: 800-Go-FedEx.
- Provide the reverse shipment tracking number as shown on your printed label.
- Contact adbops@microsoft.com if you encounter any issues while scheduling a pickup.
- You can also drop your Data Box Disk at your nearest FedEx drop-off location.
If your order was delivered via UPS, schedule a pickup with UPS. To schedule a pickup:
- Call the local UPS (country/region-specific toll-free number).
- In your call, quote the reverse shipment tracking number as shown in the E-ink display or your printed label. If you don't quote the tracking number, UPS will require an additional charge during pickup.
- If any issues are encountered while scheduling a pickup, or you're asked to pay additional fees, contact send email to adbops@microsoft.com. Instead of scheduling the pickup, you can also drop off the Data Box at the nearest drop-off location.
After the Data Box is picked up and scanned by your carrier, the order status in the portal updates to Picked up. A tracking ID is also displayed.
If using Microsoft managed shipping, follow these steps.
Shipping in Europe
Take the following steps if you're returning the device in Europe.
If you receive the device packaged in a box, retain the box, and DO NOT discard it.
Make sure the data copy to the device is complete, and the Prepare to ship step is completed successfully.
Note the tracking number. This tracking number is shown as reference number on the Prepare to Ship page of the Data Box local web UI. The tracking number is available after the Prepare to Ship step completes successfully. Download the shipping label from this page and paste it on the packing box. If you received a device without a box, ensure that the shipping label is displayed on the E-ink display. If the label is damaged or lost, or is not displayed on the E-ink display, contact Microsoft Support.
Make sure that the device is powered off and cables are removed.
Spool and securely place the power cord that was provided with device in the back of the device.
Package the device using the original box that was used for shipping. Ensure that the return label is included.
If you're shipping back to Azure datacenters in Germany or Switzerland, the Azure datacenter requires advance notice of all device returns:
Email Azure Data Box Operations at adbops@microsoft.com to receive an Inbound ID. Send email to adbops@microsoft.com. Use the following template.
To: adbops@microsoft.com
Subject: Request for Azure Data Box Inbound ID: <orderName>
Body:

I am ready to return an Azure Data Box and would like to request an Inbound ID for the following order:

Order Name: <orderName>
Return Tracking Number: <returnTracking#>
Write down the Inbound ID number provided by Azure Data Box Operations, and paste it onto the unit, where it is clearly visible, near the return label.
Schedule a pickup with UPS if returning the device. To schedule a pickup:
- Call the local UPS (country/region-specific toll free number).
- In your call, quote the reverse shipment tracking number as shown in the E-ink display or your printed label. If you don't quote the tracking number, UPS will require an additional charge during pickup.
- If any issues come up while you're scheduling a pickup, or you're asked to pay additional fees, contact Azure Data Box Operations. Send email to adbops@microsoft.com.
Instead of scheduling the pickup, you can also drop off the Data Box at the nearest drop-off location.
Once the Data Box is picked up and scanned by your carrier, the order status in the portal updates to Picked up. A tracking ID is also displayed.
If you're shipping back to Azure datacenters in Germany or Switzerland, you can also use self-managed shipping.

If using Microsoft managed shipping, follow these steps.
Shipping in Asia
Take the following steps if you're returning the device in Japan.
Keep the original box used to ship the device for return shipment.
Power off the device and remove the cables.
Spool and securely place the power cord that was provided with the device in the back of the device.
Write your company name and address information on the consignment note as your sender information.
Email adbops@microsoft.com using the following template to get the return shipment label:
- If you have multiple orders, email to ensure individual pickup.
To: adbops@microsoft.com
Subject: Microsoft Azure return shipment Pickup | [Order Name]
Body:
-  Name:
-  Contact Number:
-  Collection Address:
-  Preferred Collection Date and Time:
Print two copies of the reverse shipping label. Affix one label to the outside of the package. Use the second label to obtain a signature from the carrier team as acknowledgment.
If you encounter pickup issues:
- Contact Azure Data Box Operations at adbops@microsoft.com for assistance.
- Include the Order Name and a description of the issue in the subject line.
Once the device is picked up and scanned by the carrier, the order status in the Azure portal will update to “Picked Up” and a tracking ID will be displayed.
If using Microsoft managed shipping, follow these steps.
Shipping in Australia
Australia
Azure datacenters in Australia have an additional security notification. All the inbound shipments must have an advanced notification. Take the following steps to ship in Australia.
Keep the original box used to ship the device for return shipment.
Make sure that the data copy to device is complete and Prepare to ship run is successful.
Power off the device and remove the cables.
Spool and securely place the power cord that was provided with the device in the back of the device.
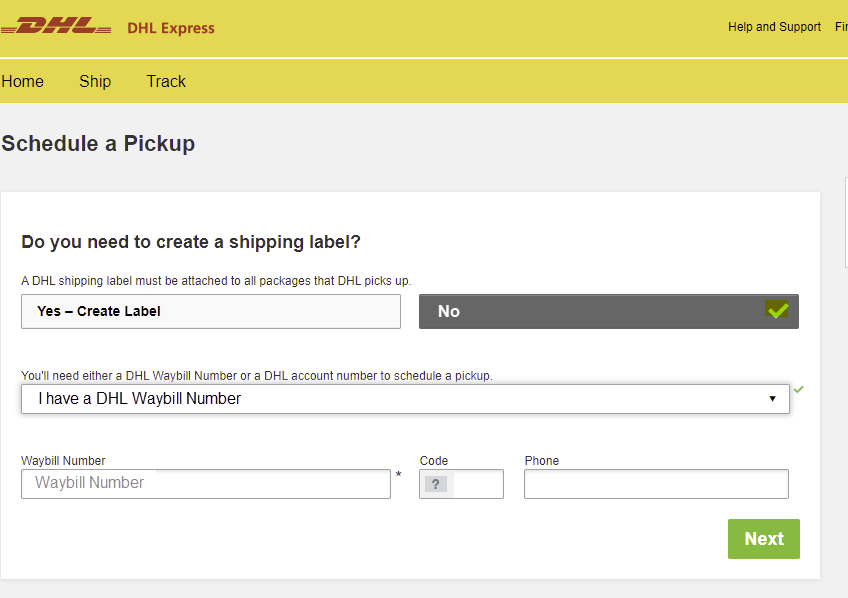
Book a pickup online by going to DHL Express Australia and selecting Schedule a Pickup.
- On the DHL website, select No to create a shipping label. Enter the DHL Waybill number generated when completing Prepare to ship process.

If using Microsoft managed shipping, follow these steps.
Shipping in Africa
S Africa
Take the following steps if you're returning the device in South Africa.
Pack the device for return shipment in the original box.
Spool and securely place the power cord that was provided with the device in the back of the device.
Note the tracking number (shown as reference number on the Prepare to Ship page of the Data Box local web UI). The tracking number is available after the "Prepare to ship" step completes successfully. Download the shipping label from this page, and paste it on the packing box.
Request a return code from Azure Data Box Operations. A return code is required for delivering the package back to the datacenter. Send email to adbops@microsoft.com. Note this code on the shipping label next to the return address, where it is clearly visible.
Book a pickup with DHL using one of the following methods:
Book a pickup online by going to DHL Express South Africa and selecting Schedule a Pickup.
On the DHL website, select No to create a shipping label. Enter the DHL Waybill number generated when completing Prepare to ship process.
Send an email to Priority.Support@dhl.com using the following template:
To: Priority.Support@dhl.com
Subject: Pickup request for Microsoft Azure
Body: Need pick up for the below shipment
  *  DHL tracking number: (reference number/waybill number)
  *  Requested pickup date: yyyy/mm/dd;time:HH MM
  *  Shipper contact: (company name)
  *  Contact person:
  *  Phone number:
  *  Full physical address:
  *  Item to be collected: Azure Dt
Or drop off the package at the nearest DHL service point.
If you come across any issues, email Priority.Support@dhl.com with details of the issue(s), and put the waybill number in the Subject: line. You can also call +27(0)119213902.
Self-managed shipping
Self-managed shipping is only available in the following regions:
| Region | Region | Region | Region | Region |
|---|---|---|---|---|
| US Government | United States | United Kingdom | Western Europe | Japan |
| Singapore | South Korea | India | South Africa | Australia |
| Brazil | Norway |
If you selected self-managed shipping when you created your order, follow these instructions (except for Brazil).
Write down the Authorization code that's shown on the Prepare to Ship page of the local web UI for the Data Box after the step completes successfully.
Power off the device and remove the cables. Spool and securely place the power cord that was provided with the device at the back of the device.
When you're ready to return the device, send an email to the Azure Data Box Operations team using the template below.
To: adbops@microsoft.com
Subject: Request for Azure Data Box drop-off for order: 'orderName'
Body:
    1. Order name
    2. Authorization code available after Prepare to Ship has completed [Yes/No]
    3. Contact name of the person dropping off. You will need to display a government-approved
    ID during the drop off.
Shipping in Brazil
To schedule a device return in Brazil, send an email to adbops@microsoft.com with the following information:
Subject: Request Azure Data Box Disk drop-off for order: <ordername>

- Order name
- Contact name of the person who will drop off the Data Box Disk (A government-issued photo ID will be required to validate the contact’s identity upon arrival.)
- Inbound Nota Fiscal (A copy of the inbound Nota Fiscal will be required at drop-off.)
Erasure of data from Data Box
Once the device reaches Azure datacenter, the Data Box erases the data on its disks as per the NIST SP 800-88 Revision 1 guidelines.
Next steps
In this tutorial, you learned about topics such as:
- Prerequisites
- Prepare to ship
- Ship Data Box to Microsoft
- Erasure of data from Data Box
Advance to the next article to learn how to manage your Data Box.