Note
Access to this page requires authorization. You can try signing in or changing directories.
Access to this page requires authorization. You can try changing directories.
This tutorial describes how to prepare your Azure Data Box to ship.
In this tutorial, you will learn about topics such as:
- Prerequisites
- Prepare to ship
Prerequisites
Before you begin, make sure:
- You've have completed the Tutorial: Copy data to Azure Data Box and verify.
- Copy jobs are complete and there are no errors on the Connect and copy page. Prepare to ship can't run if copy jobs are in progress or there are errors in the Connect and copy page.
Prepare to ship
Final step is to prepare the device to ship. In this step, all the device shares are taken offline. The shares cannot be accessed once you start this process.
Important
Prepare to ship is required as it flags data that does not conform to Azure naming conventions. This step prevents potential data upload failures due to non-conforming data.
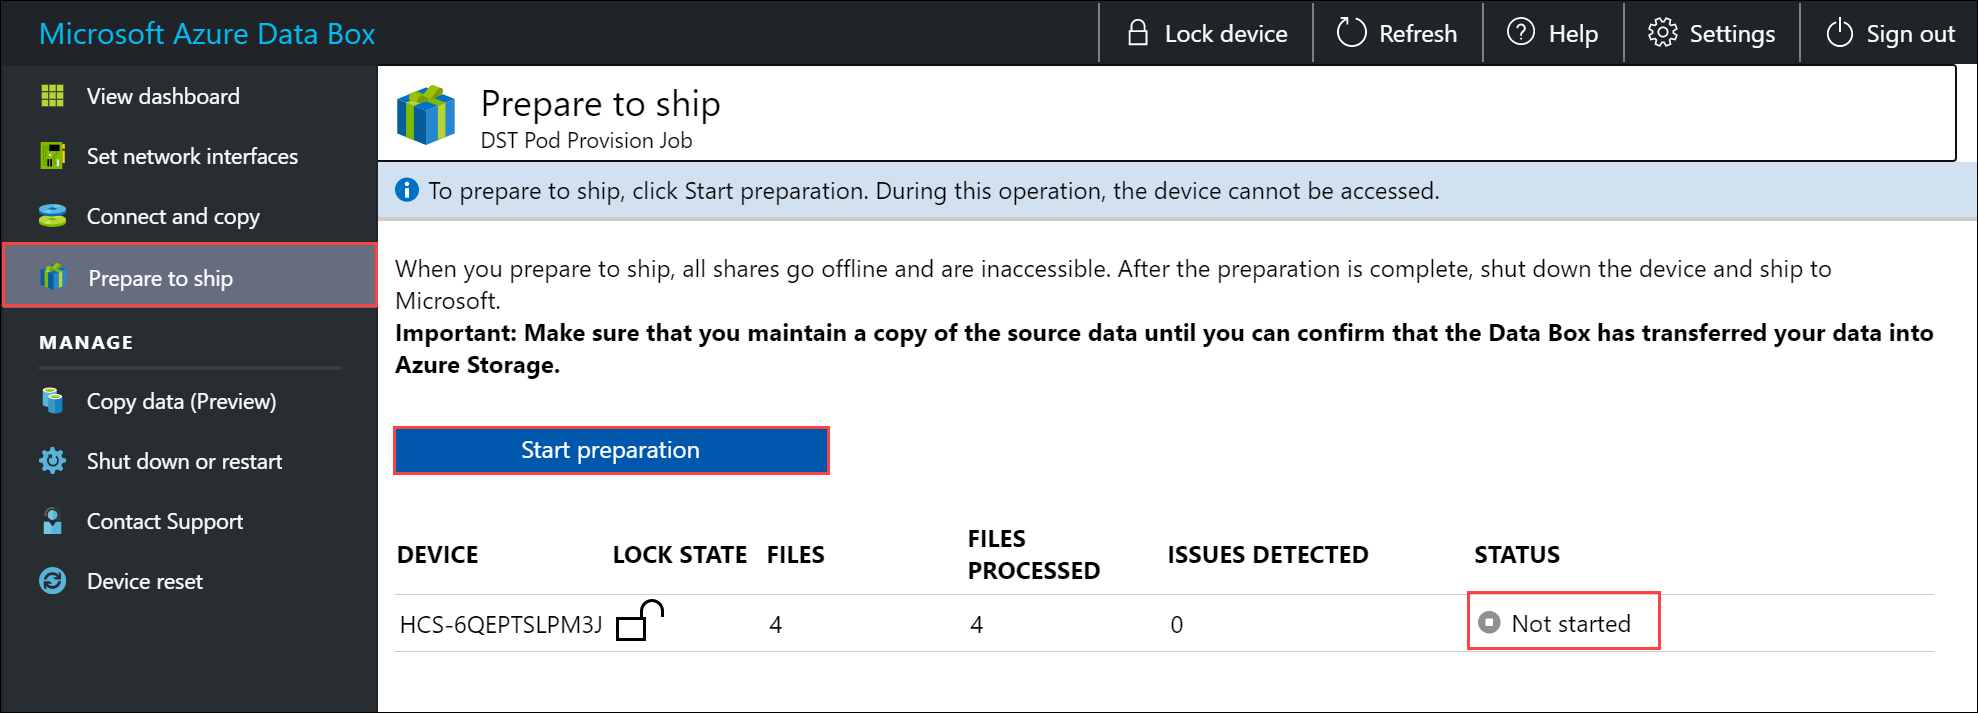
Go to Prepare to ship and click Start preparation. By default, checksums are computed while data is being copied. Prepare to ship completes the checksum computation and creates the list of files ( -BOM files). The checksum computation can take hours to days depending upon the size of your data.
If for any reason you want to stop the device preparation, click Stop preparation. You can resume the prepare to ship later.
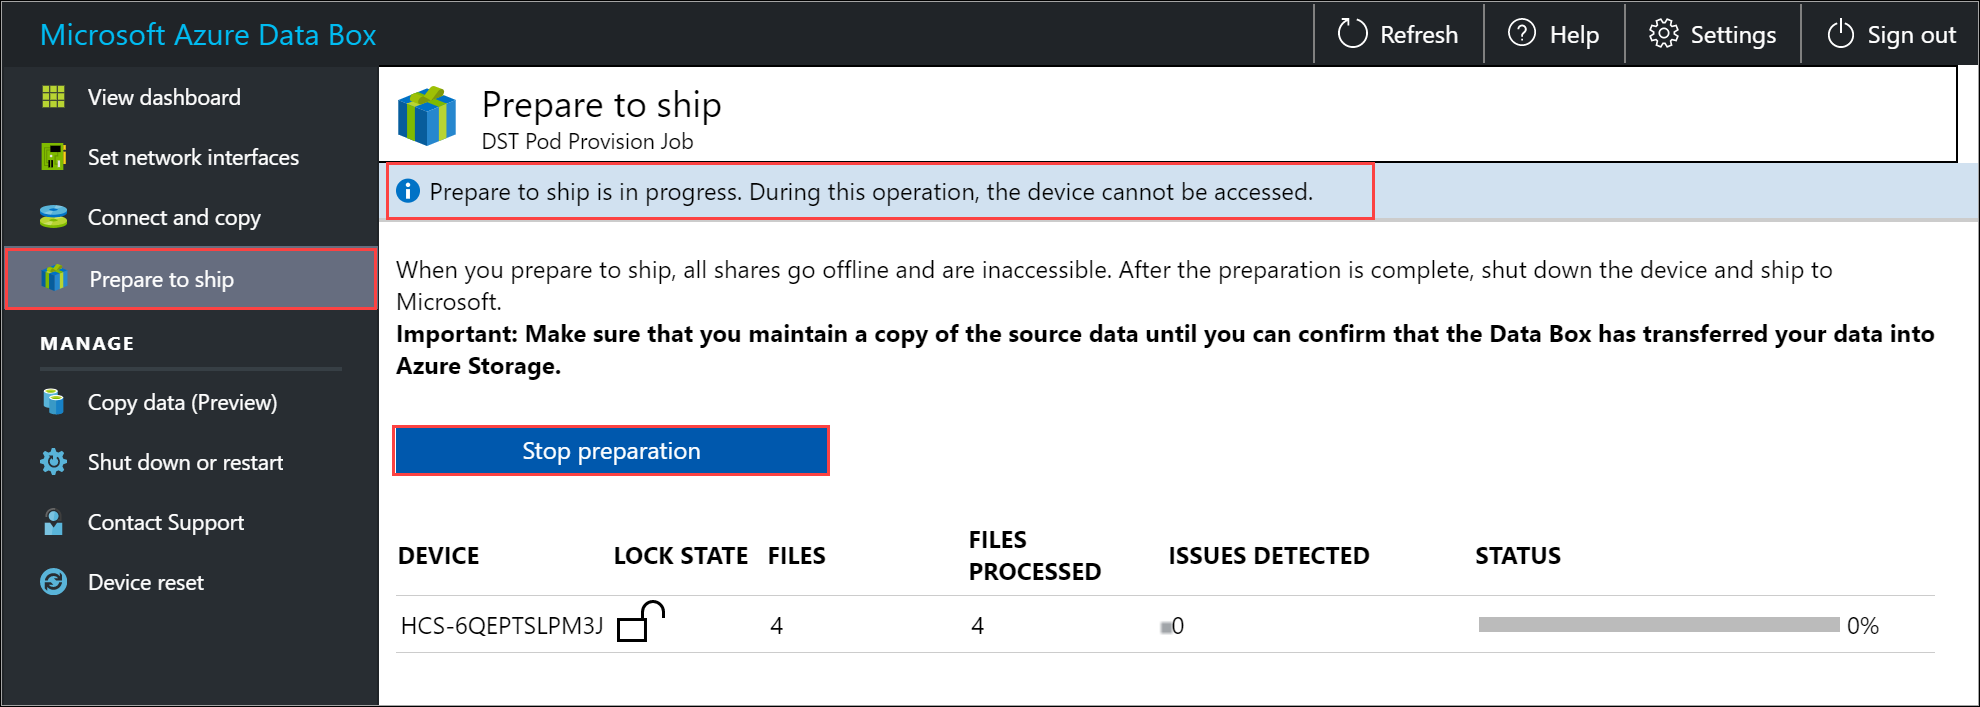
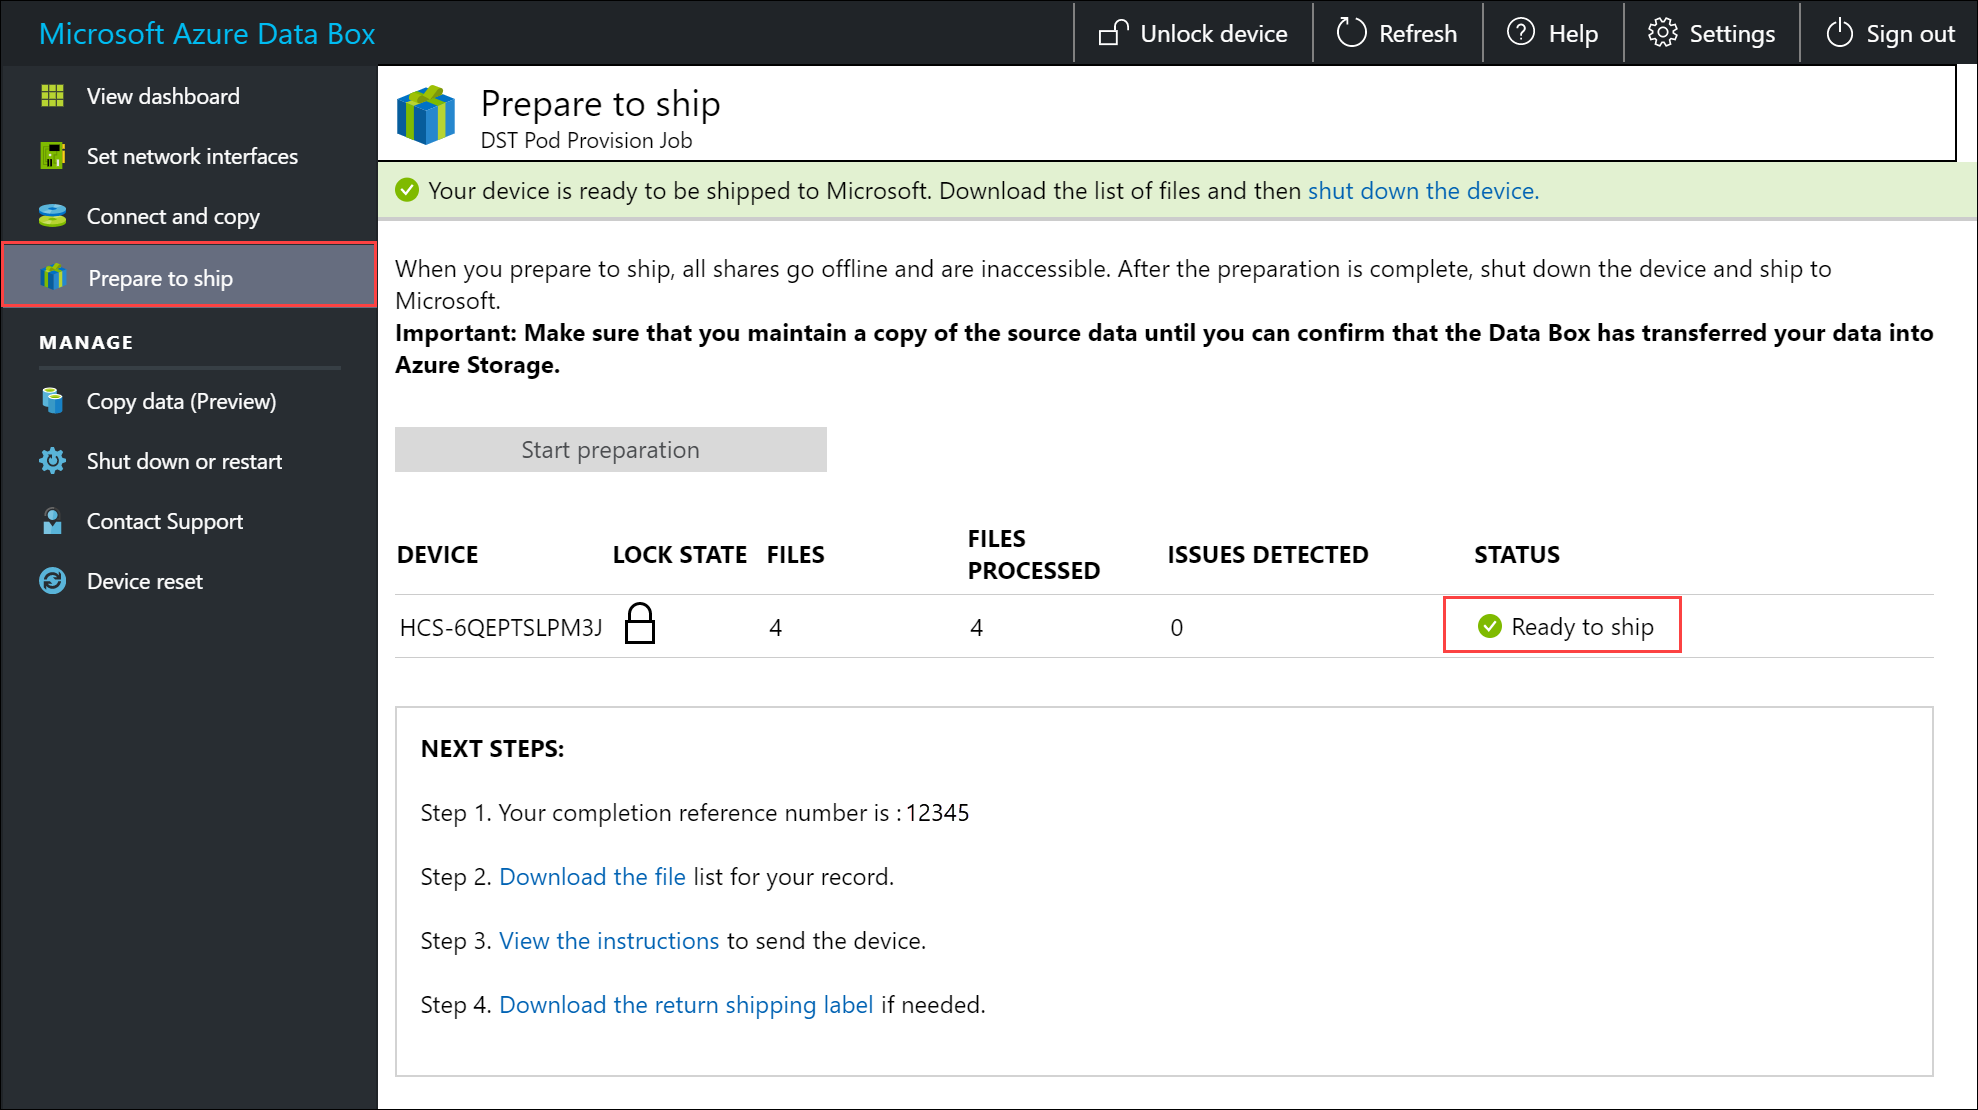
The prepare to ship starts and the device shares go offline. The device status updates to Ready to ship and the device is locked once the device preparation is complete.
If you want to copy more data to the device, you can unlock the device, copy more data, and run prepare to ship again.
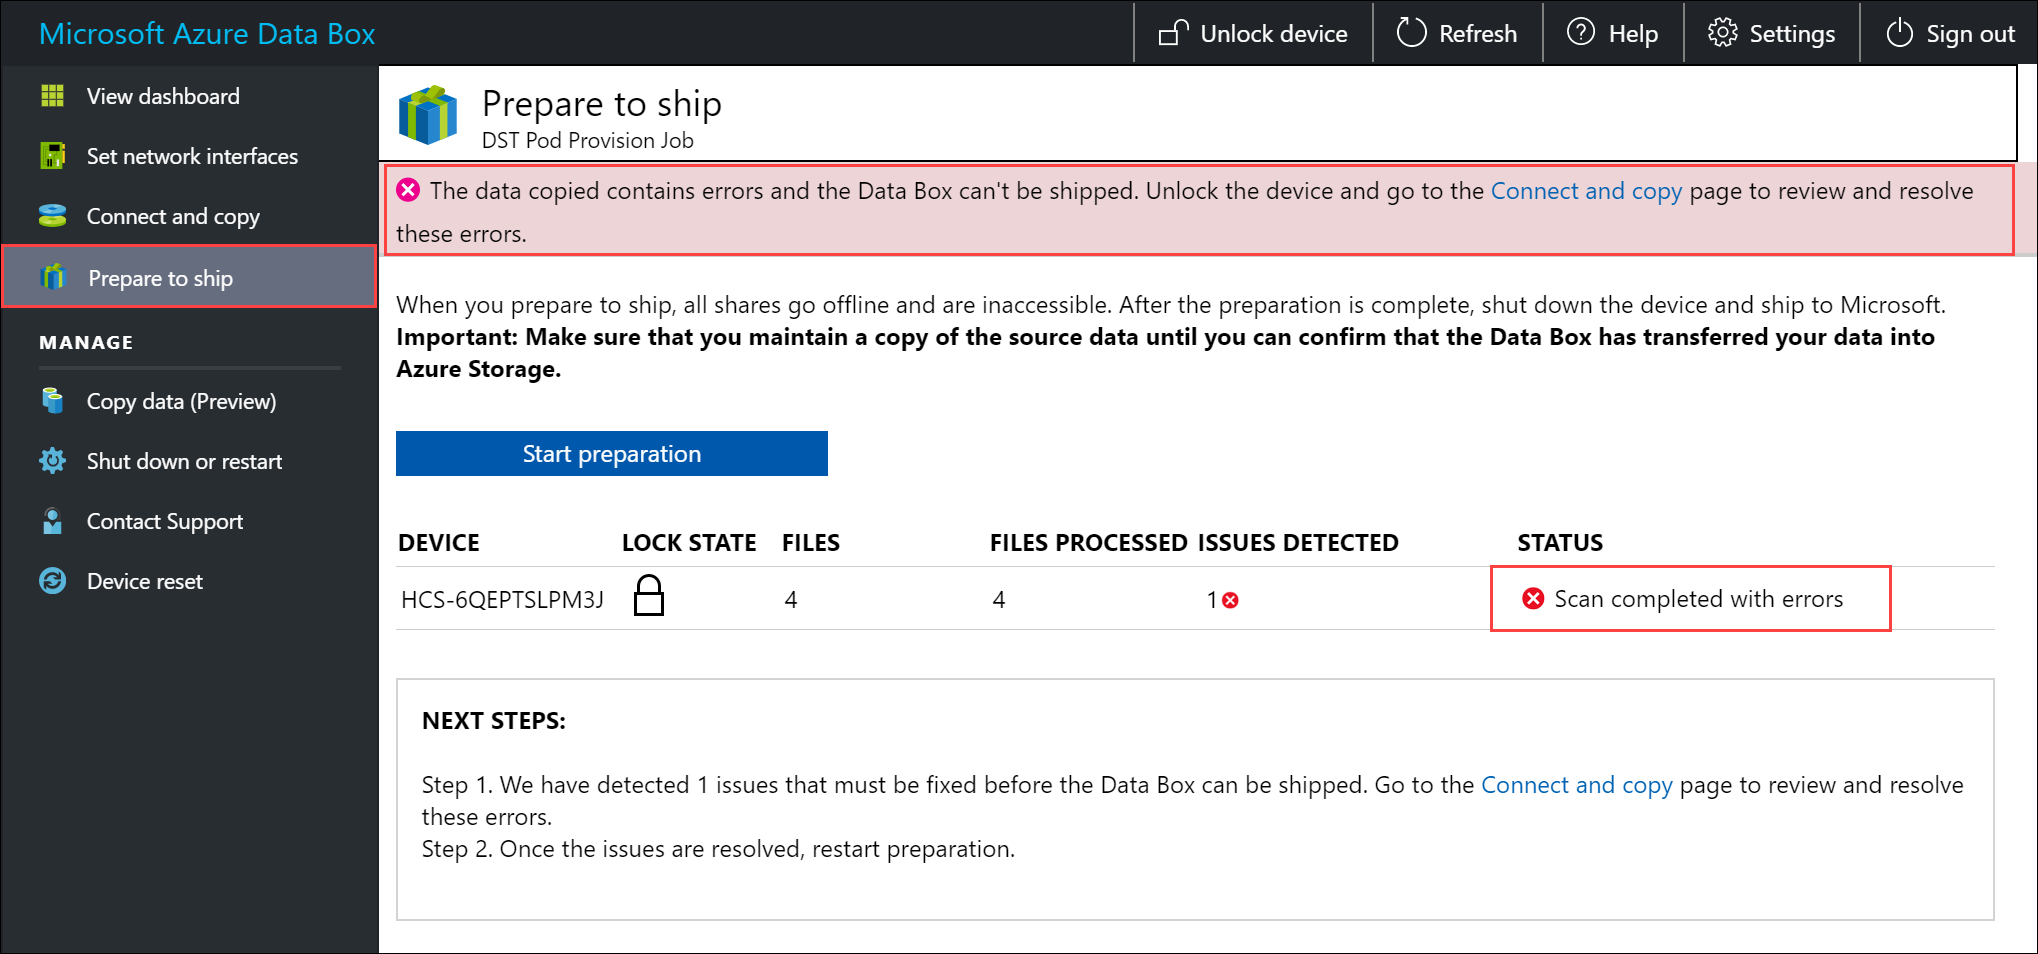
If there are errors in this step, the status updates to Scan completed with errors. Unlock the device and go to Connect and copy page, download the issues list, and resolve the errors.
If you have enabled the copy to archive option and you have not copied data into the Block Blob (Archive) shares, make sure to do so to prevent the following error:

After the errors are resolved, run Prepare to ship.
After the prepare to ship is successfully complete (with no errors), follow these steps:
Make a note of the completion reference number. Depending on the country/region in which you are, this number may be required for different operations.
Download the list of files (also known as the manifest) copied in this process. You can later use this list to verify the files uploaded to Azure. For more information, see Inspect BOM files during Prepare to ship.

Select and download the shipping instructions for the device. The shipping instructions are different depending on the country/region in which you are located.
If the E-ink is not displaying the shipping label, you can download the reverse shipment label. Make sure you have the shipping label before you shut down and disconnect the device.
Shut down the device. Go to Shut down or restart page and click Shut down. When prompted for confirmation, click OK to continue.
Remove the cables. The next step is to ship the device to Microsoft.
After the data copy is complete, you prepare and ship the device. When the device reaches Azure datacenter, data is automatically uploaded to Azure.
Prepare to ship
Before you prepare to ship, make sure that copy jobs are complete.
- Go to Prepare to ship page in the local web UI and start the ship preparation.
- Turn off the device from the local web UI. Remove the cables from the device.
The next steps are determined by where you're returning the device.
Next steps
In this tutorial, you learned about Azure Data Box topics such as:
- Prerequisites
- Prepare to ship
Advance to the following article to learn how to ship your Azure Data Box and verify the data uploaded to Azure.