Copy jobs are complete. Prepare to ship can't run if copy jobs are in progress.
Prepare to ship
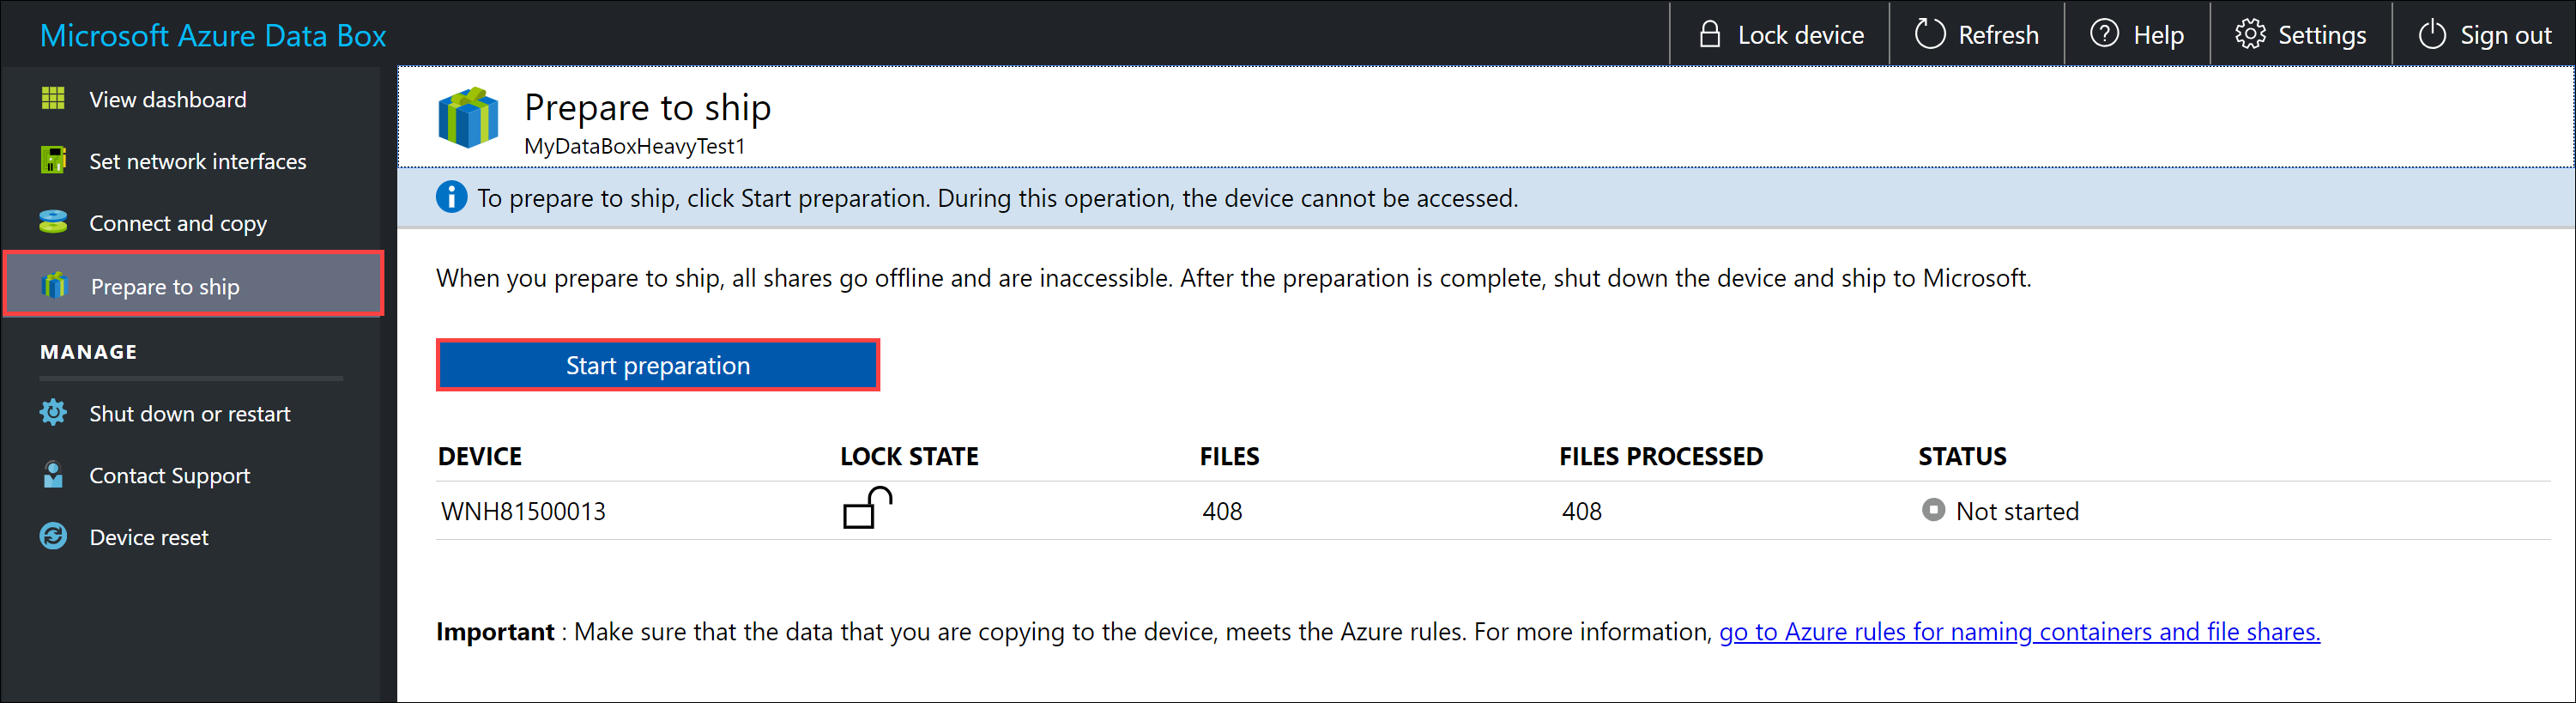
Final step is to prepare the device to ship. In this step, all the device shares are taken offline. The shares cannot be accessed once you start this process.
Important
Prepare to ship is required as it flags data that does not conform to Azure naming conventions. Skipping this step could result in potential data upload failures due to non-conforming data.
Go to Prepare to ship and click Start preparation. By default, checksums are computed while data is being copied. Prepare to ship completes the checksum computation and creates the list of files ( also known as BOM files or the manifest). The checksum computation can take hours to days depending upon the size of your data.
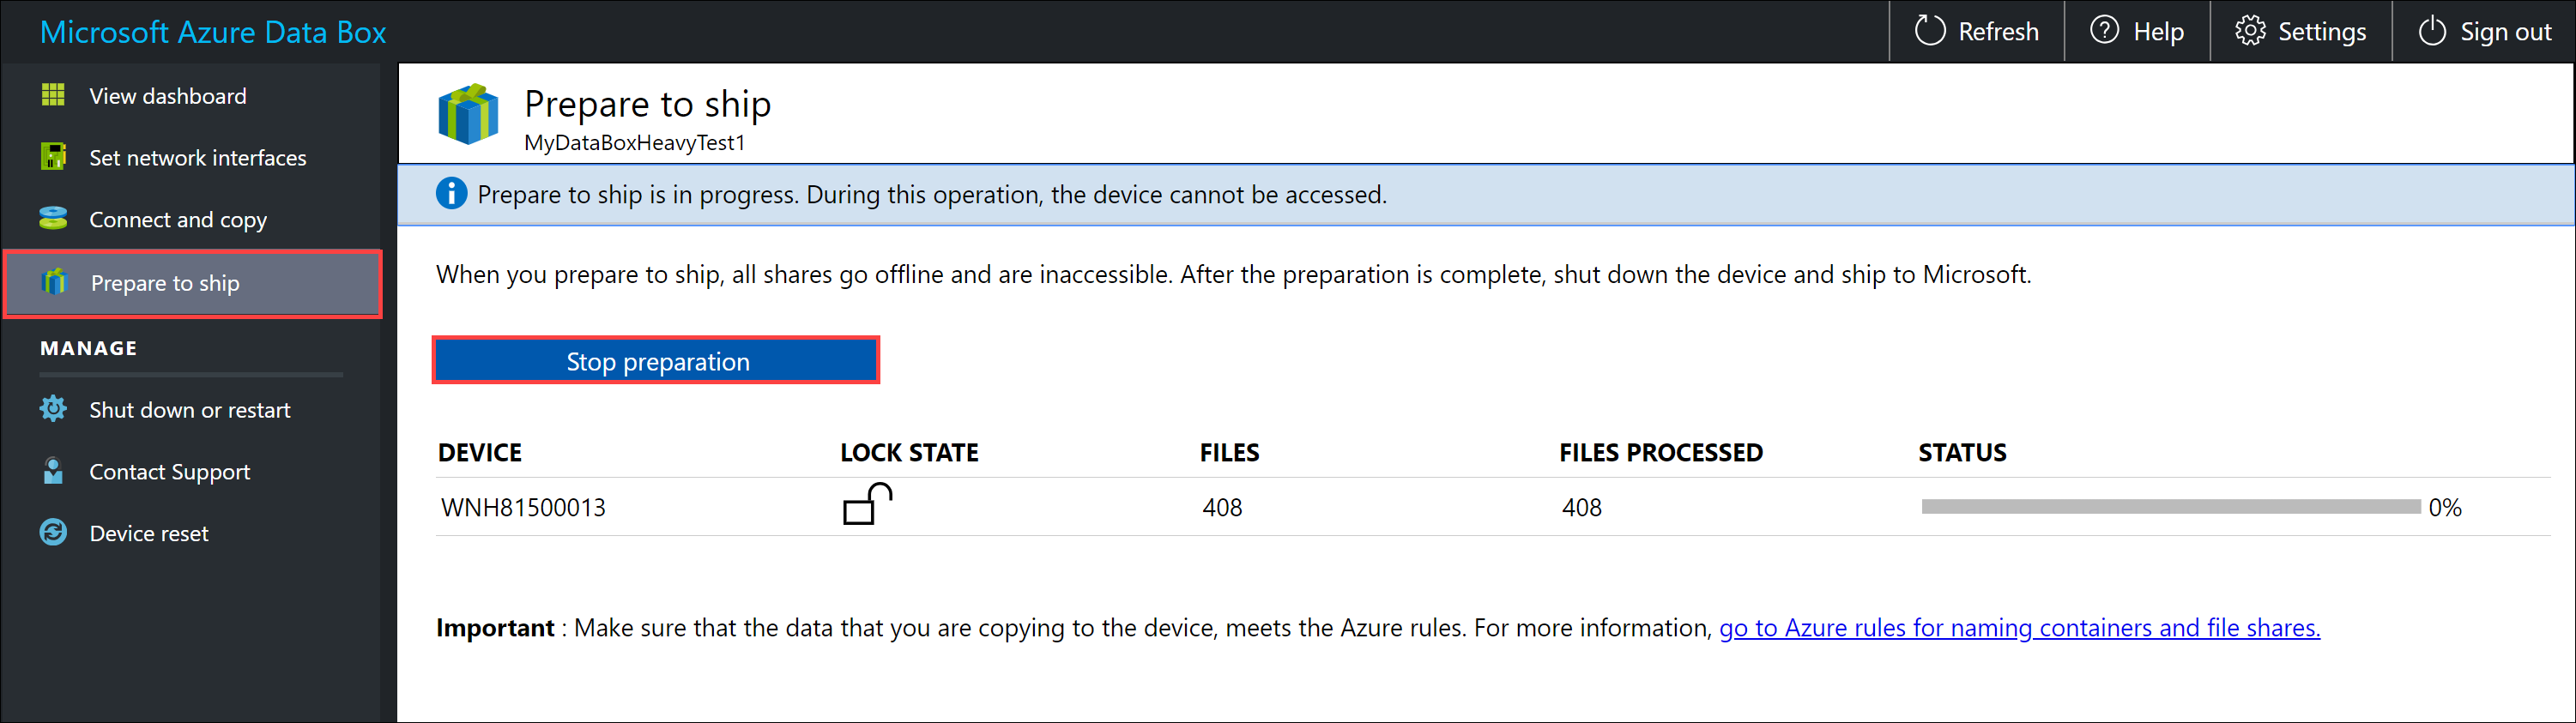
If for any reason you want to stop the device preparation, click Stop preparation. You can resume the prepare to ship later.
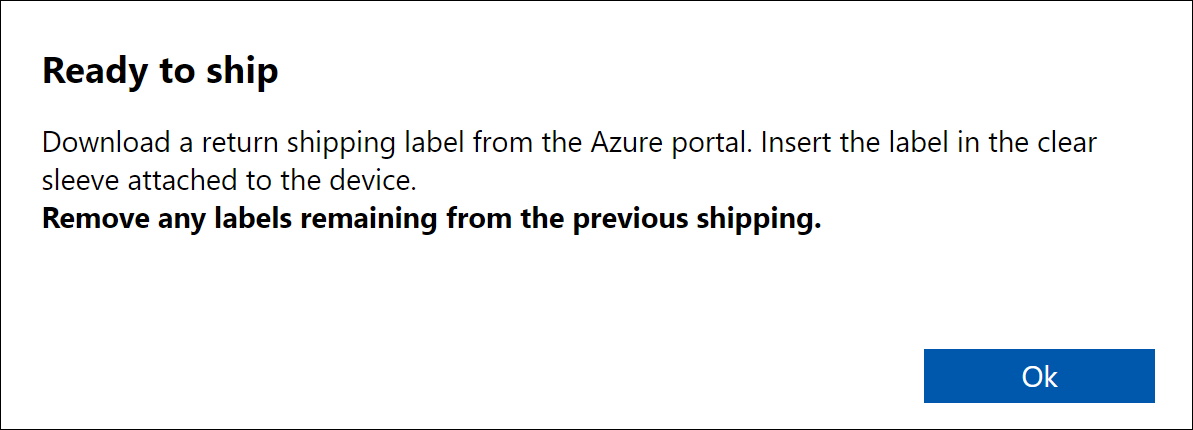
The prepare to ship starts and the device shares go offline. You see a reminder to download the shipping label once the device is ready.
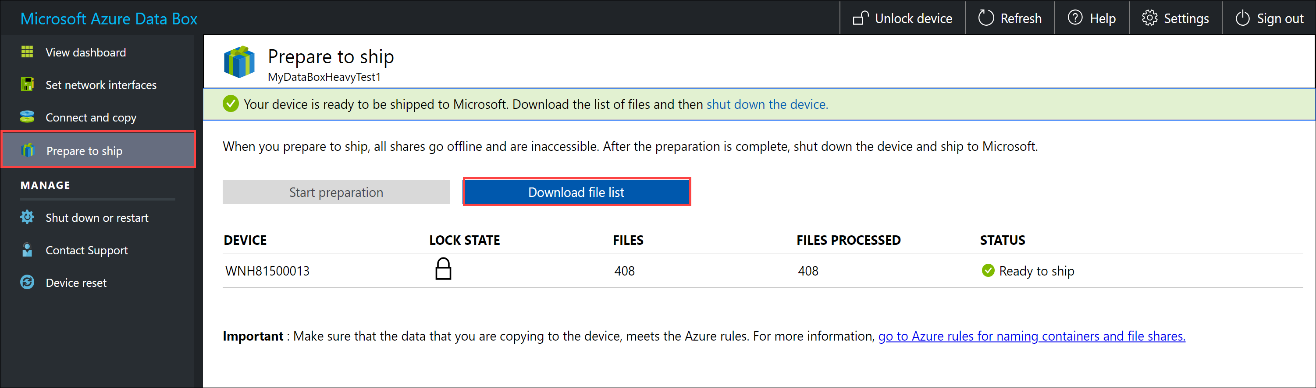
The device status updates to Ready to ship and the device is locked once the device preparation is complete.
If you want to copy more data to the device, you can unlock the device, copy more data, and run prepare to ship again.
If there are errors in this step, download the error log and resolve the errors. Once the errors are resolved, run Prepare to ship.
After the prepare to ship is successfully complete (with no errors), download the list of files ( also known as BOM files or the manifest) copied in this process.
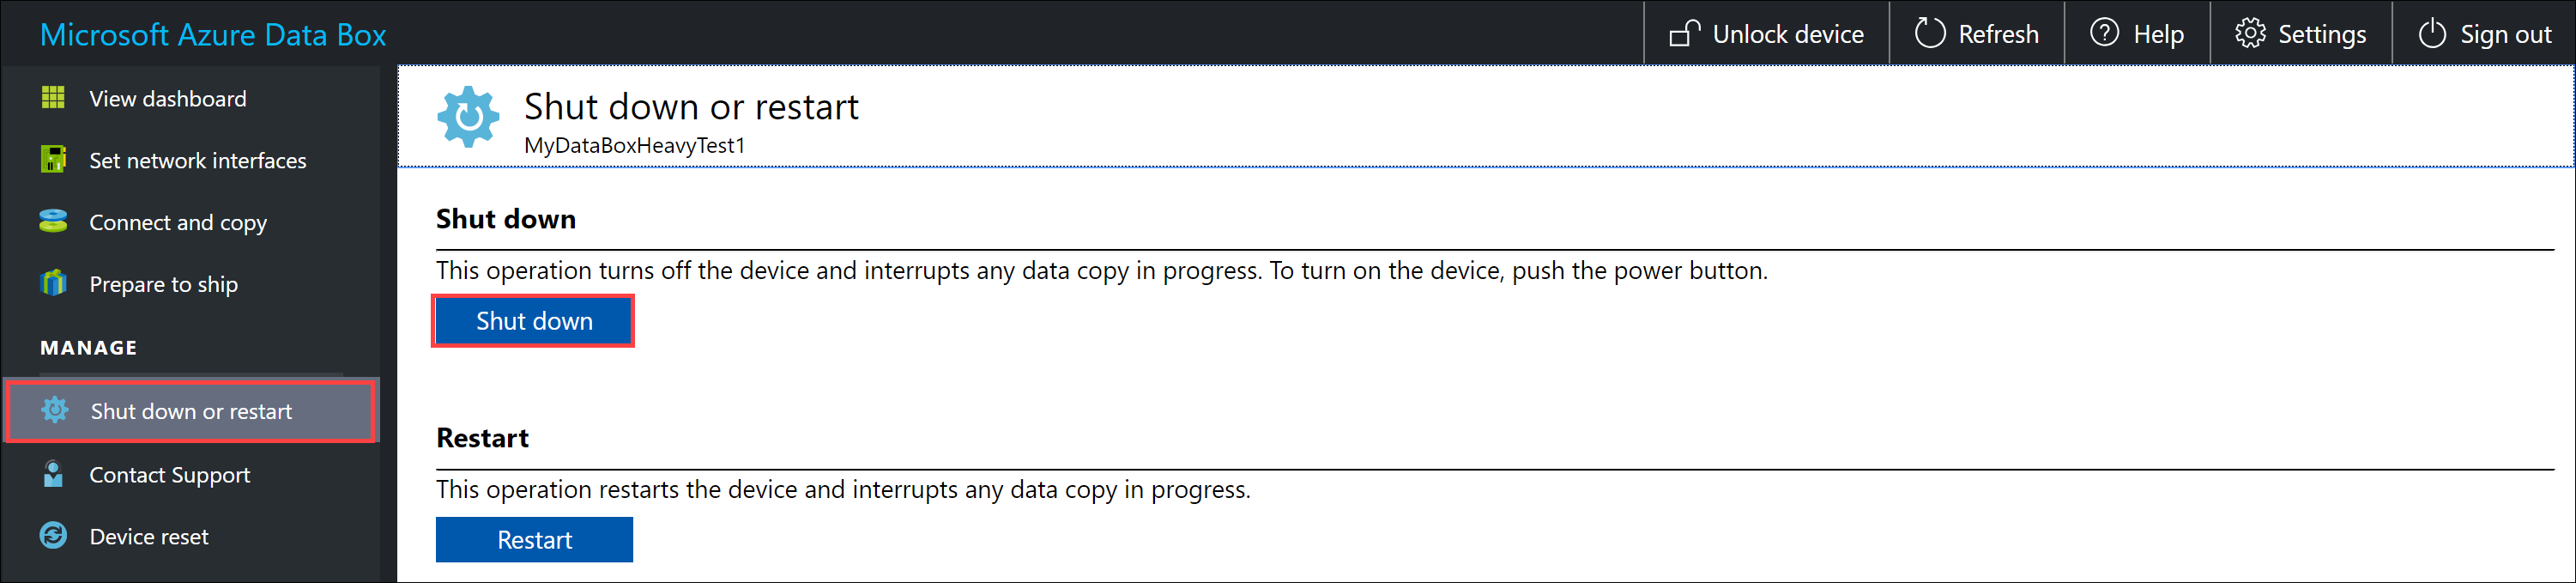
Shut down the device. Go to Shut down or restart page and click Shut down. When prompted for confirmation, click OK to continue.
Repeat all the above steps for the other device node.
Once the device has completely shut down, all the LEDs at the back of the device would have turned off. The next step is to remove all the cables and ship the device to Microsoft.
Prepare to ship
Before you prepare to ship, make sure that copy jobs are complete.
Go to Prepare to ship page in the local web UI and start the ship preparation.
Turn off the device from the local web UI. Remove the cables from the device.
You are now ready to ship your device back.
Ship Data Box Heavy back
Ensure that the device is powered off and all the cables are removed. Spool and securely place the 4 power cords in the tray that you can access from the back of the device.
The device ships LTL freight via FedEx in the US and DHL in the EU.
Reach out to Data Box Operations to inform regarding the pickup and to get the return shipping label.
Call the local number for your shipping carrier to schedule the pickup.
Ensure that the shipping label is displayed prominently on the exterior of the shipment.
Make sure that the old shipping labels from the previous shipment are removed from the device.
Once the Data Box Heavy is picked up and scanned by your carrier, the order status in the portal updates to Picked up. A tracking ID is also displayed.
Verify data upload to Azure
When Microsoft receives and scans the device, order status is updated to Received. The device then undergoes physical verification for damage or signs of tampering.
After the verification is complete, the Data Box Heavy is connected to the network in the Azure datacenter. The data copy starts automatically. Depending upon the data size, the copy operation may take a few hours to days to complete. You can monitor the copy job progress in the portal.
Once the copy is complete, order status updates to Completed.
Verify that your data is uploaded to Azure before you delete it from the source. Your data can be in:
Your Azure Storage account(s). When you copy the data to Data Box, depending on the type, the data is uploaded to one of the following paths in your Azure Storage account.
For block blobs and page blobs: https://<storage_account_name>.blob.core.windows.net/<containername>/files/a.txt
For Azure Files: https://<storage_account_name>.file.core.windows.net/<sharename>/files/a.txt
Alternatively, you could go to your Azure storage account in Azure portal and navigate from there.
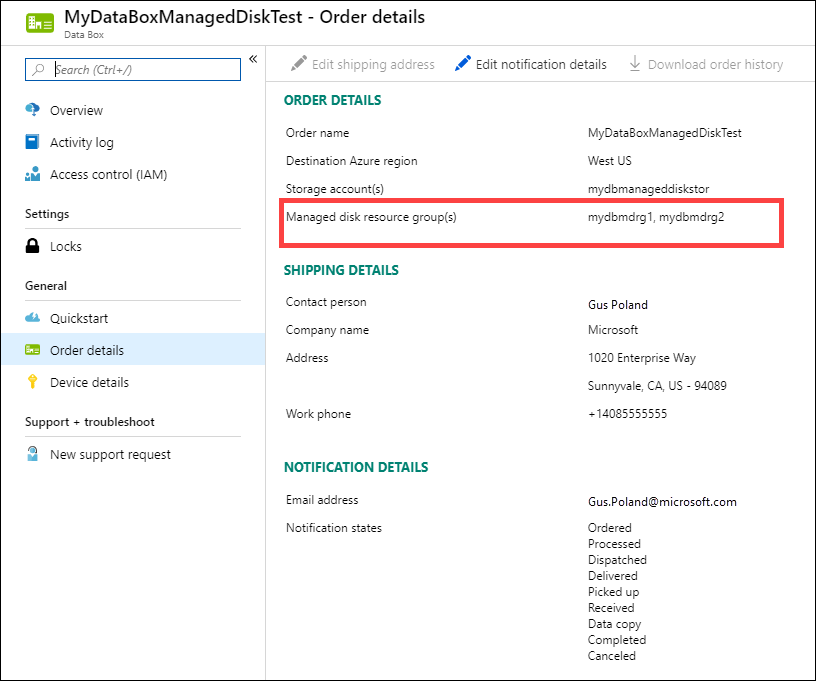
Your managed disk resource group(s). When creating managed disks, the VHDs are uploaded as page blobs and then converted to managed disks. The managed disks are attached to the resource groups specified at the time of order creation.
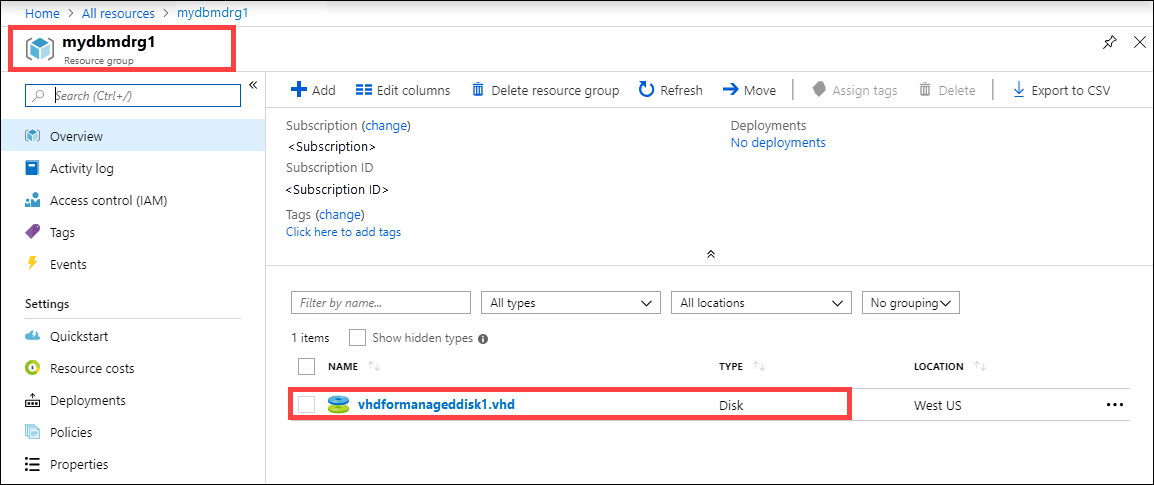
If your copy to managed disks in Azure was successful, you can go to the Order details in the Azure portal and make a note of the resource groups specified for managed disks.
Go to the noted resource group and locate your managed disks.
If you copied a VHDX, or a dynamic/differencing VHD, then the VHDX/VHD is uploaded to the staging storage account as a page blob but the conversion of VHD to managed disk fails. Go to your staging Storage account > Blobs and then select the appropriate container - Standard SSD, Standard HDD, or Premium SSD. The VHDs are uploaded as page blobs in your staging storage account.
Verify data upload to Azure
When the Data Box Heavy device is connected to the Azure datacenter network, the data upload to Azure starts automatically. Data Box service notifies you that the data copy is complete via the Azure portal.
Check error logs for any failures and take appropriate actions.
Verify that your data is in the storage account(s) before you delete it from the source.
Demonstrate understanding of common data engineering tasks to implement and manage data engineering workloads on Microsoft Azure, using a number of Azure services.