Note
Access to this page requires authorization. You can try signing in or changing directories.
Access to this page requires authorization. You can try changing directories.
Important
This documentation has been retired and might not be updated. The products, services, or technologies mentioned in this content are no longer supported. See Connect to Azure Databricks from Microsoft Excel.
This article describes how to use the Azure Databricks ODBC driver to connect Azure Databricks to Microsoft Excel. After you establish the connection, you can access the data in Azure Databricks from Excel. You can also use Excel to further analyze the data.
Before you begin
- Sign up for Azure Databricks for free.
- Create an Azure Databricks cluster. See Compute.
- Download the 64-bit version of the ODBC driver for your OS.
- Install and configure the ODBC driver. This sets up a Data Source Name (DSN) configuration that you can use to connect Azure Databricks to Microsoft Excel.
- Token management API.
- Azure Databricks personal access token.
- Install Microsoft Excel. You can use a trial version.
Connect from Microsoft Excel
This section describes how to pull data from Azure Databricks into Microsoft Excel using the DSN you created in the prerequisites.
Steps to connect using OAuth 2.0
Note
- This connection method does not work in Excel on macOS.
- The steps in this section were tested using Excel for Microsoft 365 for Windows Server 2022 Datacenter 64 bit.
The following are the steps to allow a user to connect to Azure Databricks in a single sign-on experience.
Launch ODBC Data Sources.
Go to System DSN tab and select Simba Spark entry in the DSN list (or you can also create a new DSN by following the instructions on the Microsoft Support website).
Click Configure and the following window appears.
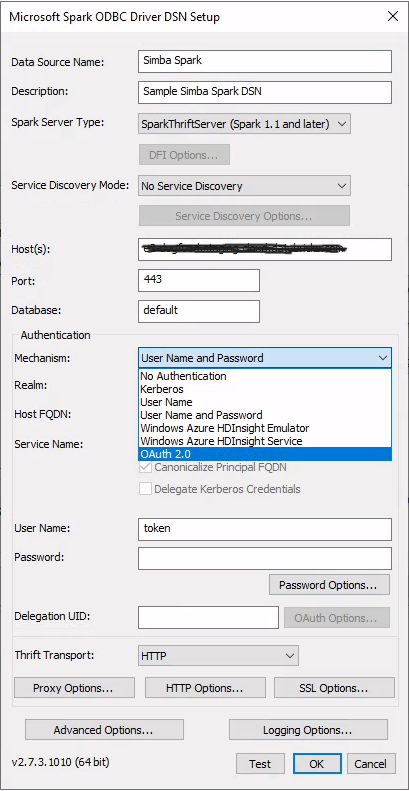
On Mechanism, select OAuth 2.0.
Click OAuth Options and the following OAuth Option window appears.
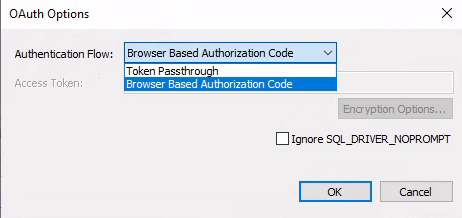
Select Browser Based Authorization Code and Uncheck IGNORE_SQLDRIVER_NOPROMPT. Close the pop-up window.
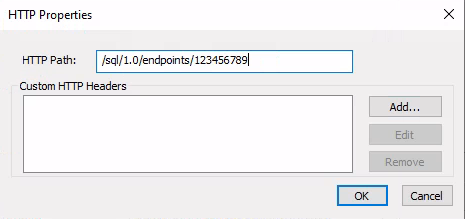
Click HTTP Options, enter the HTTP path, and then close the pop-up window.
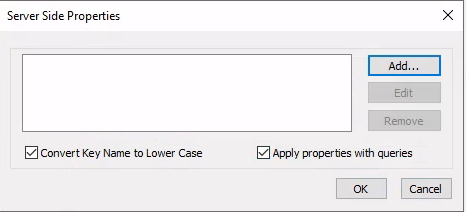
Click Advanced Options, and then click Server Side Properties in the pop-up window.
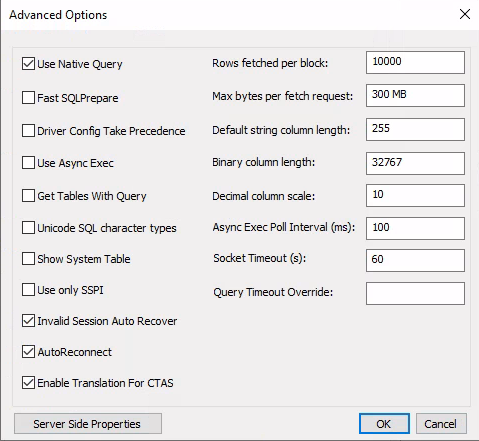
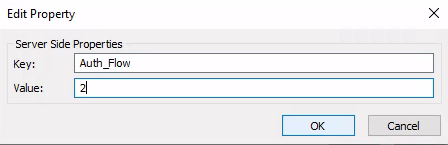
Add a server side property Auth_Flow and value 2.
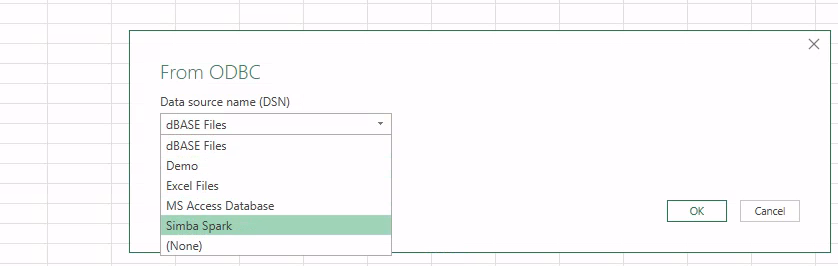
Launch Microsoft Excel and create a new blank workbook. Select menu Data > Get Data > From Other Sources > From ODBC.

Select the DSN you just configured.
Click OK to connect, and then authenticate.
Connect using a connection URL with OAuth 2.0
Note
- This connection method does not work in Excel on macOS.
- The steps in this section were tested using Excel for Microsoft 365 for Windows version 11.
You can also directly connect Excel to Azure Databricks using a connection URL. The connection URL is in the following format:
Driver=Simba Spark ODBC Driver;Host=<hostName>;Port=443;HttpPath=<httpPath>;SSL=1;AuthMech=11;Auth_Flow=2;Catalog=samples;Schema=default
- Launch Excel and select menu Data > Get Data > From Other Sources > From ODBC.
- In Data source name (DSN), select Simba Spark.
- Click Advanced options to expand the section.
- In the Connection string (non-credential properties)(optional) text box, enter the connection URL from the previous step and then click OK.
- Click Connect and then authenticate through OAuth 2.0.
Steps to connect using Azure Databricks personal access token
Note
The steps in this section were tested using Excel for Microsoft 365 for Mac version 16.70.
Open a blank workbook in Microsoft Excel.
In the Data ribbon, click the caret next to Get Data (Power Query), and then click From database (Microsoft Query).
In the iODBC Data Source Chooser, select the DSN that you created in the prerequisites, and then click OK.
For Username, enter
token.For Password, enter your personal access token from the prerequisites.
In the Microsoft Query dialog, select the Azure Databricks table that you want to load into Excel, and then click Return Data.
In the Import Data dialog, select Table and Existing sheet, and then click Import.
After you load your data into your Excel workbook, you can perform analytical operations on it.