Note
Access to this page requires authorization. You can try signing in or changing directories.
Access to this page requires authorization. You can try changing directories.
Important
Lakebase Autoscaling is in Beta in the following regions: eastus2, westeurope, westus.
Lakebase Autoscaling is the latest version of Lakebase with autoscaling compute, scale-to-zero, branching, and instant restore. For feature comparison with Lakebase Provisioned, see choosing between versions.
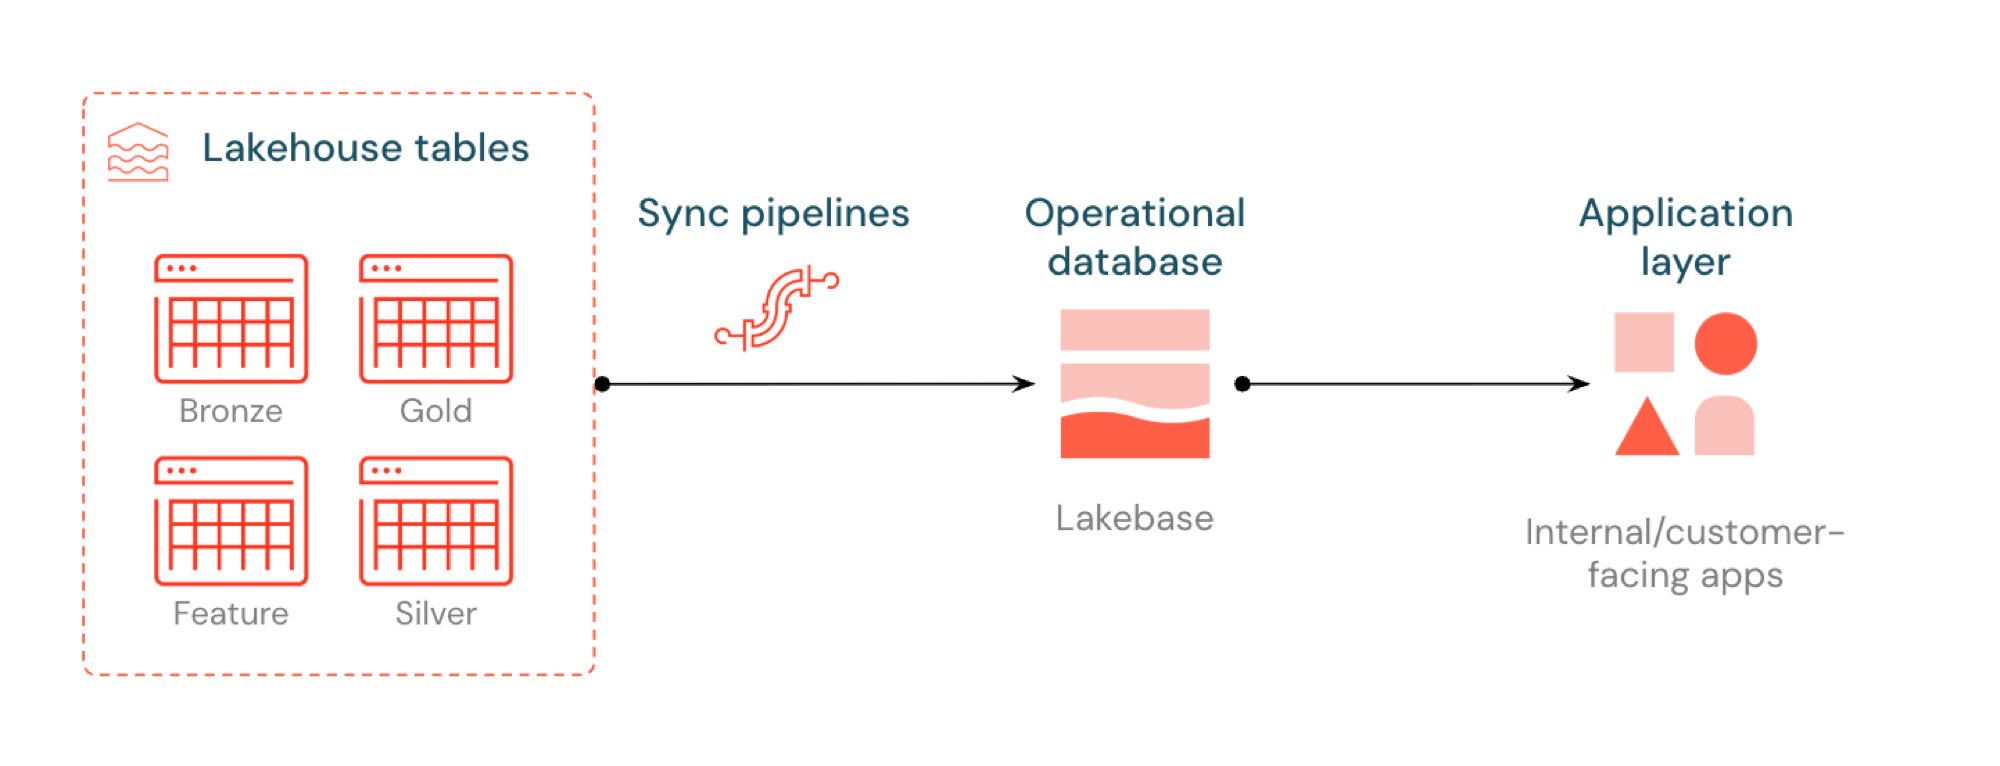
Reverse ETL in Lakebase syncs Unity Catalog tables into Postgres so applications can use curated lakehouse data directly. The lakehouse is optimized for analytics and enrichment, while Lakebase is designed for operational workloads that require fast queries and transactional consistency.
What is reverse ETL?
Reverse ETL lets you move analytics-grade data from Unity Catalog into Lakebase Postgres, where you can make it available to applications that need low-latency queries (sub-10ms) and full ACID transactions. It bridges the gap between analytical storage and operational systems by keeping curated data usable in real-time applications.
How it works
Databricks synced tables create a managed copy of your Unity Catalog data in Lakebase. When you create a synced table, you get:
- A new Unity Catalog table (read-only, managed by the sync pipeline)
- A Postgres table in Lakebase (queryable by your applications)
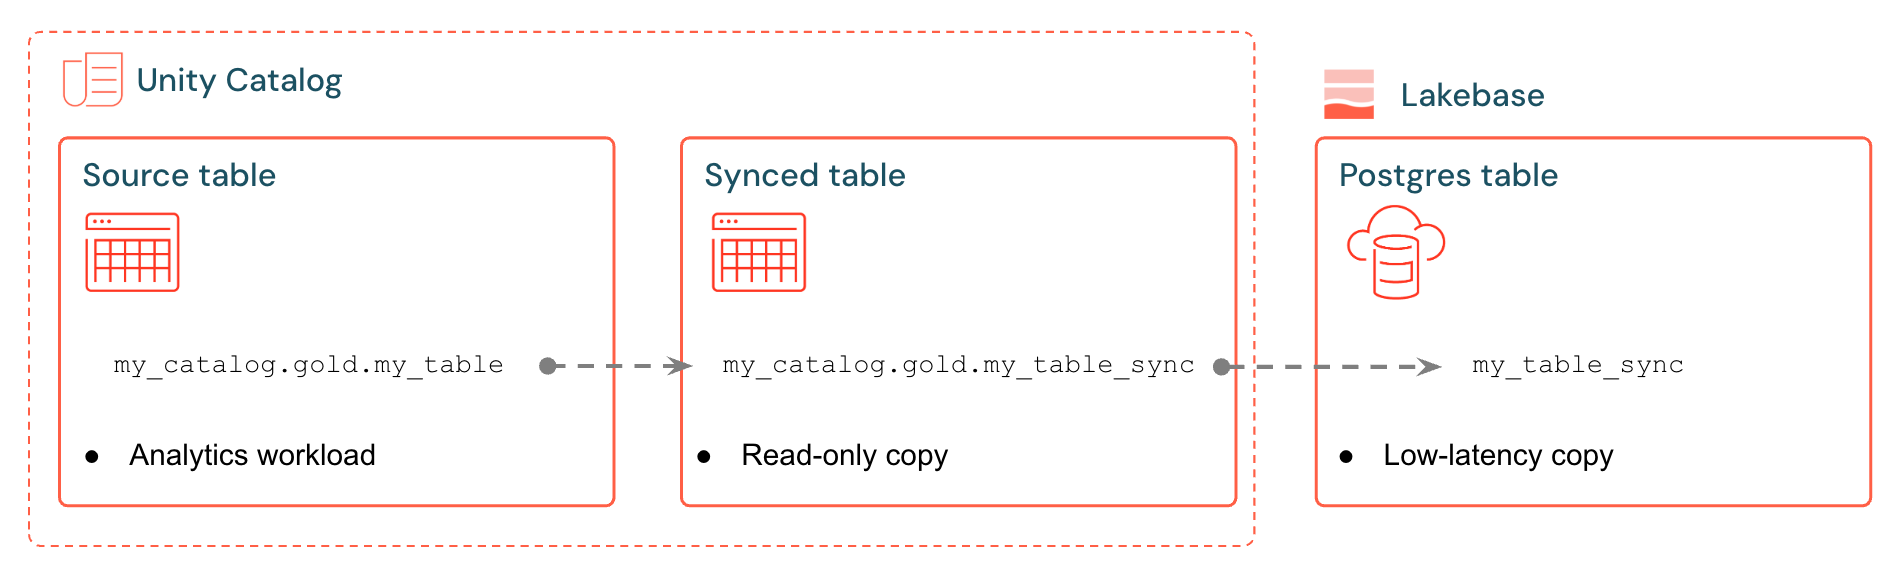
For example, you can sync gold tables, engineered features, or ML outputs from analytics.gold.user_profiles into a new synced table analytics.gold.user_profiles_synced. In Postgres, the Unity Catalog schema name becomes the Postgres schema name, so this appears as "gold"."user_profiles_synced":
SELECT * FROM "gold"."user_profiles_synced" WHERE "user_id" = 12345;
Applications connect with standard Postgres drivers and query the synced data alongside their own operational state.
Sync pipelines use managed Lakeflow Spark Declarative Pipelines to continuously update both the Unity Catalog synced table and the Postgres table with changes from the source table. Each sync can use up to 16 connections to your Lakebase database and supports continuous writes at approximately 1,200 rows per second per Capacity Unit (CU) and bulk writes at up to 15,000 rows per second per CU.
Lakebase Postgres supports up to 10,000 concurrent connections with transactional guarantees, so applications can read enriched data while also handling inserts, updates, and deletes in the same database.
Sync modes
Choose the right sync mode based on your application needs:
| Mode | Description | Best for | Performance |
|---|---|---|---|
| Snapshot | One-time copy of all data | Initial setup or historical analysis | 10x more efficient if modifying >10% of source data |
| Triggered | Scheduled updates that run on demand or at intervals | Dashboards, updated hourly/daily | Good cost/lag balance. Expensive if run <5min intervals |
| Continuous | Real-time streaming with seconds of latency | Live applications (higher cost due to dedicated compute) | Lowest lag, highest cost. Minimum 15-second intervals |
Triggered and Continuous modes require Change Data Feed (CDF) to be enabled on your source table. If CDF isn't enabled, you'll see a warning in the UI with the exact ALTER TABLE command to run. For more details on Change Data Feed, see Use Delta Lake change data feed on Databricks.
Example use cases
Reverse ETL with Lakebase supports common operational scenarios:
- Personalization engines that need fresh user profiles synced into Databricks Apps
- Applications that serve model predictions or feature values computed in the lakehouse
- Customer-facing dashboards that display KPIs in real time
- Fraud detection services that need risk scores available for immediate action
- Support tools that enrich customer records with curated data from the lakehouse
Create a synced table (UI)
You can create synced tables in the Databricks UI or programmatically with the SDK. The UI workflow is outlined below.
Prerequisites
You need:
- A Databricks workspace with Lakebase enabled.
- A Lakebase project (see Create a project).
- A Unity Catalog table with curated data.
- Permissions to create synced tables.
For capacity planning and data type compatibility, see Data types and compatibility and Capacity planning.
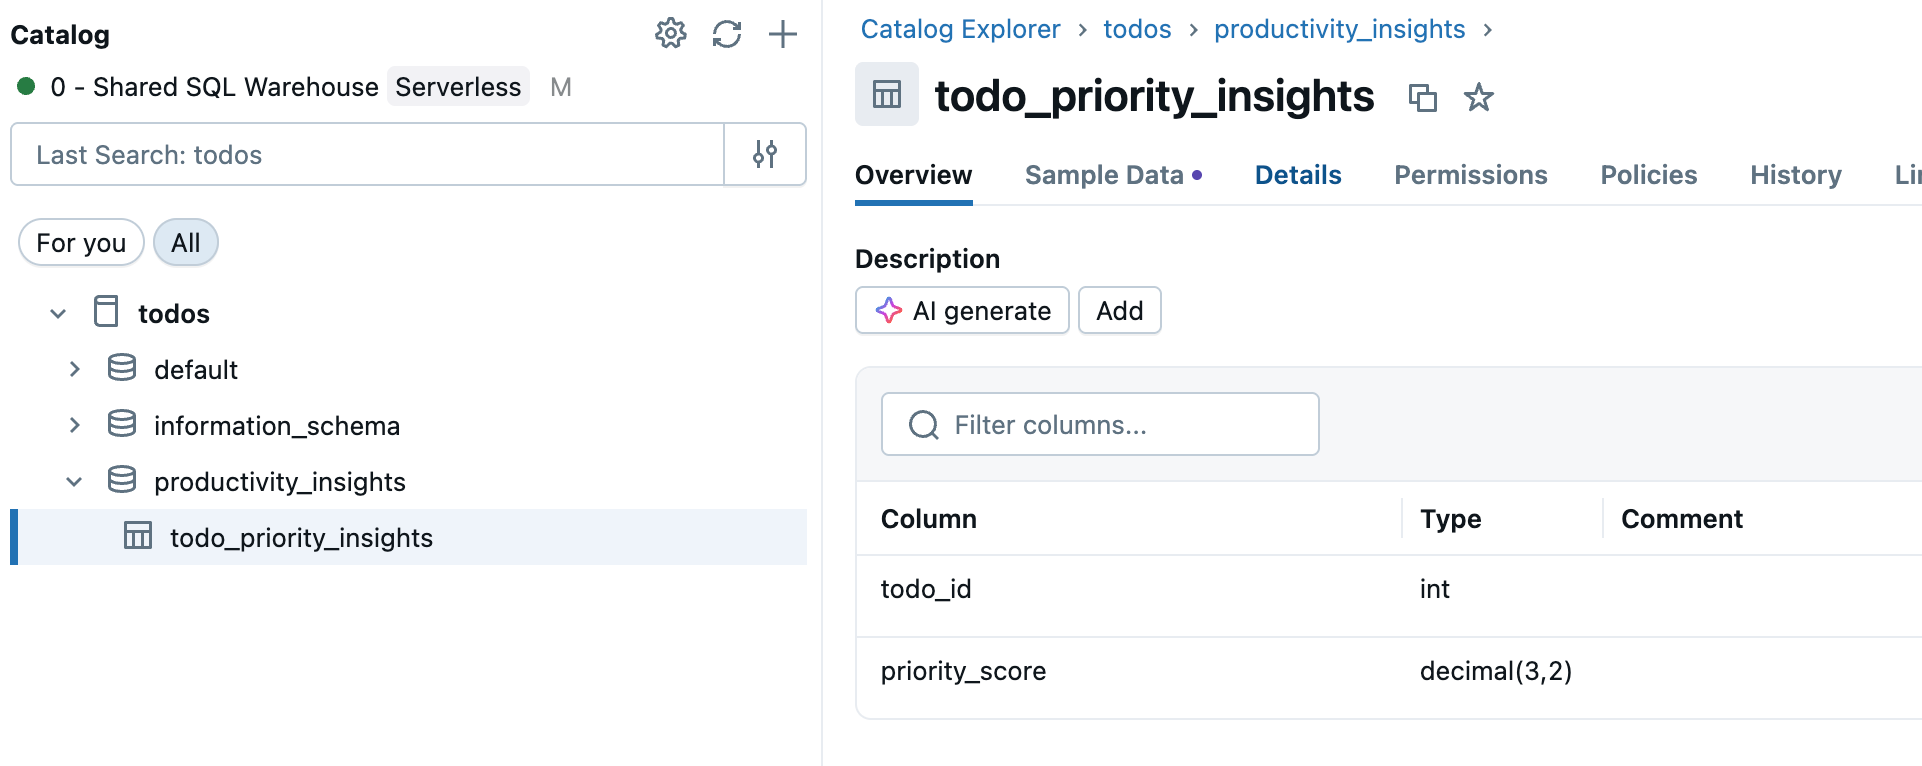
Step 1: Select your source table
Go to Catalog in the workspace sidebar and select the Unity Catalog table you want to sync.
Step 2: Enable Change Data Feed (if needed)
If you plan to use Triggered or Continuous sync modes, your source table needs Change Data Feed enabled. Check if your table already has CDF enabled, or run this command in a SQL editor or notebook:
ALTER TABLE your_catalog.your_schema.your_table
SET TBLPROPERTIES (delta.enableChangeDataFeed = true)
Replace your_catalog.your_schema.your_table with your actual table name.
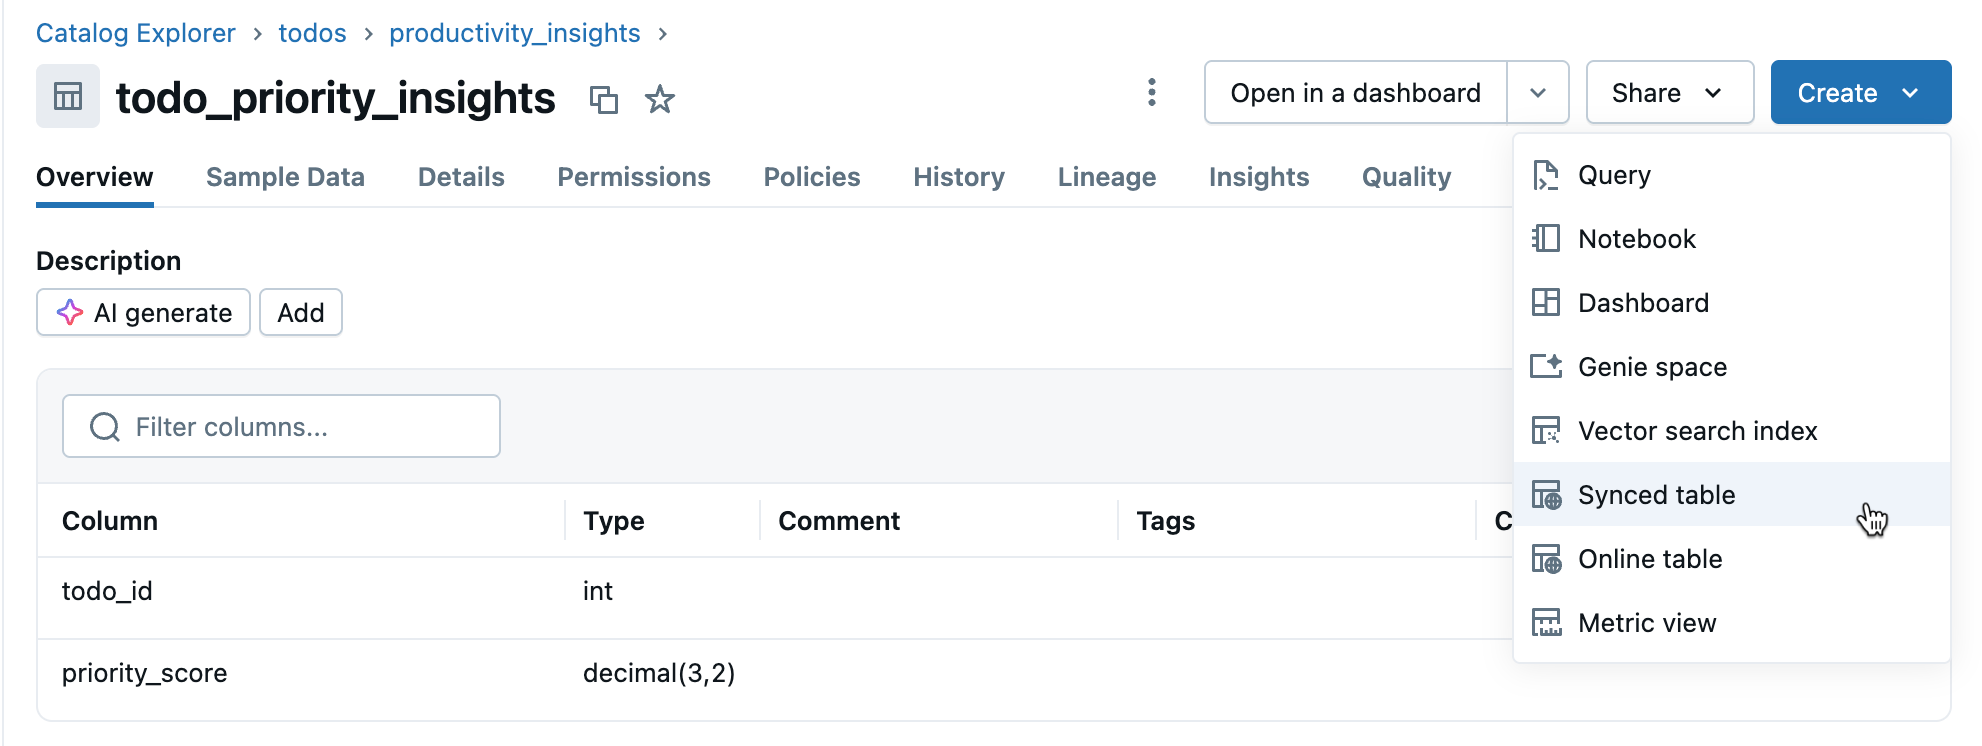
Step 3: Create synced table
Click Create > Synced table from the table details view.
Step 4: Configure
In the Create synced table dialog:
- Table name: Enter a name for your synced table (it is created in the same catalog and schema as your source table). This creates both a Unity Catalog synced table and a Postgres table you can query.
- Database type: Choose Lakebase Serverless (Autoscaling).
- Sync mode: Choose Snapshot, Triggered, or Continuous based on your needs (see sync modes above).
- Configure your project, branch, and database selections.
- Verify the Primary key is correct (usually auto-detected).
If you chose Triggered or Continuous mode and haven't enabled Change Data Feed yet, you'll see a warning with the exact command to run. For data type compatibility questions, see Data types and compatibility.
Click Create to create the synced table.
Step 5: Monitor
After creation, monitor the synced table in Catalog. The Overview tab shows sync status, configuration, pipeline status, and last sync timestamp. Use Sync now for manual refresh.
Data types and compatibility
Unity Catalog data types are mapped to Postgres types when creating synced tables. Complex types (ARRAY, MAP, STRUCT) are stored as JSONB in Postgres.
| Source column type | Postgres column type |
|---|---|
| BIGINT | BIGINT |
| BINARY | BYTEA |
| BOOLEAN | BOOLEAN |
| DATE | DATE |
| DECIMAL(p,s) | NUMERIC |
| DOUBLE | DOUBLE PRECISION |
| FLOAT | REAL |
| INT | INTEGER |
| INTERVAL | INTERVAL |
| SMALLINT | SMALLINT |
| STRING | TEXT |
| TIMESTAMP | TIMESTAMP WITH TIME ZONE |
| TIMESTAMP_NTZ | TIMESTAMP WITHOUT TIME ZONE |
| TINYINT | SMALLINT |
| ARRAY<elementType> | JSONB |
| MAP<keyType,valueType> | JSONB |
| STRUCT<fieldName:fieldType[, ...]> | JSONB |
Note
GEOGRAPHY, GEOMETRY, VARIANT, and OBJECT types are not supported.
Handle invalid characters
Certain characters like null bytes (0x00) are allowed in Unity Catalog STRING, ARRAY, MAP, or STRUCT columns but not supported in Postgres TEXT or JSONB columns. This can cause sync failures with errors like:
ERROR: invalid byte sequence for encoding "UTF8": 0x00
ERROR: unsupported Unicode escape sequence DETAIL: \u0000 cannot be converted to text
Solutions:
Sanitize string fields: Remove unsupported characters before syncing. For null bytes in STRING columns:
SELECT REPLACE(column_name, CAST(CHAR(0) AS STRING), '') AS cleaned_column FROM your_tableConvert to BINARY: For STRING columns where preserving raw bytes is necessary, convert to BINARY type.
Programmatic creation
For automation workflows, you can create synced tables programmatically using the Databricks SDK, CLI, or REST API.
Python SDK
from databricks.sdk import WorkspaceClient
from databricks.sdk.service.database import (
    SyncedDatabaseTable,
    SyncedTableSpec,
    NewPipelineSpec,
    SyncedTableSchedulingPolicy
)

# Initialize the Workspace client
w = WorkspaceClient()

# Create a synced table
synced_table = w.database.create_synced_database_table(
    SyncedDatabaseTable(
        name="lakebase_catalog.schema.synced_table",  # Full three-part name
        spec=SyncedTableSpec(
            source_table_full_name="analytics.gold.user_profiles",
            primary_key_columns=["user_id"],  # Primary key columns
            scheduling_policy=SyncedTableSchedulingPolicy.TRIGGERED,  # SNAPSHOT, TRIGGERED, or CONTINUOUS
            new_pipeline_spec=NewPipelineSpec(
                storage_catalog="lakebase_catalog",
                storage_schema="staging"
            )
        ),
    )
)
print(f"Created synced table: {synced_table.name}")

# Check the status of a synced table
status = w.database.get_synced_database_table(name=synced_table.name)
print(f"Synced table status: {status.data_synchronization_status.detailed_state}")
print(f"Status message: {status.data_synchronization_status.message}")
CLI
# Create a synced table
databricks database create-synced-database-table \
  --json '{
    "name": "lakebase_catalog.schema.synced_table",
    "spec": {
      "source_table_full_name": "analytics.gold.user_profiles",
      "primary_key_columns": ["user_id"],
      "scheduling_policy": "TRIGGERED",
      "new_pipeline_spec": {
        "storage_catalog": "lakebase_catalog",
        "storage_schema": "staging"
      }
    }
  }'

# Check the status of a synced table
databricks database get-synced-database-table "lakebase_catalog.schema.synced_table"
REST API
export WORKSPACE_URL="https://your-workspace.cloud.databricks.com"
export DATABRICKS_TOKEN="your-token"

# Create a synced table
curl -X POST "$WORKSPACE_URL/api/2.0/database/synced_tables" \
  -H "Content-Type: application/json" \
  -H "Authorization: Bearer $DATABRICKS_TOKEN" \
  --data '{
    "name": "lakebase_catalog.schema.synced_table",
    "spec": {
      "source_table_full_name": "analytics.gold.user_profiles",
      "primary_key_columns": ["user_id"],
      "scheduling_policy": "TRIGGERED",
      "new_pipeline_spec": {
        "storage_catalog": "lakebase_catalog",
        "storage_schema": "staging"
      }
    }
  }'

# Check the status
curl -X GET "$WORKSPACE_URL/api/2.0/database/synced_tables/lakebase_catalog.schema.synced_table" \
  -H "Authorization: Bearer $DATABRICKS_TOKEN"
Capacity planning
When planning your reverse ETL implementation, consider these resource requirements:
- Connection usage: Each synced table uses up to 16 connections to your Lakebase database, which count toward the instance's connection limit.
- Size limits: Total logical data size limit across all synced tables is 2 TB. Individual tables don't have limits, but Databricks recommends not exceeding 1 TB for tables requiring refreshes.
- Naming requirements: Database, schema, and table names may only contain alphanumeric characters and underscores (
[A-Za-z0-9_]+). - Schema evolution: Only additive schema changes (like adding columns) are supported for Triggered and Continuous modes.
Delete a synced table
To delete a synced table, you must remove it from both Unity Catalog and Postgres:
Delete from Unity Catalog: In Catalog, find your synced table, click the
 menu, and select Delete. This stops data refreshes but leaves the table in Postgres.
Drop from Postgres: Connect to your Lakebase database and drop the table to free up space:
DROP TABLE your_database.your_schema.your_table;
You can use the SQL editor or external tools to connect to Postgres.
Learn more
| Task | Description |
|---|---|
| Create a project | Set up a Lakebase project |
| Connect to your database | Learn connection options for Lakebase |
| Register database in Unity Catalog | Make your Lakebase data visible in Unity Catalog for unified governance and cross-source queries |
| Unity Catalog integration | Understand governance and permissions |
Other options
For syncing data into non-Databricks systems, see Partner Connect reverse ETL solutions such as Census or Hightouch.