Back up OT network sensors from the on-premises management console (Legacy)
Important
Defender for IoT now recommends using Microsoft cloud services or existing IT infrastructure for central monitoring and sensor management, and plans to retire the on-premises management console on January 1st, 2025.
For more information, see Deploy hybrid or air-gapped OT sensor management.
Back up your OT network sensors from the on-premises management console to help protect against hard drive failures and data loss. In this article, learn how to:
- Manage the sensor backup files
- Configure backup settings
- Run an unscheduled backup
- View backup notifications
- Use an SMB server to save your backup files to an external server
Manage OT sensor backup files
Define OT sensor backup schedules from your on-premises management console to streamline settings across your system and store backup files on your on-premises management console.
The on-premises management console can store up to nine backup files for each connected OT sensor, provided that the backup files don't exceed the allocated backup space.
Backup files are copied from the OT sensor to the on-premises management console over an encrypted channel.
For more information, see Set up backup and restore files.
Configure OT sensor backup settings
Sign into your on-premises management console and go to System Settings. In the Management console general configuration area, select Schedule Sensor Backups.
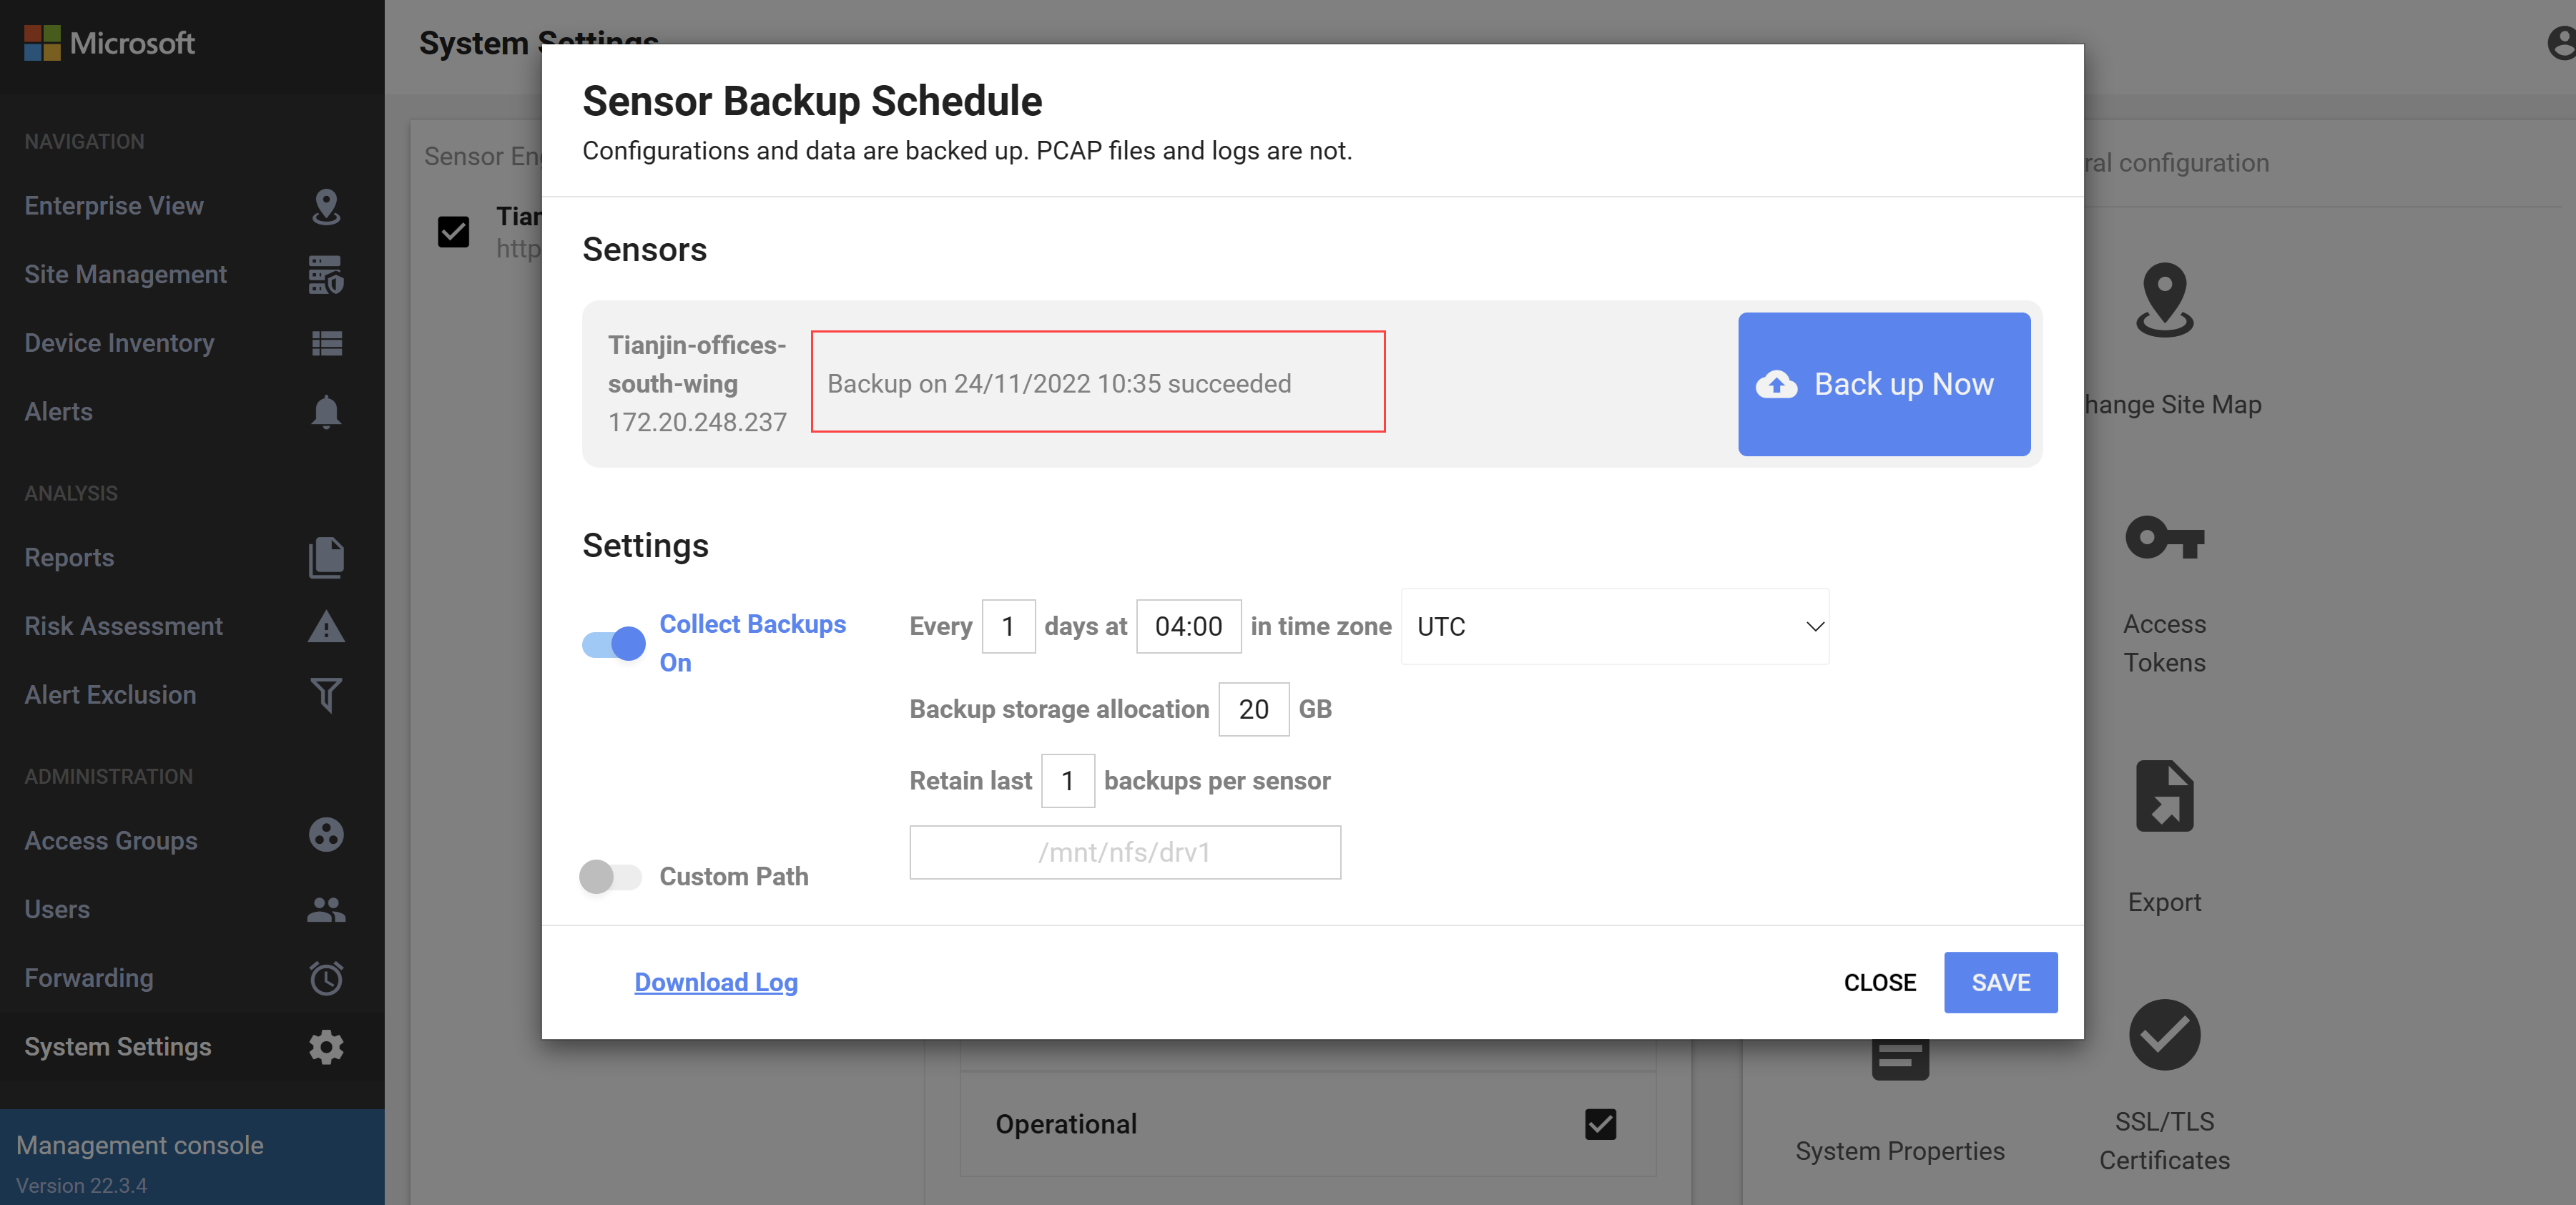
In the Sensor Backup Schedule dialog, toggle on the Collect Backups option so that it reads Collect Backups On.
Enter scheduling details for your backup, using a 24-hour clock in the time value. For example, to schedule a backup at 6:00 PM, enter 18:00.
Enter the number of GB you want to allocate for backup storage. When the configured limit is exceeded, the oldest backup file is deleted.
If you're storing backup files on the on-premises management console, supported values are defined based on your hardware profiles. For example:
Hardware profile Backup storage availability E1800 Default storage is 40 GB; limit is 100 GB. L500 Default storage is 20 GB; limit is 50 GB. L100 Default storage is 10 GB; limit is 25 GB. L60 Default storage is 10 GB; limit is 25 GB. If you're storing backup files on an external server, there's no maximum storage. However, keep in mind:
- If the allocated storage space is exceeded, the OT sensor isn't backed up.
- The on-premises management console will still attempt to retrieve backup files for managed OT sensors. If the backup file for one OT sensor exceeds the configured storage, the on-premises management console skips it and continues on to the next OT sensor's backup file.
Enter the number of backup files you want to retain on each OT sensor.
To define a custom path for your backup storage on the on-premises management console, toggle on the Custom Path option and enter the path to your backup storage. For example, you may want to save your backup files on an external server.
Supported characters include alphanumeric characters, forward slashes (/), and underscores (_).
Make sure that the location you enter is accessible by the on-premises management console.
By default, backup files are stored on your on-premises management console at
/var/cyberx/sensor-backups.Select SAVE to save your changes.
Run an immediate, unscheduled backup
Sign into your on-premises management console and go to System Settings. In the Management console general configuration area, select Schedule Sensor Backups.
Locate the OT sensor you want to back up and select Back up Now.
Select CLOSE to close the dialog.
View backup notifications
To check for backup notifications on the on-premises management console:
Sign into your on-premises management console and go to System Settings. In the Management console general configuration area, select Schedule Sensor Backups.
In the Sensor Backup Schedule dialog, check for details about recent backup activities for each sensor listed. For example:
Backup failures might occur for any of the following scenarios:
- A backup file can't be found or retrieved.
- Network connection failures.
- There isn't enough storage space allocated on the on-premises management console for the backup file.
Tip
You may want to send alerts about backup notifications to partner services.
To do this, create a forwarding alert rule on your on-premises management console. In the Create Forwarding Rule dialog box, make sure to select Report System Notifications.
Save your backup file to an external server (SMB)
We recommend saving your OT sensor backup files on your internal network. To do this, you may want to use an SMB server. For example:
Create a shared folder on the external SMB server, and make sure that you have the folder's path and the credentials required to access the SMB server.
Sign into your OT sensor via SFTP and create a directory for your backup files. Run:
sudo mkdir /<backup_folder_name_on_server>

sudo chmod 777 /<backup_folder_name_on_server>/
Edit the
fstabfile with details about your backup folder. Run:sudo nano /etc/fstab add - //<server_IP>/<folder_path> /opt/sensor/persist/backups cifs rw,credentials=/etc/samba/user,vers=3.0,uid=cyberx,gid=cyberx,file_mode=0777,dir_mode=0777 0 0Edit and create credentials to share for the SMB server. Run:
sudo nano /etc/samba/userAdd your credentials as follows:
username=<user name>

password=<password>
Mount the backup directory. Run:
sudo mount -aBackups are stored in the remote location.
Next steps
For more information, see:
Manage sensors from the on-premises management console
Back up and restore OT network sensors from the sensor console
Feedback
Coming soon: Throughout 2024 we will be phasing out GitHub Issues as the feedback mechanism for content and replacing it with a new feedback system. For more information see: https://aka.ms/ContentUserFeedback.
Submit and view feedback for