Note
Access to this page requires authorization. You can try signing in or changing directories.
Access to this page requires authorization. You can try changing directories.
This article explains how to add environment types to projects in Azure Deployment Environments. It also explains how to update, enable, disable, and delete environment types.
Project environment types are a subset of the environment types configured for a dev center. They help preconfigure the environments that a specific development team can create.
In Azure Deployment Environments, environment types that you add to the project are available to developers when they deploy environments. Environment types determine the subscription and identity that are used for those deployments.
Project environment types allow platform engineering teams to:
Configure the target subscription in which Azure resources will be created, per environment type and per project.
You can provide subscriptions for environment types in a project to automatically apply the right set of policies on environments. This action also abstracts Azure governance-related concepts from your development teams.
Preconfigure the managed identity that developers use to perform the deployment, along with the access levels that development teams get after the environment is created.
Prerequisites
- An environment type at the dev center level.
- Write access to a specific project.
Add a project environment type
When you configure a project environment type, your development teams can use it to create an environment. They'll create the environment in the mapped subscription by using the configured deployment identity, along with permissions granted to resources created as part of the environment. All the associated policies are automatically applied.
To add a new project environment type:
Sign in to the Azure portal and go to Azure Deployment Environments.
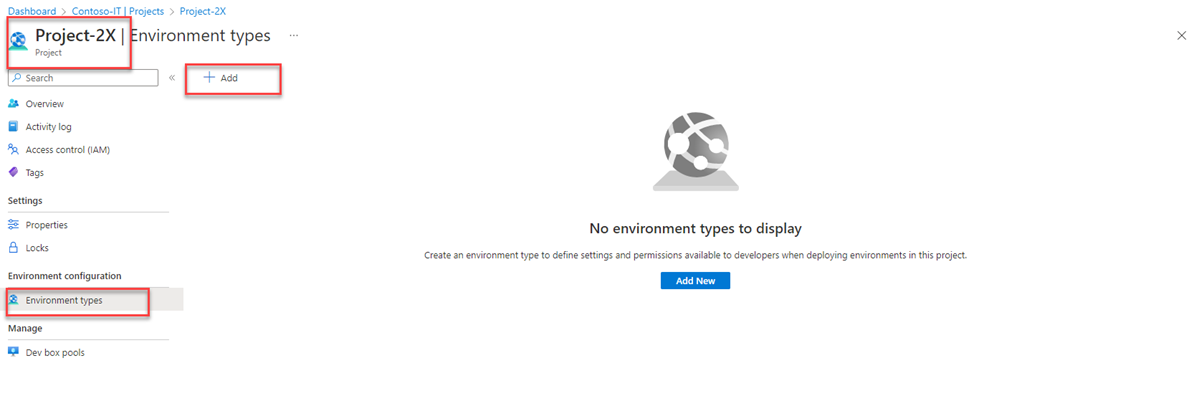
In the left pane, under Configure, select Projects. On the Projects page, select the specific project.
Select Environment types in the left pane.
Select + Add.
On the Add environment type to <project> page, provide the following details:
Name Value Type Select a dev center environment type to enable for the project. Deployment subscription Select the target subscription in which the environment will be created. Deployment identity Select either a system-assigned managed identity or a user-assigned managed identity that will be used to perform deployments on behalf of the user. Permissions on environment resources > Environment creator role(s) Select the roles that get access to the environment resources. Permissions on environment resources > Additional access Select the users or Microsoft Entra groups that are granted specific roles on the environment resources. Tags (optional) Provide a name and value for tags that are applied on all resources created as part of the environments. 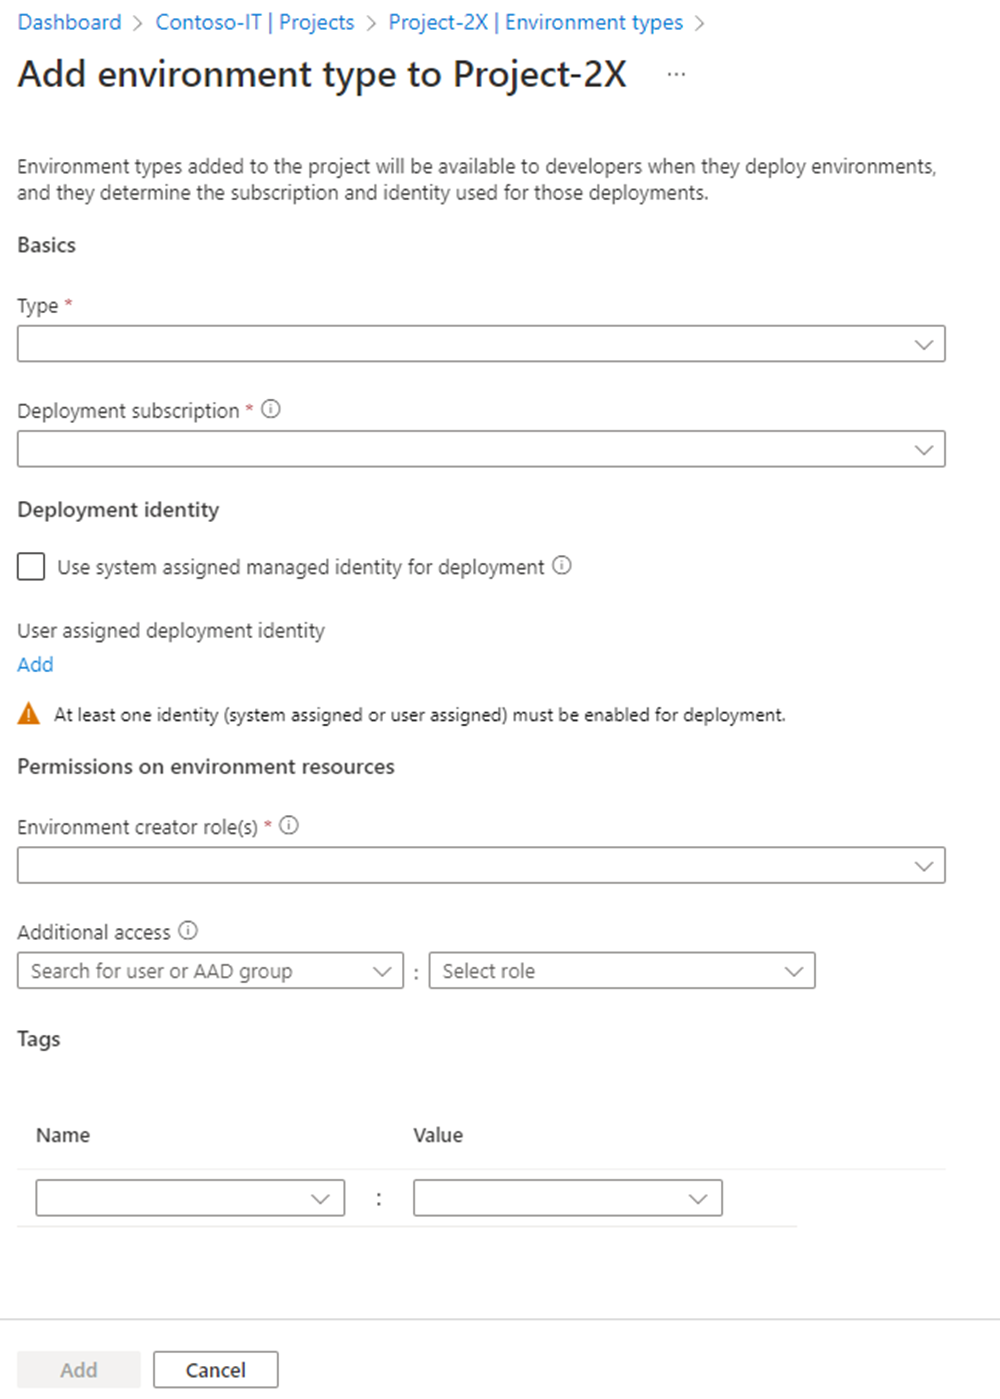


Note
At least one managed identity (system assigned or user assigned) must be enabled for deployment identity. It will be used to perform the environment deployment on behalf of the developer. Additionally, the identity attached to the dev center should be granted Contributor and User Access Administrator access to the deployment subscription that's configured for the environment type.
Update a project environment type
You can update a project environment type so that it uses a different subscription or deployment identity when developers deploy environments. Updating a project environment type affects only newly created environments. Existing environments will continue to exist in the previously mapped subscription.
To update an existing project environment type:
In the Azure portal, go to Azure Deployment Environments.
In the left pane, under Configure, select Projects. On the Projects page, select the specific project.
Select Environment types in the left pane.
On the row of the environment type that you want to update, select the ellipsis (...) and then select Edit.
On the Edit <environment type> page, update the configuration, and then select Update.
Enable or disable a project environment type
You can disable a project environment type to prevent developers from using it to create environments. Disabling a project environment type doesn't affect existing environments.
When you enable an environment type (or re-enable one that you disabled), development teams can use it to create environments.
In the Azure portal, go to Azure Deployment Environments.
In the left pane, under Configure, select Projects. On the Projects page, select the specific project.
Select Environment types in the left pane.
Select the environment type to enable or disable.
Select Enable or Disable at the top of the page.
Delete a project environment type
You can delete a specific project environment type only if no deployed environments in the project are using it. After you delete a project environment type, development teams can't use it to create environments.
In the Azure portal, go to Azure Deployment Environments.
In the left pane, under Configure, select Projects. On the Projects page, select the specific project.
Select Environment types in the left pane.
Select a project environment type to delete.
Select Delete at the top of the page, and then confirm.