Note
Access to this page requires authorization. You can try signing in or changing directories.
Access to this page requires authorization. You can try changing directories.
This guide explains how to submit a support request to increase the number of resources available to Azure Deployment Environments in your Azure subscription.
If your organization uses Deployment Environments extensively, you might encounter a quota limit during deployment. When you reach the limit for a resource in your subscription, you can request a limit increase (sometimes called a capacity increase or a quota increase) to extend the number of resources available. The request process allows the Azure Deployment Environments team to ensure that your subscription isn't involved in any cases of fraud or unintentional, sudden large-scale deployments.
To learn more about the general process for creating Azure support requests, see Create an Azure support request.
Prerequisites
- Have the Owner, Contributor, or Support Request Contributor role at the subscription level.
- Gather additional information.
Gather information for your request
Submitting a support request to increase your quota is quicker if you gather the required information before you begin the request process.
Identify the quota type
If you reach the quota limit for a Deployment Environments resource, you see a notification indicating which quota type is affected during deployment. Take note of it and submit a request for that quota type.
The following resources are limited by subscription:
- Runtime limit per month (minutes)
- Runtime limit per deployment (minutes)
- Storage limit per environment (GBs)
Determine the region for the quota increase
Deployment Environments resources can exist in many regions. For best performance, you should choose the region where your Deployment Environments project exists.
For more information about Azure regions, how they relate to global geographies, and which services are available in each region, see Azure global infrastructure.
Submit a new support request
Follow these steps to request a limit increase:
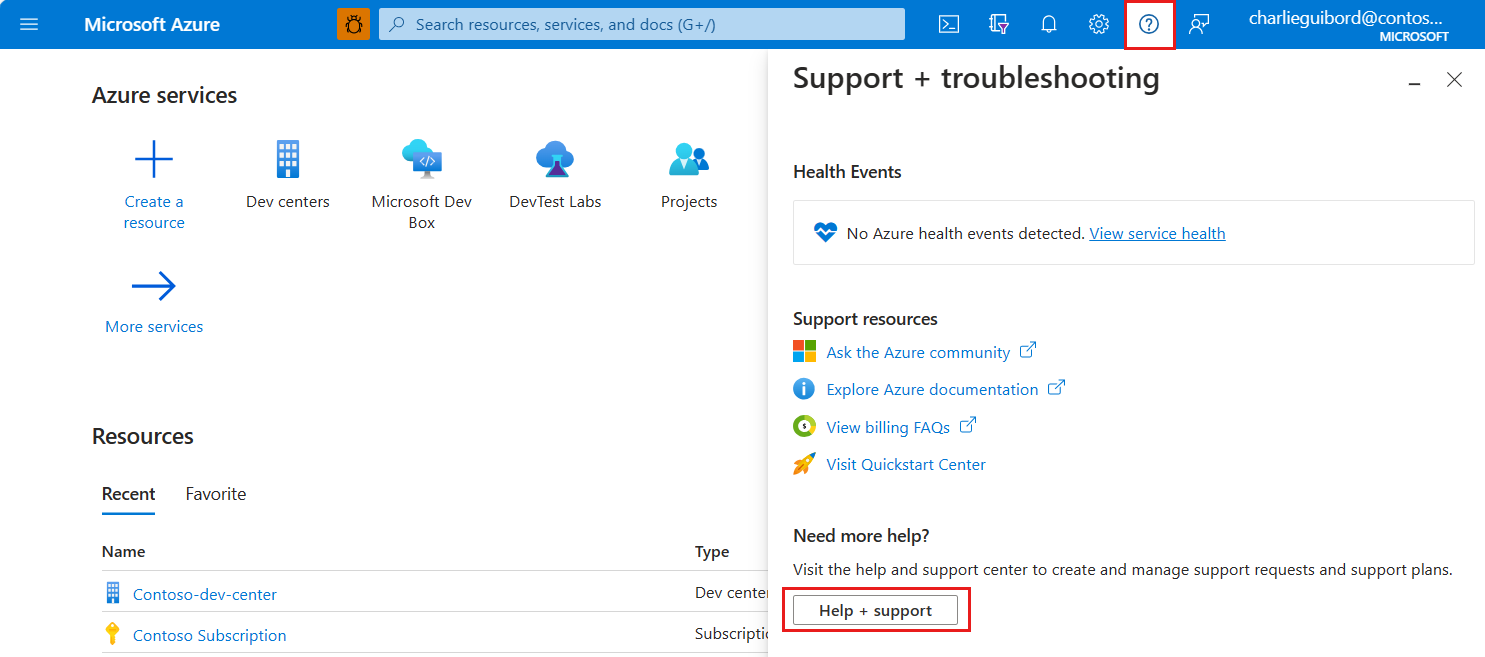
Sign in to the Azure portal, select Support + Troubleshooting in the menu bar, and then enter support in the search window:
In the Which service are you having an issue with? list, select Service and subscription limits (quotas), and then select Next.
Select Create a support request:
On the New support request page, enter the following information as needed, and then select Next.
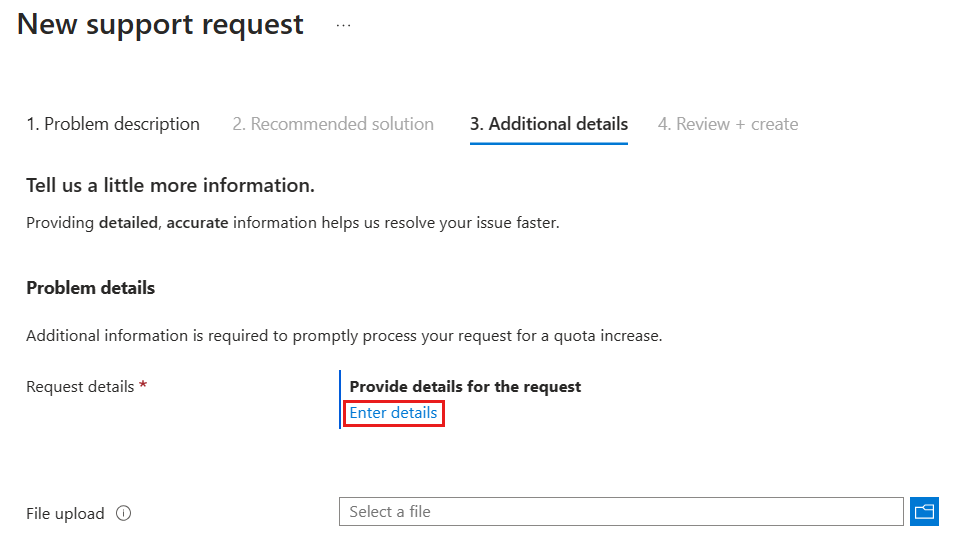
Name Value Issue type Service and subscription limits (quotas) Subscription Select the subscription to which the request applies. Quota type Azure Deployment Environments On the Additional details tab, in the Problem details section, select Enter details.
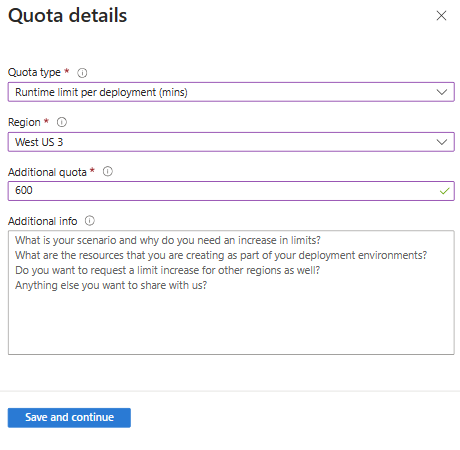
In Quota details, enter the following information, and then select Next.
Name Value Quota type Select the Quota type that you want to increase. Region Select the Region in which you want to increase your quota. Additional quota Enter the additional number of minutes that you need, or GBs per environment for storage limit increases. Additional info Enter any extra information about your request. Select Save and continue.
Complete the support request
To complete the support request, enter the following information:
Complete the remainder of the Additional details tab by using the following information:
Advanced diagnostic information
Name Value Allow collection of advanced diagnostic information Select yes or no. Support method
Name Value Support plan Select your support plan. Severity Select the severity of the issue. Preferred contact method Select email or phone. Your availability Enter your availability. Support language Select your language preference. Contact information
Name Value First name Enter your first name. Last name Enter your last name. Email Enter your contact email. Additional email for notification Enter an email for notifications. Phone Enter your contact phone number. Country/region Enter your location. Save contact changes for future support requests. Select the checkbox to save changes. Select Next.
On the Review + create tab, review the information, and then select Create.
Related content
- Check the default quota for each resource type by subscription type: Azure Deployment Environments limits


