Note
Access to this page requires authorization. You can try signing in or changing directories.
Access to this page requires authorization. You can try changing directories.
Efficient resource management is critical for development teams working on diverse projects. Microsoft Dev Box uses project policies to help platform engineers enforce governance while maintaining flexibility. With project policies, define guardrails for resource usage on a per-project basis across your organization. This article explains how to set up and manage project policies in Dev Box to optimize resource control and governance.
When policies are enforced, Dev Box checks the health of existing resource pools against the new policy settings:
- Pool health check: Dev Box checks each resource pool for compliance with the enforced policies.
- Unhealthy pools: A pool that doesn't meet the enforced requirements is marked unhealthy, which blocks the creation of new dev boxes in that pool.
- Existing dev boxes remain active: Dev boxes already created in an unhealthy pool continue to function normally, letting your teams keep working without disruption.
This enforcement mechanism ensures projects use only the resources they're approved for, maintaining a secure by default environment with efficient operations across all projects in a dev center.
Prerequisites
- Microsoft Dev Box configured with a dev center, and projects.
Create a default project policy
The first policy you create becomes the default project policy. It applies to all projects in the dev center. A default policy sets up a baseline for your projects, ensuring they have a minimum level of governance and control over accessible resources. In a default project policy, you select resources to allow, like networks, images, and SKUs. Projects use the default policy unless they have a custom project policy. If a project uses a custom policy, only the resources defined in that policy are available. If no custom policy is assigned to the project, the resources defined in the default policy are available. A project can have only one policy applied.
To create a default project policy:
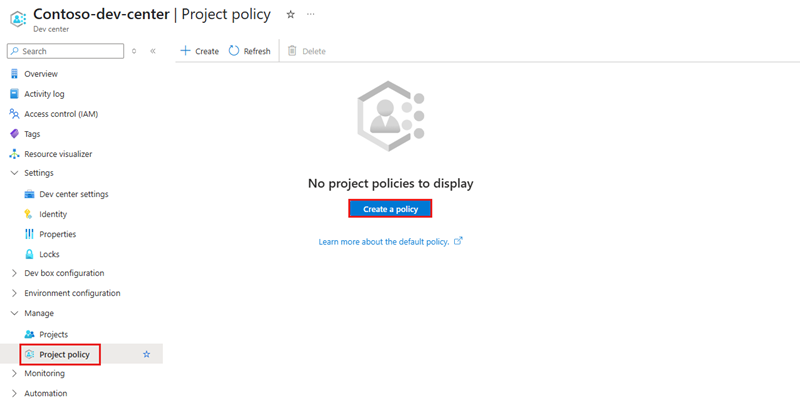
Sign in to the Azure portal. Navigate to your dev center, expand Manage in the left pane, and select Project policy. On the Project policy page, select Create a policy.
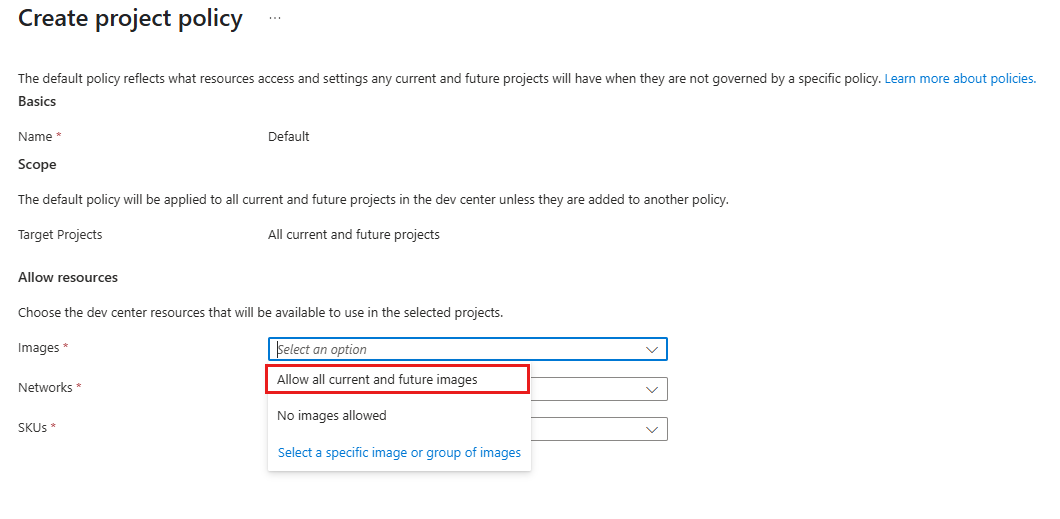
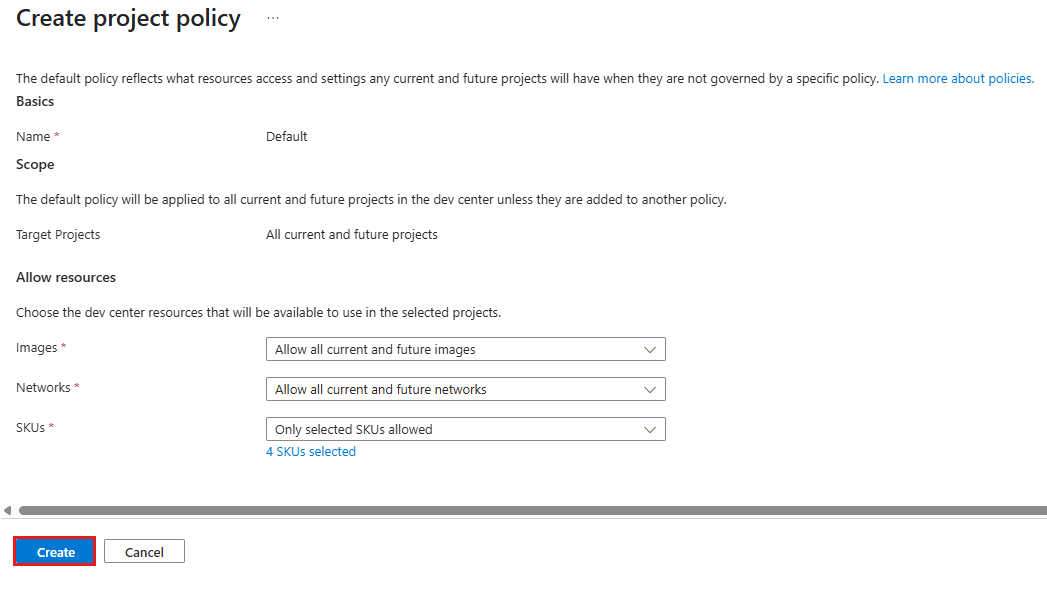
The first policy you create is the Default policy. Under Allow resources, select the resources you want to allow for the project. You must select at least one resource for each category: images, networks, and SKUs.
In Images, select Allow all current and future images.
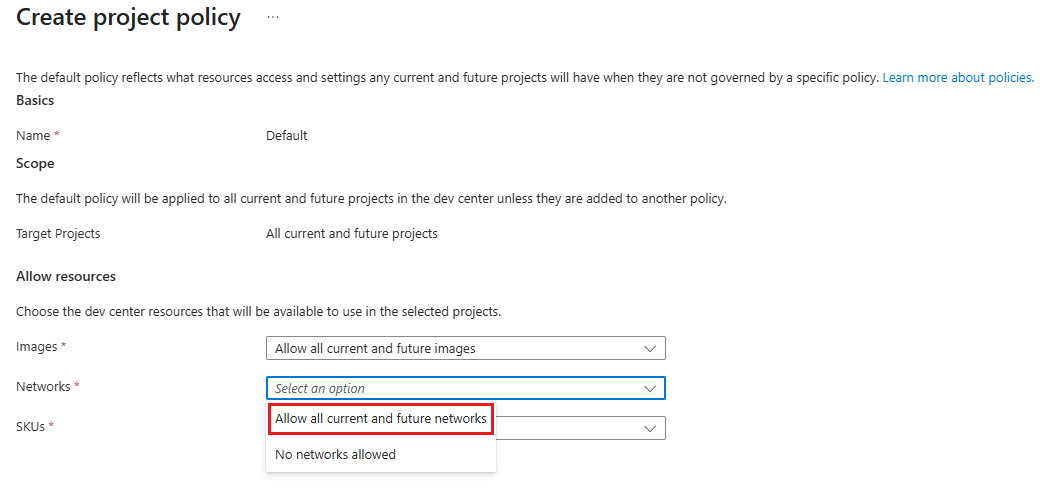
In Networks, select All current and future networks.
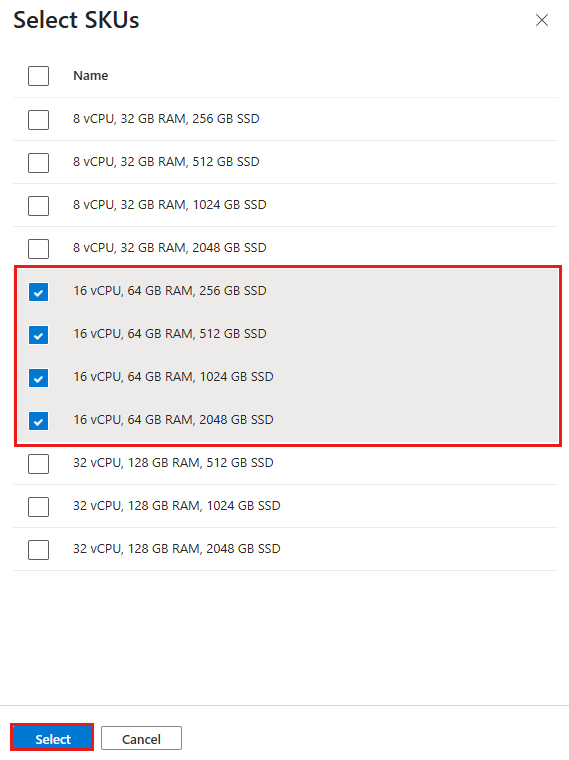
To allow specific SKU usage, in SKUs, select Select a specific SKU or group of SKUs.
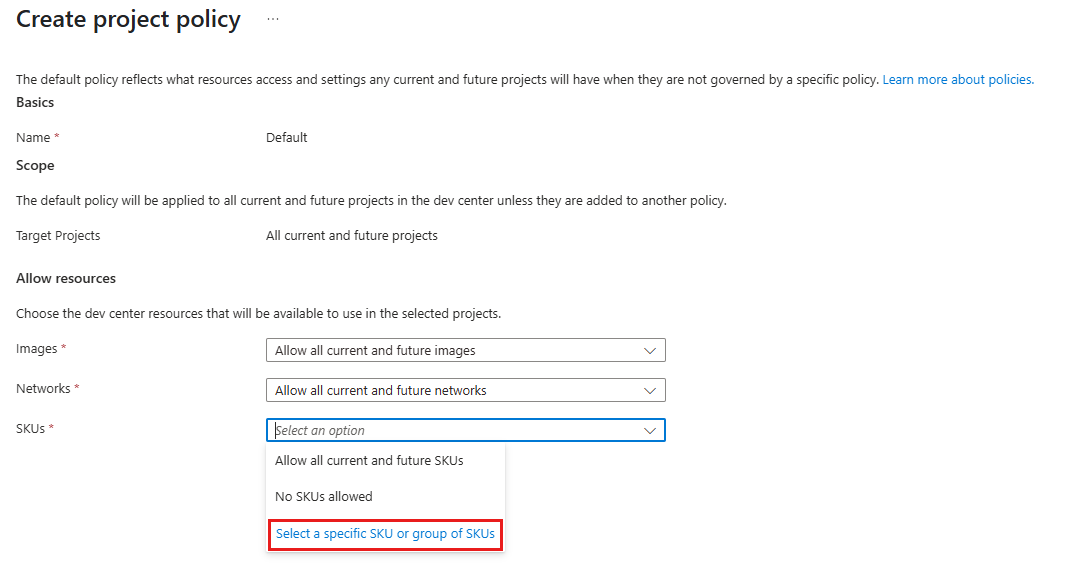
In the Select SKUs pane, select the SKUs you want to allow (for example, all 16 vCPU SKUs). Confirm your selection by selecting Select.
After selecting the resources, select Create to finalize the policy.
To confirm that the default project policy includes the resources, expand Default.

Create a custom project policy
Custom project policies enable you to control resources for specific projects. These policies allow you to control which resources are available to projects, ensuring better governance and resource management. Each project can have only one custom policy, but the same policy can be applied to multiple projects.
To create and apply a custom project policy:
Sign in to the Azure portal, go to your dev center, and in the left pane, expand Manage, then select Project policy.
On the Project policy page, select Create.

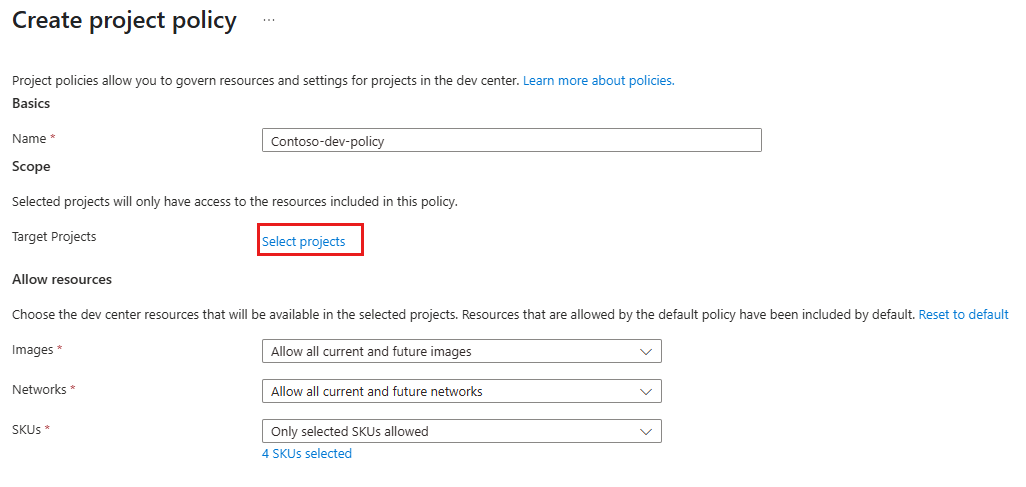
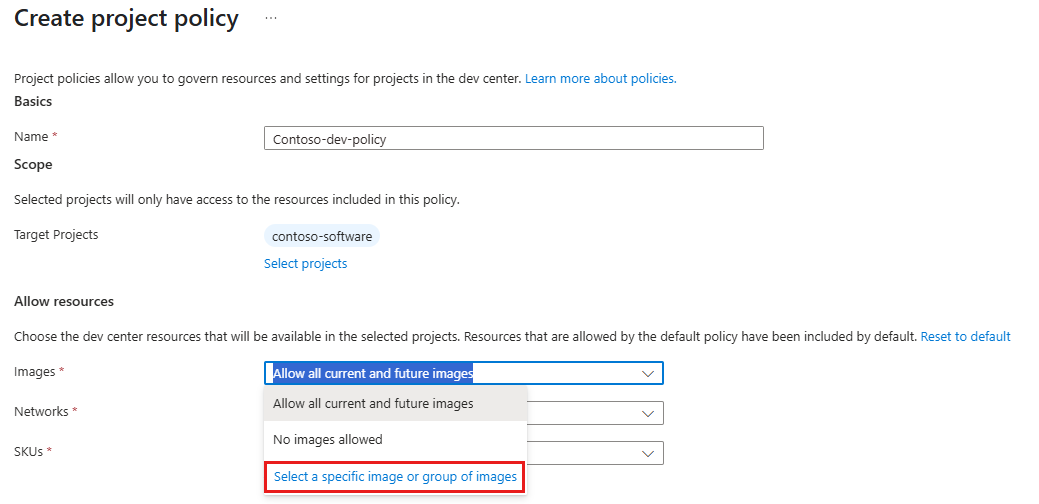
On the Create project policy page, enter a Name for the project policy.

Under Target projects, select Select projects.
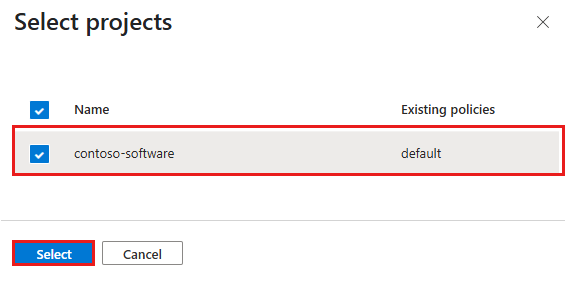
In the Select projects pane, select the projects you want to apply the policy to, and then select Select.
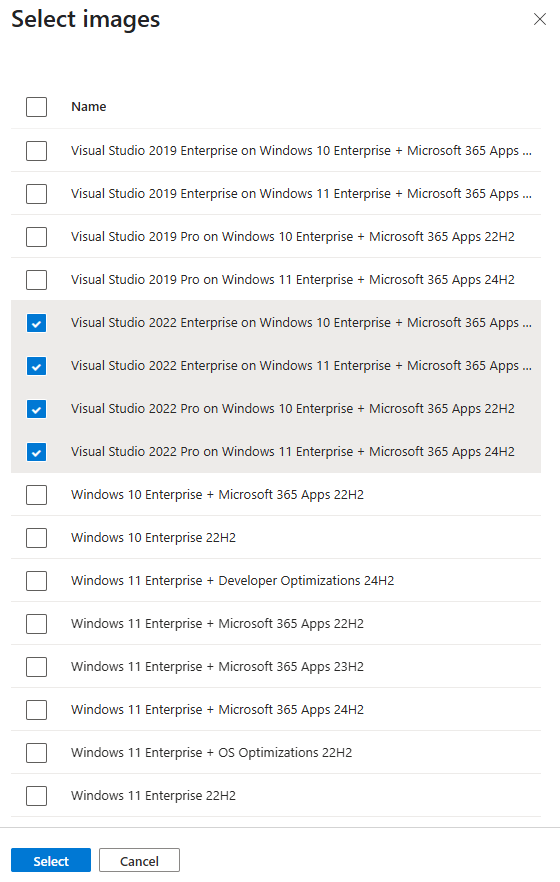
Under Allow resources, select the resources you want to allow for the project. For example, to let a project use only Visual Studio 2022 images, in Images, select Select a specific image or group of images.
- Select all Visual Studio 2022 images. To confirm your selection, select Select.
- Select all Visual Studio 2022 images. To confirm your selection, select Select.
Select more resources if needed. When you finish selecting resources, select Create.
View policies for a project
When you create a custom project policy and apply it to the target project, the default project policy doesn't apply to that project. The custom project policy must define all resources you want to allow in the project.
To view the project policies that apply to projects:
Sign in to the Azure portal, navigate to your dev center, and in the left pane, expand Manage, then select Project policy.
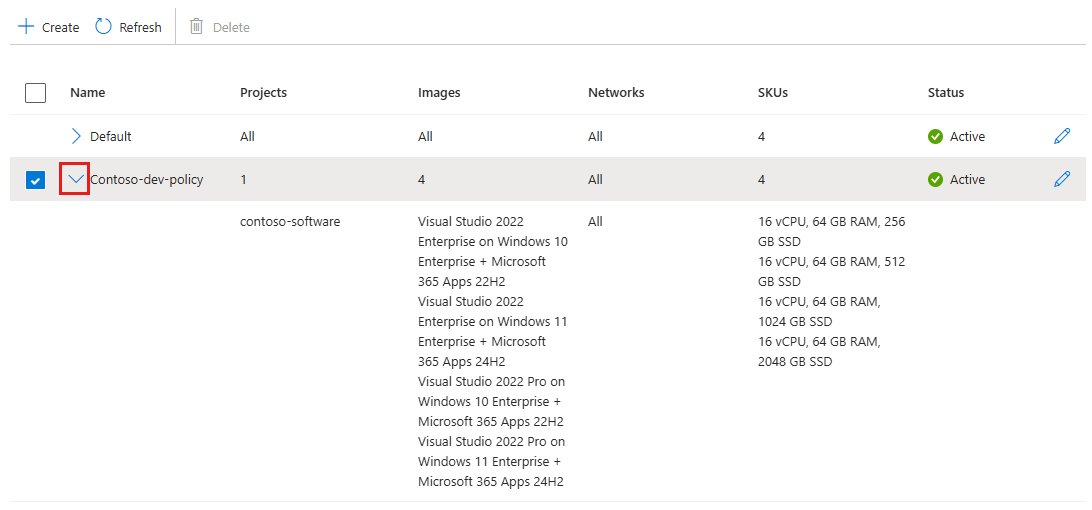
On the Project policy page, expand the custom project policy you created.
Edit a project policy
Edit a project policy to update allowed resources, modify governance settings, or adjust resource availability as project requirements evolve.
To edit a project policy:
Sign in to the Azure portal, navigate to your dev center, and in the left pane, expand Manage, then select Project policy.
For the project policy you want to edit, scroll to the right and select Edit.

After making changes, select Apply.
Delete a project policy
Deleting policies removes them from the projects where they are applied and applies the default policy. Delete custom policies first. You can't delete the default policy until all custom policies are deleted.
To delete a project policy:
Sign in to the Azure portal.
Go to your dev center.
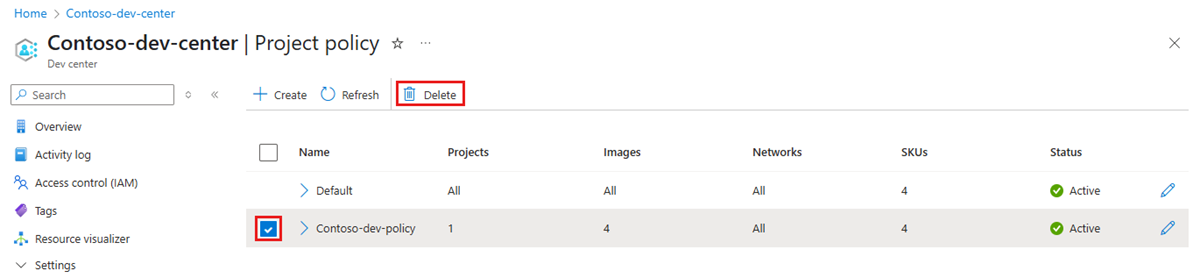
In the left pane, expand Manage, and select Project policy.
Select the project policy to delete, and select Delete.
In the Delete project policy, read the message: "Deleting a custom policy will cause a pool to become unhealthy if the pool resources are allowed by the custom policy but not allowed by the default policy.", and select OK.
Related content
- Learn more about Microsoft Dev Box architecture and key concepts.