Note
Access to this page requires authorization. You can try signing in or changing directories.
Access to this page requires authorization. You can try changing directories.
In this quickstart, you quickly deploy a cluster of traditional WebSphere Application Server (WAS) Network Deployment (ND) instances on Azure Virtual Machines (VMs). This article uses the Azure Marketplace offer for IBM WAS ND cluster to accelerate your journey to Azure VMs. The offer automatically provisions a number of resources including latest Red Hat Enterprise Linux (RHEL) VMs with fixes, latest WebSphere Application Server ND 9.0.5.x on each VM with fixes, latest IBM Java Development Kit (JDK) 8 with fixes on each VM, a Deployment Manager on one of the VMs with Administrative Console enabled, and optionally an IBM HTTP Server (IHS) or Azure Application Gateway as load balancer. Visit Azure portal to see the offer IBM WAS ND cluster on Azure VMs.
If you prefer manual step-by-step guidance for installing IBM WAS ND cluster that doesn't utilize the automation enabled by the offer, see Tutorial: Manually install IBM WebSphere Application Server Network Deployment traditional on Azure Virtual Machines.
If you're interested in providing feedback or working closely on your migration scenario with the engineering team developing WebSphere on Azure solutions, fill out this short survey on WebSphere migration and include your contact information. The team of program managers, architects, and engineers will promptly get in touch with you to initiate close collaboration.
Prerequisites
- An Azure subscription. If you don't have an Azure subscription, create a free account before you begin.
- Ensure the Azure identity you use to sign in has either the Contributor role or the Owner role in the current subscription. For an overview of Azure roles, see What is Azure role-based access control (Azure RBAC)?
- An IBMid with necessary entitlement for WebSphere Traditional (optional). If you create the deployment with an evaluation license, you don't need to provide an IBMid with entitlement for WebSphere Traditional. To get the benefit, you need to accept the IBM WebSphere Application Server License Agreement during the deployment creation steps. Otherwise, you must enter your registered IBMid and your IBMid must have active WebSphere entitlements associated with it. If provisioning with IBMid fails due to lack of entitlements, ask the primary or secondary contacts for your IBM Passport Advantage site to grant you access. Alternately, follow steps at IBM eCustomer Care for further assistance. This offer assumes you're properly licensed to run offers in Microsoft Azure. For more information, see IBM eCustomer Care.
Deploy a cluster
The steps in this section direct you to deploy an IBM WAS ND cluster on Azure VMs.
Use the following steps to find the IBM WAS ND cluster on Azure VMs offer:
Sign in to the Azure portal.
In the search bar at the top of the Azure portal, enter IBM WAS ND. In the search results, in the Marketplace section, select IBM WAS ND cluster on Azure VMs.


Alternatively, you can also go directly to the IBM WAS ND cluster on Azure VMs offer.
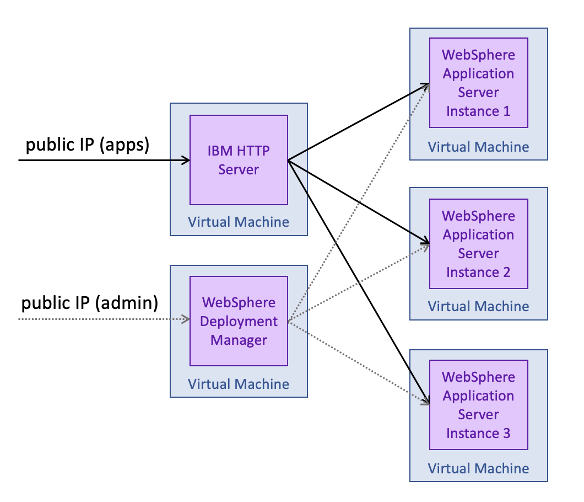
In either case, this offer deploys an IBM WAS ND cluster on Azure VMs. The cluster includes the following components:
- One Deployment Manager instance for managing the applications and application servers.
- One IBM HTTP Server instance for managing load balancing.
- WebSphere Application Server instances (nodes) for running your applications (defaults to 3 for High Availability).
The following diagram shows the default configuration.
To start your deployment, select Create on the offer page.
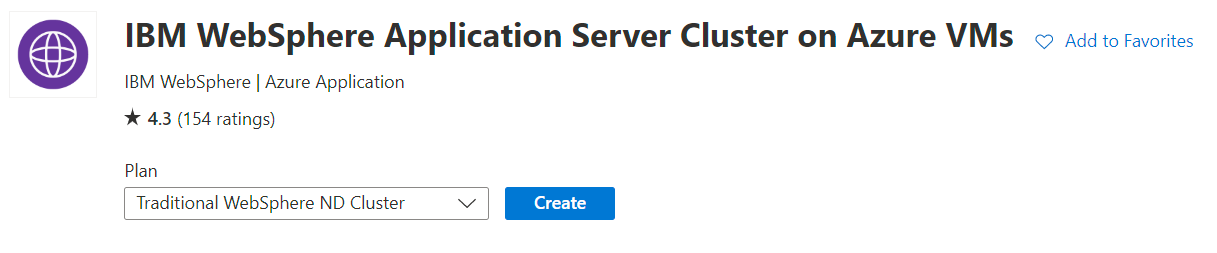
Then, you're shown the Create Traditional WebSphere ND Cluster page where you can start configuring the deployment.
The following steps show you how to fill out the Basics pane shown in the following screenshot.

On the Basics pane, ensure that the value shown in the Subscription field is the same one that has the roles listed in the prerequisites section.
In the Resource group field, select Create new and fill in a value for the resource group. Because resource groups must be unique within a subscription, pick a unique name. An easy way to have unique names is to use a combination of your initials, today's date, and some identifier - for example, jm070924wasndcluster.
Under Instance details, select the region for the deployment.
Leave the default option Evaluation for Deploy with existing WebSphere entitlement or with evaluation license?.
Note
If you select the Entitled option, you must provide an IBMid that has entitlements for WebSphere Traditional.
Select I have read and accept the IBM License Agreement.
Select I agree to IBM contacting my company or organization if you're willing to let IBM and Microsoft contact you for further offer development. Otherwise, leave it unselected.
Scroll to the bottom of the Basics pane and notice the helpful links for Report issues, get help, and share feedback.
Select Next to go to the Cluster configuration pane.
The following steps show you how to fill out the Cluster configuration pane shown in the following screenshot.

- Use the default value 4 for Number of VMs.
- Leave the default VM size for VM size.
- Leave the default value websphere for VM administrator.
- Leave the default option Password for Authentication type. You can also select SSH Public Key which is more secure.
- Provide a password for Password for VM administrator. Use the same value for Confirm password.
- Leave the default value wsadmin for WebSphere administrator.
- Provide a password for Password for WebSphere administrator. Use the same value for Confirm password.
- Under Advanced, leave the default option Yes for Accept defaults for advanced configuration.
- Select Next to go to the Load balancer pane.
The following steps show you how to fill out the Load balancer pane shown in the following screenshot.

Leave the default option IBM HTTP Server for Select a load balancer.
Note
You use IBM HTTP Server (IHS) as the load balancer in this quickstart. Alternatively, you can use Azure Application Gateway as the load balancer. For more information on Azure Application Gateway, see What is Azure Application Gateway?.
Under IBM HTTP Server settings, leave the default VM size for VM size.
Leave the default value ihsadmin for VM administrator.
Leave the default option Password for Authentication type. You can also select SSH Public Key which is more secure.
Provide a password for Password for VM administrator. Use the same value for Confirm password.
Leave the default value ihsadmin for IBM HTTP Server administrator.
Provide a password for Password for IBM HTTP Server administrator. Use the same value for Confirm password.
Under Advanced, leave the default option Yes for Accept defaults for advanced configuration.
Select Next to go to the Networking pane.
The following steps show you how to fill out the Networking pane shown in the following screenshot. This pane enables you to customize the virtual network and subnet into which the IBM WAS ND cluster deploys. For information about virtual networks, see Create, change, or delete a virtual network.

- Accept the defaults on this pane.
- Select Next to go to the Database pane.
The following steps show you how to fill out the Database pane shown in the following screenshot, and start the deployment.

Use the default option No for Connect to database? in this quickstart.
Note
Alternatively, you can select Yes and provide the necessary details to connect to your database. For more information about connecting to a database, see Tutorial: Migrate WebSphere Application Server to Azure Virtual Machines with high availability and disaster recovery.
Select Review + create. If you see any validation failed error messages, fix validation problems, then select Review + create again.
Select Create.
Track the progress of the deployment on the Deployment is in progress page.
Depending on network conditions and other activity in your selected region, the deployment may take up to 20 minutes to complete. After that, you should see the text Your deployment is complete displayed on the deployment page.
Access the WAS Administrative Console and IHS Console
After the cluster deployment completes, select the Outputs section on the left panel to see the administrative console and IHS console URLs, along with other details.
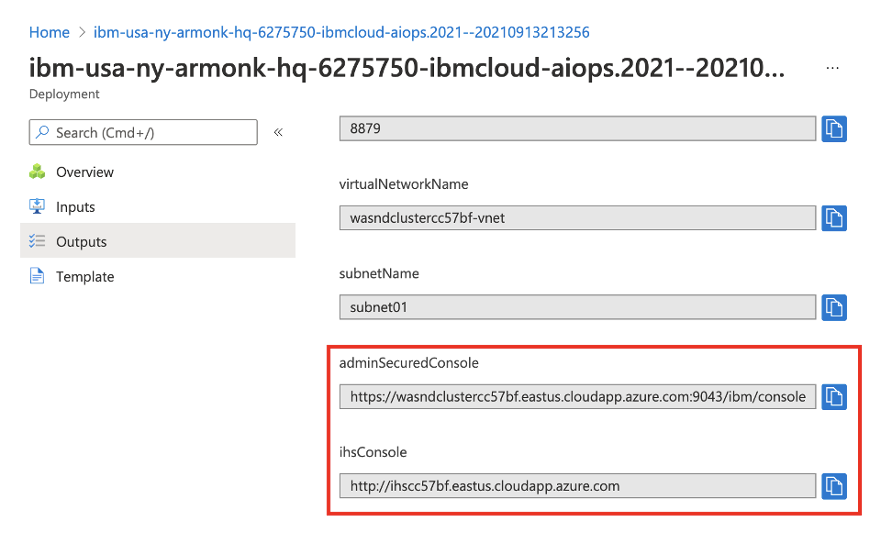
Use the copy icon to copy these URLs for the adminSecuredConsole and the ihsConsole, then paste them into two different browser address bars to sign in to both consoles, separately. After the administrative console page loads, you should see the sign in page, as shown in the following screenshot.
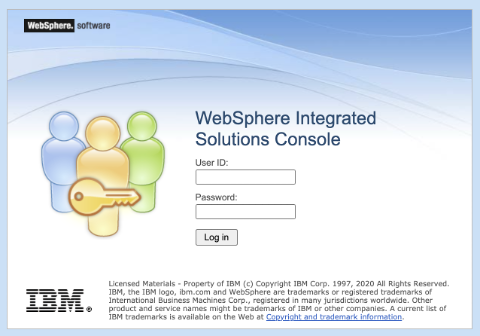
Sign in using the WebSphere administrator credentials you provided when setting up the Cluster configuration. After signing in, you see the following page.

Then, sign in to the IHS console. After the IHS console loads, you should see the following page:
Trying out an application
First, use the following steps to enable the option Synchronize changes with Nodes so that any configuration can be automatically synchronized to all application servers of the cluster:
- On the administrative console that you signed into earlier, select System administration > Console Preferences.
- In the Console Preferences pane, select Synchronize changes with Nodes, and then select Apply. You should see the message Your preferences have been changed.
Now, follow these instructions if you'd like to try out an application in the cluster:
On the administrative console that you signed into earlier, select Applications > New Application and then select New Enterprise Application.
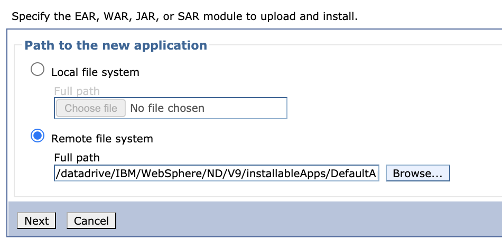
On the next panel, select Remote file system and then select Browse…. You're given the option to browse the file systems of your installed servers.
Select the system that begins with Dmgr. You're shown the Deployment Manager's file system. From there, select V9 and then installableApps. In that directory, you should see many applications available to install. Select DefaultApplication.ear and then select OK.
Then, you're taken back to the page for selecting the application, which should look like the following screenshot:
Select Next and then Next to go with the Fast Path deployment process.
In the Fast Path wizard, use the defaults for everything except Step 2: Map modules to servers. On that page, select the checkbox for the Default Web Application Module row, then hold Ctrl and select the options under Clusters and servers. Finally, select Apply.

You should see new entries in the table under the Server column. These entries should look similar to the ones in the following screenshot.

After you complete all the steps, select Finish, and then on the next page select Save. You should see messages for Synchronize changes with Nodes, as shown in the following screenshot:

Next, you need to start the application. Go to Applications > All Applications. Select the checkbox for DefaultApplication.ear, ensure the Action is set to Start, and then select Submit Action.
You should see success messages, as shown in the following screenshot:

When you see the success messages, you can try the app. In your browser, navigate to the IHS deployment and add /snoop. You should see information similar to the following about the server instance that processed the request:

When you refresh the browser, the app cycles through the server instances of the cluster.
Clean up resources
To avoid Azure charges, you should clean up unnecessary resources. When you no longer need the cluster, use the following steps to delete the resource groups to clean up the resources used in this tutorial:
- Sign in to the Azure portal.
- Enter the resource group name of your WAS ND cluster - for example,
jiangma070924wasndcluster- in the search box at the top of the Azure portal, and select the matched resource group from the search results. - Select Delete resource group.
- In Enter resource group name to confirm deletion, enter the resource group name.
- Select Delete.
Next step
To explore options to run WebSphere products on Azure, see the following article: