Note
Access to this page requires authorization. You can try signing in or changing directories.
Access to this page requires authorization. You can try changing directories.
This article explains how to migrate from traditional authentication methods to more secure, passwordless connections with Azure Database for PostgreSQL.
Application requests to Azure Database for PostgreSQL must be authenticated. Azure Database for PostgreSQL provides several different ways for apps to connect securely. One of the ways is to use passwords. However, you should prioritize passwordless connections in your applications when possible.
Compare authentication options
When the application authenticates with Azure Database for PostgreSQL, it provides a username and password pair to connect the database. Depending on where the identities are stored, there are two types of authentication: Microsoft Entra authentication and PostgreSQL authentication.
Microsoft Entra authentication
Microsoft Entra authentication is a mechanism for connecting to Azure Database for PostgreSQL using identities defined in Microsoft Entra ID. With Microsoft Entra authentication, you can manage database user identities and other Microsoft services in a central location, which simplifies permission management.
Using Microsoft Entra ID for authentication provides the following benefits:
- Authentication of users across Azure Services in a uniform way.
- Management of password policies and password rotation in a single place.
- Multiple forms of authentication supported by Microsoft Entra ID, which can eliminate the need to store passwords.
- Customers can manage database permissions using external (Microsoft Entra ID) groups.
- Microsoft Entra authentication uses PostgreSQL database users to authenticate identities at the database level.
- Support of token-based authentication for applications connecting to Azure Database for PostgreSQL.
PostgreSQL authentication
You can create accounts in PostgreSQL. If you choose to use passwords as credentials for the accounts, these credentials will be stored in the user table. Because these passwords are stored in PostgreSQL, you need to manage the rotation of the passwords by yourself.
Although it's possible to connect to Azure Database for PostgreSQL with passwords, you should use them with caution. You must be diligent to never expose the passwords in an unsecure location. Anyone who gains access to the passwords is able to authenticate. For example, there's a risk that a malicious user can access the application if a connection string is accidentally checked into source control, sent through an unsecure email, pasted into the wrong chat, or viewed by someone who shouldn't have permission. Instead, consider updating your application to use passwordless connections.
Introducing passwordless connections
With a passwordless connection, you can connect to Azure services without storing any credentials in the application code, its configuration files, or in environment variables.
Many Azure services support passwordless connections, for example via Azure Managed Identity. These techniques provide robust security features that you can implement using DefaultAzureCredential from the Azure Identity client libraries. In this tutorial, you'll learn how to update an existing application to use DefaultAzureCredential instead of alternatives such as connection strings.
DefaultAzureCredential supports multiple authentication methods and automatically determines which should be used at runtime. This approach enables your app to use different authentication methods in different environments (local dev vs. production) without implementing environment-specific code.
The order and locations in which DefaultAzureCredential searches for credentials can be found in the Azure Identity library overview. For example, when working locally, DefaultAzureCredential will generally authenticate using the account the developer used to sign in to Visual Studio. When the app is deployed to Azure, DefaultAzureCredential will automatically switch to use a managed identity. No code changes are required for this transition.
To ensure that connections are passwordless, you must take into consideration both local development and the production environment. If a connection string is required in either place, then the application isn't passwordless.
In your local development environment, you can authenticate with Azure CLI, Azure PowerShell, Visual Studio, or Azure plugins for Visual Studio Code or IntelliJ. In this case, you can use that credential in your application instead of configuring properties.
When you deploy applications to an Azure hosting environment, such as a virtual machine, you can assign managed identity in that environment. Then, you won't need to provide credentials to connect to Azure services.
Note
A managed identity provides a security identity to represent an app or service. The identity is managed by the Azure platform and does not require you to provision or rotate any secrets. You can read more about managed identities in the overview documentation.
Migrate an existing application to use passwordless connections
The following steps explain how to migrate an existing application to use passwordless connections instead of a password-based solution.
0) Prepare the working environment
First, use the following command to set up some environment variables.
export AZ_RESOURCE_GROUP=<YOUR_RESOURCE_GROUP>
export AZ_DATABASE_SERVER_NAME=<YOUR_DATABASE_SERVER_NAME>
export AZ_DATABASE_NAME=demo
export AZ_POSTGRESQL_AD_NON_ADMIN_USERNAME=<YOUR_AZURE_AD_NON_ADMIN_USER_DISPLAY_NAME>
export AZ_LOCAL_IP_ADDRESS=<YOUR_LOCAL_IP_ADDRESS>
export CURRENT_USERNAME=$(az ad signed-in-user show --query userPrincipalName --output tsv)
Replace the placeholders with the following values, which are used throughout this article:
<YOUR_RESOURCE_GROUP>: The name of the resource group your resources are in.<YOUR_DATABASE_SERVER_NAME>: The name of your PostgreSQL server. It should be unique across Azure.<YOUR_AZURE_AD_NON_ADMIN_USER_DISPLAY_NAME>: The display name of your Microsoft Entra non-admin user. Make sure the name is a valid user in your Microsoft Entra tenant.<YOUR_LOCAL_IP_ADDRESS>: The IP address of your local computer, from which you'll run your Spring Boot application. One convenient way to find it is to open whatismyip.akamai.com.
1) Configure Azure Database for PostgreSQL
1.1) Enable Microsoft Entra ID-based authentication
To use Microsoft Entra ID access with Azure Database for PostgreSQL, you should set the Microsoft Entra admin user first. Only a Microsoft Entra Admin user can create/enable users for Microsoft Entra ID-based authentication.
To set up a Microsoft Entra administrator after creating the server, follow the steps in Manage Microsoft Entra roles in Azure Database for PostgreSQL - Flexible Server.
Note
PostgreSQL Flexible Server can create multiple Microsoft Entra administrators.
2) Configure Azure Database for PostgreSQL for local development
2.1) Configure a firewall rule for local IP
Azure Database for PostgreSQL instances are secured by default. They have a firewall that doesn't allow any incoming connection. To be able to use your database, you need to add a firewall rule that will allow the local IP address to access the database server.
Because you configured your local IP address at the beginning of this article, you can open the server's firewall by running the following command:
az postgres flexible-server firewall-rule create \
    --resource-group $AZ_RESOURCE_GROUP \
    --name $AZ_DATABASE_SERVER_NAME \
    --rule-name $AZ_DATABASE_SERVER_NAME-database-allow-local-ip \
    --start-ip-address $AZ_LOCAL_IP_ADDRESS \
    --end-ip-address $AZ_LOCAL_IP_ADDRESS \
    --output tsv
If you're connecting to your PostgreSQL server from Windows Subsystem for Linux (WSL) on a Windows computer, you need to add the WSL host ID to your firewall.
Obtain the IP address of your host machine by running the following command in WSL:
cat /etc/resolv.conf
Copy the IP address following the term nameserver, then use the following command to set an environment variable for the WSL IP Address:
export AZ_WSL_IP_ADDRESS=<the-copied-IP-address>
Then, use the following command to open the server's firewall to your WSL-based app:
az postgres flexible-server firewall-rule create \
    --resource-group $AZ_RESOURCE_GROUP \
    --name $AZ_DATABASE_SERVER_NAME \
    --rule-name $AZ_DATABASE_SERVER_NAME-database-allow-local-ip \
    --start-ip-address $AZ_WSL_IP_ADDRESS \
    --end-ip-address $AZ_WSL_IP_ADDRESS \
    --output tsv
2.2) Create a PostgreSQL non-admin user and grant permission
Next, create a non-admin Microsoft Entra user and grant all permissions on the $AZ_DATABASE_NAME database to it. You can change the database name $AZ_DATABASE_NAME to fit your needs.
Create a SQL script called create_ad_user_local.sql for creating a non-admin user. Add the following contents and save it locally:
cat << EOF > create_ad_user_local.sql
select * from pgaadauth_create_principal('$AZ_POSTGRESQL_AD_NON_ADMIN_USERNAME', false, false);
EOF
Then, use the following command to run the SQL script to create the Microsoft Entra non-admin user:
psql "host=$AZ_DATABASE_SERVER_NAME.postgres.database.azure.com user=$CURRENT_USERNAME dbname=postgres port=5432 password=$(az account get-access-token --resource-type oss-rdbms --output tsv --query accessToken) sslmode=require" < create_ad_user_local.sql
Now use the following command to remove the temporary SQL script file:
rm create_ad_user_local.sql
Note
You can read more detailed information about creating PostgreSQL users in Create users in Azure Database for PostgreSQL.
3) Sign in and migrate the app code to use passwordless connections
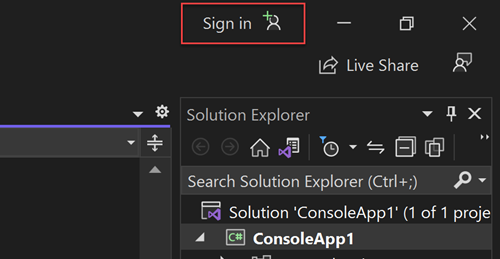
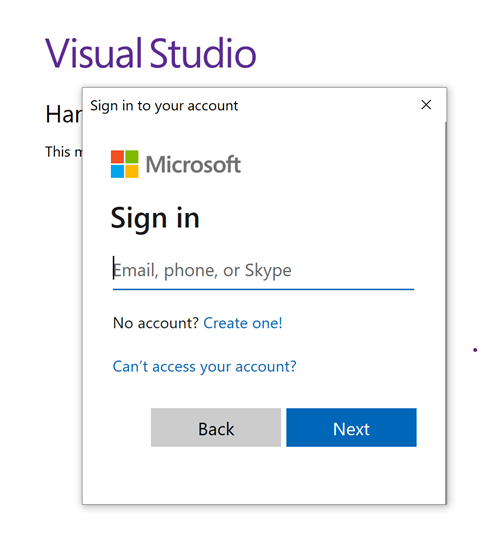
For local development, make sure you're authenticated with the same Microsoft Entra account you assigned the role to on your PostgreSQL. You can authenticate via the Azure CLI, Visual Studio, Azure PowerShell, or other tools such as IntelliJ.
Sign in to Azure through the Azure CLI by using the following command:
az login


Next, use the following steps to update your code to use passwordless connections. Although conceptually similar, each language uses different implementation details.
Inside your project, add the following reference to the
azure-identity-extensionspackage. This library contains all of the entities necessary to implement passwordless connections.<dependency> <groupId>com.azure</groupId> <artifactId>azure-identity-extensions</artifactId> <version>1.0.0</version> </dependency>Enable the Azure PostgreSQL authentication plugin in JDBC URL. Identify the locations in your code that currently create a
java.sql.Connectionto connect to Azure Database for PostgreSQL. Updateurlanduserin your application.properties file to match the following values:url=jdbc:postgresql://$AZ_DATABASE_SERVER_NAME.postgres.database.azure.com:5432/$AZ_DATABASE_NAME?sslmode=require&authenticationPluginClassName=com.azure.identity.extensions.jdbc.postgresql.AzurePostgresqlAuthenticationPlugin user=$AZ_POSTGRESQL_AD_NON_ADMIN_USERNAMEReplace the
$AZ_POSTGRESQL_AD_NON_ADMIN_USERNAMEand the two$AZ_DATABASE_SERVER_NAMEvariables with the value that you configured at the beginning of this article.
Run the app locally
After making these code changes, run your application locally. The new configuration should pick up your local credentials if you're signed in to a compatible IDE or command line tool, such as the Azure CLI, Visual Studio, or IntelliJ. The roles you assigned to your local dev user in Azure will allow your app to connect to the Azure service locally.
4) Configure the Azure hosting environment
After your application is configured to use passwordless connections and it runs locally, the same code can authenticate to Azure services after it's deployed to Azure. For example, an application deployed to an Azure App Service instance that has a managed identity assigned can connect to Azure Storage.
In this section, you'll execute two steps to enable your application to run in an Azure hosting environment in a passwordless way:
- Assign the managed identity for your Azure hosting environment.
- Assign roles to the managed identity.
Note
Azure also provides Service Connector, which can help you connect your hosting service with PostgreSQL. With Service Connector to configure your hosting environment, you can omit the step of assigning roles to your managed identity because Service Connector will do it for you. The following section describes how to configure your Azure hosting environment in two ways: one via Service Connector and the other by configuring each hosting environment directly.
Important
Service Connector's commands require Azure CLI 2.41.0 or higher.
Assign the managed identity using the Azure portal
The following steps show you how to assign a system-assigned managed identity for various web hosting services. The managed identity can securely connect to other Azure Services using the app configurations you set up previously.
On the main overview page of your Azure App Service instance, select Identity from the navigation pane.
On the System assigned tab, make sure to set the Status field to on. A system assigned identity is managed by Azure internally and handles administrative tasks for you. The details and IDs of the identity are never exposed in your code.


You can also assign managed identity on an Azure hosting environment by using the Azure CLI.
You can assign a managed identity to an Azure App Service instance with the az webapp identity assign command, as shown in the following example:
export AZ_MI_OBJECT_ID=$(az webapp identity assign \
    --resource-group $AZ_RESOURCE_GROUP \
    --name <service-instance-name> \
    --query principalId \
    --output tsv)
Assign roles to the managed identity
Next, grant permissions to the managed identity you assigned to access your PostgreSQL instance.
If you connected your services using Service Connector, the previous step's commands already assigned the role, so you can skip this step.
Test the app
Before deploying the app to the hosting environment, you need to make one more change to the code because the application is going to connect to PostgreSQL using the user created for the managed identity.
Update your code to use the user created for the managed identity:
Note
If you used the Service Connector command, skip this step.
properties.put("user", "$AZ_POSTGRESQL_AD_MI_USERNAME");
After making these code changes, you can build and redeploy the application. Then, browse to your hosted application in the browser. Your app should be able to connect to the PostgreSQL database successfully. Keep in mind that it may take several minutes for the role assignments to propagate through your Azure environment. Your application is now configured to run both locally and in a production environment without the developers having to manage secrets in the application itself.
Next steps
In this tutorial, you learned how to migrate an application to passwordless connections.
You can read the following resources to explore the concepts discussed in this article in more depth: