Note
Access to this page requires authorization. You can try signing in or changing directories.
Access to this page requires authorization. You can try changing directories.
Azure Artifacts enables developers to efficiently manage all their dependencies from a single feed. Feeds in Azure Artifacts serve as organizational repositories for storing, managing, and sharing packages whether within a team, across organizations, or publicly on the internet. Azure Artifacts supports a wide range of package types, including NuGet, npm, Python, Maven, Cargo, and Universal Packages.
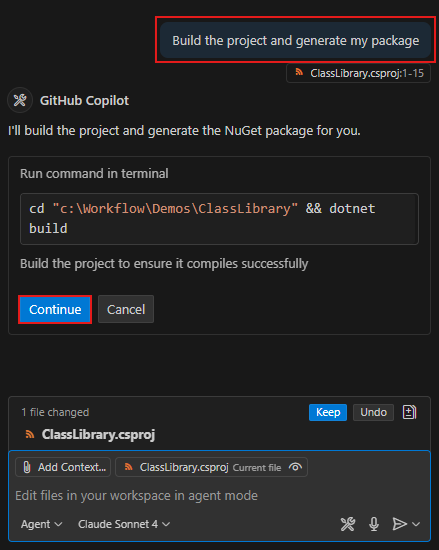
This article walks you through publishing your first NuGet package to an Azure Artifacts feed. Optionally, you can follow the instructions to use GitHub Copilot to help set up your project and prepare your package for publishing.
Prerequisites
| Product | Requirements |
|---|---|
| Azure DevOps | - An Azure DevOps organization. - An Azure DevOps project. - Download and install the .NET SDK version 9.0.200 or later. |
| GitHub Copilot (Optional) | - Set up GitHub Copilot and Visual Studio Code. A 30-day GitHub Copilot free trial is available if you haven't signed up yet. |
Create a feed
If you already have a feed, you can skip this section. Otherwise, follow the steps below to create a new feed in Azure Artifacts:
Sign in to your Azure DevOps organization, and then navigate to your project.
Select Artifacts, and then select Create Feed.
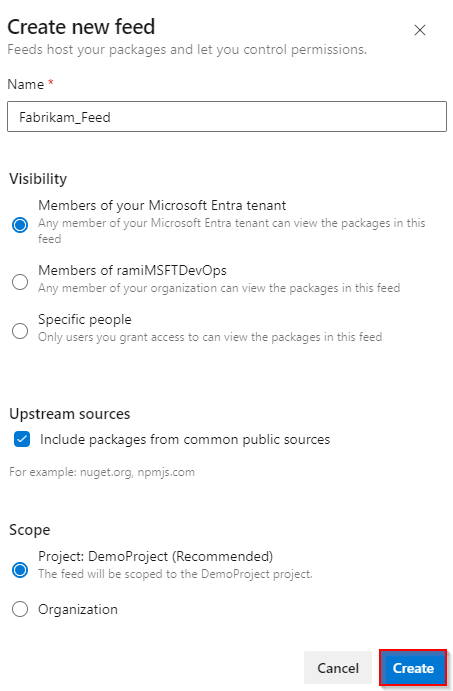
Provide a descriptive Name for your feed and set its Visibility to define who can view packages in your feed. Define the Scope of your feed, and check the Upstream sources checkbox if you want to include packages from public sources.
Select Create when you're done.
Sign in to your Azure DevOps collection, and then navigate to your project.
Select Artifacts, and then select Create Feed.
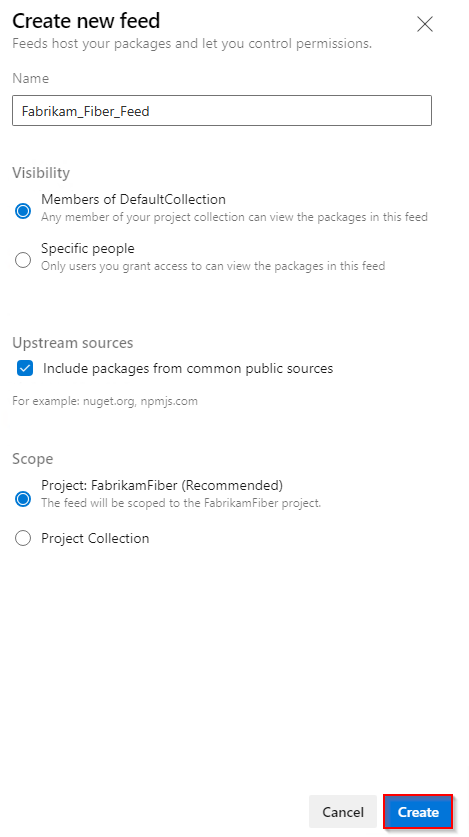
Provide a descriptive Name for your feed and set its Visibility to define who can view packages in your feed. Define the Scope of your feed, and check the Upstream sources checkbox if you want to include packages from public sources.
Select Create when you're done.
Prepare your package
In this example, you'll use a sample .NET Core Class Library and set up your package metadata before building the project and creating a NuGet package ready for publishing to your feed. If you don't have a project yet, follow the instructions in this guide to Create a .NET class library using Visual Studio Code.
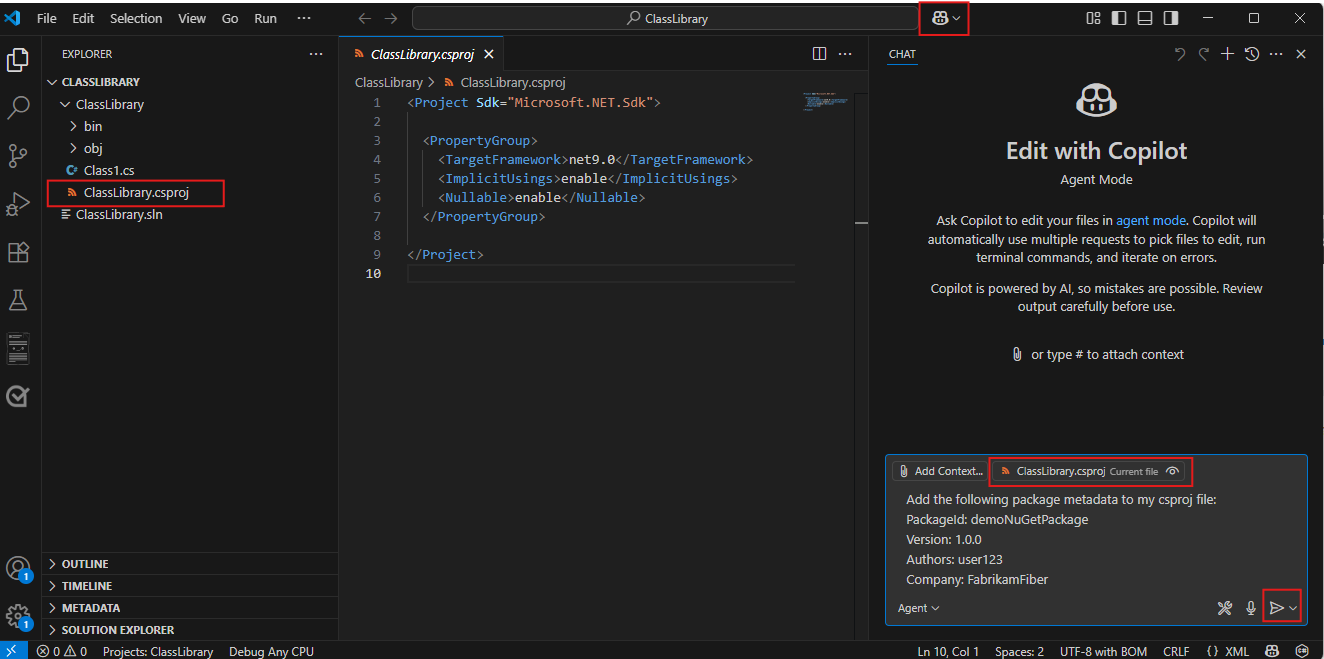
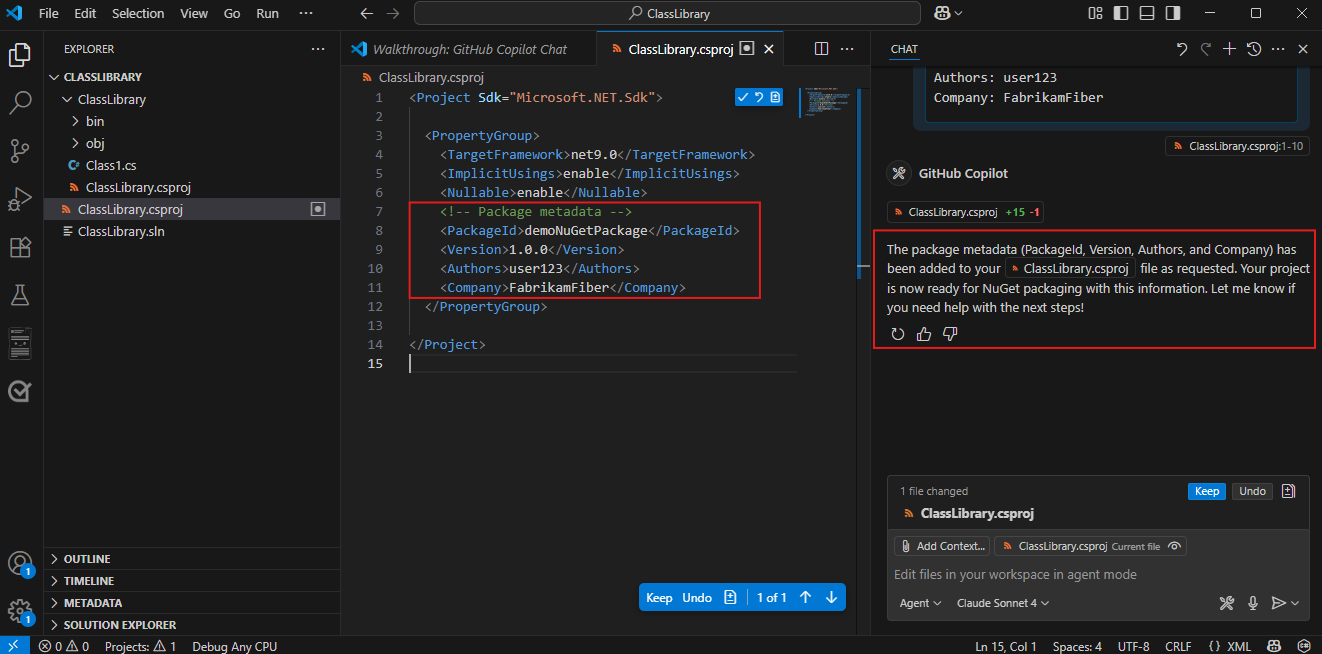
Open your project in Visual Studio Code, and then select your csproj file. Add your package metadata within the
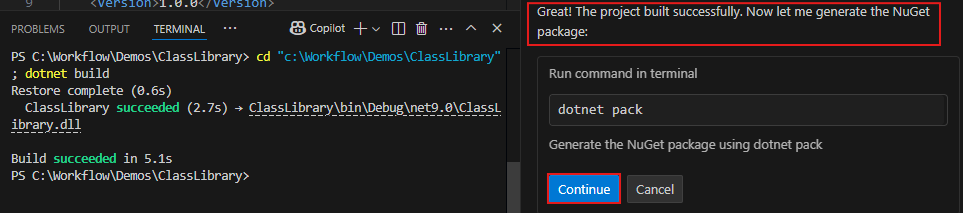
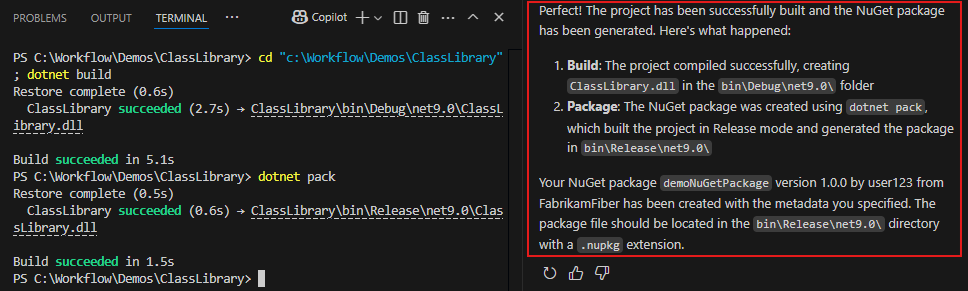
<PropertyGroup>tag. Your file should resemble the following:<Project Sdk="Microsoft.NET.Sdk"> <PropertyGroup> <TargetFramework>net8.0</TargetFramework> <RootNamespace>demo_class_library</RootNamespace> <ImplicitUsings>enable</ImplicitUsings> <Nullable>enable</Nullable> <PackageId>YOUR_PACKAGE_NAME</PackageId> <Version>YOUR_PACKAGE_VERSION</Version> <Authors>YOUR_NAME</Authors> <Company>YOUR_COMPANY</Company> </PropertyGroup> </Project>Run the following command in your project directory to build your project and create a .nupkg package. Your package will be in the
bin\releasefolder.dotnet pack
Set up the Azure Artifacts Credential Provider
To authenticate with your feed, you must first install the Azure Artifacts Credential Provider. Using the tool installer included with dotnet, you can install the credential provider from the CLI using the following command:
dotnet tool install --global Microsoft.Artifacts.CredentialProvider.NuGet.Tool
If your repository-level nuget.config is configured to use only Azure Artifacts sources, run the install command from outside that directory, or explicitly set nuget.org as the source:
dotnet tool install --global Microsoft.Artifacts.CredentialProvider.NuGet.Tool --source https://api.nuget.org/v3/index.json
Optionally, pin the tool to a major version (for example, in container images where reproducibility matters):
dotnet tool install --global Microsoft.Artifacts.CredentialProvider.NuGet.Tool --version 2.* --source https://api.nuget.org/v3/index.json
First usage
The first time you perform an operation that requires authentication, use one of the following approaches:
- Run the command with
--interactivesodotnetcan prompt you to sign in. This is the recommended approach for most local development scenarios.
Before you run an interactive command, make sure your project is set up and your feed is added to nuget.config. For setup details, see project setup.
Once your project is set up and connected to your feed, navigate to your project directory and run:
dotnet restore --interactive
This command signs you in and acquires a session token. After sign-in succeeds, you can run authenticated commands without --interactive while the cached session token remains valid. For more information, see Session token cache locations.
- For non-interactive scenarios, such as Docker containers and custom automation, provide credentials through environment variables.
For Azure Pipelines, use the NuGetAuthenticate@1 task to authenticate to your feed before running commands such as dotnet restore or dotnet nuget push. See Restore NuGet packages with Azure Pipelines for more details.
Connect to a feed
Follow the steps below to set up your project and connect to your Azure Artifacts feed. Make sure you've installed the Azure Artifacts credential provider and the latest version of NuGet as outlined in the prerequisites.
Sign in to your Azure DevOps organization, and then navigate to your project.
Select Artifacts and then select your feed from the dropdown menu.
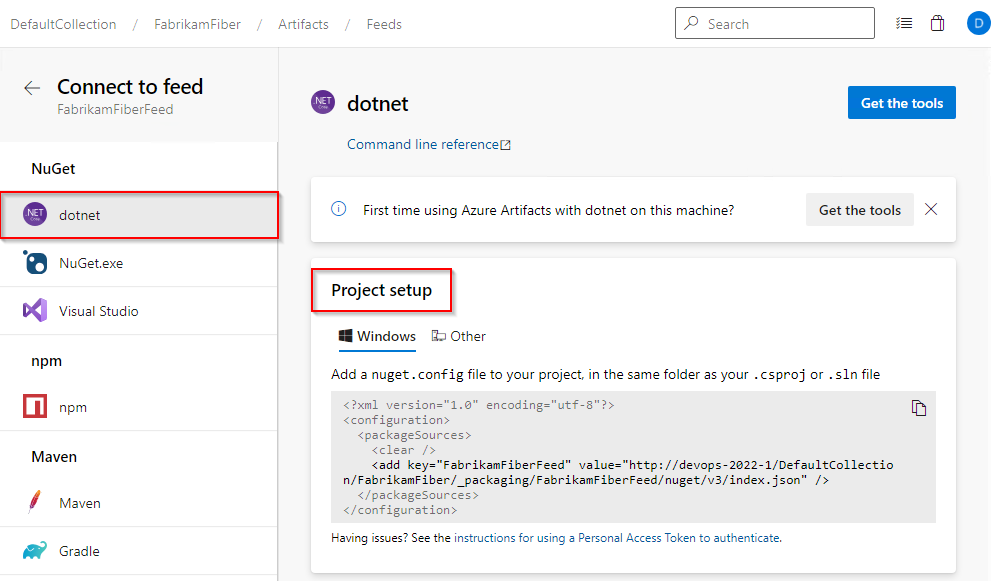
Select Connect to feed, and then select dotnet from the NuGet section.
Follow the instructions in the Project setup to set up your nuget.config file. The structure of your file should resemble one of the following:
Project-scoped feed:
<?xml version="1.0" encoding="utf-8"?>
<configuration>
  <packageSources>
    <clear />
    <add key="<FEED_NAME>" value="https://pkgs.dev.azure.com/<ORGANIZATION_NAME>/<PROJECT_NAME>/_packaging/<FEED_NAME>/nuget/v3/index.json" />
  </packageSources>
</configuration>
Organization-scoped feed:
<?xml version="1.0" encoding="utf-8"?>
<configuration>
  <packageSources>
    <clear />
    <add key="<FEED_NAME>" value="https://pkgs.dev.azure.com/<ORGANIZATION_NAME>/_packaging/<FEED_NAME>/nuget/v3/index.json" />
  </packageSources>
</configuration>
Sign in to your Azure DevOps collection, and then navigate to your project.
Select Artifacts, and then select your feed from the dropdown menu.
Select Connect to Feed, and then select dotnet from the left navigation pane.
Follow the instructions in the Project setup section to set up your nuget.config file.
Publish your package
Run the following command from your project directory to publish the package to your Azure Artifacts feed. The --api-key parameter is required, but you can use any string value when publishing to Azure Artifacts.
dotnet nuget push --source <FEED_NAME> --api-key <ANY_STRING> <PACKAGE_PATH>