Add status badges for your GitHub repo
Azure DevOps Services | Azure DevOps Server 2022 - Azure DevOps Server 2019
You can add Markdown syntax to a GitHub repo README.md file to display your board status in that repo. Show the status by adding the syntax you choose from your board settings.
Note
Requires Azure DevOps Server 2019 Update 1 or later version.
The syntax shown works whether you connected your project to a GitHub.com or your GitHub Enterprise Server repository. For GitHub Enterprise Server, your server must be network accessible to Azure DevOps Services.
Prerequisites
- Your Azure Boards project must be connected to the GitHub repository where the commits and pull requests you want to link to/from exist. For more information, see Azure Boards-GitHub integration.
- You must have a board you want to configure. When you add a team, you add a board for that team. For more information, see About teams and Agile tools.
- You must be added to the team administrator role for the team's settings you want to modify, or be a member of the Project Administrators security group. To get added, see Add a team administrator or Change project-level permissions.
- To add the status badge to the GitHub.com repository, you must be a contributor of the repository.
Add a status badge
Sign into Azure Boards and open your board.
Select the
 gear icon to configure the board and set general team settings.
Select Status badge and then check or uncheck the Allow anonymous users to access the status badge. When it's unchecked, users who aren't signed in can still view the status badge.
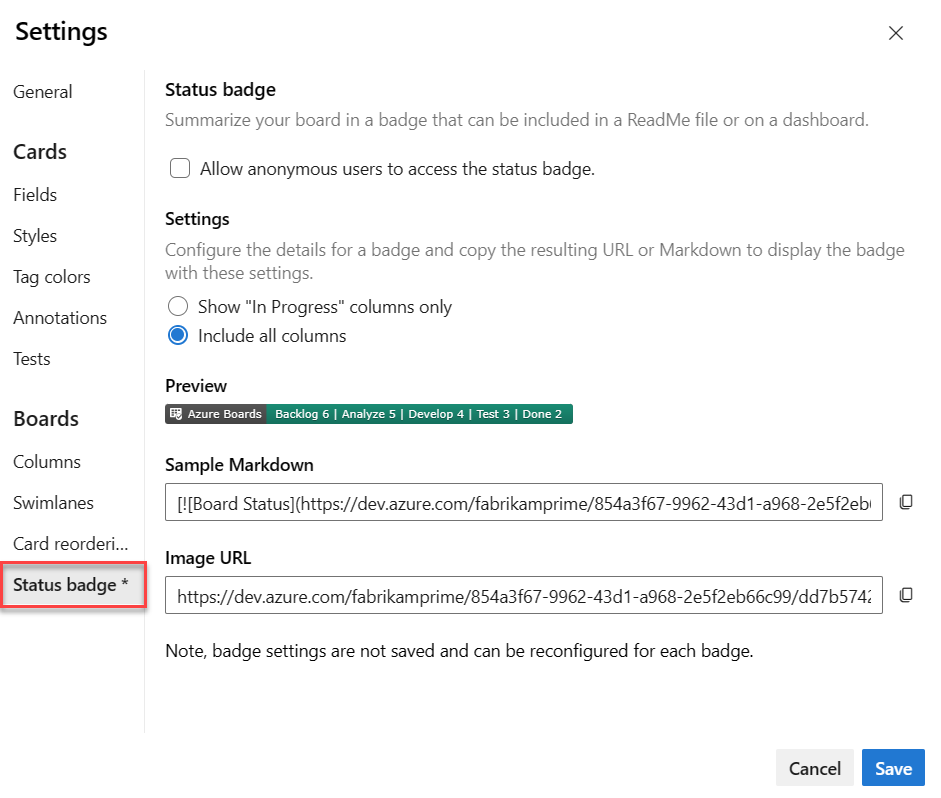
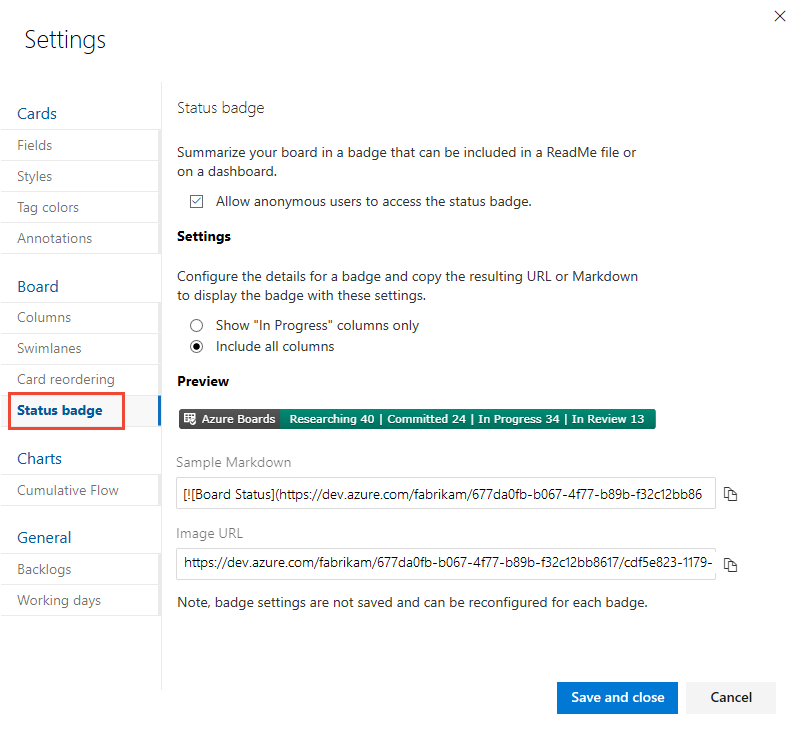
Choose the badge type you want and choose the
 copy icon to copy the Markdown syntax for the badge.
- Show "In progress" columns only ignores the first and last columns.
- Include all columns includes the first and last columns of the board.
- You can customize the set of columns by specifying
2for the columnOptions and then a comma-delimited list of the board columns to appear. For example,?columnOptions=2&columns=Proposed,Committed,In%20Progress,In%20Review, as shown in the following syntax. For column labels that include spaces, you must encode the space with%20. For example,In%20Progress.
[](https://dev.azure.com/fabrikam/677da0fb-b067-4f77-b89b-f32c12bb8617/_boards/board/t/cdf5e823-1179-4503-9fb1-a45e2c1bc6d4/Microsoft.RequirementCategory/)A badge similar to the following displays.

When you're done, select Save.
The only setting that you can configure is the Allow anonymous users to access the status badge. The badge type under Settings only switches the Markdown syntax for you to copy from the Sample Markdown and Image URL values.
Open the README file in your GitHub repo and paste the syntax you copied to make the badge display.
You should see the same preview image that you selected with values that correspond to your board.
Related articles
Feedback
Coming soon: Throughout 2024 we will be phasing out GitHub Issues as the feedback mechanism for content and replacing it with a new feedback system. For more information see: https://aka.ms/ContentUserFeedback.
Submit and view feedback for