Events
Mar 17, 9 PM - Mar 21, 10 AM
Join the meetup series to build scalable AI solutions based on real-world use cases with fellow developers and experts.
Register nowThis browser is no longer supported.
Upgrade to Microsoft Edge to take advantage of the latest features, security updates, and technical support.
Azure DevOps Services | Azure DevOps Server 2022 - Azure DevOps Server 2019
Sprint Taskboards are similar to boards because they show work items as cards instead of as lists. They're different in the ways summarized in Backlogs, Boards, and Plans. Similar to boards, you can customize cards and add columns.
Sprint Taskboards are similar to boards in that they show work items as cards instead of as lists. They're different in the ways summarized in Backlogs, Boards, and Plans. Similar to the boards, you can customize cards. To change column names or add columns, you need to customize the workflow.
Note
This article addresses customization of a sprint Taskboard. For information on customizing a board, see Manage and configure team tools.
| Category | Requirements |
|---|---|
| Taskboard | A sprint Taskboard that you want to configure. When you add a team, you add a Taskboard for every sprint selected for your team. For more information, see About teams and Agile tools. |
| Permissions | To add or rename columns, or customize cards: Team Administrator role for the team's settings that you want to modify, or Member of the Project Administrators group. |
To add or remove columns, choose Column Options. You customize all other options through the Settings dialog for the Taskboard.
Important
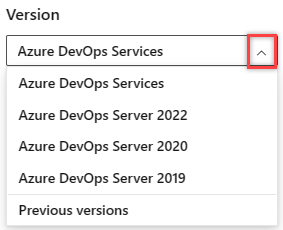
Select the version of this article that corresponds to your platform and version. The version selector is above the table of contents. Look up your Azure DevOps platform and version.
Option
Use to...
Manage bugs on Taskboard similar to tasks.
Add or remove columns shown on Taskboard.
Add or remove fields from cards.
Includes adding the Parent field to cards.
Add or remove fields from cards.
Add styling rules to change card color and title style based on field criteria.
Note
Each team can customize their Taskboard columns and cards. Taskboard settings are not inherited from other teams that they may share portions of area paths.
Before you configure your Taskboard, you'll want to make sure the following tasks are as complete as possible. Otherwise, you'll find yourself revisiting your configuration.
Process Administrator:
Note
You can customize a work item type which is different than customizing the card displayed on the Taskboard. You customize a WIT by adding fields, changing the workflow, adding custom rules and more. You can also add custom work item types and custom backlog levels. For more information, see Customize an inheritance process.
Team Administrator:
If you want bugs to appear on your taskboard, change your team settings for show bugs on the backlogs and boards.
You can add columns or rename columns that appear in your Taskboard. You'll see different column titles and choices based on the process used to create your project and whether your team has chosen to treat bugs like requirements or like tasks.
Note
Columns you add to a Taskboard aren't supported with corresponding fields such as the board columns you add which is supported with Board Column field.
The changes made apply to all sprint Taskboards for the selected team.
From your web browser, open your team's sprint Taskboard as described in Update and monitor your Taskboard. Remember, only team or project administrators can customize the taskboard.
Choose Column Options.

In the Customize Columns dialog, choose the column you want to rename, or choose Add Column.
In this example, we add a column named Review and set the Task to In Progress.
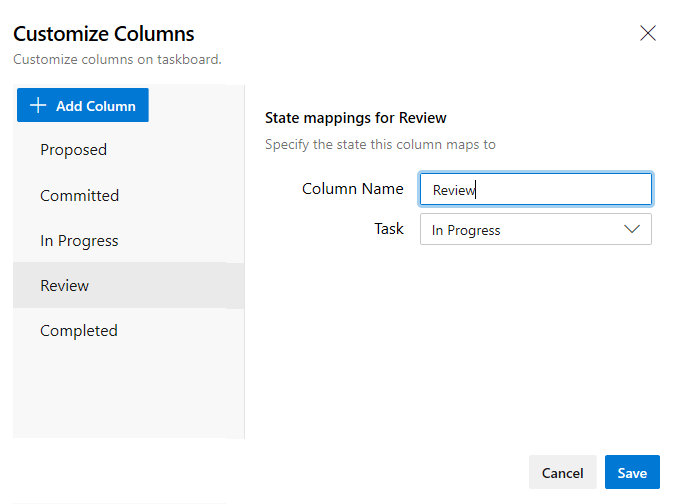
Similar to the board, each column must map to a category state. There are four category states: Proposed, Committed, In Progress, and Completed. At least one column must map to Proposed and one column must map to Completed. To learn more about each state, see Workflow states and state categories.
To change the column order, hover over the column and choose the ![]() grabber icon and drag it up or down within the list of columns.
grabber icon and drag it up or down within the list of columns.

To delete a column, first make sure that the column doesn't contain any work items. If it does, move the items to another column. Then, hover over the column and choose the ![]() delete icon.
delete icon.

Scrum teams use the Taskboard to burn down work and report on progress during daily stand ups. Each sprint Taskboard shows cards that correspond to both requirements and tasks.
Information rich cards not only provide at-a-glance information of interest to you and your team. They also provide a way for you to update a field without opening the work item. And, with style rules, you can highlight those work items with select colors based on the criteria you set.
Each card corresponds to a work item that you use to share information, track status, and assign work.
Note
For more information, see Backlogs, boards, and plans. In case you don't see the desired work items on your backlog or board, see Set up your backlogs and boards.
In this example, the bug work item type (WIT) shows all the core fields. It also shows three other fields and tags. To make severity 1 bugs stand out, a styling rule has been added to cause the card to display as yellow.
In the card shown below, the following customizations have been set for the task work item type (WIT):

You can either increase or simplify the information that displays on your cards. It all depends on what's of interest to your team. Does your team like to refer to work items by their ID? Do they want to see estimates? Do they want to highlight work items according to set criteria? Or, do just the bare bones of title and assignment suffice?
Your best bet is to show fields on cards based on what your team frequently refers to. Or, you can show fields based on updates when using the Taskboards. Also, add fields with information that you can use to filter the board. If you're new to working with these tools, see Sprint planning.
You change the way cards appear on the Taskboard in the same way you change the appearance of cards on boards. Only here, you start from the Taskboard.
Open the taskboard for the sprint you want to customize. Remember, only team or project administrators can customize the taskboard.
Choose the ![]() gear icon to open the Settings dialog.
gear icon to open the Settings dialog.

Choose Fields and then a work item type to see all the settings you can modify.
Place a check mark in the check box for those fields you want to have appear on the board.
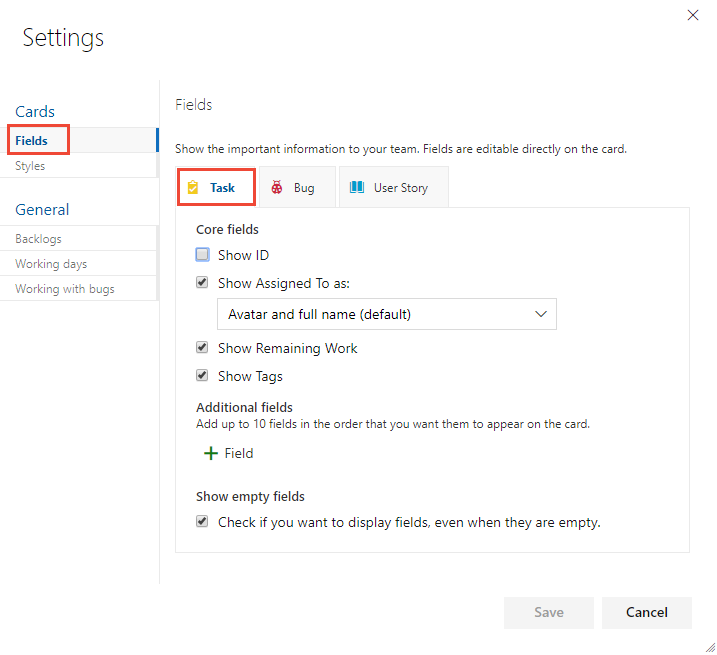
Repeat this step for each work item type you want to change. Don't be surprised if the options change when you choose a different work item type. For example, Show Remaining Work only applies to tasks and perhaps bugs, but not to user stories or product backlog items.
To add a field, choose the ![]() plus icon and enter the name of a field you want to add.
plus icon and enter the name of a field you want to add.
To remove a field, choose the ![]() delete icon next to the field.
delete icon next to the field.
When you're done with your changes, choose Save.
Using the board views provides you with quick and easy ways to update work items as work progresses. Making daily or frequent updates helps everyone on your team stay in sync with what's been done and what needs doing next.
To update status of a work item, you simply drag-and-drop cards to a different column. To change the order or stack ranking of a work item, you drag a card up or down within a column.
Moving the card from In Progress to the Done column on the Task board, for example, updates the corresponding State field. In this case, the State field updates from Doing to Done.
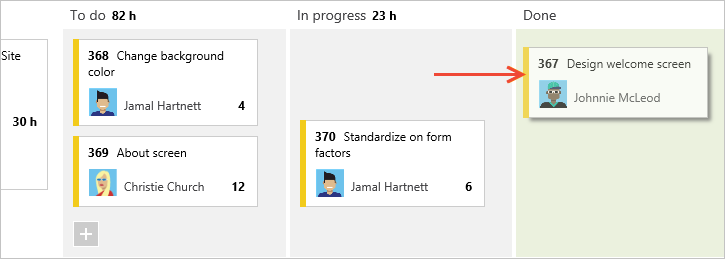
Another handy feature is to update a field without having to open the work item. You can update most fields shown on the card. Here we reassign a task.
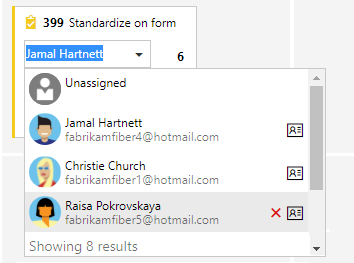
This quick update feature is useful when you need to update many work items at once. For example, you can add estimates or update Remaining Work.
To change the title, choose the ![]() actions icon, and then choose Edit title.
actions icon, and then choose Edit title.
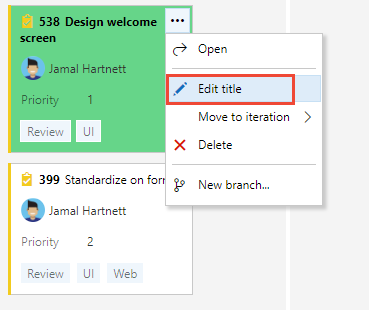
To add tags, double-click the work item to open it. And, just a reminder, you can't change the IDs for a work item, not from the card and not from within the form.
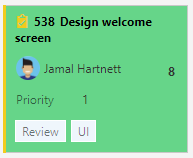
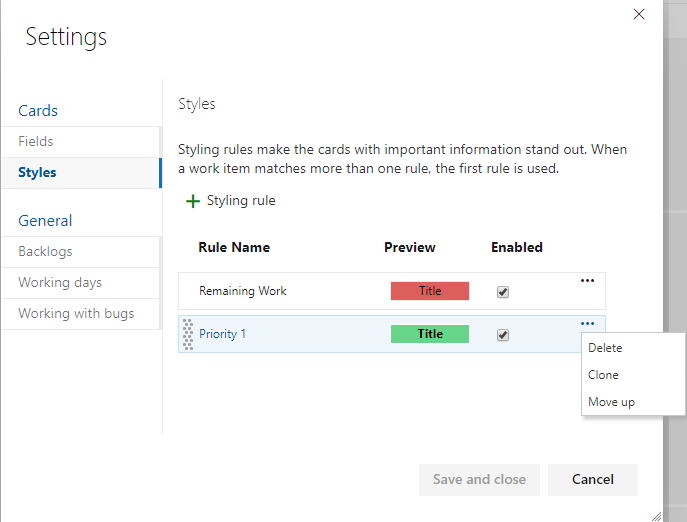
With styling rules, you can cause cards to change color when their corresponding work items meet criteria that you set. Here, we highlight Priority 1 tasks by having the cards display as green.
What rules should you apply to highlight work items? Here are a few examples and their associated criteria.
| Work items | Criteria |
|---|---|
| High priority items | Priority = 1 |
| High effort items | Remaining Work>=12 |
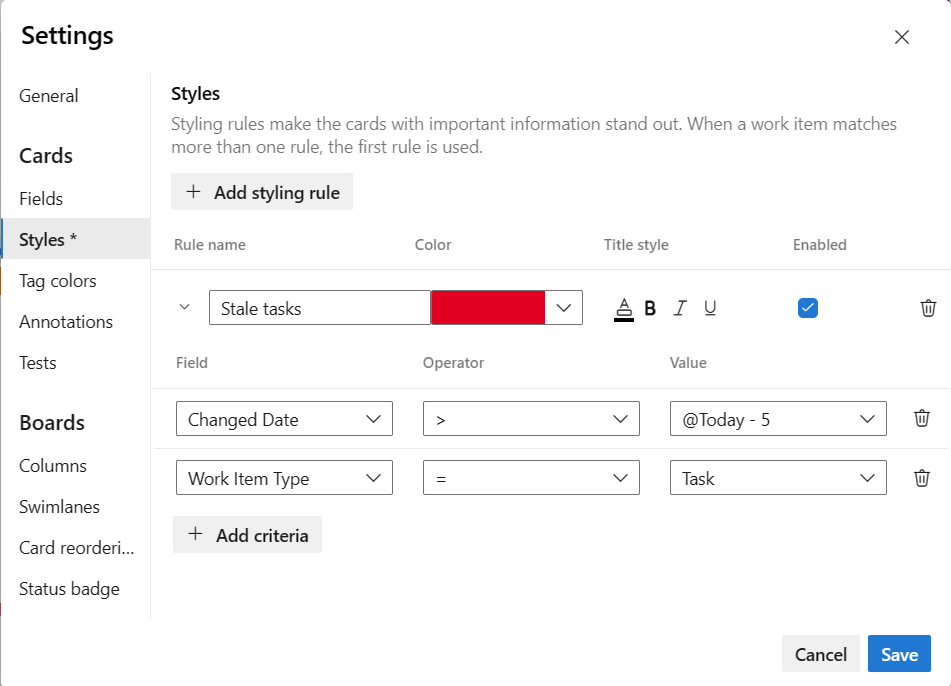
| Stale items unchanged in the last 5 days | Changed Date @Today-5 |
| Title contains a key word | Title Contains Yes |
| Severity 1 bugs | Severity = 1 - Critical AND Work Item Type = Bug |
| High value business items | Business Value 50 |
| Items assigned to specific feature area | Area Path Under Fabrikam Fiber\Phone |
| Contains specific tag | Tags Contain RTM |
| Blocked tasks (Scrum process only) | Blocked = Yes |
You can apply style rules to change the color of Taskboard cards based on specified field criteria.
Open the Taskboard that you want to customize.
Choose the ![]() gear icon to open the Settings dialog.
gear icon to open the Settings dialog.
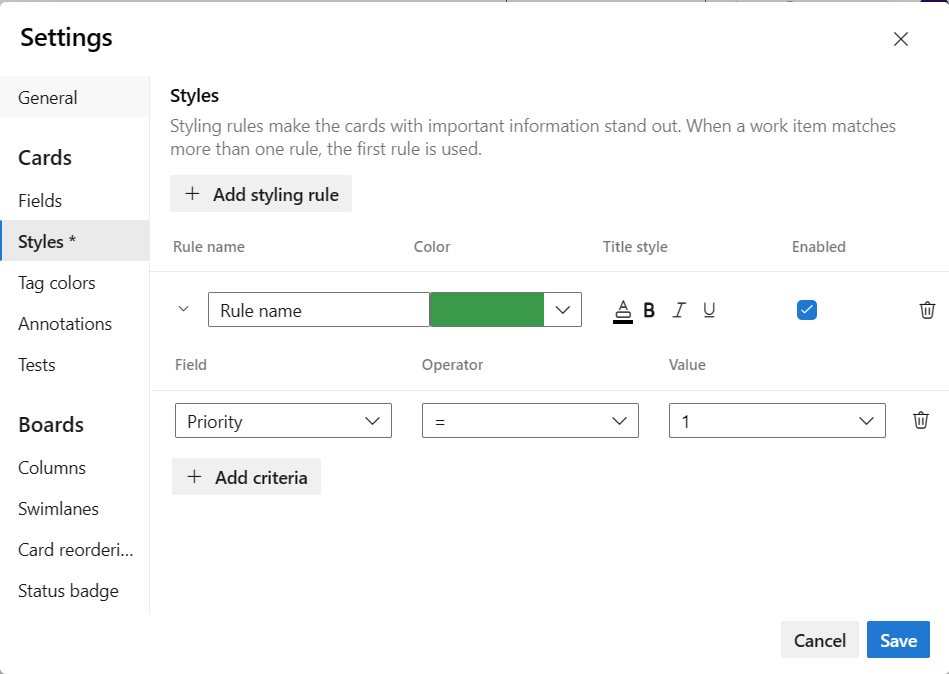
Choose Styles to specify a style rule. Choose the ![]() plus icon to add a style. Select the color to apply to the card and define the criteria for the style rule.
plus icon to add a style. Select the color to apply to the card and define the criteria for the style rule.
In this example, we show the Styles dialog for the taskboard.
Follow these rules when creating and ordering your style rules:
The criteria you specify works in a similar fashion as when constructing a query.
All clauses are considered AND clauses, grouping clauses isn't supported.
Card rules apply to all work items that meet the rule criteria
Rule color applies to work items based on the order in which rules are listed. If you add more than one style rule, make sure that you move them in the order of most importance. Drag them into the order you want them applied.
You can quickly enable and disable a style rule.
Here we add a Stale tasks rule that highlights tasks that haven't changed in the last five days.
To copy or delete a style rule, choose the ![]() actions icon and select Clone or Delete, respectively.
actions icon and select Clone or Delete, respectively.
When you're done with your changes, choose Save.
Your Taskboard automatically refreshes when changes occur. There isn't any live updates control, it simply happens in the background. As other team members move or reorder cards on the taskboard, the Taskboard automatically updates with these changes. You don't need to press F5 to see the latest changes.
Events
Mar 17, 9 PM - Mar 21, 10 AM
Join the meetup series to build scalable AI solutions based on real-world use cases with fellow developers and experts.
Register nowTraining
Learning path
Use advance techniques in canvas apps to perform custom updates and optimization - Training
Use advance techniques in canvas apps to perform custom updates and optimization
Documentation
Manage columns on your board - Azure Boards
Learn how to map, add, and edit columns on your team's board to effectively manage your workflow in Azure Boards or Azure DevOps.
Add or remove columns within a work item list in Azure Boards - Azure Boards
Learn how to add column fields to show and sort fields for a backlog or query in Azure Boards.
Customize cards on a board - Azure Boards
Learn how to customize cards to provide at-a-glance information of interest to your team in Azure Boards and Azure DevOps.