Note
Access to this page requires authorization. You can try signing in or changing directories.
Access to this page requires authorization. You can try changing directories.
Azure DevOps Services
This article explains how to use the Azure DevOps Demo Generator application to quickly create a new Azure DevOps project prepopulated with sample content, such as work items, repositories, and other resources needed for labs and demonstrations.
Prerequisites
Set up the Demo Generator application by following the steps in the configure section.
Select your authentication method for Demo Generator
Use one of the following methods to authenticate to the Azure DevOps Demo Generator app:
Microsoft Entra: Register your application in Microsoft Entra.
- Sign in with the displayed code.
- Select an organization to create a project from the list.
Important
We recommend the more secure Microsoft Entra tokens over higher-risk personal access tokens. Learn more about our efforts to reduce PAT usage. Review our authentication guidance to choose the right authentication mechanism for your needs.
Personal Access Token (PAT): Sign in with a Personal Access Token (PAT) with the following scopes:
Scope Description vso.agentpools Agent Pools (read) vso.build_execute Build (read and execute) vso.code_full Code (full) vso.dashboards_manage Team dashboards (manage) vso.extension_manage Extensions (read and manage) vso.profile User profile (read) vso.project_manage Project and team (read, write, and manage) vso.release_manage Release (read, write, execute, and manage) vso.serviceendpoint_manage Service Endpoints (read, query, and manage) vso.test_write Test management (read and write) vso.variablegroups_write Variable Groups (read, create) vso.work_full Work items (full) Enter the organization name and the PAT. Provide the project name and press enter to create a project
")
")
Create your demo project
To create your demo project, do the following steps:
Select the organization where you want to host the project created by the Azure DevOps Demo Generator. If you belong to multiple organizations associated with your credentials, choose the appropriate one.
Enter a project name, such as "MyProjectDemo," that you and other contributors can easily identify as a demo project.
Choose from several available templates, such as:
- eShopOnWeb: a .NET app that deploys to Azure App Service
- PartsUnlimited: an ASP.NET app with customized CI/CD pipelines
- MyShuttle: a Java app with Azure App Service deployment. If you're following a lab from Azure DevOps Labs, select the DevOps Labs section to choose the relevant template.
Use templates that provide fictional Azure DevOps users, prepopulated Agile work items and data, source code in an Azure Repos Git repo, and access to Azure Pipelines.
(Optional) Manually install any required extensions by selecting the provided link for each extension. This link opens the extension's page in the Azure DevOps Marketplace, where you can install it.
(Optional) Approve the installation of other required extensions when prompted. If the demo generation process detects missing extensions, consent by pressing Y or Yes, then press Enter to create the project.
Your project might take a few minutes for the Demo Generator to create.
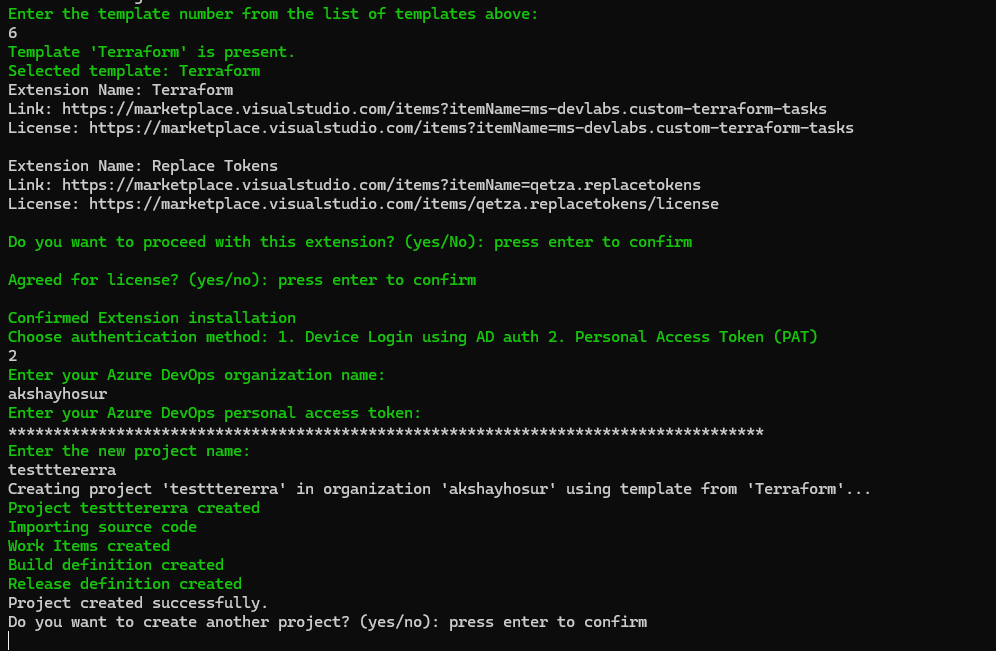
Go to your organization to confirm that the project was created once the "Project created successfully" message displays.
