Note
Access to this page requires authorization. You can try signing in or changing directories.
Access to this page requires authorization. You can try changing directories.
Azure DevOps Services | Azure DevOps Server | Azure DevOps Server 2022
Note
We recommend using Download Pipeline Artifacts and Publish Pipeline Artifacts for faster performance.
Azure Artifacts enables teams to use feeds and upstream sources to manage their dependencies. You can use Azure Pipelines to publish and download different types of artifacts as part of your CI/CD workflow.
Publish artifacts
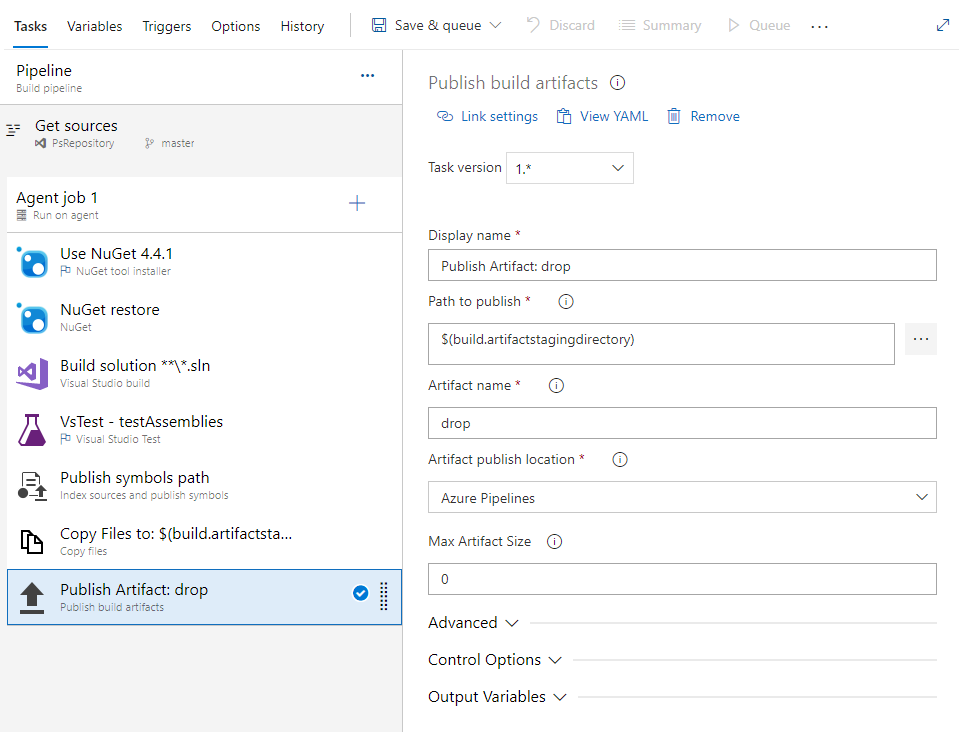
Artifacts can be published at any stage of your pipeline. You can use YAML or the classic Azure DevOps editor to publish your packages.
- powershell: gci env:* | sort-object name | Format-Table -AutoSize | Out-File $env:BUILD_ARTIFACTSTAGINGDIRECTORY/environment-variables.txt

- task: CopyFiles@2
  inputs:
    sourceFolder: '$(Build.SourcesDirectory)'
    contents: '**/$(BuildConfiguration)/**/?(*.exe|*.dll|*.pdb)'
    targetFolder: '$(Build.ArtifactStagingDirectory)'
- task: PublishBuildArtifacts@1
  inputs:
    pathToPublish: '$(Build.ArtifactStagingDirectory)'
    artifactName: drop
- pathToPublish: the path of your artifact. This can be an absolute or a relative path. Wildcards aren't supported.
- artifactName: the name of your artifact.
Note
Make sure you aren't using one of the reserved folder names when publishing your artifact. See Application Folders for more details.
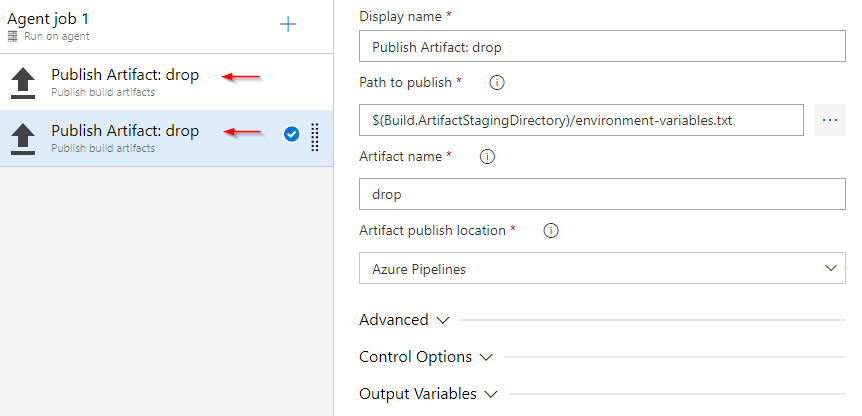
Example: Use multiple tasks
- powershell: gci env:* | sort-object name | Format-Table -AutoSize | Out-File $env:BUILD_ARTIFACTSTAGINGDIRECTORY/environment-variables.txt

- task: CopyFiles@2
  inputs:
    sourceFolder: '$(Build.SourcesDirectory)'
    contents: '**/$(BuildConfiguration)/**/?(*.exe|*.dll|*.pdb)'
    targetFolder: '$(Build.ArtifactStagingDirectory)'
- task: PublishBuildArtifacts@1
  inputs:
    pathToPublish: '$(Build.ArtifactStagingDirectory)'
    artifactName: drop1
- task: PublishBuildArtifacts@1
  inputs:
    pathToPublish: '$(Build.ArtifactStagingDirectory)'
    artifactName: drop2
- pathToPublish: the path of your artifact. This can be an absolute or a relative path. Wildcards aren't supported.
- artifactName: the name of your artifact.
Example: Copy and publish binaries
- powershell: gci env:* | sort-object name | Format-Table -AutoSize | Out-File $env:BUILD_ARTIFACTSTAGINGDIRECTORY/environment-variables.txt

- task: CopyFiles@2
  inputs:
    sourceFolder: '$(Build.SourcesDirectory)'
    contents: '**/$(BuildConfiguration)/**/?(*.exe|*.dll|*.pdb)'
    targetFolder: '$(Build.ArtifactStagingDirectory)'
- task: PublishBuildArtifacts@1
  inputs:
    pathToPublish: '$(Build.ArtifactStagingDirectory)'
    artifactName: drop
- sourceFolder: the folder that contains the files you want to copy. If you leave this empty, copying will be done from $(Build.SourcesDirectory).
- contents: File paths to include as part of the copy.
- targetFolder: destination folder.
- pathToPublish: the folder or file path to publish. It can be an absolute or a relative path. Wildcards aren't supported.
- artifactName: the name of the artifact that you want to create.
Note
Make sure not to use reserved name for artifactName such as Bin or App_Data. See ASP.NET Web Project Folder Structure for more details.
 Utility: Copy Files
 Utility: Publish Build Artifacts
Note
Build.ArtifactStagingDirectory path is cleaned up after each build. If you're using this path to publish your artifact, make sure you copy the content you wish to publish into this directory before the publishing step.
Download artifacts
- powershell: gci env:* | sort-object name | Format-Table -AutoSize | Out-File $env:BUILD_ARTIFACTSTAGINGDIRECTORY/environment-variables.txt

- task: DownloadBuildArtifacts@1
  inputs:
    buildType: 'current'        # Options: 'current' | 'specific'. Specify which build artifacts will be downloaded: `current` or from a specific build
    downloadType: 'single'      # Options: 'single' | 'specific'. Choose whether to download a single artifact or all artifacts of a specific build.
    artifactName: 'drop'        # Required when downloadType == single. The name of the artifact that will be downloaded.
    downloadPath: '$(System.ArtifactsDirectory)'    # Path on the agent machine where the artifacts will be downloaded. Default: $(System.ArtifactsDirectory).
 Utility: Download Build Artifacts
Note
If you're using a deployment task, you can reference your build artifacts using $(Agent.BuildDirectory). See Agent variables for more details.
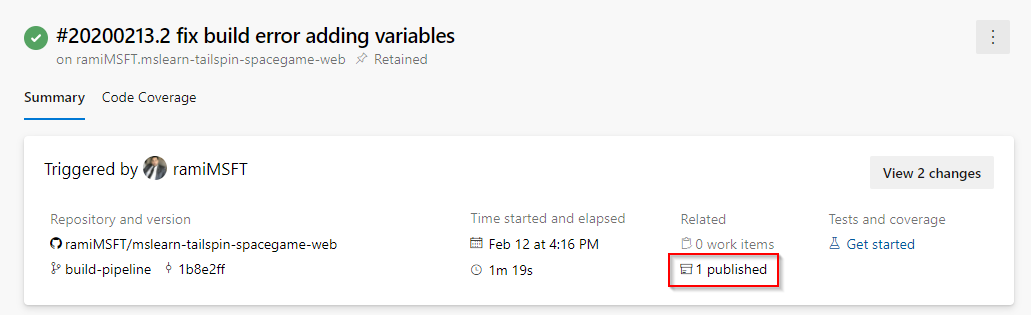
When your pipeline run is completed, navigate to Summary to explore or download your artifact.
Download a specific artifact
steps:
- task: DownloadBuildArtifacts@1
  displayName: 'Download Build Artifacts'
  inputs:
    buildType: specific                        # Options: 'current' | 'specific'. Specify which build artifacts will be downloaded: `current` or from a specific build
    project: 'xxxxxxxxxx-xxxx-xxxx-xxxxxxxxxxx'    # Required when buildType == specific. Project ID.
    pipeline: 20                                   # Required when buildType == specific. Build pipeline.
    buildVersionToDownload: specific    # Options: 'latest' | 'latestFromBranch' | 'specific'. Required when buildType == specific. Build version to download.
    buildId: 128                        # Required when buildType == specific && buildVersionToDownload == specific. Build ID.
    artifactName: drop                  # The name of the artifact that will be downloaded.
    extractTars: false                  # boolean. Extract all files that are stored inside tar archives.

Tips
Disable IIS Basic Authentication if you're using Azure DevOps Server to allow authentication with your Personal Access Token. For more information, see Why did my PAT stop working?.
Use forward slashes in file path arguments. Backslashes don't work in macOS/Linux agents.
Build artifacts are stored on a Windows filesystem, which causes all UNIX permissions to be lost, including the execution bit. You might need to restore the correct UNIX permissions after downloading your artifacts from Azure Pipelines.
Build.ArtifactStagingDirectoryandBuild.StagingDirectoryare interchangeable.Build.ArtifactStagingDirectorypath is cleaned up after each build.Deleting a build associated with packages published to a file share will result in the deletion of all Artifacts in that UNC path.
If you're publishing your packages to a file share, make sure you provide access to the build agent.
Make sure you allow Azure Artifacts Domain URLs and IP addresses if your organization is using a firewall.