Deploy to a Linux Virtual Machine
Azure DevOps Services | Azure DevOps Server 2022 | Azure DevOps Server 2020
Learn how to set up an Azure DevOps pipeline for multi-virtual machine deployments that uses an environment and virtual machine resources.
Use the instructions in this article for any app that publishes a web deployment package.
Prerequisites
- An Azure account with an active subscription. Create an account for free.
- An active Azure DevOps organization. Sign up for Azure Pipelines.
- A Linux virtual machine (VM) hosted in Azure.
- To install a JavaScript or Node.js app, set up a Linux VM with Nginx in Azure, see Create a Linux VM with Azure CLI.
- To deploy a Java Spring Boot and Spring Cloud based apps, create a Linux VM in Azure using Java 13 on Ubuntu 20.04 template, which provides a fully supported OpenJDK-based runtime.
Get your sample code
If you already have an app in GitHub that you want to deploy, you can create a pipeline for that code.
If you are a new user, fork this repo in GitHub:
https://github.com/MicrosoftDocs/pipelines-javascript
Create an environment with virtual machines
You can add virtual machines as resources within environments and target them for multi-VM deployments. The deployment history view provides traceability from the VM to the commit.
Sign into your Azure DevOps organization and navigate to your project.
Go to the Pipelines page and select Environments > Create Environment.
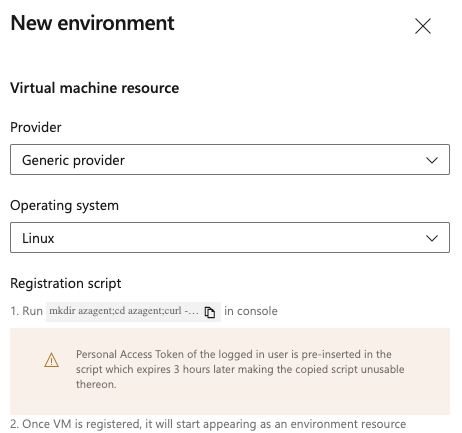
Specify a Name (required) for the environment and a Description.
Choose Virtual Machines as a Resource to be added to the environment, and then select Next.
Choose Linux for the Operating System and copy the registration script.
Run the registration script on each of the target VMs registered with the environment.
Note
- The Personal Access Token (PAT) of the signed in user gets pre-inserted in the script and expires after three hours.
- If your VM already has any agent running on it, provide a unique name to register with the environment.
Once VM is registered, it will start appearing as an environment resource under Resources.
To add more VMs, copy the script again. Select Add resource and choose Virtual Machines. This script is the same for all the VMs you want to add to the same environment.
Each machine interacts with Azure Pipelines to coordinate deployment of your app.

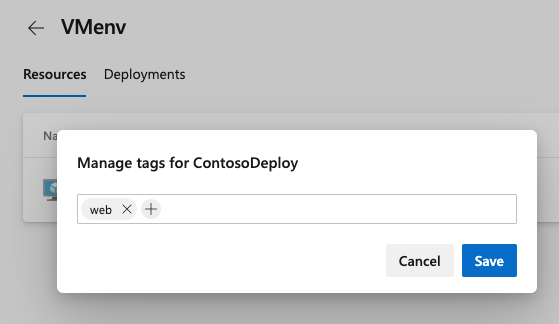
You can add or remove tags for the VM. Select on the dots at the end of each VM resource in Resources.
Tags limit deployment to specific VMs when the environment's used in a deployment job. Each tag is limited to 256 characters. There's no limit to the number of tags you can create.
Define your CI build pipeline
You need a CI build pipeline that publishes your web app. You also need a deployment script that can be run locally on the Ubuntu server. Set up a CI build pipeline based on the runtime you want to use.
Sign in to your Azure DevOps organization and go to your project.
In your project, go to the Pipelines page, and then choose the action to create a new pipeline.
Select GitHub as the location of your source code.
You may be redirected to GitHub to sign in. If so, enter your GitHub credentials.
When the list of repositories appears, select the sample app repository that you want.
Azure Pipelines analyzes your repository and recommends a suitable pipeline template.
Select the starter template and copy this YAML snippet to build a general Node.js project with npm. You'll add to this YAML in future steps.
trigger:
- main

pool:
  vmImage: ubuntu-latest

stages:
- stage: Build
  displayName: Build stage
  jobs:
  - job: Build
    displayName: Build
    steps:
    - task: UseNode@1
      inputs:
        version: '16.x'
      displayName: 'Install Node.js'
    - script: |
        npm install
        npm run build --if-present
        npm run test --if-present
      displayName: 'npm install, build and test'
    - task: ArchiveFiles@2
      displayName: 'Archive files'
      inputs:
        rootFolderOrFile: '$(System.DefaultWorkingDirectory)'
        includeRootFolder: false
        archiveType: zip
        archiveFile: $(Build.ArtifactStagingDirectory)/$(Build.BuildId).zip
        replaceExistingArchive: true
    - upload: $(Build.ArtifactStagingDirectory)/$(Build.BuildId).zip
      artifact: drop
For more guidance, review the steps mentioned in Build your Node.js app with gulp for creating a build.
Select Save and run > Commit directly to the main branch > Save and run.
A new run starts. Wait for the run to complete.
Define CD steps to deploy to the Linux VM
Edit your pipeline and add a deployment job by referencing the environment and the VM resources you created earlier. Update
tagsto refer to tags for your virtual machine.jobs: - deployment: VMDeploy displayName: Web deploy environment: name: <environment name> resourceType: VirtualMachine tags: web1 # Update or remove value to match your tag strategy:
To learn more about the environment keyword and resources targeted by a deployment job, see the YAML schema.
Select specific sets of VMs from the environment to receive the deployment by specifying the tags that you've defined for each VM in the environment.
For more information, see the complete YAML schema for deployment job.
Specify either
runOnceorrollingas a deployment strategy.runOnceis the simplest deployment strategy. All the life-cycle hooks, namelypreDeploydeploy,routeTraffic, andpostRouteTraffic, get executed once. Then, eitheron:successoron:failuregets executed.See the following example of a deployment job for
runOnce:jobs: - deployment: VMDeploy displayName: Web deploy environment: name: <environment name> resourceType: VirtualMachine strategy: runOnce: deploy: steps: - script: echo my first deploymentSee the following example of a YAML snippet for the rolling strategy with a Java pipeline. You can update up to five targets gets in each iteration.
maxParalleldetermines the number of targets that can be deployed to, in parallel. The selection accounts for absolute number or percentage of targets that must remain available at any time, excluding the targets being deployed to. It's also used to determine the success and failure conditions during deployment.jobs: - deployment: VMDeploy displayName: web environment: name: <environment name> resourceType: VirtualMachine strategy: rolling: maxParallel: 2 #for percentages, mention as x% preDeploy: steps: - download: current artifact: drop - script: echo initialize, cleanup, backup, install certs deploy: steps: - task: Bash@3 inputs: targetType: 'inline' script: | # Modify deployment script based on the app type echo "Starting deployment script run" sudo java -jar '$(Pipeline.Workspace)/drop/**/target/*.jar' routeTraffic: steps: - script: echo routing traffic postRouteTraffic: steps: - script: echo health check post-route traffic on: failure: steps: - script: echo Restore from backup! This is on failure success: steps: - script: echo Notify! This is on successWith each run of this job, deployment history gets recorded against the
<environment name>environment that you've created and registered the VMs.
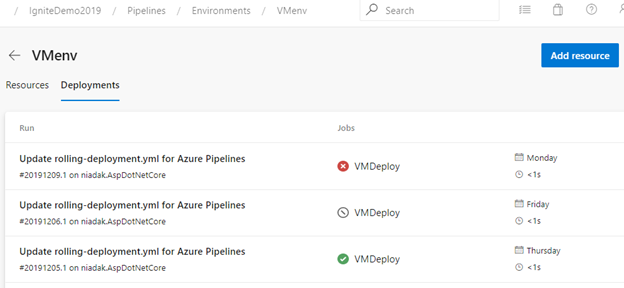
Pipeline traceability views in environment
The Deployments view provides complete traceability of commits and work items, and a cross-pipeline deployment history per environment.
Next steps
Related articles
Feedback
Coming soon: Throughout 2024 we will be phasing out GitHub Issues as the feedback mechanism for content and replacing it with a new feedback system. For more information see: https://aka.ms/ContentUserFeedback.
Submit and view feedback for