Note
Access to this page requires authorization. You can try signing in or changing directories.
Access to this page requires authorization. You can try changing directories.
Azure DevOps Services | Azure DevOps Server | Azure DevOps Server 2022
In this quickstart, you create a pipeline that builds and tests a Python app. You see how to use Azure Pipelines to build, test, and deploy Python apps and scripts as part of your continuous integration and continuous delivery (CI/CD) system.
Prerequisites
Python is preinstalled on Microsoft-hosted agents for Linux, macOS, and Windows. You don't have to set up anything more to build Python projects. To see which Python versions are preinstalled, see Software.
| Product | Requirements |
|---|---|
| Azure DevOps | - An Azure DevOps project. - The ability to run pipelines on Microsoft-hosted agents. Enable the free tier, or purchase a parallel job. - Basic knowledge of YAML and Azure Pipelines. For more information, see Create your first pipeline. - Permissions: - To create a pipeline: you must be in the Contributors group and the group needs to have Create build pipeline permission set to Allow. Members of the Project Administrators group can manage pipelines. - To create service connections: You must have the Administrator or Creator role for service connections. |
| GitHub | - A GitHub account. - A GitHub service connection to authorize Azure Pipelines. |
| Product | Requirements |
|---|---|
| Azure DevOps | - An Azure DevOps project. - A self-hosted agent with Python 3.12 or other Python version installed. To create one, see Self-hosted agents. - Basic knowledge of YAML and Azure Pipelines. For more information, see Create your first pipeline. - Permissions: - To create a pipeline: you must be in the Contributors group and the group needs to have Create build pipeline permission set to Allow. Members of the Project Administrators group can manage pipelines. - To create service connections: You must have the Administrator or Creator role for service connections. |
| GitHub | - A GitHub account. - A GitHub service connection to authorize Azure Pipelines. |
Important
GitHub procedures might require you to take one or more of the following actions in GitHub:
- Sign in.
- Authorize Azure Pipelines.
- Authenticate to GitHub organizations.
- Install the Azure Pipelines app.
Follow instructions to complete the required processes. For more information, see Access to GitHub repositories.
Fork the sample code
Fork the sample Python repository to your GitHub account.
- Go to the python-sample-vscode-flask-tutorial repository.
- Select Fork at upper right.
- Make sure your GitHub account name is selected under Owner, and select Create fork. The fork is named the same as the parent repository by default, but you can name it something different.
Create your pipeline
- In your Azure DevOps project, select Pipelines from the left navigation menu and then select New pipeline, or Create Pipeline if this pipeline is the first in the project.
- On the Where is your code screen, select GitHub as the location of your source code.
- On the Select a repository screen, select your forked Python sample repository.
- On the Configure your pipeline screen, select Starter pipeline.
Customize your pipeline
On the Review your pipeline YAML screen, replace the contents of the generated azure-pipelines.yml file with the following code. The code does the following actions on three different versions of Python:
- Installs required Python version and dependencies.
- Packages build artifacts to a ZIP archive.
- Publishes the archive to your pipeline.
- Runs tests.
trigger:
- main

pool:
  vmImage: ubuntu-latest

strategy:
  matrix:
    Python310:
      python.version: '3.10'
    Python311:
      python.version: '3.11'
    Python312:
      python.version: '3.12'

steps:
  - task: UsePythonVersion@0
    inputs:
      versionSpec: '$(python.version)'
    displayName: 'Use Python $(python.version)'

  - script: |
      python -m pip install --upgrade pip
      pip install -r requirements.txt
    displayName: 'Install dependencies'

  - task: ArchiveFiles@2
    displayName: 'Archive files'
    inputs:
      rootFolderOrFile: $(System.DefaultWorkingDirectory)
      includeRootFolder: false
      archiveType: zip
      archiveFile: $(Build.ArtifactStagingDirectory)/$(Build.BuildId)-$(python.version).zip
      replaceExistingArchive: true

  - task: PublishBuildArtifacts@1
    inputs:
      PathtoPublish: '$(Build.ArtifactStagingDirectory)'
      ArtifactName: 'drop'
      publishLocation: 'Container'

  - script: |
      pip install pytest pytest-azurepipelines
      pytest
    displayName: 'pytest'
On the Review your pipeline YAML screen, replace the contents of the generated azure-pipelines.yml file with the following code. The code does the following actions:
- Installs required Python version and dependencies.
- Packages build artifacts to a ZIP archive.
- Publishes the archive to your pipeline.
- Runs tests.
Customize azure-pipelines.yml to match your project configuration.
- If you have a different agent pool, replace the pool
nameplaceholder with your pool name ordefault. - If necessary, change the Python
versionSpecto a version installed on your self-hosted agent.
  trigger:
  - main

  pool:
    name: '<your-pool-name or default>'

  steps:
  - task: UsePythonVersion@0
    inputs:
      versionSpec: '3.12'
    displayName: 'Use Python 3.12'

  - script: |
      python -m pip install --upgrade pip
      pip install -r requirements.txt
    displayName: 'Install dependencies'


  - task: ArchiveFiles@2
    displayName: 'Archive files'
    inputs:
      rootFolderOrFile: $(System.DefaultWorkingDirectory)
      includeRootFolder: false
      archiveType: zip
      archiveFile: $(Build.ArtifactStagingDirectory)/$(Build.BuildId).zip
      replaceExistingArchive: true

  - task: PublishBuildArtifacts@1
    inputs:
      PathtoPublish: '$(Build.ArtifactStagingDirectory)'
      ArtifactName: 'drop'
      publishLocation: 'Container'

  - script: |
      pip install pytest pytest-azurepipelines
      pytest
    displayName: 'pytest'
Run your pipeline
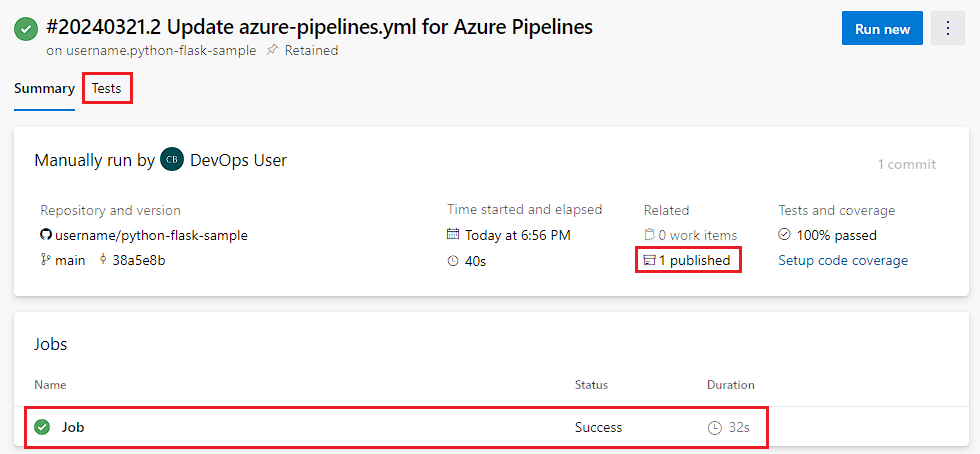
Select Save and run, and then select Save and run again. You can select Job on the Summary screen to see your job in action.
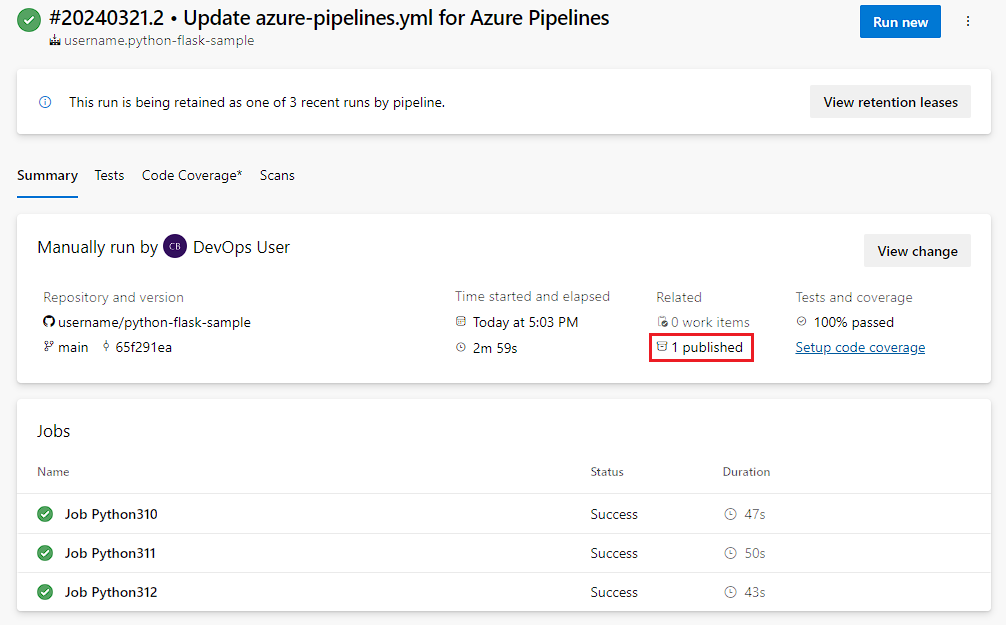
The job runs three times, once for each specified Python version. The three versions can run in parallel on different agents.

View artifacts and test results
To view your build artifacts, select the [N] published link on the Summary tab.
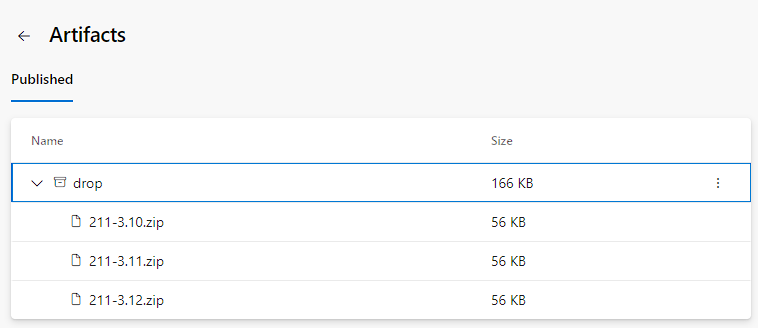
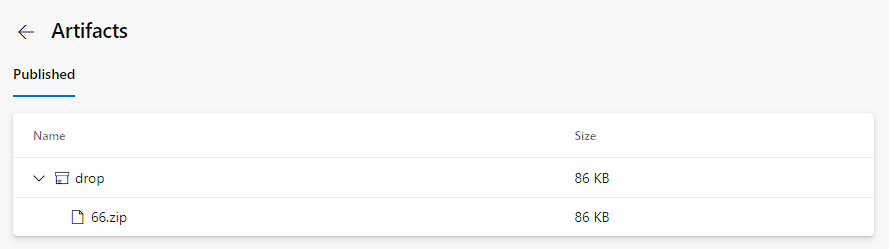
The Artifacts page shows the published build artifacts.
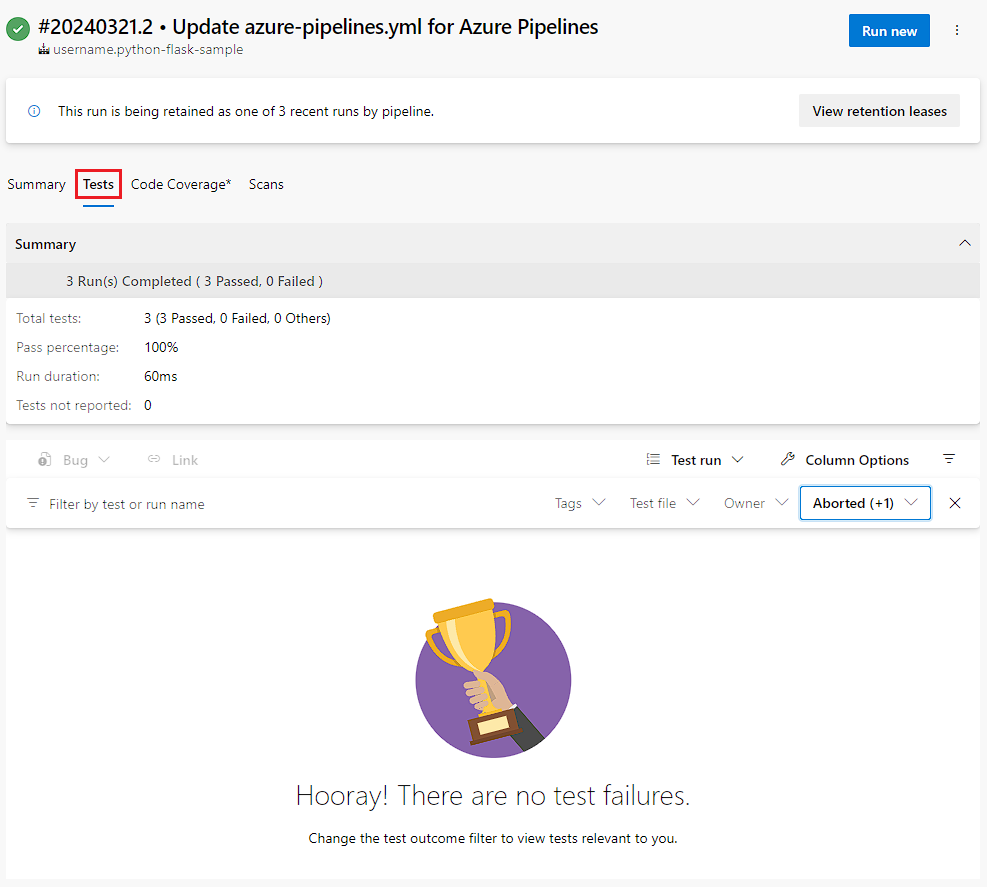
To view the test results, select the Tests tab.
Clean up
If you're done using the pipeline you created, you can delete it.
Select Pipelines from your project's left navigation menu.
In the pipeline list, hover over the pipeline you created, select the More actions icon at right, and then select Delete.
Or select the pipeline, and on the pipeline page, select the More actions icon at upper right, and then select Delete.
Enter the pipeline name, and then select Delete again.
You successfully created and ran a pipeline that built and tested a Python app. You can now use Azure Pipelines to build, test, and deploy Python apps and scripts as part of your CI/CD process.