Note
Access to this page requires authorization. You can try signing in or changing directories.
Access to this page requires authorization. You can try changing directories.
Azure DevOps Services | Azure DevOps Server | Azure DevOps Server 2022 | Azure DevOps Server 2020
Visual Studio 2019 | Visual Studio 2022
Do you plan to adopt Git, are familiar with TFVC actions, and wondering how they map to Git? Both are powerful and mature source control systems. However, mapping common actions you have grown accustomed to in the one to the other can be a confusing experience.
This article doesn't delve deep into the Git commands, as they are well documented in the product documentation, but show examples to help you make the right decisions, while moving through a typical create -> clone -> branch -> change -> commit -> push workflow.
Start at the beginning by creating a new repo
Each Project can host TFVC and Git repositories in the same project, creating one TFVC, and one or more Git repositories.

Once the repo is created, you are presented with step-by-step instructions to quickly get started.
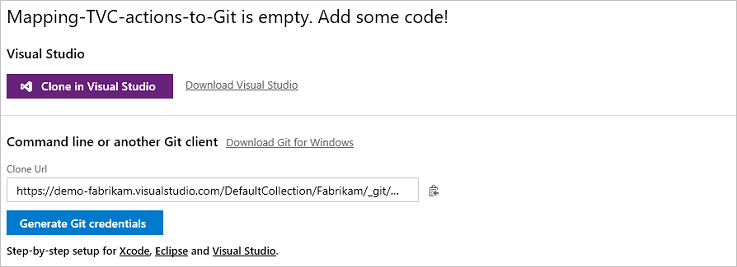
Click Create a ReadMe file at the end of the instruction page, to give the repo context and to create some history.

Create a workspace and get latest
When connecting to a TFVC repo for the first time, you typically create a workspace and get the latest code. so, how do you get started in Git?
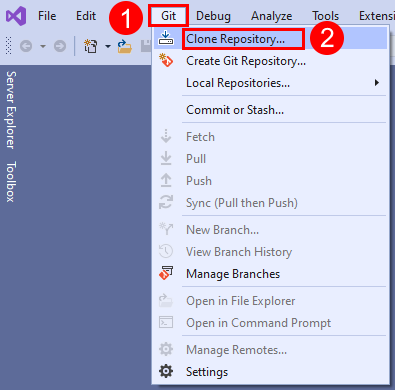
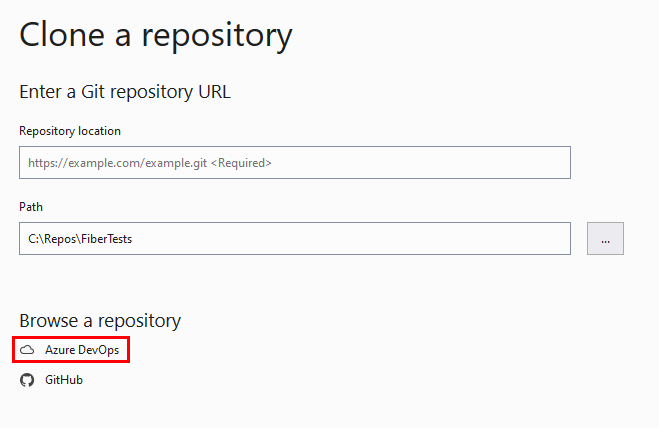
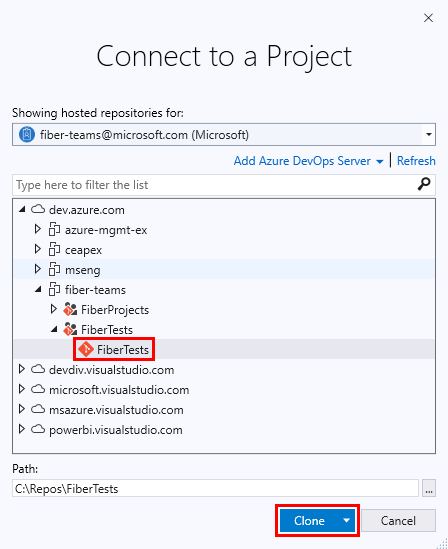
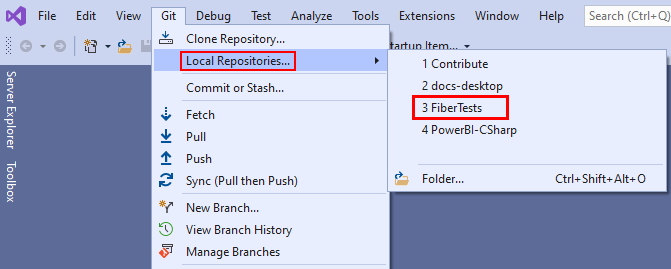
Similar to a workspace in TFVC you clone the Git repository to a folder on your machine. Cloning will download all of the contents and history of the repository, to your local machine. Once you have the cloned repo, nearly all operations are performed locally. You are able to work offline with a full backup of the centralized repository.
git clone https://dev.azure.com/demo-fabrikam/Fabrikam/_git/Mapping-TFVC-actions-to-Git
You only need to clone once per repo, but like TFVC workspaces, you can have multiple clones to isolate in-progress work. However, branching is typically a better way to isolate changes.
Create a branch
With Git, you are always working in a branch and by default in themain branch. We recommend you create multiple local branches. It's a process that takes seconds and allows you to seamlessly context switch between branches and work in isolation. Unlike TFVC branches, which are scoped to paths, Git branches are repository scoped. They are lightweight, can be local only, or shared with others when you are ready to share your changes.
Consider branching if you need to work in isolation, need to suspend your work, focus on new features, or if you are planning to conduct a Git pull request.
As a TFVC user, repeat a few times:
- Branching is recommended!
- Git branching is inexpensive, fast, and powerful!
- Git encourages you to use local branches.
- Publish local branches to your centralized repository as needed.
- Always verify your branch context before making changes.
- Name the branch using a common convention such as users/alias/branchname for example: users/doris/newfeature
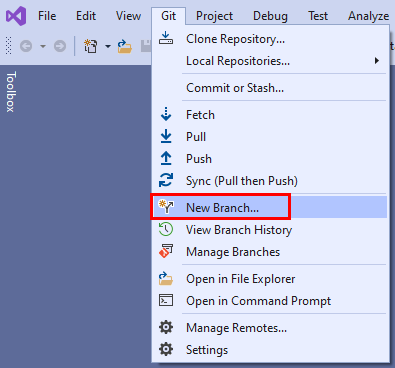
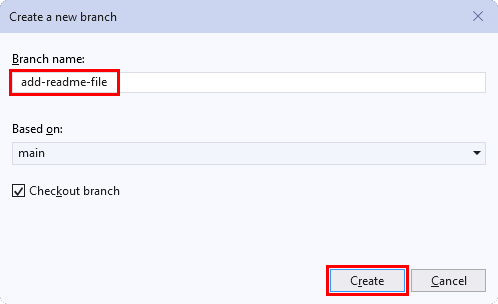
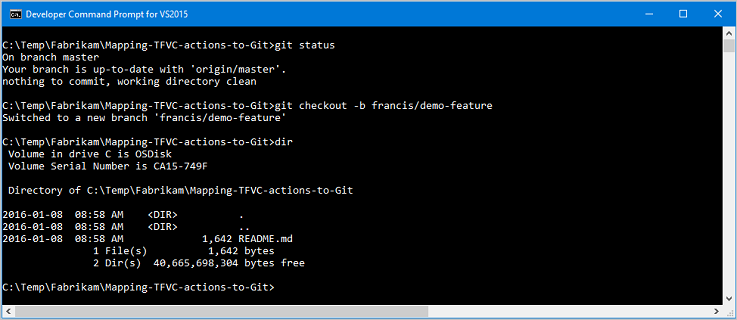
Create and switch to a local topic branch, named francis/demo-feature. It is good practice to run a git status first, to verify that you are on the right branch to start with.
git checkout -b francis/demo-feature
Make a change by adding files
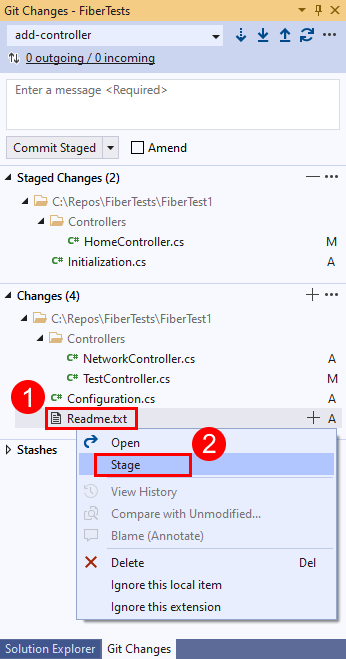
Similar to the TFVC experience, new files in the working folder are not automatically part of the repository. You stage your new files with the git add command, which is synonymous to performing an add Items to Folder operation in TFVC.
git add <file>
or
git add --all
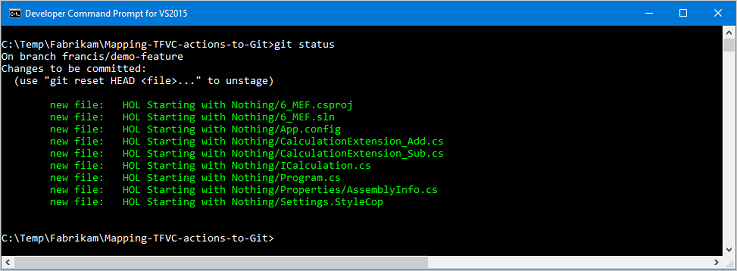
Using the pre-baked sample, you will have 13 new files that have been included and staged in the local repository.
View pending changes
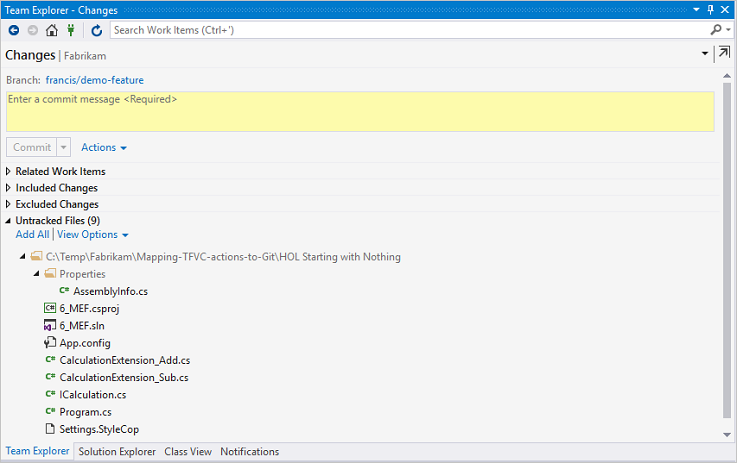
Wondering what changes are now sitting in your working environment? As before, the Git status command or the Changes view in the Visual Studio IDE will show changes in your working tree.
git status
Check in changes and commit locally
In TFVC, you share your changes with a Check In, which sends your pending changes to the server. The Git process is a bit different. First, you commit to the local repository, creating a commit object (like a changeset), then you push to send those changes to the server.
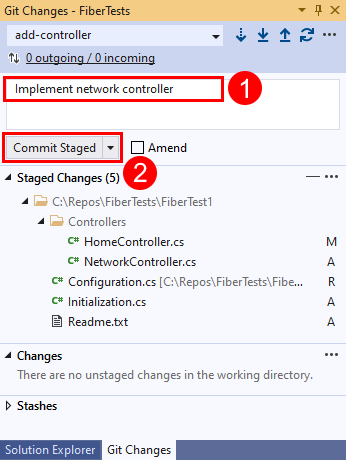
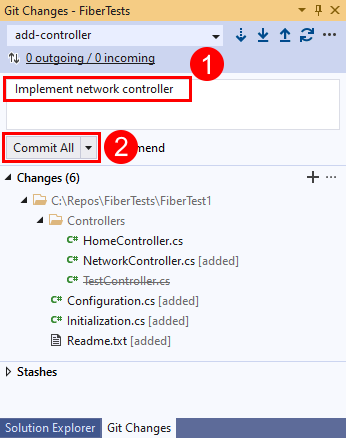
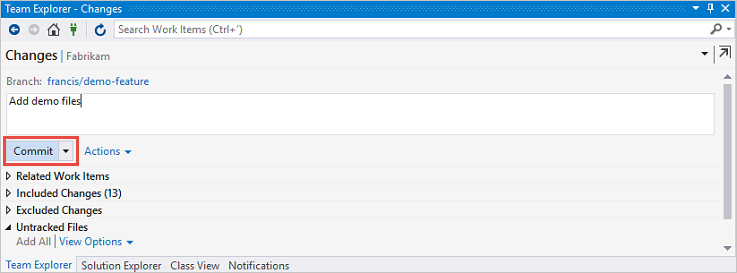
You commit the changes to your local repository using git commit, similar to a Checkin Pending Changes in TFVC. A key difference is that the git commit commits your changes to the local repository instead of the remote repository.
git commit
Check in changes with the server/remote repo
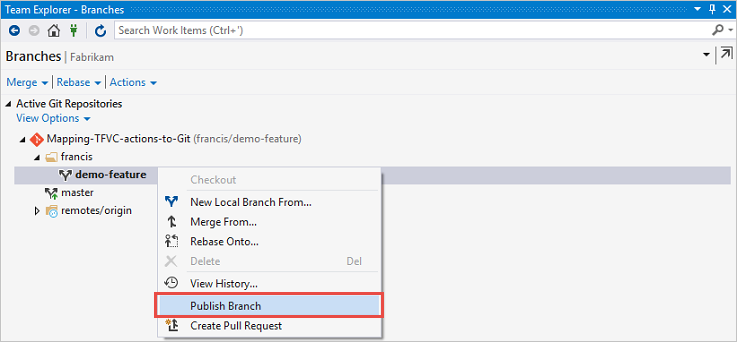
First you need to publish your local francis/demo-feature branch to the remote server, which includes all committed changes.
git push --set-upstream origin francis/demo-feature
To synchronize further updates in your local with the remote repository, you need to push your changes using git push. The recommended practice using the git command or the Visual Studio IDE is to:
fetchto download content and preview incoming changes from others.pullto download and then merge changes from others.pushto share your local changes.
View history
To see the commit, you just created you can review the local history.
For a compact history, use:
git log --oneline
For a detailed, view, use:
git log
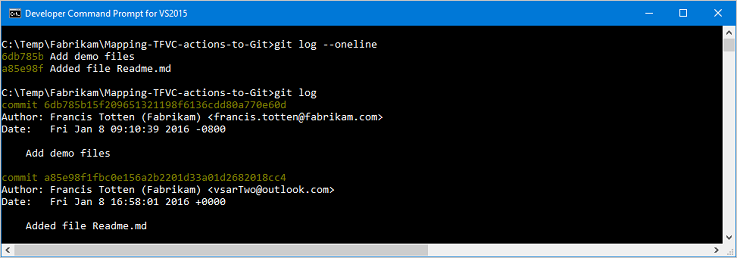
As shown above, git log lists the author, email, date written, and the commit SHA-1 checksum. As a TFVC user you may want to use the --stat option to include more information, such as file name and change statistics.
You can also view the history of the centralized repository using the Azure DevOps Services web portal.
In the Azure DevOps Services web portal, choose CODE > History or CODE > Explorer > History

At this point, you have successfully explored the create -> clone -> branch -> change -> commit -> push workflow, based on common TFVC actions.
You also have the option of issuing a pull request, to publish and stage your changes on the server/remote repo at this point.
Other actions
Switch branches
When working with Git, you do not change branches by switching to separate folders and locations on your machine. You change the context by doing a checkout, making the entire working directory match the selected branch or commit. Fast and simple!
Command line
git checkout <branch>
If you forgot what branches you have in your local repository, use git branch to list the default and known branches.
Keep in mind which branch you are working on! When you work with multiple branches in Git, you switch branches in place in the same working directory. Switching between branches is a fast operation, and making sure you are on the right branch at all times is good practice.
Get latest version
There are lots of reasons to want to get updates. For example, when you need to switch context to another project, refresh your development machine with the latest version of the codebase.
Command line
git pull
or
git fetch
followed by
git merge FETCH_HEAD
Always get the latest version and resolve merge conflicts locally.
Undo local changes
There may be a valid reason to revert all revisions you made in your local repository and reset your working environment to the latest version from the remote repository.
Command line
git reset --hard HEAD
followed by
git pull origin
followed by
git clean -xdf
The scenario is synonymous to doing a Get > Latest Version with the Overwrite writable files that are not checked out and Overwrite all files if the local version matches the specified version options in TFVC.
Alternatively you can manually delete your local repo—after making a validated copy of course—and then clone the repository again.
There are a lot more actions and options available to Git users. Here are some useful reference sites for further reading:
- Git commands covered herein, refer to git documentation
- Think like (a) Git, a Guide for the Perplexed.
- How to undo (almost) anything with Git, by Joshua Wehner
Q&A
What about sync?
"Does the Visual Studio IDE Commit and Sync not magically do all this?", you may be asking yourself.
Select Git > Commit or Stash to open Git Changes. Select the Commit All dropdown menu, then select Commit All and Sync.
Or, in Team Explorer, select the Commit dropdown menu and then Command and Sync.

With magic comes responsibility! Many users dislike the sync as it can sometimes mess up your local history and add a merge commit on top of your current commit. Once you are in a bad state, you have to revert to the command line as there is currently no reset support in the IDE.
Authors: Jesse Houwing, Martin Hinshelwood, Mike Fourie, and Willy Schaub from the ALM | DevOps Rangers. Connect with them here.
(c) 2015 Microsoft Corporation. All rights reserved. This document is provided "as-is." Information and views expressed in this document, including URL and other Internet Web site references, may change without notice. You bear the risk of using it.
This document does not provide you with any legal rights to any intellectual property in any Microsoft product. You may copy and use this document for your internal, reference purposes.
