Note
Access to this page requires authorization. You can try signing in or changing directories.
Access to this page requires authorization. You can try changing directories.
Azure DevOps Services | Azure DevOps Server 2022 - Azure DevOps Server 2019
When moving to Git from another version control system like Subversion (SVN), we generally recommend that you perform a "tip migration", which migrates just the latest version of the repository contents, without including history. However, many people want to perform a more advanced migration, including history. The guidance provided in this article introduces a migration with history.
SVN migrations to Git can vary in complexity, depending on how old the repository is and how many branches were created and merged, and whether you're using regular SVN or close relative like SVK.
It could be simple if:
- You have a new repository
- You have a standard setup of a trunk, branches, and tags directory
It's likely going to be complex if:
- Your team has performed many branching and merging operations
- Your repository follows a non-standard directory setup
- Your directory setup has changed over time
There are several ways to migrate from SVN to Git. The approach outlined in this article is based on using git-svn, a Git extension, which can be used to check out a Subversion repository to a local Git repository and then push changes from the local Git repository back to the Subversion repository. These steps give a detailed overview of the process for migrating from SVN to Git in a Windows environment, without synchronizing back to the original SVN repository. The result will be a bare Git repository for sharing with the rest of your team.
Prerequisites
| Category | Requirements |
|---|---|
| Project access | Member of a project. |
| Permissions | - View code in private projects: At least Basic access. - Clone or contribute to code in private projects: Member of the Contributors security group or corresponding permissions in the project. - Set branch or repository permissions: Manage permissions permissions for the branch or repository. - Change default branch: Edit policies permissions for the repository. - Import a repository: Member of the Project Administrators security group or Git project-level Create repository permission set to Allow. For more information, see Set Git repository permissions. |
| Services | Repos enabled. |
| Tools | Optional. Use az repos commands: Azure DevOps CLI. |
Note
In public projects, users with Stakeholder access have full access to Azure Repos, including viewing, cloning, and contributing to code.
| Category | Requirements |
|---|---|
| Project access | Member of a project. |
| Permissions | - View code: At least Basic access. - Clone or contribute to code: Member of the Contributors security group or corresponding permissions in the project. |
| Services | Repos enabled. |
Note
Before you try to migrate your source code from a centralized version control system to Git, be sure that you familiarize yourself with the differences between centralized and distributed version control systems, and plan your team's migration. After you've prepared, you can begin the migration.
The high-level workflow for migrating from SVN to Git is as follows:
- Prepare a migration environment
- Convert the source SVN repository to a local Git repository
- (Optional) Synchronize the local Git repository with any changes from SVN repository while developers continue using SVN
- Push the local Git repository to a remote Git repository hosted on Azure Repos
- Lock SVN repository, synchronize any remaining changes from SVN repository to local Git repository and push final changes to the remote Git repository on Azure Repos
- Developers switch to Git as main source control system
Prepare a migration environment
Configure a migration environment on a local workstation and install the following software:
- Git
- Subversion
- git-svn utility (already part of Git)
You'll also need to create a Git repository for your organization to host the converted SVN repository, you may follow Create a new Git repo in your project
Convert the source SVN repository to a local Git repository
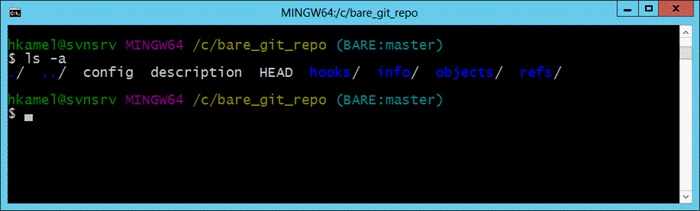
The goal of this step is to convert the source Subversion repository to a local bare Git repository. A bare Git repository doesn't have a local working checkout of files that can be changed, instead it only contains the repository's history and the metadata about the repository itself. This is the recommended format for sharing a Git repository via a remote repository hosted on a service like Azure Repos.
Tip
Bare Git repositories are structured differently and given the fact that it doesn't have a working directory prevent direct commit to the repository.
Retrieve a list of all Subversion authors
Subversion just uses the username for each commit, while Git stores both a real name and an email address. By default, the git-svn tool will list the SVN username in the author and email fields. However, you can create a mapping file for SVN users along with their corresponding Git names and emails.
Subversion users
Git users
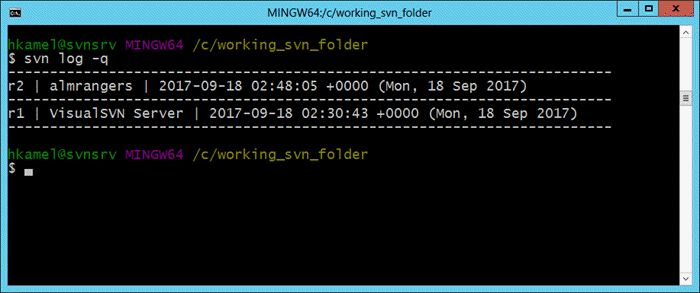
To extract a list of all SVN users from the root of your local Subversion checkout, run this PowerShell command:
For results in utf8NoBOM encoding, run the following command:
svn.exe log --quiet | ? { $_ -notlike '-*' } | % { "{0} = {0} " -f ($_ -split ' | ')[1] } | Select-Object -Unique | Sort-Object | Out-File 'authors-transform.txt' -Encoding utf8NoBOM
For results in ASCII encoding, run the following command:
svn.exe log --quiet | ? { $_ -notlike '-*' } | % { "{0} = {0} " -f ($_ -split ' | ')[1] } | Select-Object -Unique | Sort-Object | Out-File 'authors-transform.txt' -Encoding ASCII
This command will retrieve all the log messages, extract the usernames, eliminate any duplicate usernames, sort the usernames, and place them into an authors-transform.txt file in UTF-8 format (or ASCII format, depending on which encoding you specified). You can then edit each line in the file to create a mapping of SVN users to well-formatted Git users. For example, you can map jamal = jamal <jamal> to jamal = Jamal Hartnett <jamal@fabrikam-fiber.com>.
Clone the Subversion repository using git-svn
The following command will do the standard git-svn transformation using the authors-transform.txt file created in the earlier step. It will place the Git repository in the c:\mytempdir folder in your local machine.
git svn clone ["SVN repo URL"] --prefix=svn/ --no-metadata --authors-file "authors-transform.txt" --stdlayout c:\mytempdir
Note
The --prefix=svn/ is necessary because otherwise the tools can't tell SVN revisions from imported ones. We recommend setting a prefix (with a trailing slash), as your SVN-tracking refs will then be located at refs/remotes/$prefix/, which is compatible with Git's own remote-tracking branch layout (refs/remotes/$remote/).
Setting a prefix is also useful if you wish to track multiple projects that share a common repository. By default, the prefix is set to origin/.
If you're using the standard trunk, branches, tags layout you'll just put --stdlayout. However, if you have something different you may have to pass the --trunk, --branches, and --tags to find what is what. For example, if your repository structure was trunk/companydir and you branched that instead of trunk, you would probably want --trunk=trunk/companydir --branches=branches.
git svn clone ["SVN repo URL"] --prefix=svn/ --no-metadata --trunk=/trunk --branches=/branches --tags=/tags --authors-file "authors-transform.txt" c:\mytempdir
Note
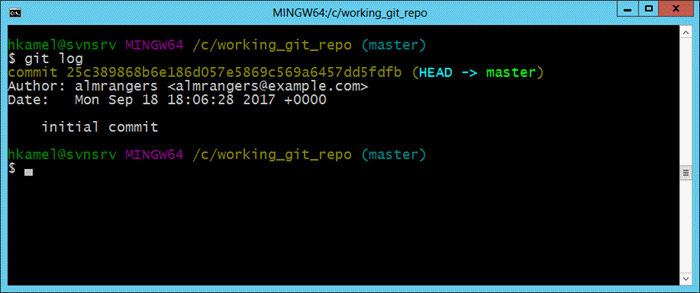
This command can take a few minutes to several hours depending on the size of the SVN repository. Upon completion, you'll have a Git checkout of your repository.
Convert version control-specific configurations
If your SVN repo was using svn:ignore properties, you can convert to a .gitignore file using:
cd c:\mytempdir
git svn show-ignore --id=origin/trunk > .gitignore
git add .gitignore
git commit -m 'Convert svn:ignore properties to .gitignore.'
Tip
Read more about .gitignore: Ignore file changes with Git
Push repository to a bare git repository
In this step, you'll create a bare repository and make its default branch match SVN's trunk branch name.
Create a bare Git repository
git init --bare c:\new-bare.git
cd c:\new-bare.git
git symbolic-ref HEAD refs/heads/svn/trunk
Push the local Git repository to the new bare Git repository
cd c:\mytempdir
git remote add bare c:\new-bare.git
git config remote.bare.push refs/remotes/*:refs/heads/*
git push bare
Rename the
trunkbranch tomain. Your main development branch will be named "trunk", which matches the name it was in Subversion. You'll want to rename it to Git's standardmainbranch using:cd c:\new-bare.git git branch -m svn/trunk mainClean up branches and tags git-svn makes all of Subversions tags into very-short branches in Git of the form "tags/name". You'll want to convert all those branches into actual Git tags or delete them.
Migrate SVN tags to be Git tags
cd c:\new-bare.git
git for-each-ref --format='%(refname)' refs/heads/svn/tags | % { $_.Replace('refs/heads/svn/tags/','') } | % { git tag $_ "refs/heads/svn/tags/$_"; git branch -D "svn/tags/$_" }
Advanced migrations
Create all the SVN branches as proper Git branches
While it's easy to create all SVN branches as a proper Git branches, it's recommended that you evaluate the following points before you continue:
If there are Feature branches: Can you wait until they integrate to the trunk before migrating?
If there are Release branches: Does it make sense to keep SVN around for servicing? If you migrate feature branches, are you prepared to service branches out of Git?
If you still want to migrate existing branches, run the following PowerShell command:
git for-each-ref --format='%(refname)' refs/remotes | % { $_.Replace('refs/remotes/','') } | % { git branch "$_" "refs/remotes/$_"; git branch -r -d "$_"; }
Note
This command can take a few minutes to several hours depending on the size of the SVN repository. Upon completion, you'll have a Git checkout of your repository.
Migrate only specific revisions
When not specified, git-svn clone will migrate all of the revisions from the first commit (r1) to HEAD. If you need to migrate only a specific set of revisions, the command for git-svn clone should be appended with an option of -r.
For example, if you need to migrate from rev 100 to HEAD, the command looks like this:
git svn clone ["SVN repo URL"] --prefix=svn/ --no-metadata --authors-file "authors-transform.txt" --stdlayout c:\mytempdir -r100:HEAD
Update your workflow
Moving from a centralized version control system to Git is more than just migrating code. Your team needs training to understand how Git is different from your existing version control system and how these differences affect day-to-day work. Learn more.
Reference information
- Choosing the right version control for your project
- Learn Git
- Ignore file changes with Git
- Migrate from TFVC to Git
Authors: Hosam Kamel, William H. Salazar | Find the origin of this article and connect with the ALM | DevOps Rangers Branching guidance
(c) 2017 Microsoft Corporation. All rights reserved. This document is provided "as-is." Information and views expressed in this document, including URL and other Internet Web site references, may change without notice. You bear the risk of using it.
This document doesn't provide you with any legal rights to any intellectual property in any Microsoft product. You may copy and use this document for your internal, reference purposes.