Note
Access to this page requires authorization. You can try signing in or changing directories.
Access to this page requires authorization. You can try changing directories.
As an Azure DevTest Labs lab owner and user, you can Hibernate the virtual machines (VMs) in your lab. Hibernation allows applications and processes that were previously running in your VM resume from the state prior to hibernation. When you hibernate a machine, Azure stores the memory contents of the VM in the OS disk and then deallocates the VM. When the VM is started again from its hibernation state, the memory contents are transferred from the OS disk back into memory. Once a VM is placed in a hibernated state, you aren't charged for the compute cost of the VM, just like how you aren't charged for it in a stopped (deallocated) state. You're only charged for the storage (OS disk, data disks) and networking resources (IPs, etc.) attached to the VM.
Important
The Hibernation of VMs feature is currently in preview in Azure DevTest Labs. For more information about the preview status, see the Supplemental Terms of Use for Microsoft Azure Previews. The document defines legal terms that apply to Azure features that are in beta, in preview, or otherwise not yet released into general availability.
Hibernate is an effective cost management feature for:
- Scenarios where the VMs don't need to run 24/7.
- Scenarios where you don’t want to lose the state of the applications and processes on your VM when it is deallocated.
- Systems with long boot times due to memory intensive applications. These applications can be initialized on VMs and hibernated. These “prewarmed” VMs can then be quickly started when needed, with the applications already up and running in the desired state.
Azure DevTest Labs currently only supports enabling Hibernation on VM creation. To enable hibernation during VM creation, you can use the Azure portal and API. Hibernation can only be triggered from the API and the Azure portal and not directly from the VM.
Note
Please note that Hibernation support is limited to certain VM sizes and OS versions. Make sure you have a supported configuration before using hibernation. To learn more about Hibernation in general, its supported configurations in Azure, and other limitations, please visit Hibernation for Azure Virtual Machines
This article explains how to Hibernate VMs in DevTest Labs.
Create lab virtual machines with Hibernation enabled in Azure DevTest Labs
This article describes how to create Azure virtual machines (VMs) with Hibernation enabled in Azure DevTest Labs by using the Azure portal.
Prerequisite
You need at least user access to a lab in DevTest Labs. For more information about creating labs, see Create a lab in the Azure portal.
Configure basic settings
In the Azure portal, go to the Overview page for the lab.
On the lab Overview page, select Add.

On the Choose a base page, select an image for the VM. You can choose Marketplace images, custom images, or formulas that the lab owner made available. The following instructions use Windows 11 Pro. Some bases might have different settings.
On the Basics Settings tab of the Create lab resource screen, provide the following information:
- Virtual machine name: Keep the autogenerated name, or enter another unique VM name.
- User name: Keep the user name, or enter another user name to grant administrator privileges on the VM.
- Use a saved secret: Select this checkbox to use a secret from Azure Key Vault instead of a password to access the VM. If you select this option, under Secret, select the secret to use from the dropdown list. For more information, see Store secrets in a key vault.
- Password: If you don't choose to use a secret, enter a VM password between 8 and 123 characters long.
- Save as default password: Select this checkbox to save the password in the Key Vault associated with the lab.
- Virtual machine size: Keep the default value for the base, or select Change Size to select different sizes.
- Allow hibernation: Select this option to enable hibernation for the virtual machine. If you enable Hibernation, you also must select either Public IP or Private IP in the Advanced settings. Hibernation for Shared IPs isn't currently supported.
- OS disk type: Keep the default value for the base, or select a different option from the dropdown list.
- Security type: Select Trusted Launch to enable it for Gen2 VMs. On selecting Trusted Launch When the options Secure boot, vTPM, and Integrity Monitoring appear, select the appropriate options for your deployment. For more information, see Trusted Launch-enabled security features.
- Artifacts: This field shows the number of artifacts already configured for this VM base. Optionally, select Add or Remove Artifacts to select and configure artifacts to add to the VM.
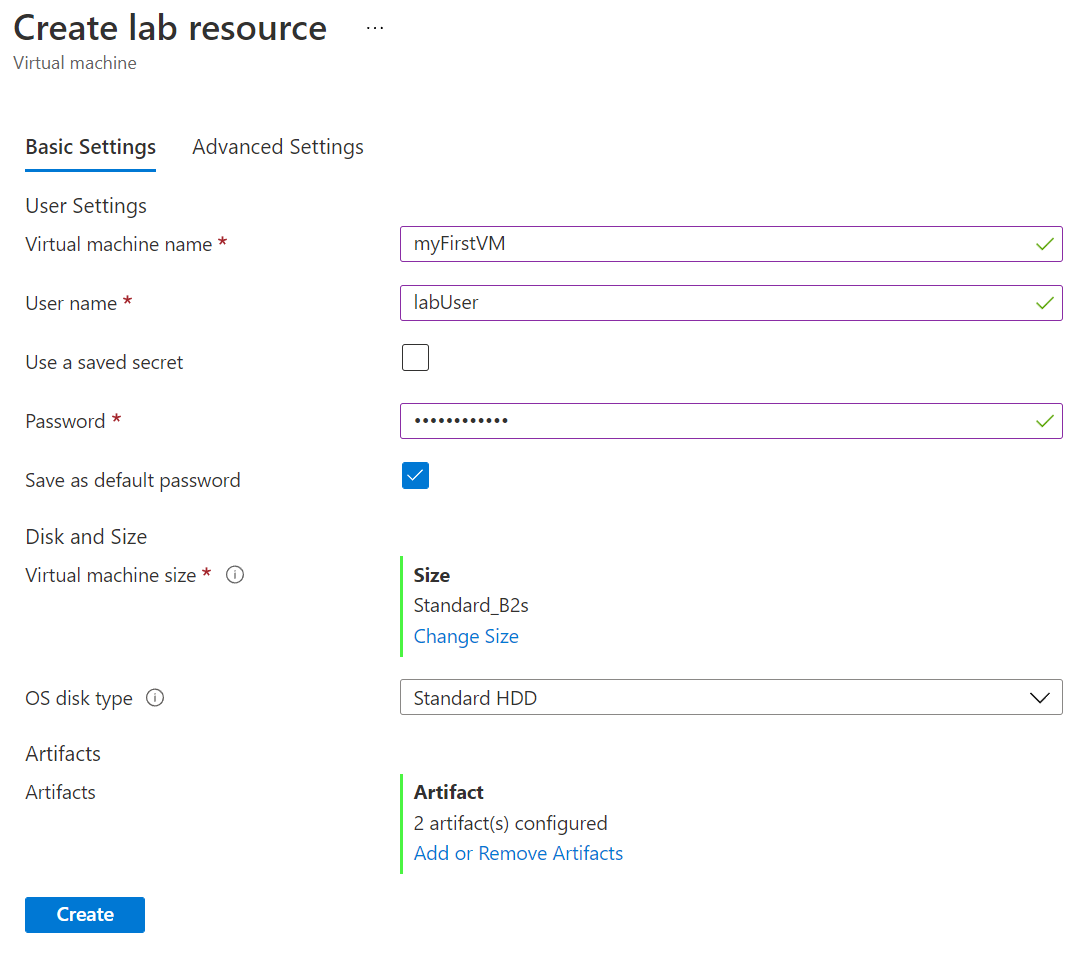
After you configure all settings, on the Basic Settings tab of the Create lab resource screen, select Create to deploy the VM with Hibernation enabled.
During VM deployment, you can select the Notifications icon at the top of the screen to see progress. Creating a VM takes a while.
When the deployment is complete, if you kept yourself as VM owner, the VM appears under My virtual machines on the lab Overview page. To connect to the VM, select it from the list, and then select Connect on the VM's Overview page. If the VM is stopped, select Start first to start the VM.
To learn more about how to create virtual machines (VMs) in Azure DevTest Labs in general, please visit Create and add virtual machines to a lab in Azure DevTest Labs
Hibernating a running VM in Azure DevTest Labs
Sign in to the Azure portal.
In the search bar, search for and select DevTest Labs.
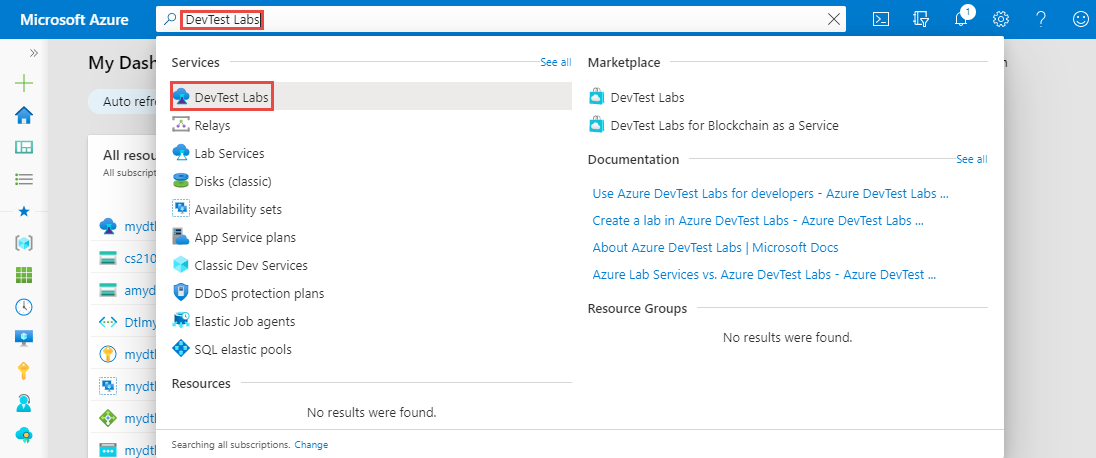
From the list of labs, select your lab.

On the home page for your lab, select the VM from the My virtual machines list for which you had enabled Hibernation on VM creation.
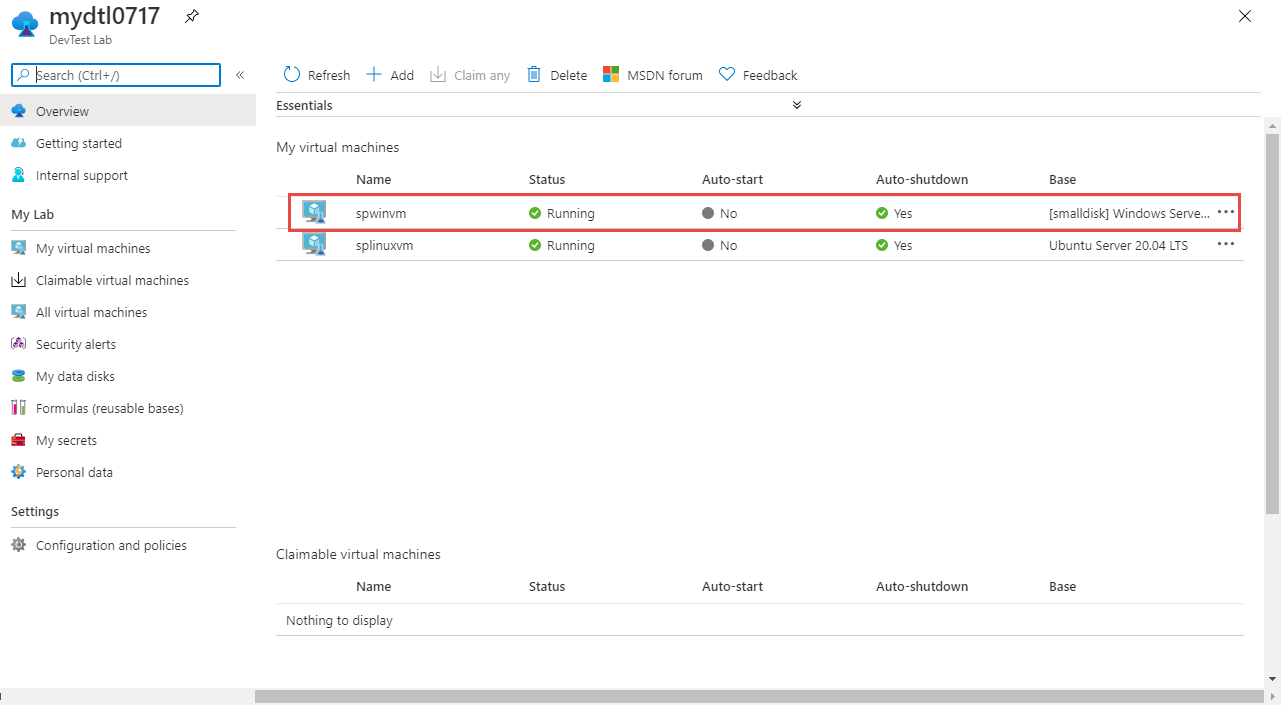
On the Virtual machine page for your VM, select Hibernate on the toolbar. The VM status should be in a running state for Hibernate option to be enabled.

Once you select Hibernate, it will trigger the Hibernation process. Once the Hibernation process is completed, the status will be updated to Hibernated (deallocated).