Note
Access to this page requires authorization. You can try signing in or changing directories.
Access to this page requires authorization. You can try changing directories.
Trusted Launch provides a seamless solution to enhance the security of Generation 2 (Gen 2) virtual machines (VMs) by protecting against advanced and persistent attack techniques. This feature is composed of several coordinated infrastructure technologies that can be enabled independently, each adding an additional layer of defense against sophisticated threats. With Trusted Launch, you can securely deploy VMs with verified boot loaders, operating system (OS) kernels, and drivers, as well as protect keys, certificates, and secrets within the VMs. Additionally, it offers insights and confidence in the integrity of the entire boot chain, ensuring that workloads are trusted and verifiable.
For more information about Trusted Launch, see Trusted Launch for Azure VMs.
This article explains how to use Trusted Launch for Gen 2 VMs in Azure DevTest Labs.
Important
Trusted Launch for Generation 2 VMs is currently in preview in Azure DevTest Labs. For more information about the preview status, see the Supplemental Terms of Use for Microsoft Azure Previews. The document defines legal terms that apply to Azure features that are in beta, in preview, or otherwise not yet released into general availability.
Create lab virtual machines with Trusted Launch for Generation 2 VMs
Prerequisite
You need at least user access to a lab in DevTest Labs. For more information about creating labs, see Create a lab in the Azure portal.
Create a Gen 2 VM with Trusted Launch
In the Azure portal, go to the Overview page for the lab.
On the lab Overview page, select Add.

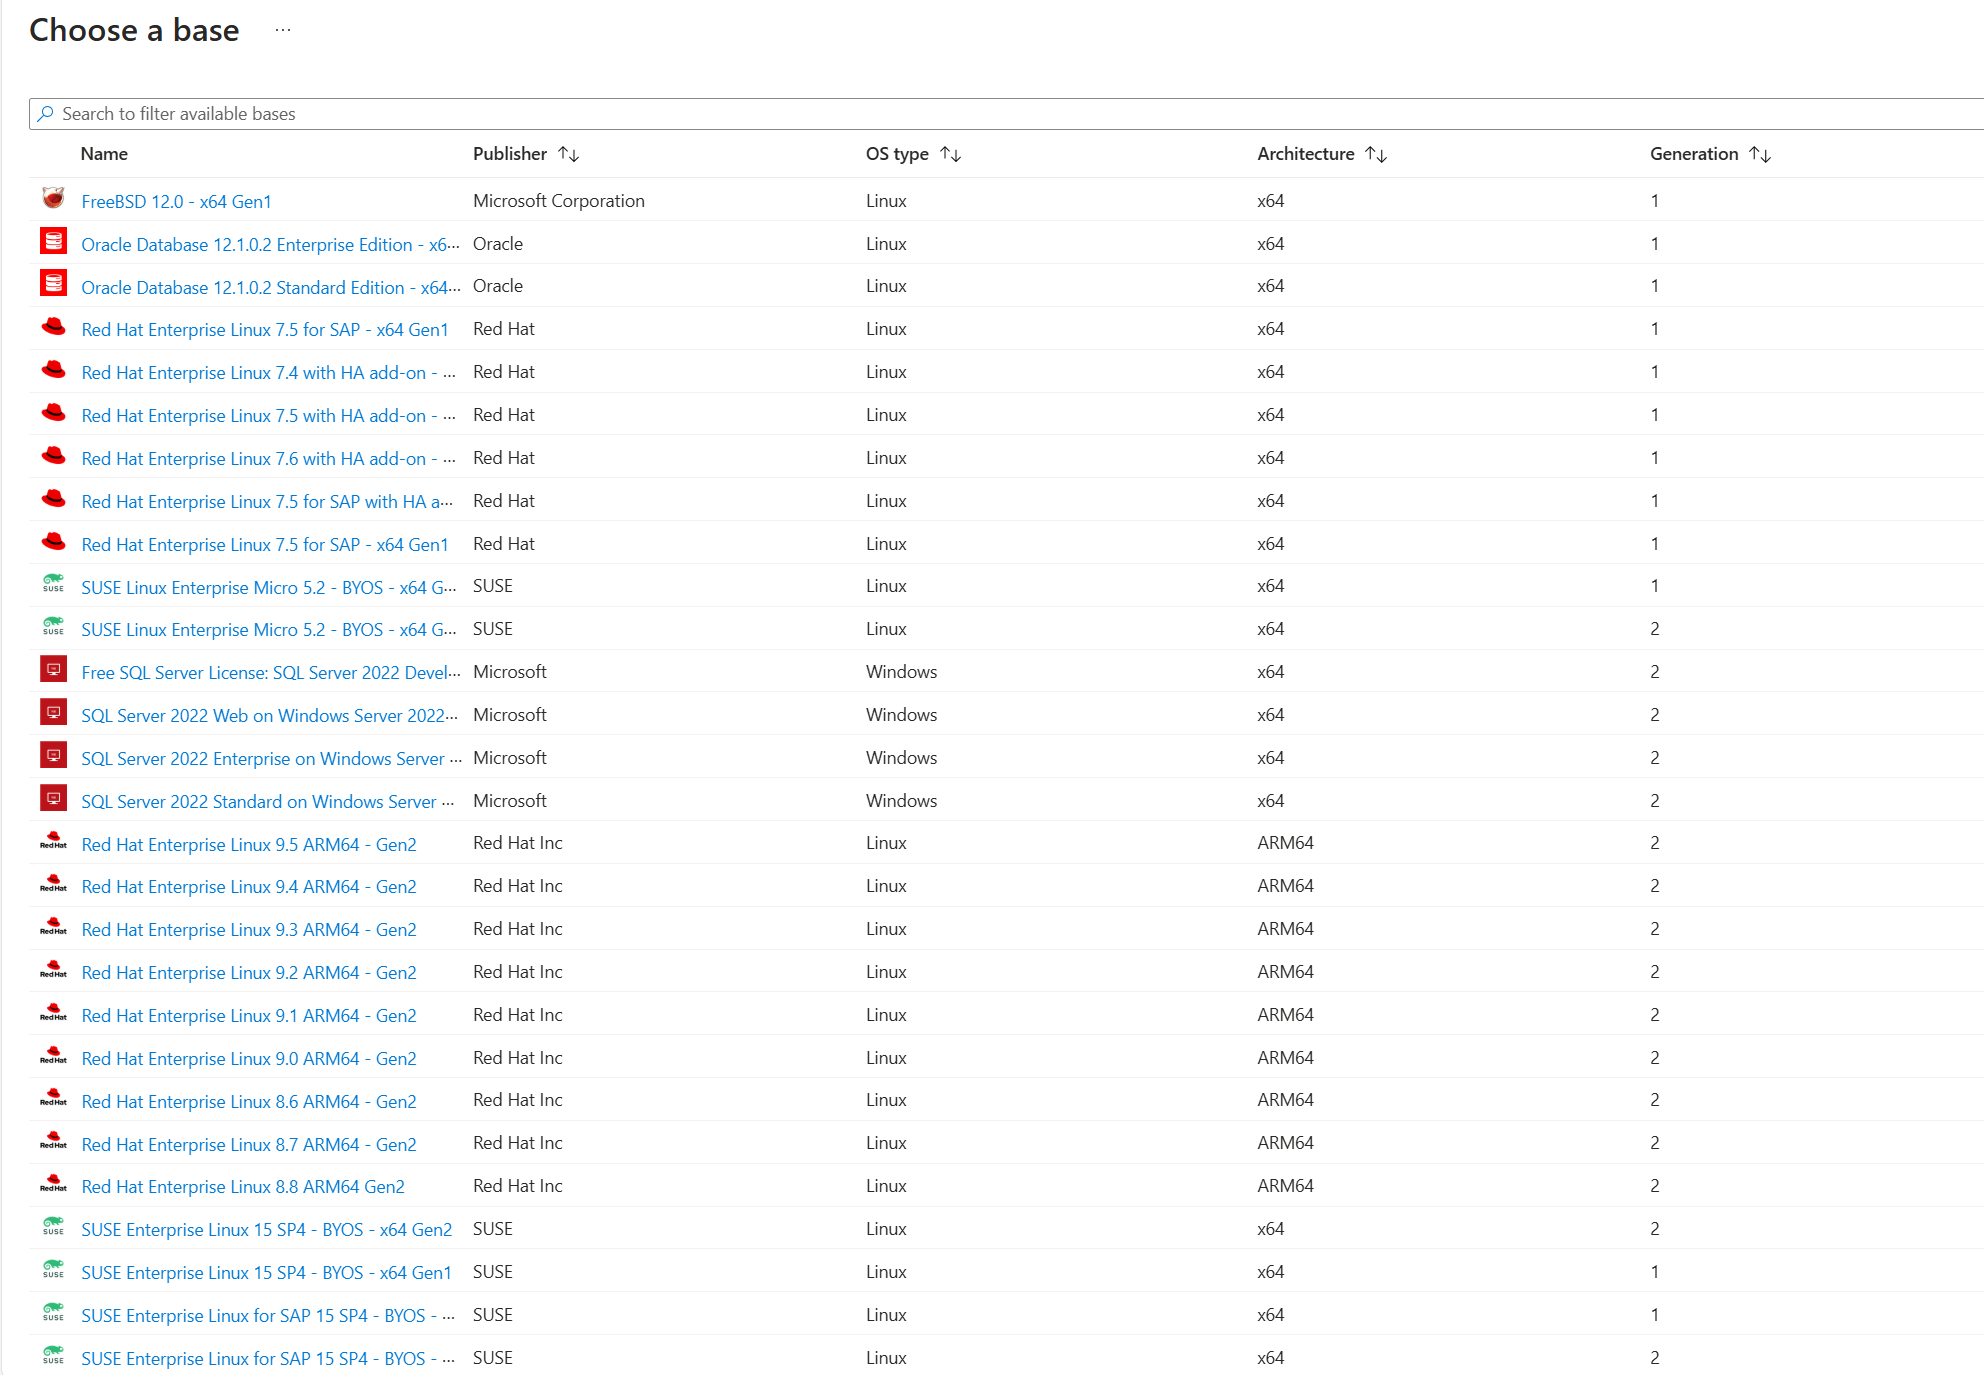
On the Choose a base page, select a Generation 2 image for the VM. The Generation column in the list of images displays whether it is a Generation 1 or Generation 2 image.
On the Basics Settings tab of the Create lab resource screen, provide the following information:
- Virtual machine name: Keep the autogenerated name, or enter another unique VM name.
- User name: Keep the user name, or enter another user name to grant administrator privileges on the VM.
- Use a saved secret: Select this checkbox to use a secret from Azure Key Vault instead of a password to access the VM. If you select this option, under Secret, select the secret to use from the dropdown list. For more information, see Store secrets in a key vault.
- Password: If you don't choose to use a secret, enter a VM password between 8 and 123 characters long.
- Save as default password: Select this checkbox to save the password in the Key Vault associated with the lab.
- Virtual machine size: Keep the default value for the base, or select Change Size to select different sizes.
- Allow hibernation: Select this option to enable hibernation for this virtual machine. If you enable Hibernation, you also must select either Public IP or Private IP in the Advanced settings. Hibernation for Shared IPs isn't currently supported.
- OS disk type: Keep the default value for the base, or select a different option from the dropdown list.
- Security type: Select Trusted Launch to enable it for Generation 2 VMs. On selecting Trusted Launch, the options Secure boot, vTPM, and Integrity Monitoring will appear. Based on your needs, select the appropriate options among them for your deployment. For more information, see Trusted Launch-enabled security features.
- Artifacts: This field shows the number of artifacts already configured for this VM base. Optionally, select Add or Remove Artifacts to select and configure artifacts to add to the VM.
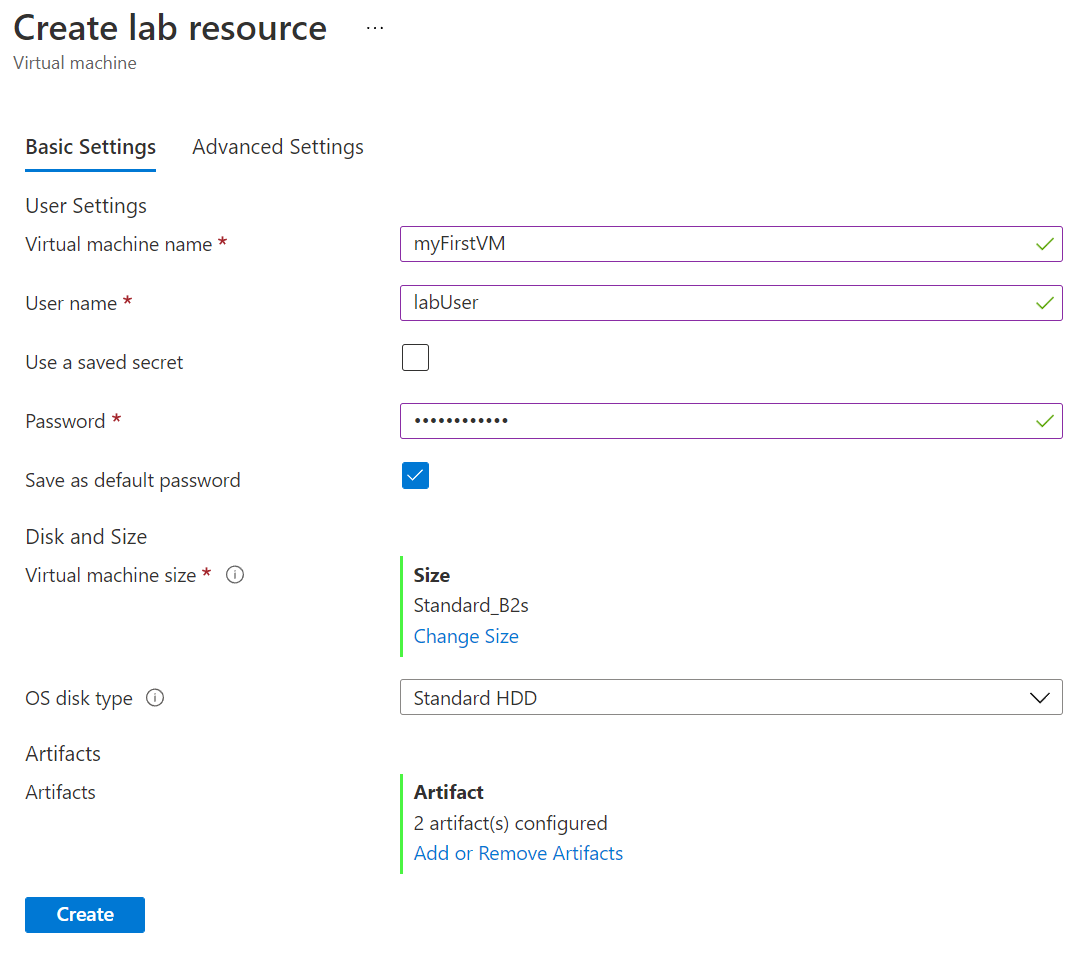
After you configure all settings, on the Basic Settings tab of the Create lab resource screen, select Create to deploy the VM.


During VM deployment, you can select the Notifications icon at the top of the screen to see progress. Creating a VM takes a while.
When the deployment is complete, if you kept yourself as VM owner, the VM appears under My virtual machines on the lab Overview page. To connect to the VM, select it from the list, and then select Connect on the VM's Overview page. If the VM is stopped, select Start first to start the VM.