Note
Access to this page requires authorization. You can try signing in or changing directories.
Access to this page requires authorization. You can try changing directories.
Azure DevTest Labs creates all labs inside Azure virtual networks. The virtual network acts as a security boundary to isolate lab resources from the public internet. By default, DevTest Labs creates a new virtual network for each lab, but you can also use an existing virtual network.
If your organizational networking policies require it, you can isolate all lab resources to the lab's virtual network. This article walks you through how to use the Azure portal to create or configure a network-isolated lab in DevTest Labs.
You can use the Azure portal to enable network isolation only during lab creation. To convert an existing lab and its resources to isolated network mode, you can use the PowerShell script Convert-DtlLabToIsolatedNetwork.ps1.
Network isolation lets you:
- Isolate all lab virtual machines (VMs) and environments in a preexisting virtual network that you select.
- Completely isolate the lab, including VMs, environments, the lab storage account, and key vaults, to a selected virtual network.
- Join an Azure virtual network to an on-premises network to securely connect to on-premises resources. For more information, see DevTest Labs enterprise reference architecture: Connectivity components.
Prerequisites
- Owner or Contributor-level permissions in the Azure subscription where you want to create the network-isolated lab.
Enable network isolation
During lab creation, you can enable network isolation for the default lab virtual network, or for another, preexisting virtual network that you use for the lab.
Enable network isolation for the default virtual network
To create the lab and enable network isolation in the default virtual network:
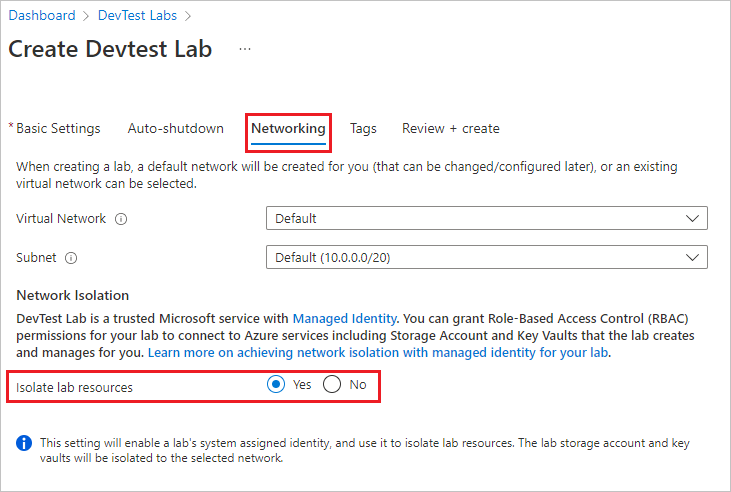
During lab creation, select the Networking tab on the Create DevTest Lab screen.
On the Networking screen, leave Virtual Network and Subnet set to Default. Select Yes next to Isolate lab resources, and finish creating the lab.
If you enable network isolation for the default network, no further action is needed. The lab handles isolating resources from now on.
Enable network isolation for an existing virtual network
To use a different, existing virtual network for the lab, and enable network isolation for that network:
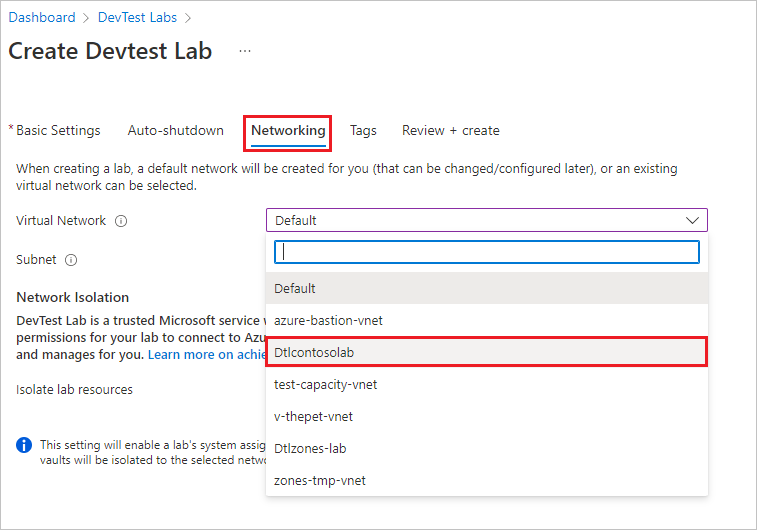
During lab creation, select the Networking tab on the Create DevTest Lab screen.
On the Networking screen, select a network other than Default from the dropdown list next to Virtual Network. The list only shows networks in the same region and subscription as the lab.
Select a subnet in the virtual network.
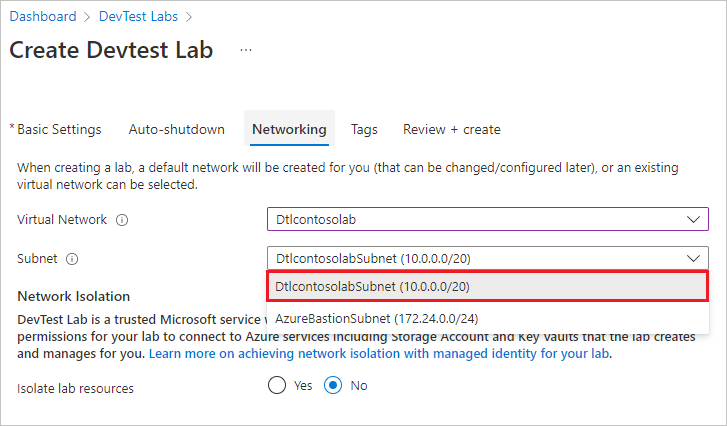
Select Yes next to Isolate lab resources, and finish creating the lab.
If you enable network isolation for a different network than the default, complete the following instructions to configure service endpoints for network access.
Configure service endpoints
If you enabled network isolation for a virtual network other than the default, complete the following steps to isolate the lab storage account and key vault to the network you selected. Do these steps after the lab is created, but before you do any other configuration or create any lab VMs or resources.
Configure the endpoint for the lab storage account
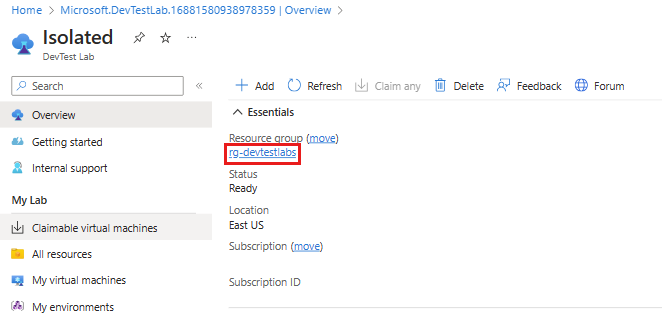
On the lab's Overview page, select Resource visualizer.
On the Resource visualizer page, select the lab's storage account.
You can also open the lab storage account from Storage accounts or the lab's resource group. The lab storage account is named
a<labName><4-digit number>. For example, if the lab name isFabrikam, the storage account name could beafabrikam1234.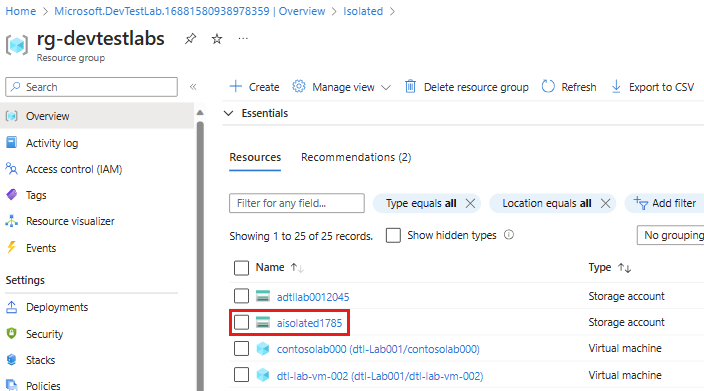
On the storage account page, expand Security + networking and select Networking from the left navigation menu.
On the Firewalls and virtual networks tab, ensure that Enabled from selected virtual networks and IP addresses is selected under Public network access, and select Add existing virtual network.
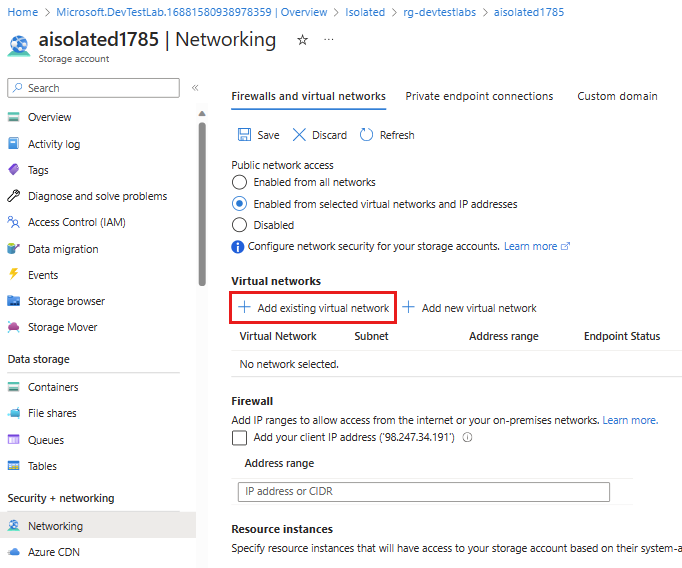
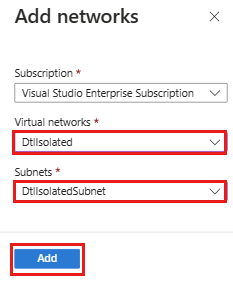
On the Add networks pane, select the virtual network and subnet you chose when you created the lab, and then select Enable.
Once the service endpoint is successfully enabled, select Add.
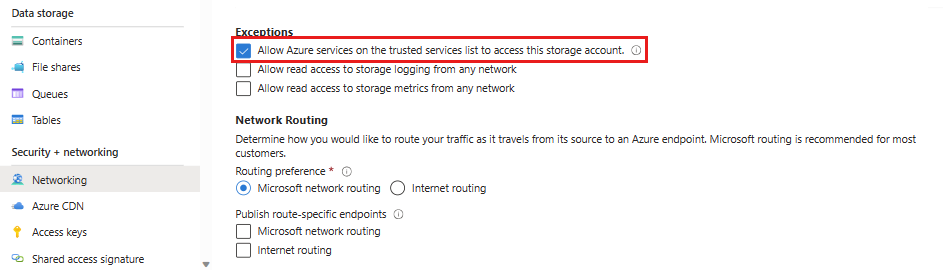
On the Networking page, make sure Allow Azure services on the trusted services list to access this storage account is selected under Exceptions at the bottom of the page. DevTest Labs is a trusted Microsoft service, so selecting this option lets the lab operate normally in a network isolated mode.
Select Save at the top of the page.
Azure Storage now allows inbound connections from the added virtual network, which enables the lab to operate successfully in a network isolated mode.
You can automate these steps with PowerShell or Azure CLI to configure network isolation for multiple labs. For more information, see Configure Azure Storage firewalls and virtual networks.
Configure the endpoint for the lab key vault
On the lab's Overview page, select Resource visualizer.
On the Resource visualizer page, select the lab's key vault. The key vault is named
<labName><4-digit number>. For example, if the lab name isFabrikam, the key vault name could beFabrikam1234.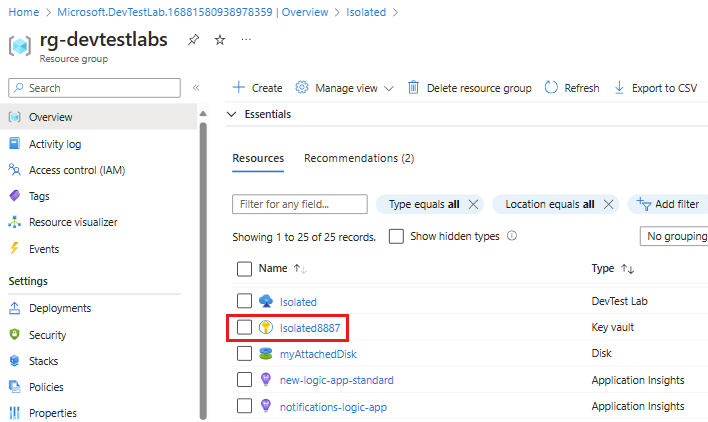
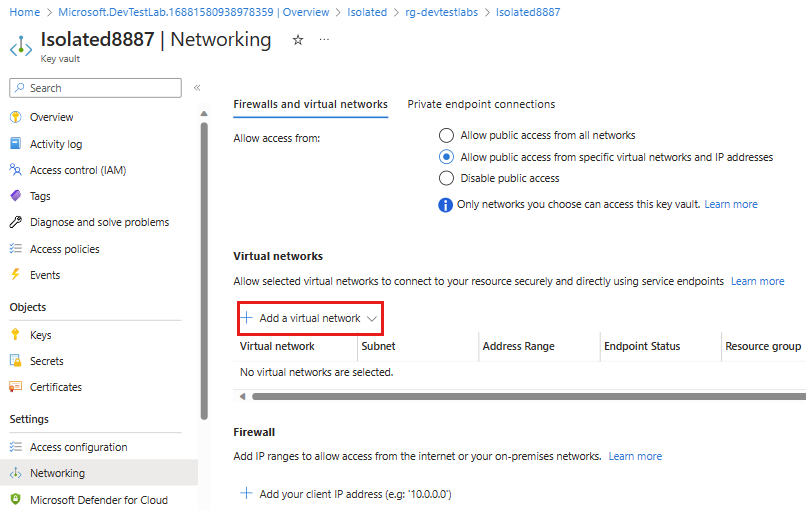
On the key vault page, expand Settings and select Networking from the left navigation menu.
On the Firewalls and virtual networks tab, ensure that Allow public access from specific virtual networks and IP addresses is selected, and select Add a virtual network > Add existing virtual networks.
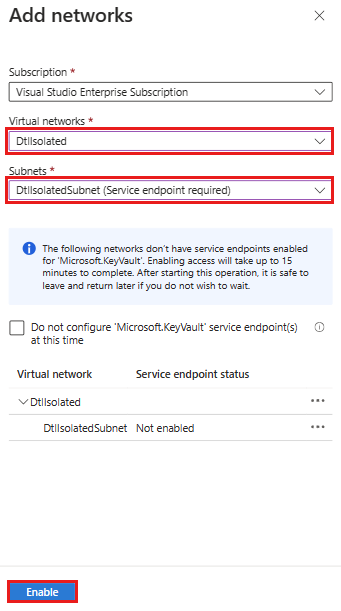
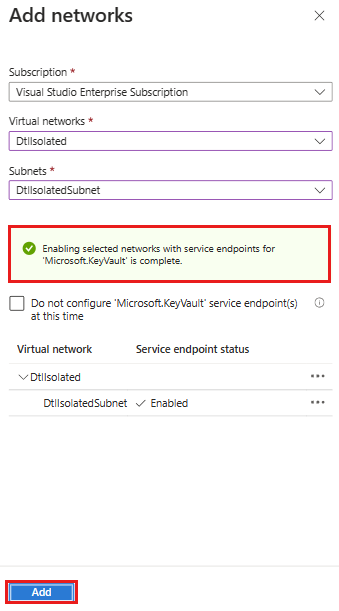
On the Add networks pane, select the virtual network and subnet you chose when you created the lab, and then select Enable.
Once the service endpoint is successfully enabled, select Add.
On the Networking page, make sure Allow trusted Microsoft services to bypass this firewall is selected under Exception, and select Apply.
Use a network-isolated lab
You must configure several other processes to be able to use them with a network-isolated lab.
Enable access to the storage account from outside the lab
You must explicitly enable any access to the network isolated lab's storage account from an allowed endpoint, such as a local or virtual machine (VM). Actions like uploading a virtual hard disk (VHD) to the storage account for creating custom images require this access. You can enable access by creating a lab VM and securely accessing the lab's storage account from that VM.
For more information, see Connect to a storage account using an Azure Private Endpoint.
Provide storage account to export lab usage data
To export usage data for a network isolated lab, you must explicitly specify a storage account and generate a blob within the account to store the data. Exporting usage data fails in network isolated mode if you don't explicitly specify the storage account to use.
For more information, see Export or delete personal data from Azure DevTest Labs.
Set key vault access policies
Enabling the key vault service endpoint affects only the firewall. Make sure to also configure the appropriate key vault access permissions in the key vault Access policies section.
For more information, see Assign a Key Vault access policy.