Use Azure Digital Twins Explorer (preview)
Azure Digital Twins Explorer (preview) is a tool for visualizing and working with Azure Digital Twins. This article describes the features of Azure Digital Twins Explorer, and how to use them to manage the data in your Azure Digital Twins instance. You can interact with the Azure Digital Twins Explorer using clicks or keyboard shortcuts.
How to access
The main way to access Azure Digital Twins Explorer is through the Azure portal.
To open Azure Digital Twins Explorer for an Azure Digital Twins instance, first navigate to the instance in the portal, by searching for its name in the portal search bar.
Next, select the Open Azure Digital Twins Explorer (preview) button.

This will open Azure Digital Twins Explorer in a new tab. If this is your first time using the Explorer, you'll see a welcome modal summarizing its key features.
Azure Digital Twins Explorer might automatically connect to your instance. If not, you'll see the following screen asking you to specify an Azure Digital Twins URL. (If you don't see this box on your screen, Azure Digital Twins Explorer has already completed this step automatically.)

If you see this box, enter https:// into the field, followed by the host name of your instance (this can be found back on the instance's Overview page in the portal). These values together make up the instance URL. Select Save to connect to your instance.
Important
Azure Digital Twins Explorer does not support private endpoints. If you want to use Azure Digital Twins Explorer with an Azure Digital Twins instance that uses Private Link to disable public access, you can deploy the Azure Digital Twins Explorer codebase privately in the cloud. For instructions on how to do this, see Azure Digital Twins Explorer: Running in the cloud.
Switch contexts within the app
Once in the application, you're also able to change which instance is currently connected to the explorer, by selecting the instance name from the top toolbar.

Doing so will bring up the Azure Digital Twins URL modal, where you can enter the host name of another Azure Digital Twins instance after the https:// prefix to connect to that instance.

Note
At this time, the ability to switch contexts within the app isn't available for personal Microsoft Accounts (MSA). MSA users will need to access the explorer from the chosen instance in the Azure portal, or may connect to a certain instance through a direct link to the environment.
Query your digital twin graph
You can use the Query Explorer panel to run queries on your graph.

Enter the query you want to run. If you want to enter a query in multiple lines, you can use SHIFT + ENTER to add a new line to the query box.
Select the Run Query button to display query results in the Twin Graph panel.
Note
Query results containing relationships can only be rendered in the Twin Graph panel if the results include at least one twin as well. While queries that return only relationships are possible in Azure Digital Twins, you can only view them in Azure Digital Twins Explorer by using the Output panel.
Overlay query results
You can check the Overlay results box before running your query if you'd like the results to be highlighted from what is currently being shown in the Twin Graph panel, instead of completely replacing the panel's contents with the new query results.

If the query result includes something that isn't currently being shown in the Twin Graph panel, the element will be added onto the existing view.
Save and rerun queries
Queries can be saved in local storage in your browser, making them easy to select and rerun.
Note
Local browser storage means that saved queries will not be available in other browsers apart from the one where you saved them, and they will remain in the browser storage indefinitely until the local storage is cleared.
To save a query, enter it into the query box and select the Save icon at the right of the panel. Enter a name for the saved query when prompted.

Once the query has been saved, it's available to select from the Saved Queries dropdown menu to easily run it again.

To delete a saved query, select the X icon next to the name of the query when the Saved Queries dropdown menu is open.
Tip
For large graphs, it's suggested to query only a limited subset and then load the remainder of the graph as required. You can double-click on a twin in the Twin Graph panel to retrieve additional related nodes.
Explore the Twin Graph
The Twin Graph panel allows you to explore the twins and relationships in your instance.

You can use this panel to explore twin data.
The Twin Graph panel also provides several abilities to customize your graph viewing experience:
- Change twin display property
- Edit twin graph layout
- Control twin graph expansion
- Show and hide twin graph elements
- Filter and highlight twin graph elements
Explore twin data
Run a query using the Query Explorer to see the twins and relationships in the query result displayed in the Twin Graph panel.
Tip
The query to display all twins and relationships is SELECT * FROM digitaltwins.
View twin and relationship properties
To view the property values of a twin or a relationship, select the twin or relationship in the Twin Graph and use the Toggle property inspector button to expand the Twin Properties or Relationship Properties panel, respectively. This panel will display all the properties associated with the element, along with their values. It also includes default values for properties that haven't yet been set.

Data type icons
The properties shown in the Twin Properties and Relationship Properties panels are each displayed with an icon, indicating the type of the field from the DTDL model. You can hover over an icon to display the associated type.
The table below shows the possible data types and their corresponding icons. The table also contains links from each data type to its schema description in the DTDL v3 Language Description.
| Icon | Data type |
|---|---|
| boolean | |
| component | |
| date | |
| dateTime | |
| duration | |
| enum | |
| map | |
| Numeric types, including double, float, integer, and long | |
| object | |
| string | |
| time |
Errors
The Twin Properties panel will display error messages if the twin or some of its properties no longer match its model.
There are two possible error scenarios that each give their own error message:
- One or many models used by the twin are missing. As a result, all the properties associated with that model will be flagged as "missing" in the Twin Properties panel. This error can happen if the model has been deleted since the twin was created.
- Some properties on the twin are not part of the twin's model. Only these properties will be flagged as "missing" in the Twin Properties panel. This error can happen if the model for the twin has been replaced or changed since the properties were set, and the properties no longer exist in the most recent version of the model.
Both of these error messages are shown in the screenshot below:

Validate and explore historized properties
If your Azure Digital Twins instance has data history enabled, you can validate and explore its historized data in Azure Digital Twins Explorer. Follow the steps below to visualize historized data in a chart, or view raw values in a table.
From the Twin Graph viewer, select a twin whose historized properties you want to view to open it in the Twin Properties panel. In the top right corner of the panel, select the Time series icon to open the Data history explorer.
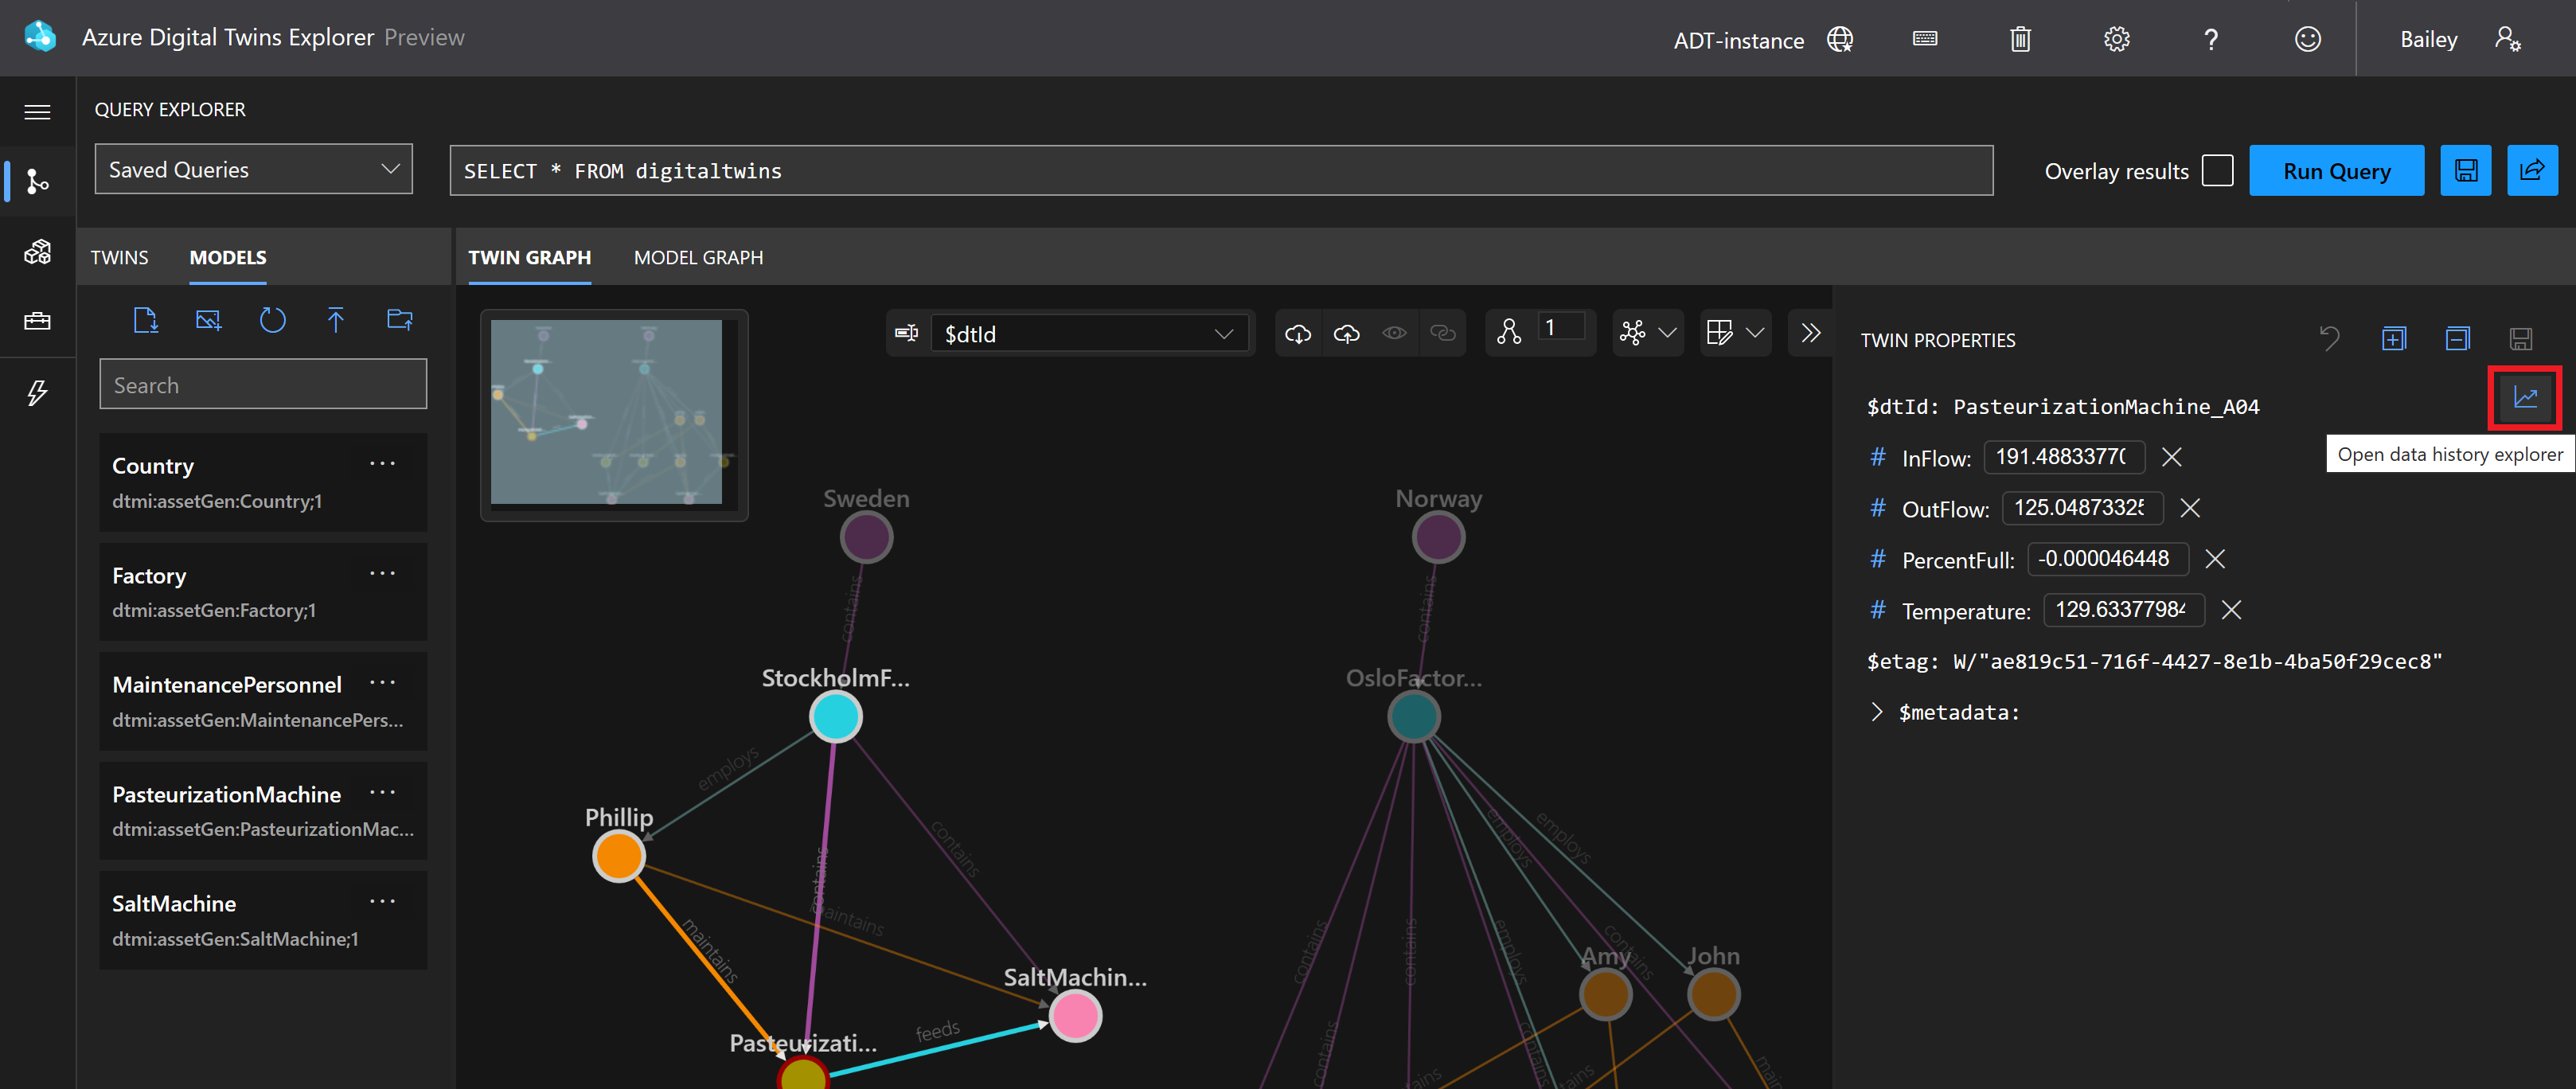
Select the twin name from the left to bring up the options for choosing which historical properties of the twin to view. The Twin ID field will be pre-populated with the twin selection. Next to this field, you can select the Inspect properties icon to view the twin data, or the Advanced twin search icon to find other twins by querying property values.
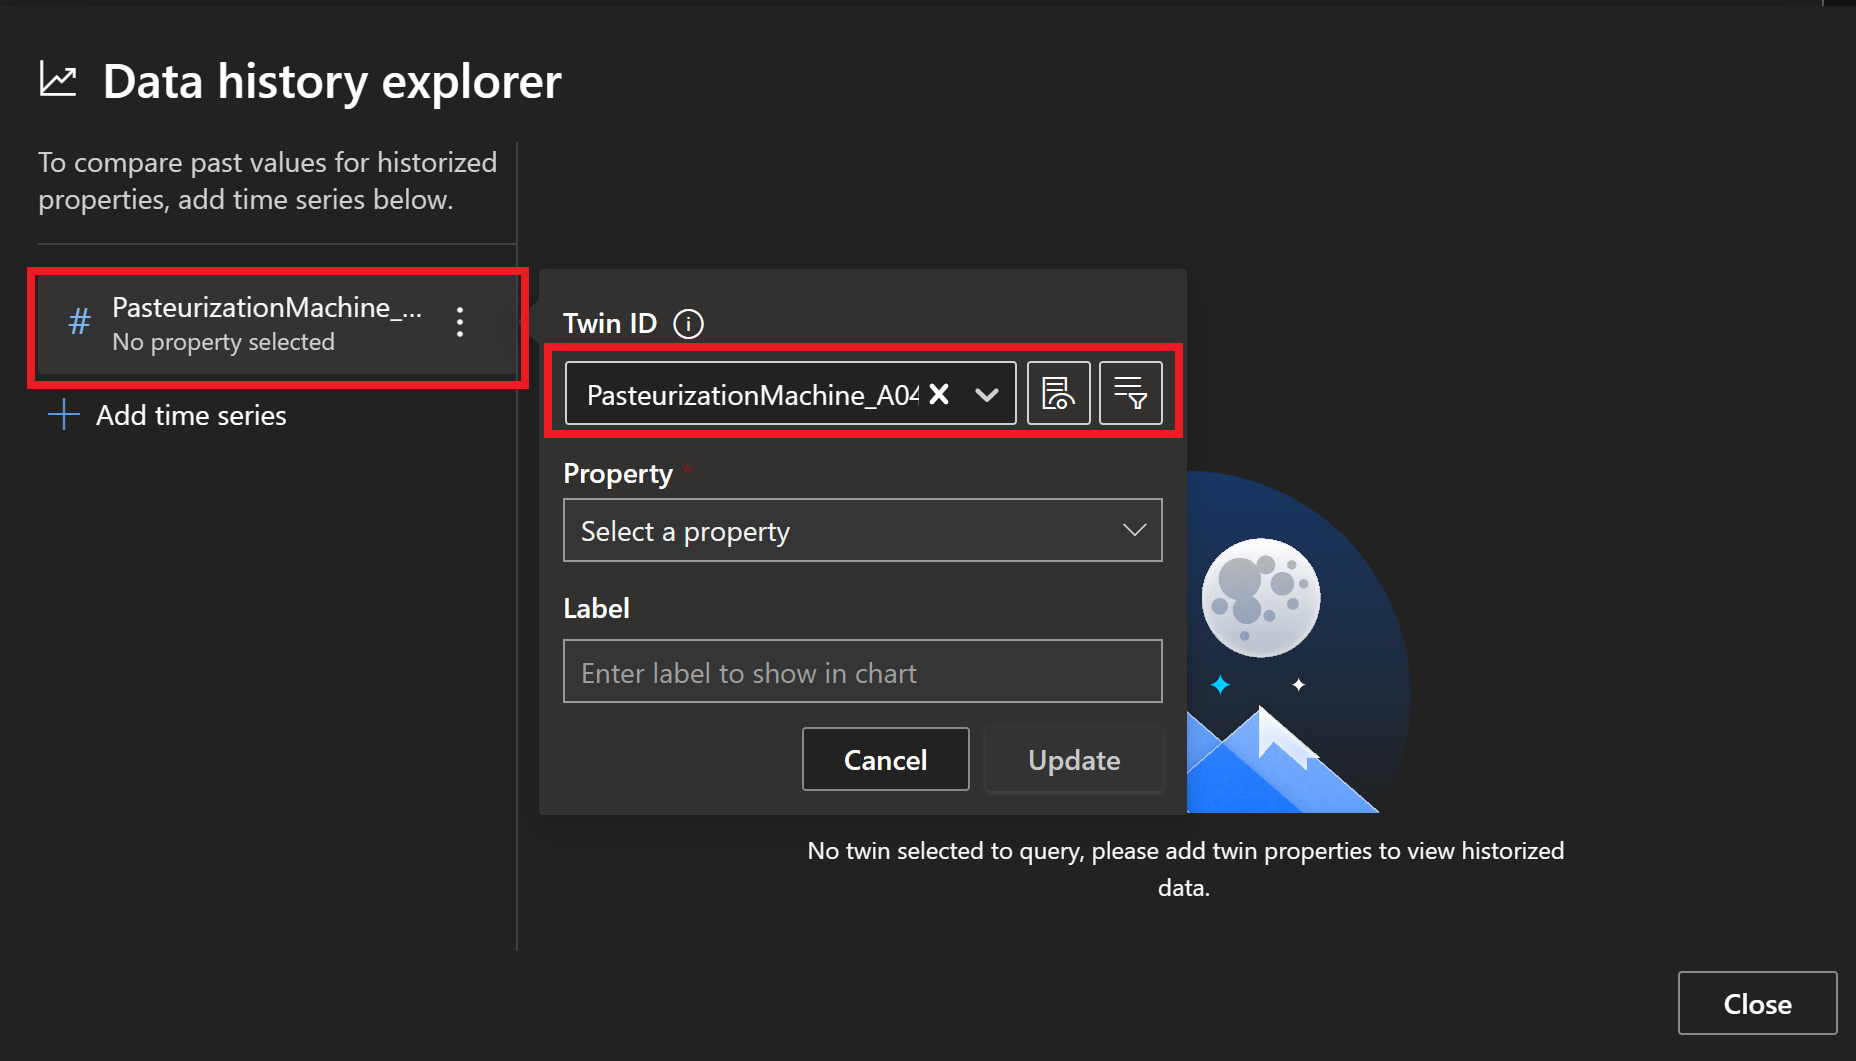
In the Property field, select the property whose historized data you'd like to view. If the property is not numeric, but it consists of numeric values, use the Cast property value to number option to attempt to cast this data to numbers so it can be visualized on the chart.

Note
If you can't select a property from the dropdown list because the list is not responding, this might mean there's an error in some model in your instance. For example, having non-unique enum values in the attributes of a model will break this feature. If this happens, review your model definitions and make sure all properties are valid.
Choose a Label for the time series and select Update.


This will load the chart view of the historized values for the chosen property. You can use the tabs above the chart to toggle between the chart view and table view.
To add more properties to the visualization, use the Add time series button on the left.

To exit the data history explorer and return to the main Azure Digital Twins Explorer, select Close.
View history in chart
The Chart view of historized properties shows property values as points on a line graph over time.

You can use the icons above the chart to control the chart settings, including...
- changing the time range for the data that's included in the chart.
- selecting whether multiple time series are shown independently or on a shared y-axis. Selecting Independent for the axes means that each time series will scale to the chart and maintain their own axis for scale. Selecting Shared axes means that all time series data will be scaled to the same axis.
- choosing the aggregation logic for the chart. When the property has more data points than can be shown on the chart, the data will be aggregated into a finite number of data points using either average, minimum or maximum functions.
There's also a button to Open query in Azure Data Explorer, where you can view and modify the current query to further explore the time series data.

View history in table
The Table view of historized properties shows property values and their timestamps in a table.

You can use the icons above the table to control the table settings, including...
- changing the time range for the data that's included in the table.
- downloading the table data for independent analysis.
View a twin's relationships
You can also quickly view the code of all relationships that involve a certain twin (including incoming and outgoing relationships).
Right-click a twin in the graph, and choose Get relationships. Doing so brings up a Relationship Information modal displaying the JSON representation of all incoming and outgoing relationships.

Change twin display property
You can configure which property you'd like to display to identify twins in your twin graph. The default is the $dtId value, but you can choose from any properties that exist in your model set (even ones that aren't present on every twin).
To change the display property, use the Select Twin Display Name Property dropdown menu. The dropdown menu is ordered by the number of models that contain the property.

If you choose a property that isn't present on every twin, any twins in the graph that don't have that property will display with an asterisk (*) followed by their $dtId value.
Edit twin graph layout
You can rearrange the twins into different configurations by clicking and dragging them around the Twin Graph screen.
You can also apply one of several layout algorithms to the graph from the options in the Choose Layout menu.

Control twin graph expansion
While viewing a query result in the Twin Graph panel, you can double-click a twin to have the graph fetch its relationships and related twins and display them if they're not already present in the view. You can customize this expansion by setting a size and direction to determine how many twins to fetch.
To set the number of layers to expand, use the Expansion Level option. This number indicates how many layers of relationships to fetch from the selected twin.

To indicate which types of relationships to follow when expanding, use the Expansion Direction button. Doing so allows you to select from incoming, outgoing, or both incoming and outgoing relationships.

Show and hide twin graph elements
You can toggle the option to hide twins or relationships from the graph view.
To hide a twin or relationship, right-click it in the Twin Graph window. Doing so will bring up a menu with options to hide the element or other related elements.

You can also hide multiple twins or relationships at once by using the CTRL/CMD or SHIFT keys to multi-select several elements of the same type in the graph. From here, follow the same right-click process to see the hide options.
To return to showing all twins after some have been hidden, use the Show All button. To return to showing all relationships, use the Show All Relationships button.

Filter and highlight twin graph elements
You can filter the twins and relationships that appear in the graph by text, by selecting this Filter icon:

You can also highlight the twins and relationships that appear in the graph by text, by selecting this Highlight icon:

Manage twins and graph
Azure Digital Twins Explorer provides several ways to manage the twins and relationships in your instance.
This section describes how to perform the following management activities:
- View flat list of twins and relationships
- Create twins, with or without initial properties
- Create relationships between twins
- Edit twin and relationship properties
- Delete twins and relationships
For information about the viewing experience for twins and relationships, see Explore twins and the Twin Graph.
View flat list of twins and relationships
The Twins panel shows a flat list of your twins and their associated relationships. You can search for twins by name, and expand them for details about their incoming and outgoing relationships.

Create twins
You can create a new digital twin from its model definition in the Models panel.
To create a twin from a model, find that model in the list and choose the menu dots next to the model name. Then, select Create a Twin. You'll be asked to enter a name for the new twin, which must be unique. Then save the twin, which will add it to your graph.

To add property values to your twin, see Edit twin and relationship properties.
Create relationships
To create a relationship between two twins, start by selecting the source twin for the relationship in the Twin Graph window. Next, hold down a CTRL/CMD or SHIFT key while you select a second twin to be the target of the relationship.
Once the two twins are simultaneously selected, right-click the target twin to bring up a menu with an option to Add relationships between them.

Doing so will bring up the Create Relationship dialog, populated with the source twin and target twin of the relationship (you can also use the Swap Relationship icon to switch them). There is a Relationship dropdown menu that contains the types of relationship that the source twin can have, according to its DTDL model. Select an option for the relationship type, and Save the new relationship.
Edit twin and relationship properties
To view the property values of a twin or a relationship, select the element in the Twin Graph and use the Toggle property inspector button to expand the Twin Properties or Relationship Properties panel, respectively.
You can use this panel to directly edit writable properties. Update their values inline, and select the Save changes button at the top of the panel to save. When the update is saved, the screen displays a modal window showing the JSON Patch operation that was applied by the update API.

Tip
The properties shown in the Twin Properties and Relationship Properties panels are each displayed with an icon, indicating the type of the field from the DTDL model. For more information about the type icons, see Data type icons.
Delete twins and relationships
To delete a twin or a relationship, right-click it in the Twin Graph window. Doing so will bring up a menu with an option to delete the element.

You can delete multiple twins or multiple relationships at once, by using the CTRL/CMD or SHIFT keys to multi-select several elements of the same type in the graph. From here, follow the same right-click process to delete the elements.
You can also choose to delete all of the twins in your instance at the same time, using the Delete All Twins button in the top toolbar.

Explore models and the Model Graph
Models can be viewed both in the Models panel on the left side of the Azure Digital Twins Explorer screen, and in the Model Graph panel in the middle of the screen.
The Models panel:

The Model Graph panel:

Note
Currently, Azure Digital Twins Explorer fully supports DTDL v2 models and supports limited functionality for DTDL v3 models. In Azure Digital Twins Explorer, DTDL v3 models can be viewed in the Models panel, and twins created with DTDL v3 models can be viewed and edited (including those with array properties). However, DTDL v3 models won't show up in the Model Graph panel, and they can't be imported using Azure Digital Twins Explorer. To import DTDL v3 models to your instance, use another developer interface like the APIs and SDKs or the Azure CLI.
You can use these panels to view your models.
The Model Graph panel also provides several abilities to customize your graph viewing experience:
- Edit model graph layout
- Filter and highlight model graph elements
- Upload model images to represent models in the graphs
View models
You can view a flat list of the models in your instance in the Models panel. This list is searchable using the Search bar in the panel.
You can use the Model Graph panel to view a graphical representation of the models in your instance, along with the relationships, inheritance, and components that connect them to each other.
Note
Currently, Azure Digital Twins Explorer fully supports DTDL v2 models and supports limited functionality for DTDL v3 models. In Azure Digital Twins Explorer, DTDL v3 models can be viewed in the Models panel, and twins created with DTDL v3 models can be viewed and edited (including those with array properties). However, DTDL v3 models won't show up in the Model Graph panel, and they can't be imported using Azure Digital Twins Explorer. To import DTDL v3 models to your instance, use another developer interface like the APIs and SDKs or the Azure CLI.
View model definition
To see the full definition of a model, find that model in the Models pane and select the menu dots next to the model name. Then, select View Model. Doing so will display a Model Information modal showing the raw DTDL definition of the model.

You can also view a model's full definition by selecting it in the Model Graph, and using the Toggle model details button to expand the Model Detail panel. This panel will also display the full DTDL code for the model.

Edit model graph layout
You can rearrange the models into different configurations by clicking and dragging them around the Model Graph screen.
You can also apply one of several layout algorithms to the model graph from the options in the Choose Layout menu.

Filter and highlight model graph elements
You can filter the types of model references that appear in the Model Graph. Turning off one of the reference types via the switches in this menu will prevent that reference type from displaying in the graph.

You can also filter the models and references that appear in the graph by text, by selecting this Filter icon:

You can highlight the models and references that appear in the graph by text, by selecting this Highlight icon:

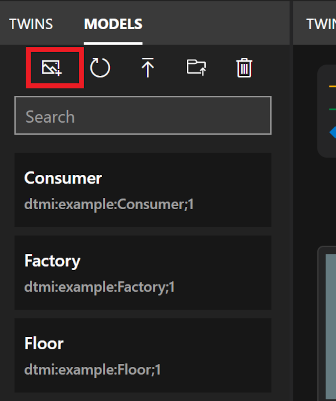
Upload model images
You can upload custom images to represent different models in the Model Graph and Twin Graph views. You can upload images for individual models, or for several models at once.
Note
These images are stored in local browser storage. This means that the images will not be available in other browsers apart from the one where you saved them, and they will remain in the browser storage indefinitely until the local storage is cleared.
To upload an image for a single model, find that model in the Models panel and select the menu dots next to the model name. Then, select Upload Model Image. In the file selector box that appears, navigate on your machine to the image file you want to upload for that model. Choose Open to upload it.

You can also upload model images in bulk.
First, use the following instructions to set the image file names before uploading. Doing so enables Azure Digital Twins Explorer to automatically assign the images to the correct models after upload.
- Start with the model ID value (for example,
dtmi:example:Floor;1) - Replace instances of ":" with "_" (the example becomes
dtmi_example_Floor;1) - Replace instances of ";" with "-" (the example becomes
dtmi_example_Floor-1) - Make sure the file has an image extension (the example becomes something like
dtmi_example_Floor-1.png)
Note
If you try to upload an image that does not map to any existing model using the criteria above, the image will not be uploaded or stored.
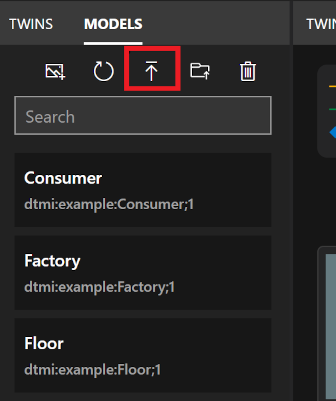
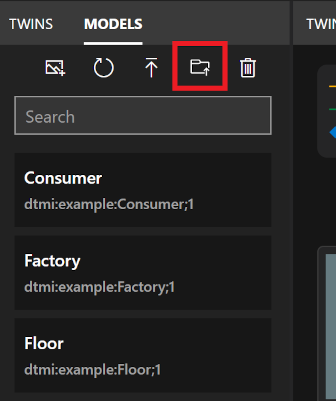
Then, to upload the images at the same time, use the Upload Model Images icon at the top of the Models panel. In the file selector box, choose which image files to upload.
Manage models
You can use the Models panel on the left side of the Azure Digital Twins Explorer screen to perform management activities on the entire set of models, or on individual models.
With this panel, you can complete the following model management activities:
- Upload models into your Azure Digital Twins instance
- Delete models from your instance
- Refresh models to reload the list of all models into this panel
For information about the viewing experience for models, see Explore models and the Model Graph.
Upload models
You can upload models from your machine by selecting model files individually, or by uploading an entire folder of model files at once. If you're uploading one JSON file that contains the code for many models, be sure to review the bulk model upload limitations.
Note
Currently, Azure Digital Twins Explorer fully supports DTDL v2 models and supports limited functionality for DTDL v3 models. In Azure Digital Twins Explorer, DTDL v3 models can be viewed in the Models panel, and twins created with DTDL v3 models can be viewed and edited (including those with array properties). However, DTDL v3 models won't show up in the Model Graph panel, and they can't be imported using Azure Digital Twins Explorer. To import DTDL v3 models to your instance, use another developer interface like the APIs and SDKs or the Azure CLI.
To upload one or more models that are individually selected, select the Upload a model icon showing an upwards arrow.
In the file selector box that appears, navigate on your machine to the model(s) you want to upload. You can select one or more JSON model files and select Open to upload them.
To upload a folder of models, including everything that's inside it, select the Upload a directory of Models icon showing a file folder.
In the file selector box that appears, navigate on your machine to a folder containing JSON model files. Select Open to upload that top-level folder and all of its contents.
Important
If a model references another model in its definition, like when you're defining relationships or components, the model being referenced needs to be present in the instance in order to upload the model that uses it. If you're uploading models one-by-one, that means that you should upload the model being referenced before uploading any models that use it. If you're uploading models in bulk, you can select them all in the same import and Azure Digital Twins will infer the order to upload them in. However, if you're uploading more than 50 models in the same file, see the bulk model upload limitations.
Limitations of bulk model upload
The limitations in this section apply to models that are contained within a single JSON file, being uploaded to Azure Digital Twins Explorer at the same time.
While there's no limit to how many models you can include with a single JSON file, there are special considerations for files containing more than 50 models. If you're uploading more than 50 models within the same model file, follow these tips:
- If there are any models that inherit from other models that are defined in the same file, place them near the end of the list.
- If there are any models that reference other models defined in the same file as components, place them near the end of the list.
- Verify that wherever a model references another model that's defined in the same file (either through inheritance or as a component), the model that contains the reference comes later in the list than the referenced model definition.
This will help make sure that model dependencies are resolved correctly during the upload process.
Delete models
You can use the Models panel to delete individual models, or all of the models in your instance at once.
To delete a single model, find that model in the list and select the menu dots next to the model name. Then, select Delete Model.

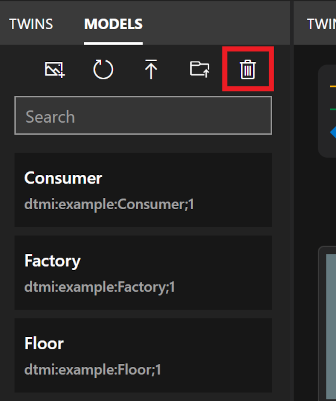
To delete all of the models in your instance at once, choose the Delete All Models icon at the top of the Models panel.
Refresh models
When you open Azure Digital Twins Explorer, the Models panel should automatically show all available models in your environment.
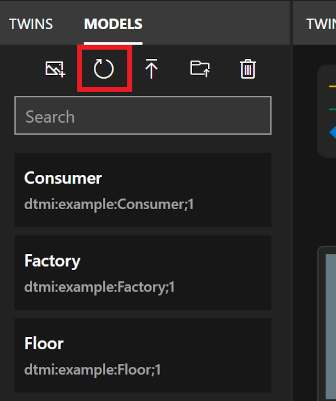
However, you can manually refresh the panel at any time to reload the list of all models in your Azure Digital Twins instance. To do so, select the Refresh models icon.
Import/export graph
From the Twin Graph panel, you have the options to import and export graph features.
Import graph
You can use the import feature to add twins, relationships, and models to your instance. This feature can be useful for creating many twins, relationships, and/or models at once.
Note
If your graph import file includes models, they'll be subject to the bulk model upload limitations.
Create import file
The first step in importing a graph is creating a file representing the twins and relationships you want to add.
The import file can be in either of these two formats:
- The JSON-based format generated on graph export. This format can contain twins, relationships, and/or models.
- The custom Excel-based format described in the rest of this section. This format allows you to upload twins and relationships.
Create import file in Excel
To create a custom graph in Excel that can upload twins and relationships to Azure Digital Twins Explorer, use the following format.
Each row represents an element to create: either a twin, a relationship, or a combination of twin and corresponding relationship. Use the following columns to structure the twin or relationship data. The column names can be customized, but they should remain in this order.
| ModelID | ID | Relationship (source) | Relationship Name | Init Data |
|---|---|---|---|---|
| (Optional) The DTMI ID of the model to use for the new twin. This model definition should already exist in the instance. You can leave this column blank for a row if you want that row to create only a relationship (no twins). |
(Required) The unique ID for a twin. If a new twin is being created in this row, this value will be the ID of the new twin. If there's relationship information in the row, this ID will be used as the target of the relationship. |
(Optional) The ID of a twin that should be the source twin for a new relationship. You can leave this column blank for a row if you want that row to create only a twin (no relationships). |
(Optional) The name for the new relationship to create. The relationship direction will be from the twin in column C to the twin in column B. |
(Optional) A JSON string containing property settings for the twin to be created. The properties must match the ones defined in the model from column A. |
Here's an example .xlsx file creating a small graph of two floors and two rooms.

You can view this file and other .xlsx graph examples in the Azure Digital Twins Explorer repository on GitHub.
Note
The properties and relationships described in the .xlsx must match what's defined in the model definitions for the related twins.
Import file to Azure Digital Twins Explorer
Once you have a file on your machine that's ready to be imported, select the Import Graph icon in the Twin Graph panel.

In the file selector box that appears, navigate on your machine to the graph file (.xlsx or .json) that you want to upload and choose Open to upload it.
Azure Digital Twins will open an Import panel showing a preview of the graph to be imported. To confirm, select the Save icon in the upper-right corner of the panel.
If import is successful, a modal window will display the number of models, twins, and relationships that were uploaded.

Export graph and models
You can use the export feature to export partial or complete graphs, including models, twins, and relationships. Export serializes the twins and relationships from the most recent query results, as well as all models in the instance, to a JSON-based format that you can download to your machine.
To begin, use the Query Explorer panel to run a query that selects the twins and relationships that you want to download. Doing so will populate them in the Twin Graph panel.
Tip
The query to display all twins and relationships is SELECT * FROM digitaltwins.
Once the Twin Graph panel is showing the portion of the graph you want to download, select the Export Graph icon.

This action enables a Download link in the Twin Graph box. Select it to download a JSON-based representation of the query result, and all the models in your instance, to your machine.
Tip
This file can be edited and/or re-uploaded to Azure Digital Twins through the import feature.
Link to your environment and specific query
You can share a link to your Azure Digital Twins Explorer environment with others to collaborate on work. This section describes how to generate a link to your Azure Digital Twins Explorer environment, which can optionally include a specific query to run when the link is opened. This section also describes what permissions the recipient needs to have in order to interact with your twin data.
Recipient access requirements
For the recipient to open the link and view the instance in Azure Digital Twins Explorer, they must log into their Azure account, and have Azure Digital Twins Data Reader access to the instance (you can read more about Azure Digital Twins roles in Security).
For the recipient to make changes to the graph and the data, they must have the Azure Digital Twins Data Owner role on the instance.
Generate link to environment with specific query
To generate a link to your Azure Digital Twins Explorer environment that includes a specific query, enter the query you want to capture in the Query Explorer, then select the Share button to copy the full link.

For the example and query in the screenshot above, the Share button produces this link: https://explorer.digitaltwins.azure.net/?query=SELECT%20*%20FROM%20digitaltwins%20T%20WHERE%20T.InFlow%20%3E%2070&tid=<tenant-ID>&eid=<Azure-Digital-Twins-instance-host-name>. The link contains the tenant ID and host name of the Azure Digital Twins instance, as well as formatted query text.
You can share this URL to allow someone to access your instance and this query. When they open Azure Digital Twins Explorer with the link, the results of the query will automatically populate in the Twin Graph panel.
Generate link to environment without specific query
To share a link to your Azure Digital Twins Explorer environment with no specific query attached, start by using the Share button to copy the link to your instance.

Then, manually remove the query parameter from the result.
For example, the Share button in the screenshot above would produce this link: https://explorer.digitaltwins.azure.net/?query=SELECT%20*%20FROM%20digitaltwins&tid=<tenant-ID>&eid=<Azure-Digital-Twins-instance-host-name>. You can remove the query=SELECT%20*%20FROM%20digitaltwins& portion to produce the URL https://explorer.digitaltwins.azure.net/?tid=<tenant-ID>&eid=<Azure-Digital-Twins-instance-host-name>.
Then, share this URL to allow someone to access your instance. When they open Azure Digital Twins Explorer with the link, they'll be connected to your instance and won't see any pre-populated query results.
Accessibility and advanced settings
You can enable several advanced settings for Azure Digital Twins Explorer to customize your experience or make it more accessible.
You can use the Keyboard Shortcuts icon in the top-right toolbar to view a list of keyboard shortcuts that can be used to navigate the Azure Digital Twins Explorer.

There are several advanced features that can be accessed under the Settings cog in the top-right toolbar:
- Eager Loading: When a query returns twins that have relationships to other twins that aren't included in the query results, this feature will load the "missing" twins before rendering the graph.
- Caching: When this feature is enabled, Azure Digital Twins Explorer will keep a local cache of relationships and models in memory to improve query performance. These caches are cleared on any write operations on the relevant elements, as well as on browser refresh. This feature is off by default.
- Console: This feature enables display of a console window, capable of using simple shell functions for working with the graph.
- Output: This feature enables display of an output window, which shows a diagnostic trace of operations.
- High Contrast: This feature changes the colors of the Azure Digital Twins Explorer so they appear with greater contrast.
You can customize the panel layout by editing the positions of the panels that make up Azure Digital Twins Explorer (Query Explorer, Twins, Models, Twin Graph, Model Graph). To move a panel to a different location, click and hold the panel name, and drag it to its new desired position.

The panel positions will be reset upon refresh of the browser window.
Next steps
Learn about writing queries for the Azure Digital Twins twin graph:
Feedback
Coming soon: Throughout 2024 we will be phasing out GitHub Issues as the feedback mechanism for content and replacing it with a new feedback system. For more information see: https://aka.ms/ContentUserFeedback.
Submit and view feedback for